Photography is anything but a simple task. Getting good results is part composure, part experience, and part hardware. The mobile phone space has been blowing up over the past few years with fewer and fewer people buying dedicated point and shoot cameras and instead relying on their smartphone. Honor has risen to the task though with the Honor 20 lineup and today we are going to talk about how to get the best out of the Honor 20 Pro and its many camera sensors, techniques to get the best shot, and how Honors Master AI system helps meet that challenge.
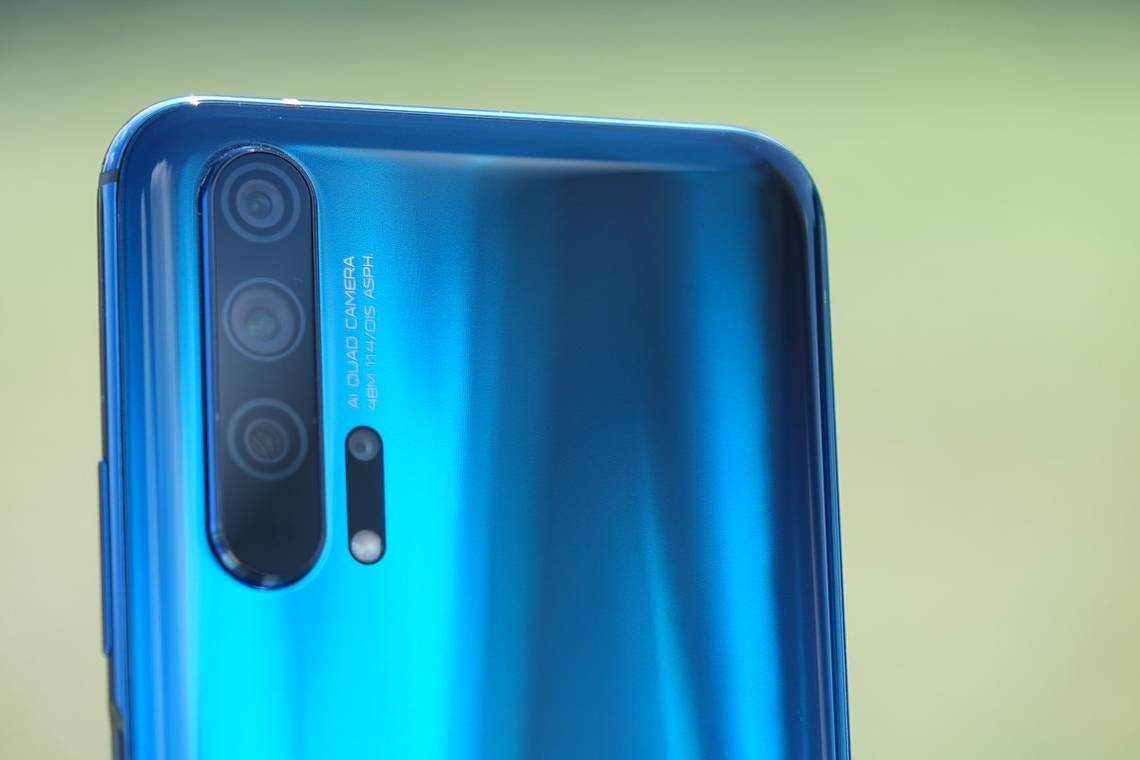
If you aren’t familiar with the Honor 20 Pro’s cameras, here is a quick rundown of all the specs. The main sensor is a 48MP Sony IMX586 with Phase Detect and Laser autofocus, Optical and Electronic Image Stabilization, and a bokeh enabling f1.4 lens that brings in significantly more light than competitors F1.8 or F2.0 lens. The second camera is a 3x 80mm f2.4 telephoto lens that also features Phase Detect and Laser autofocus. The third is an ultra-wide 16MP camera and the fourth is an industry-first dedicated Macro camera. The Honor 20 Pro has a vast array of cameras for every situation, so let's go over some of those common scenarios and how the Honor 20 Pro helps you get your best result.
AI Master On vs AI Master Off
The Honor 20 Pro features MagicUI's AI Master mode to automatically identify and adjust the shot settings for whatever scenario you are in. Take the below examples for instance and see how AI Master has its advantages and disadvantages.
Depending on what your desired end result is, you first have to decide if you want to have AI Master enabled or disabled. The above images reflect the changes that AI on and AI off make. While the second image is closer to reality, the AI Master mode does make the flower pop a lot more and adds more yellows and greens. This type of shot would be ideal for Instagram.
This second image taken with the wide-angle sensor shows how much more of a difference the AI Master mode makes on panoramic shots. Each of the colors is well beyond what they are in real life, but it does make for a photo you won't need to retouch for Social Media sharing and does have a WOW-factor.
In this final test of AI Master, you can see that it keeps everything very realistic and just applies normal HDR settings to the shot.
Regular and Zoom Vs Macro
As we have discussed, the Honor 20 Pro features both a 3X zoom sensor and a dedicated Macro sensor. Sometimes you might want to get super close on an image and you have a choice, should you use the Macro sensor or get right up and close with the primary one. What about the zoom lens, could you just zoom in on it? See how the below image perspective and feel is changed depending on what lens you use.
The Primary sensor clearly delivers the best all-around shot, but the 3X sensor does a really good job as well. While its colors could use some tuning, thanks to the narrower field of view you get a larger than life feel from the zoomed-in shot. The final image taken with the Macro sensor shows its advantages and disadvantages. You can really get super close on an object and see things you normally couldn't, but it also doesn't have the quality of the larger sensors and at 2MP you will not be able to blow up this image to print or see on a larger screen for more details.
This image though shows the benefits of using the Macro sensor. I could get very close to my subject and still have it in focus whereas the primary sensor could not focus at this close range.
48 Megapixel Ultra Clarity Mode Uses
We've already discussed in previous articles the benefits to using the AI Ultra Clarity mode available on the Honor 20 Pro. It is great for large panoramas and areas with little movement. Below you can see a less than ideal scenario where leaving the camera in the 12MP mode is superior.
The image on the left was taken using the 48MP Ultra Clarity mode and resized for uploading to the site. You can see that the benefits from stacking the images for the 12MP image are in the detailed shadows and overall image exposure. The 48MP photo does have more detail, but you can see that there is less detail on any moving objects. 48MP Ultra Clarity takes about 6 seconds to shoot and process, so any moving subjects could have blurring due to the process. While this mode is ideal for landscape shots, you won't want to use it for closeups or objects that are moving.
-

- Honor 20 Pro - Regular
When to Use the Ultra-Wide Angle
One of the most common questions I see asked is when to use the normal wide-angle camera versus the ultra-wide-angle camera. The answer is whenever you want a super wide or tall shot and you are not taking a portrait of a person. The neat thing about wide-angle shots is that you can take them in both landscape and portrait for some neat angles and interesting shots.
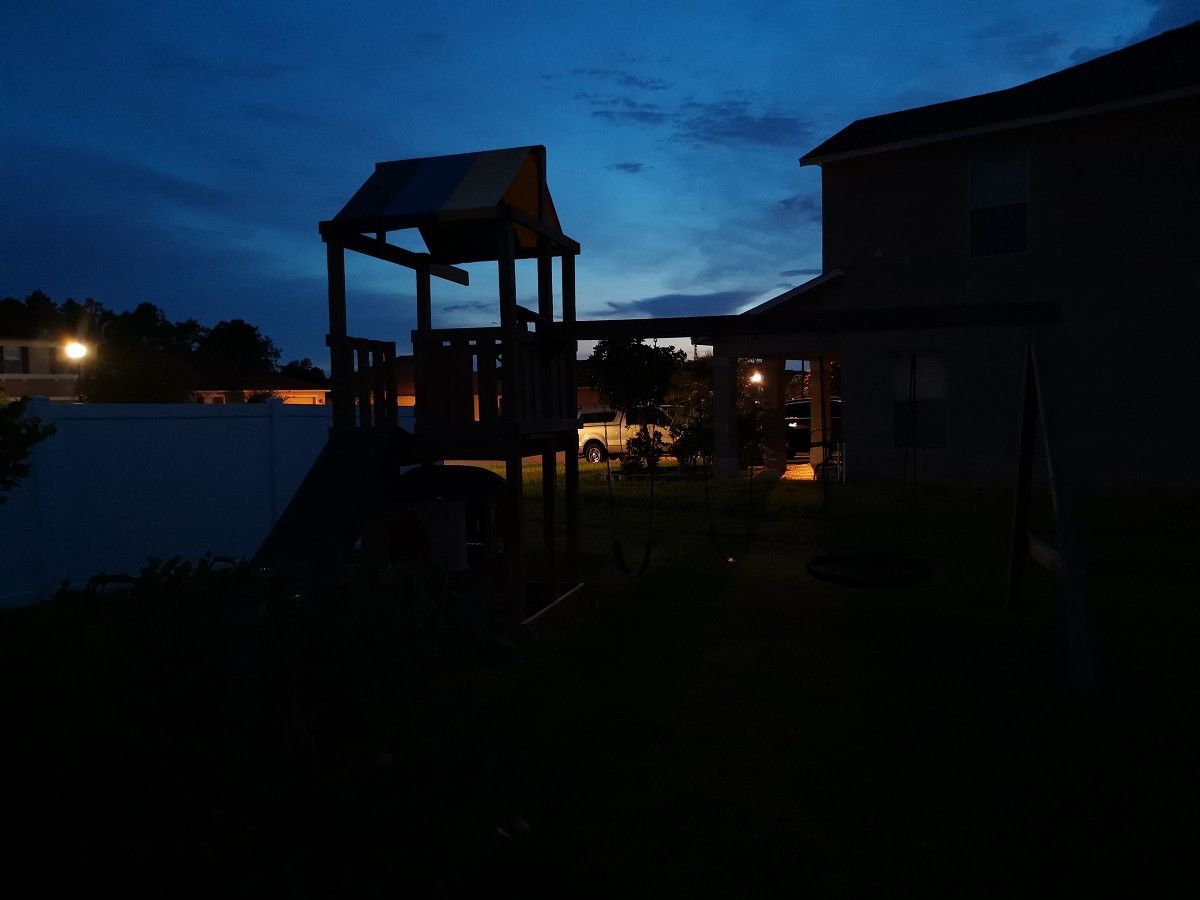
Night Mode vs Pro Mode and Regular Mode
The Honor 20 Pro features Honor's excellent night mode, and that is what we are comparing next. One of the downsides of the night mode is the time to shoot. It can take up to 6 seconds to capture the scene, so you need to have steady hands and no moving objects for the best result. With the last image, I decided to put the phone into night mode, lower the ISO to 400, and shutter speed to 1/10 to capture a really cool nightscape with very little noise.
-
- Honor 20 Pro - Pro Mode
The Honor 20 Pro has one of the most versatile setups available today, and we hope these tips will help you to master the camera and its various settings!