It's been a few years since Microsoft unveiled the second version of its Windows Subsystem for Linux (AKA WSL 2), and the runtime is now mature enough to run Linux applications with GUIs. The next step on the journey is none other than the Windows Subsystem for Android, which will let you run Android apps under Windows 11. Microsoft's love for Linux doesn't just end here, as the company has also been maintaining a full-fledged Linux distribution for a while. Known as CBL-Mariner (where CBL stands for Common Base Linux), the distribution has been created by Microsoft’s Linux System Group — the same team that created the Linux kernel used for WSL 2.
"CBL-Mariner is an internal Linux distribution for Microsoft’s cloud infrastructure and edge products and services. CBL-Mariner is designed to provide a consistent platform for these devices and services and will enhance Microsoft’s ability to stay current on Linux updates."
-Microsoft
Notably, CBL-Mariner is not a traditional user-focused Linux distribution with a fancy GUI. Rather, it only has the basic packages needed to support and run containers. The package management system is RPM-based, which uses both dnf and tdnf (Tiny DNF). The distribution also supports an image-based update mechanism for atomic servicing and rollback using RPM-OSTree. As for security, CBL-Mariner comes with a hardened kernel, signed updates, ASLR, compiler-based hardening, and tamper-resistant logs among many other features.
How to boot CBL-Mariner using the official ISO
Although Microsoft released the operating system back in 2020, the company initially didn't offer precompiled ISOs. The source code is available on GitHub and people are expected to build the ISO themselves. This situation changed recently, as Microsoft is now hosting official CBL-Mariner ISO builds on its server.
While experienced users can still create a bootable VHDX (or VHD) image from precompiled RPMs in the CBL-Mariner package repository, one can also grab the installer disc image in ISO format and easily install the OS on a virtualization platform or a real PC.
Step 1 – Get the ISO
The CBL-Mariner ISO is UEFI-compliant and can be booted on any modern x86-64 PC. The latest version of the ISO can be downloaded from the link below:
In case you want to build the ISO yourself, do the following:
-
Clone the CBL-Mariner GitHub repo using git:
git clone https://github.com/microsoft/CBL-Mariner.git -
Switch to the toolkit folder:
cd CBL-Mariner/toolkit -
Execute the ISO build command:
sudo make iso REBUILD_TOOLS=y REBUILD_PACKAGES=n CONFIG_FILE=./imageconfigs/full.json -
The resulting ISO can be found in
../out/images/full.
Step 2 – Prepare the target platform
As mentioned earlier, CBL-Mariner isn't meant to be a daily-driver operating system for your PC. It would be better to install it on a hypervisor platform. On Windows, you can use Microsoft's own Hyper-V. Oracle VM VirtualBox is another cross-platform solution that can be used on Windows, Linux, as well as on macOS. Depending on the host OS, you can also pick up a suitable VMware or Parallels virtualization product.
In this tutorial, we will use Hyper-V for the sake of convenience.
- Since Hyper-V is built into Windows as an optional feature, we need to enable it first. The Home and Home Single Language SKUs don't officially support Hyper-V, but it is possible to enable the feature on those editions using this tutorial.
-
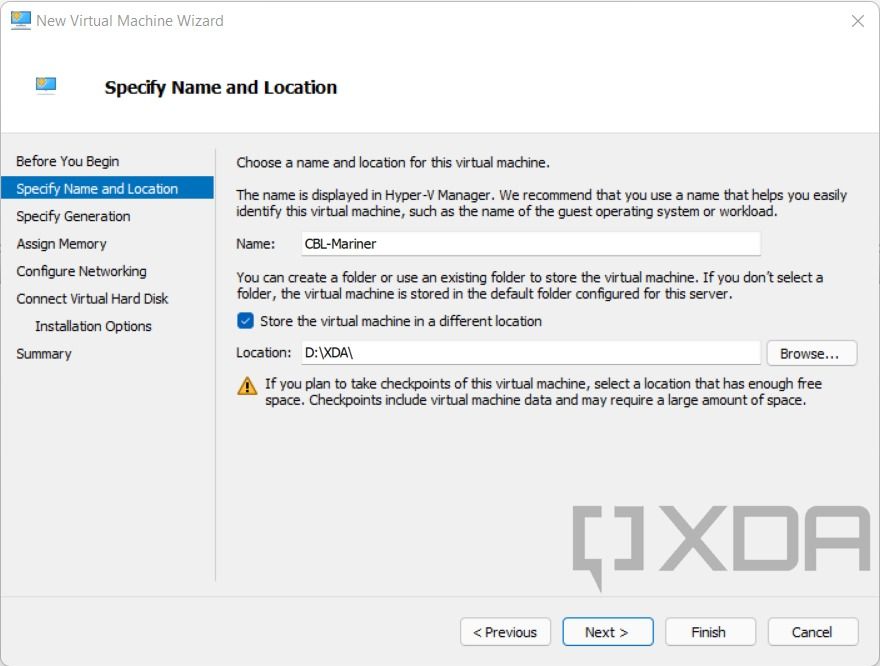
Open the Hyper-V Manager application and select Action->New->Virtual Machine. Provide a name for your VM and press Next >.
- Select Generation 1 (VHD) or Generation 2 (VHDX), then press Next >.
- Change Memory size if desired, then press Next >.
- Select a virtual switch, then press Next >.
-
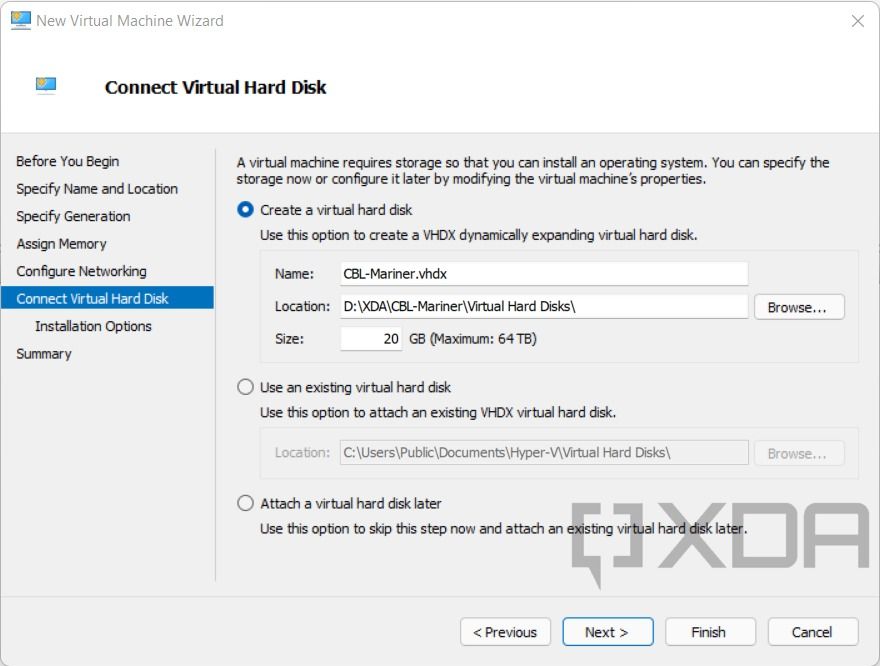
Select Create a virtual hard disk, choose a location for your VHD(X) and set your desired disk Size. Then press Next >.
- Select Install an operating system from a bootable image file and browse to your CBL-Mariner ISO.
- Press Finish.


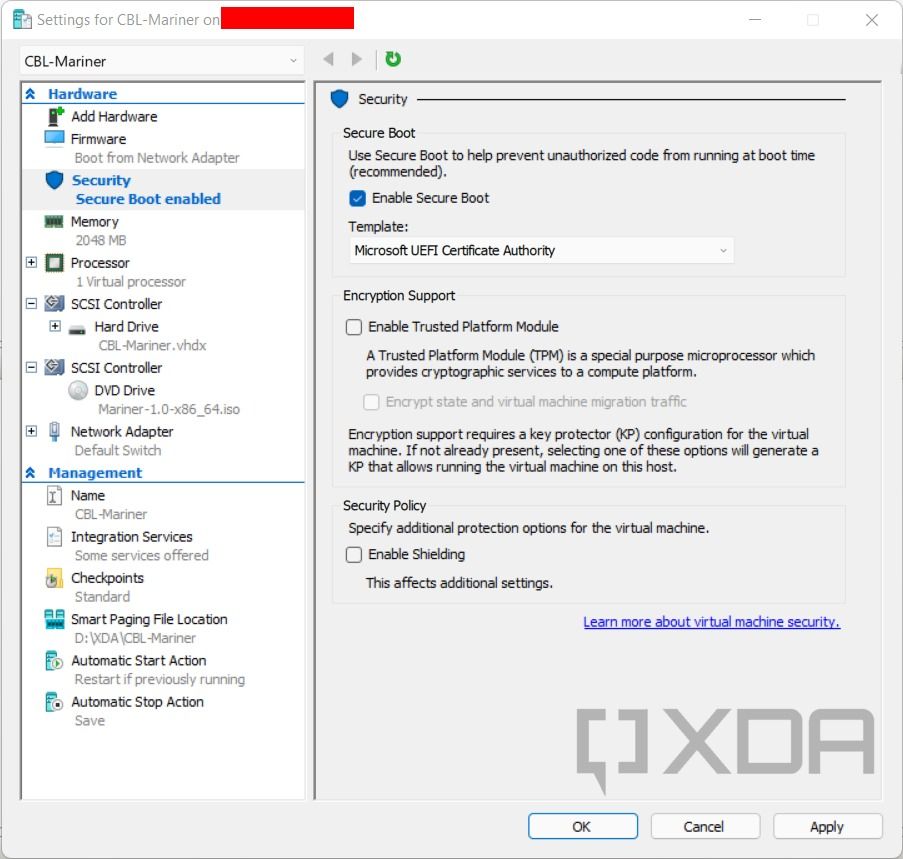
If you have created a Generation 2 VM, then you have to configure a couple of additional settings:
- Right click your virtual machine from Hyper-V Manager.
- Select the Settings... option.
-
Select Security and under Template: select Microsoft UEFI Certificate Authority.
-
Select Firmware and adjust the boot order so DVD is first and Hard Drive is second.
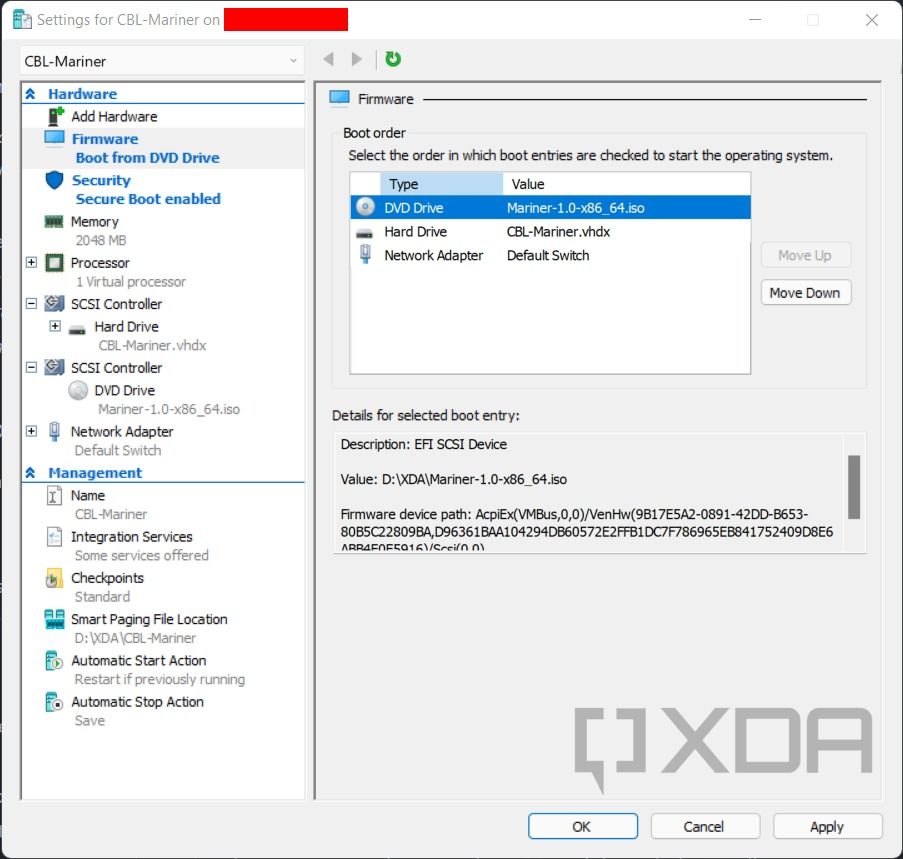
- Select Apply to apply all changes.


Step 3 – Installing the OS
Now that we have prepared the platform, we are ready to install CBL-Mariner on the virtual machine.
- Right click your VM and select the Connect... option to start booting.
- Select Start.
-
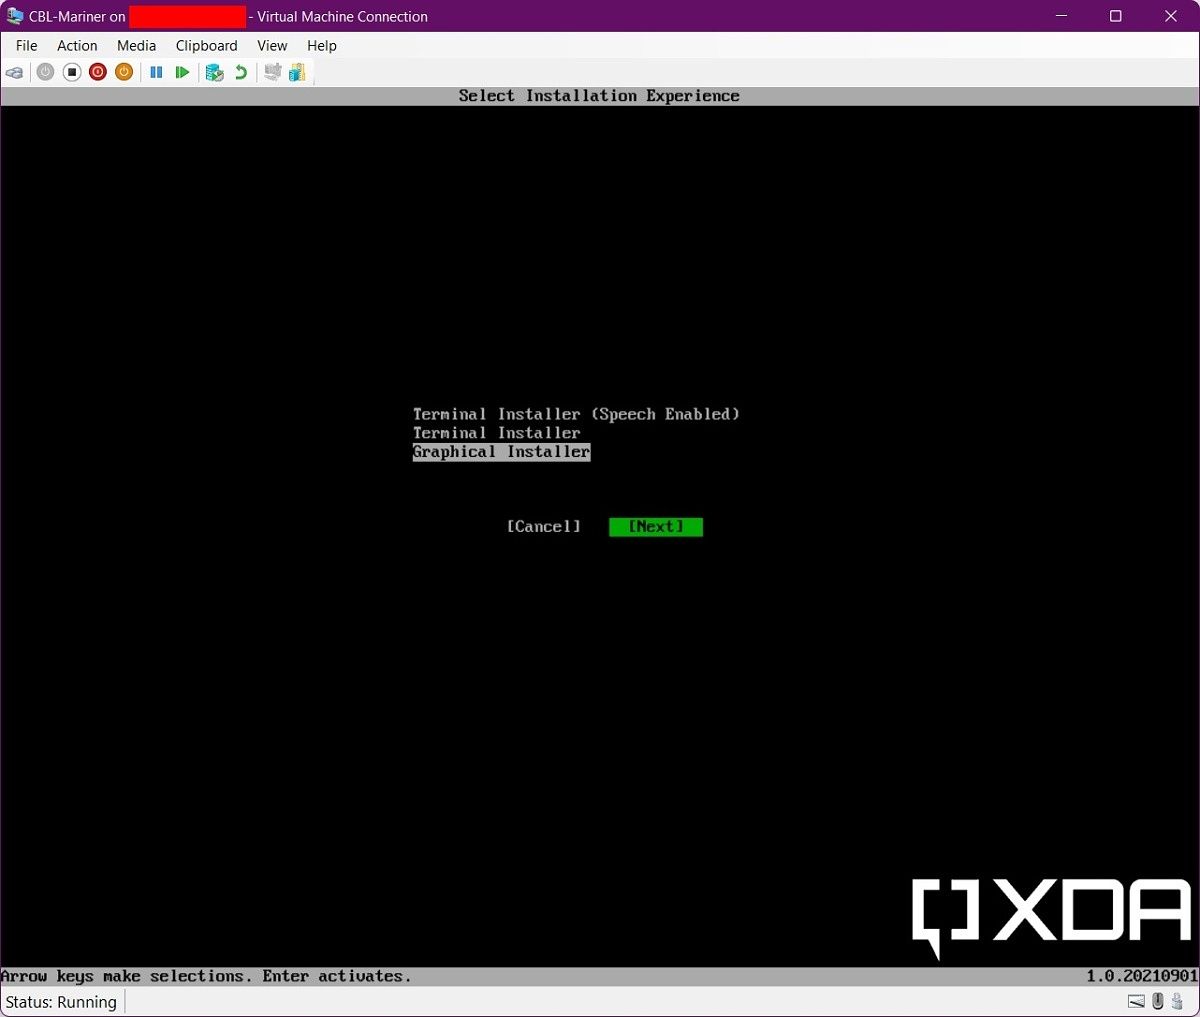
The installer application will give the option to proceed in text or graphic mode. In this tutorial, we will choose the latter.
-
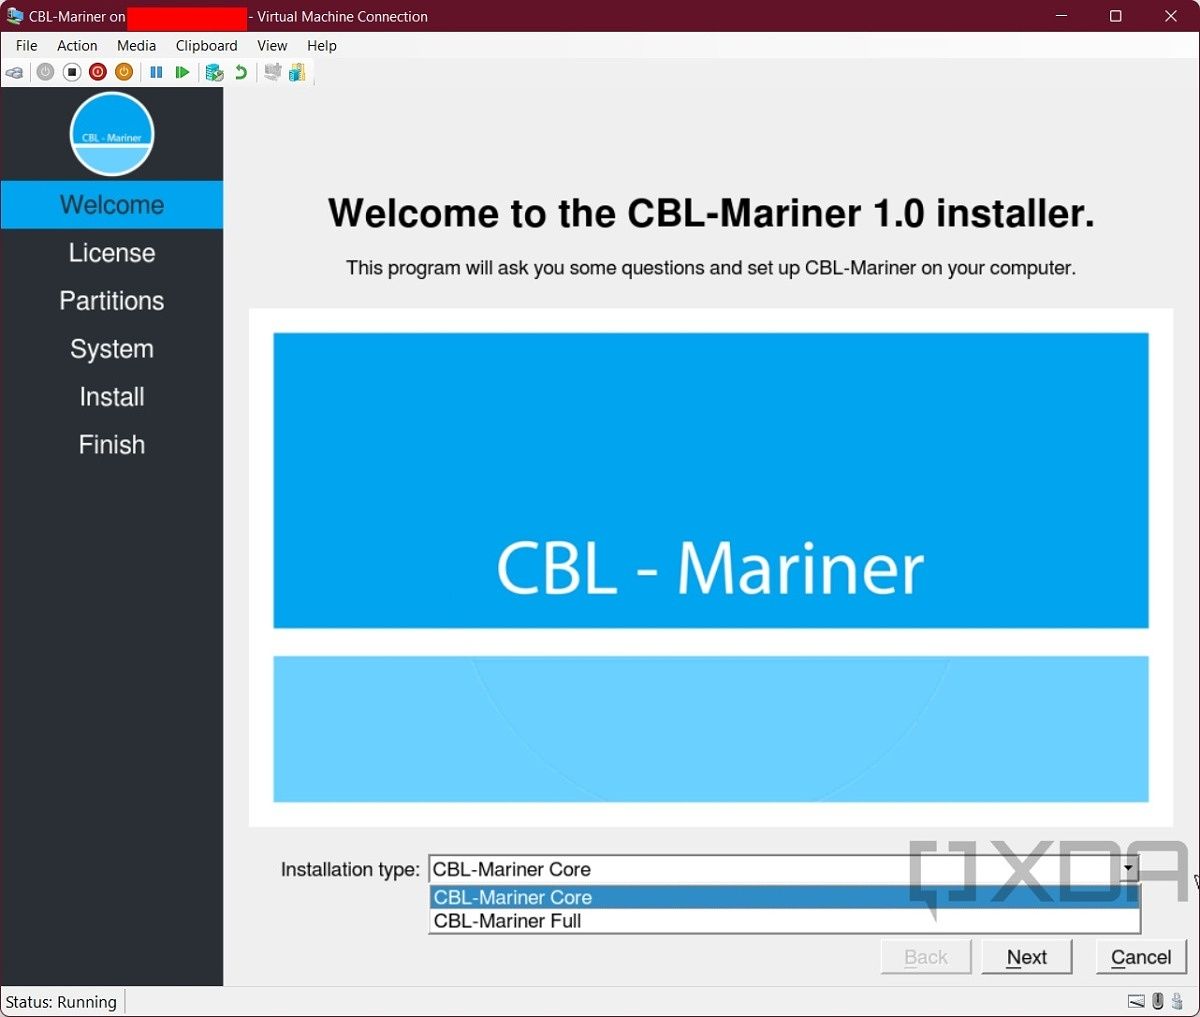
There are two types of installations: Core and Full.
-
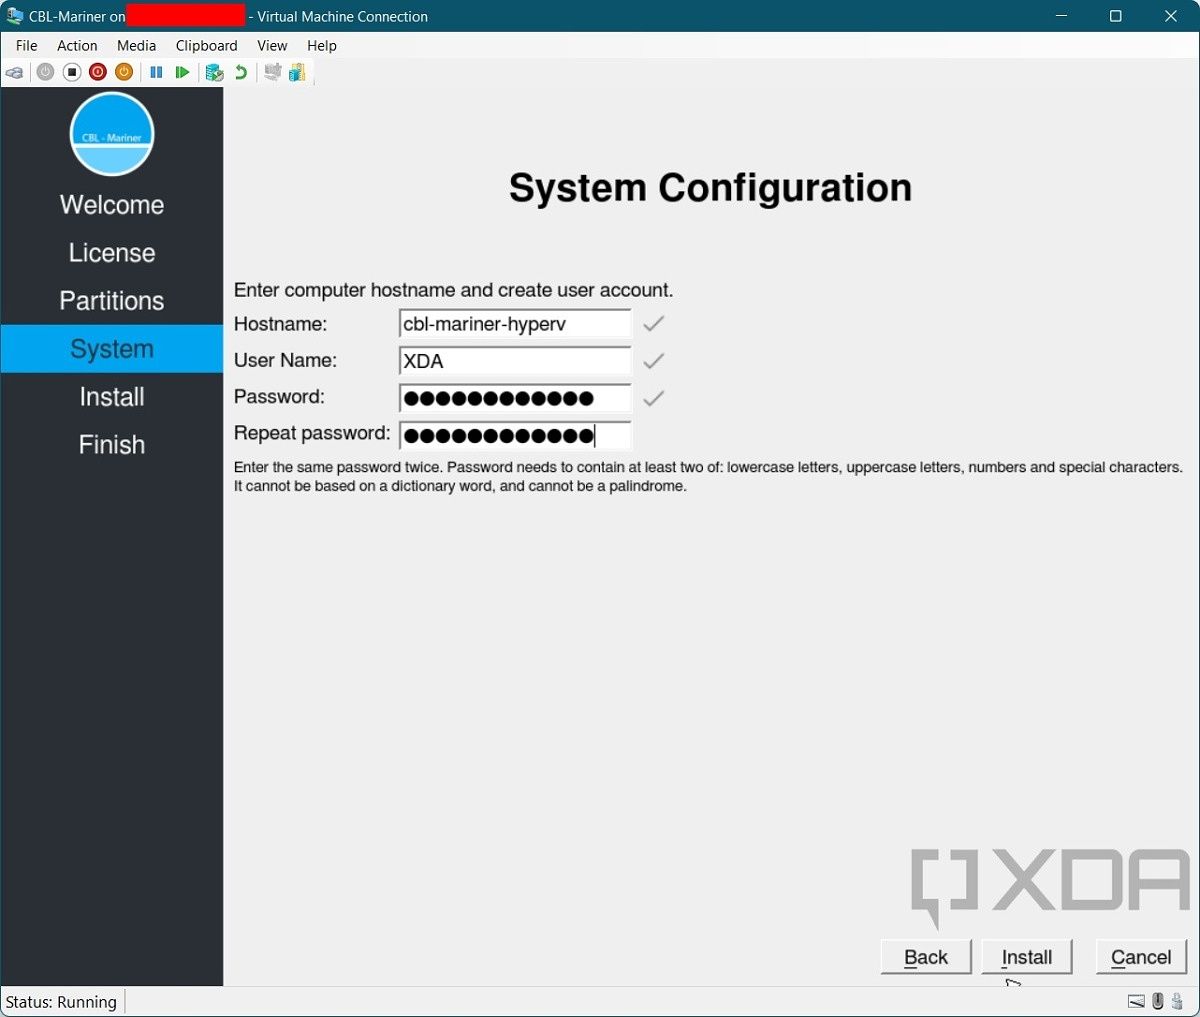
After choosing your desired flavor, it will ask you for typical parameters like username, partitioning, etc.
- When installation completes, select restart to reboot the machine. The installation ISO will be automatically ejected.


Step 4 – Booting the OS
As soon as the installation phase ends, the VM will reboot and subsequently start booting the newly installed OS from the virtual hard disk. When prompted, sign in to your CBL-Mariner instance using the username and password provisioned through the installer application.

That's it! You can now add additional packages like an SSH server and customize the VM instance as per your needs. For more about its security features, take a look at CBL-Mariner's GitHub security features list.