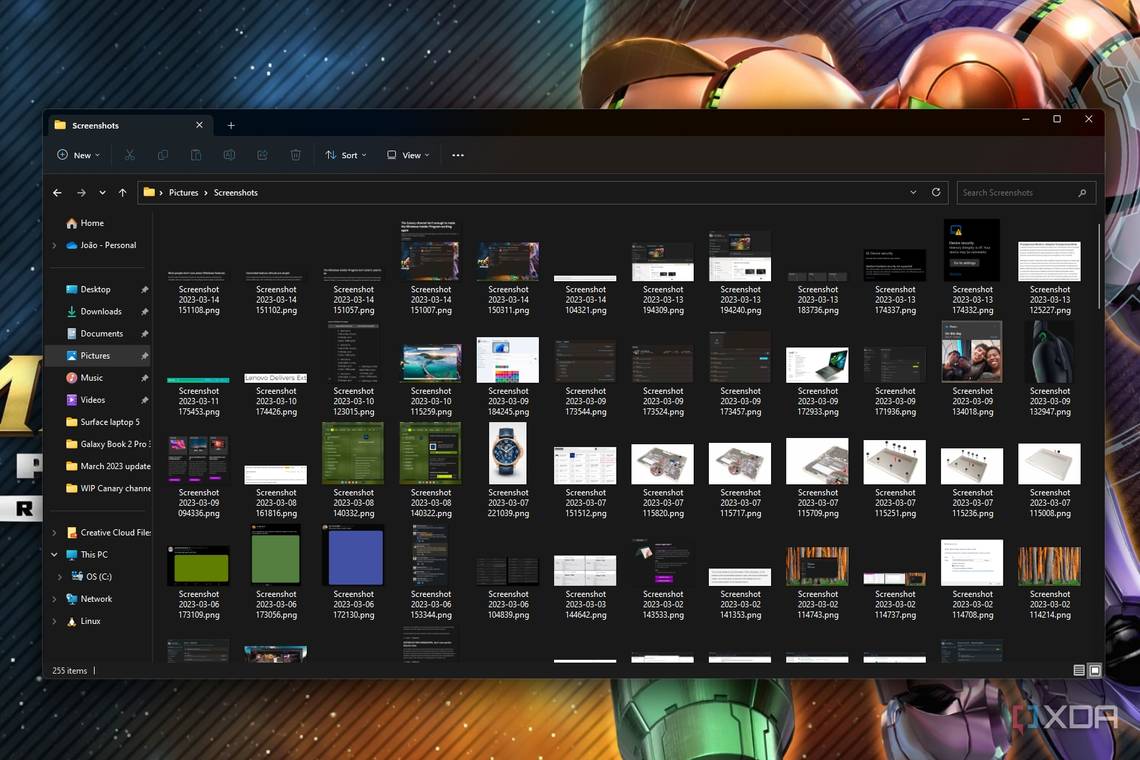
Depending on how familiar you are with Windows 11 (and previous versions), you may know that there's a fairly easy way to take screenshots of your entire screen by pressing the Windows key + Print Screen (Prt Scn) shortcut on your keyboard. It can even capture images across multiple monitors. These screenshots are automatically saved to a dedicated Screenshots folder in your Pictures library, but did you know you can choose where this folder is stored? Here's how to change that location for a more customized screenshot setup.

How to record your screen in Windows 11
Screen recording in Windows 11 can be accomplished in a few relatively easy ways. Our guide can walk you through each process, step by step.How to change the default screenshot save location on Windows 11
The default save location of screenshots on Windows 11 will work for plenty of users, but changing the location can save you time and help streamline your storage setup. You can store them anywhere on your PC or even choose a special location like OneDrive or Dropbox, so they're always backed up to the cloud. Here's what you need to do to change the save location of screenshots on Windows 11:
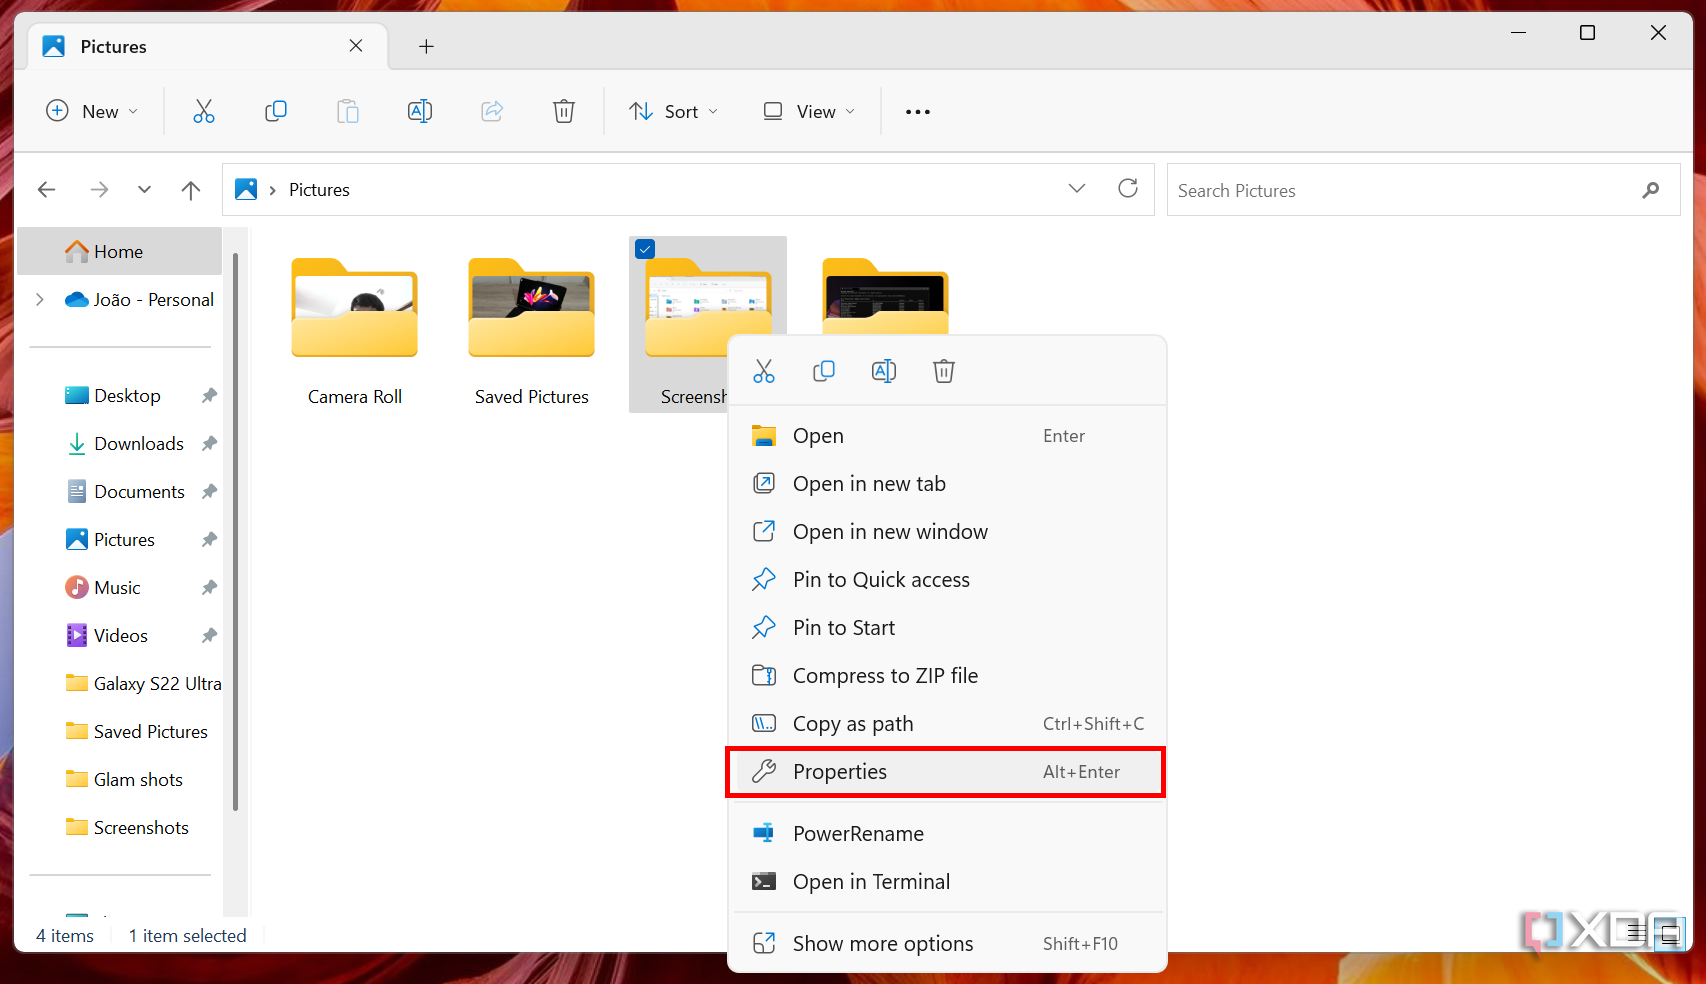
- Launch File Explorer.
-
Click Pictures from the Home page or the navigation pane on the left.

- If you have unpinned the Pictures folder, you can also click the downward arrow in the File Explorer address bar and choose it from there.
- Right-click the Screenshots folder.
-
Click Properties.
- Click the Location tab.
-
Click Move to browse for a new screenshot location and select the folder you want. Alternatively, if you already have the address for the folder, enter it in the address bar.
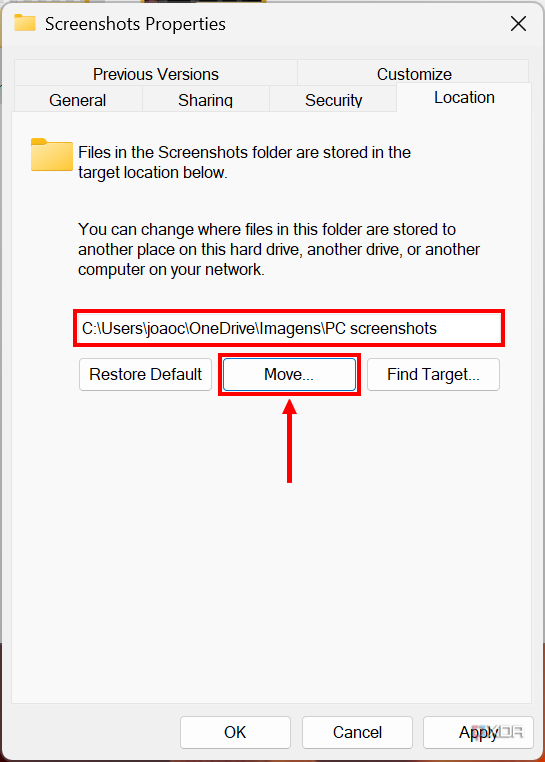
You'll need to create a new folder in the location you want to store your screenshots, as the Screenshots folder will merge with whatever folder you select. If there are other files, they will be mixed with your screenshots, and you won't be able to separate them.
- Click OK.


That's about all there is to it. From now on, whenever you take a screenshot, it will automatically be saved in the Screenshots folder in that new location. This also affects screenshots taken with the Snipping Tool since those are saved automatically thanks to the latest Windows 11 updates. Of course, with the Snipping Tool, you can save files to different locations on a case-by-case basis.
On that note, you can check out our deep dive on the Windows 11 Snipping Tool if you'd like to learn more about that. It recently added support for screen recording, too. If you're interested in learning about other Windows 11 features, maybe take a look at how to use Start menu folders to organize your apps a bit better.

Windows 11 deep dive: Checking out the new Snipping Tool
Want to be ready for Windows 11? Here's everything you need to know about taking and editing screenshots in the Windows 11 Snipping Tool.