Quick Links
Over time, computers can accumulate a lot of files due to regular usage, and very often, you no longer need them. As these files pile up, they can take up a significant amount of space on your drive, and you may find that you can no longer save new files. A lot of these files are what you'd call a "cache," which are generally files that exist to speed up loading times in certain circumstances, though there are other types of temporary files your PC can create over time. If you need to free up some space on your Windows 11 PC, clearing this cache and other temporary files is a good start. Thankfully, it's a fairly straightforward process, and there are two main ways to do it.

Windows 11: Everything you need to know
Windows 11 is the latest and greatest operating system from Microsoft, and it packs a ton of changes. Here's what you need to know.Clear cache using the Windows 11 Settings app
The first and most prominent way to delete temporary cache files from your PC is to use the Settings app, which has gained plenty of storage management features over the years. The process is fairly simple, though you'll want to pay attention to some parts of the process as we go.
- Open the Settings app (from the Start menu or by using Search, for example).
-
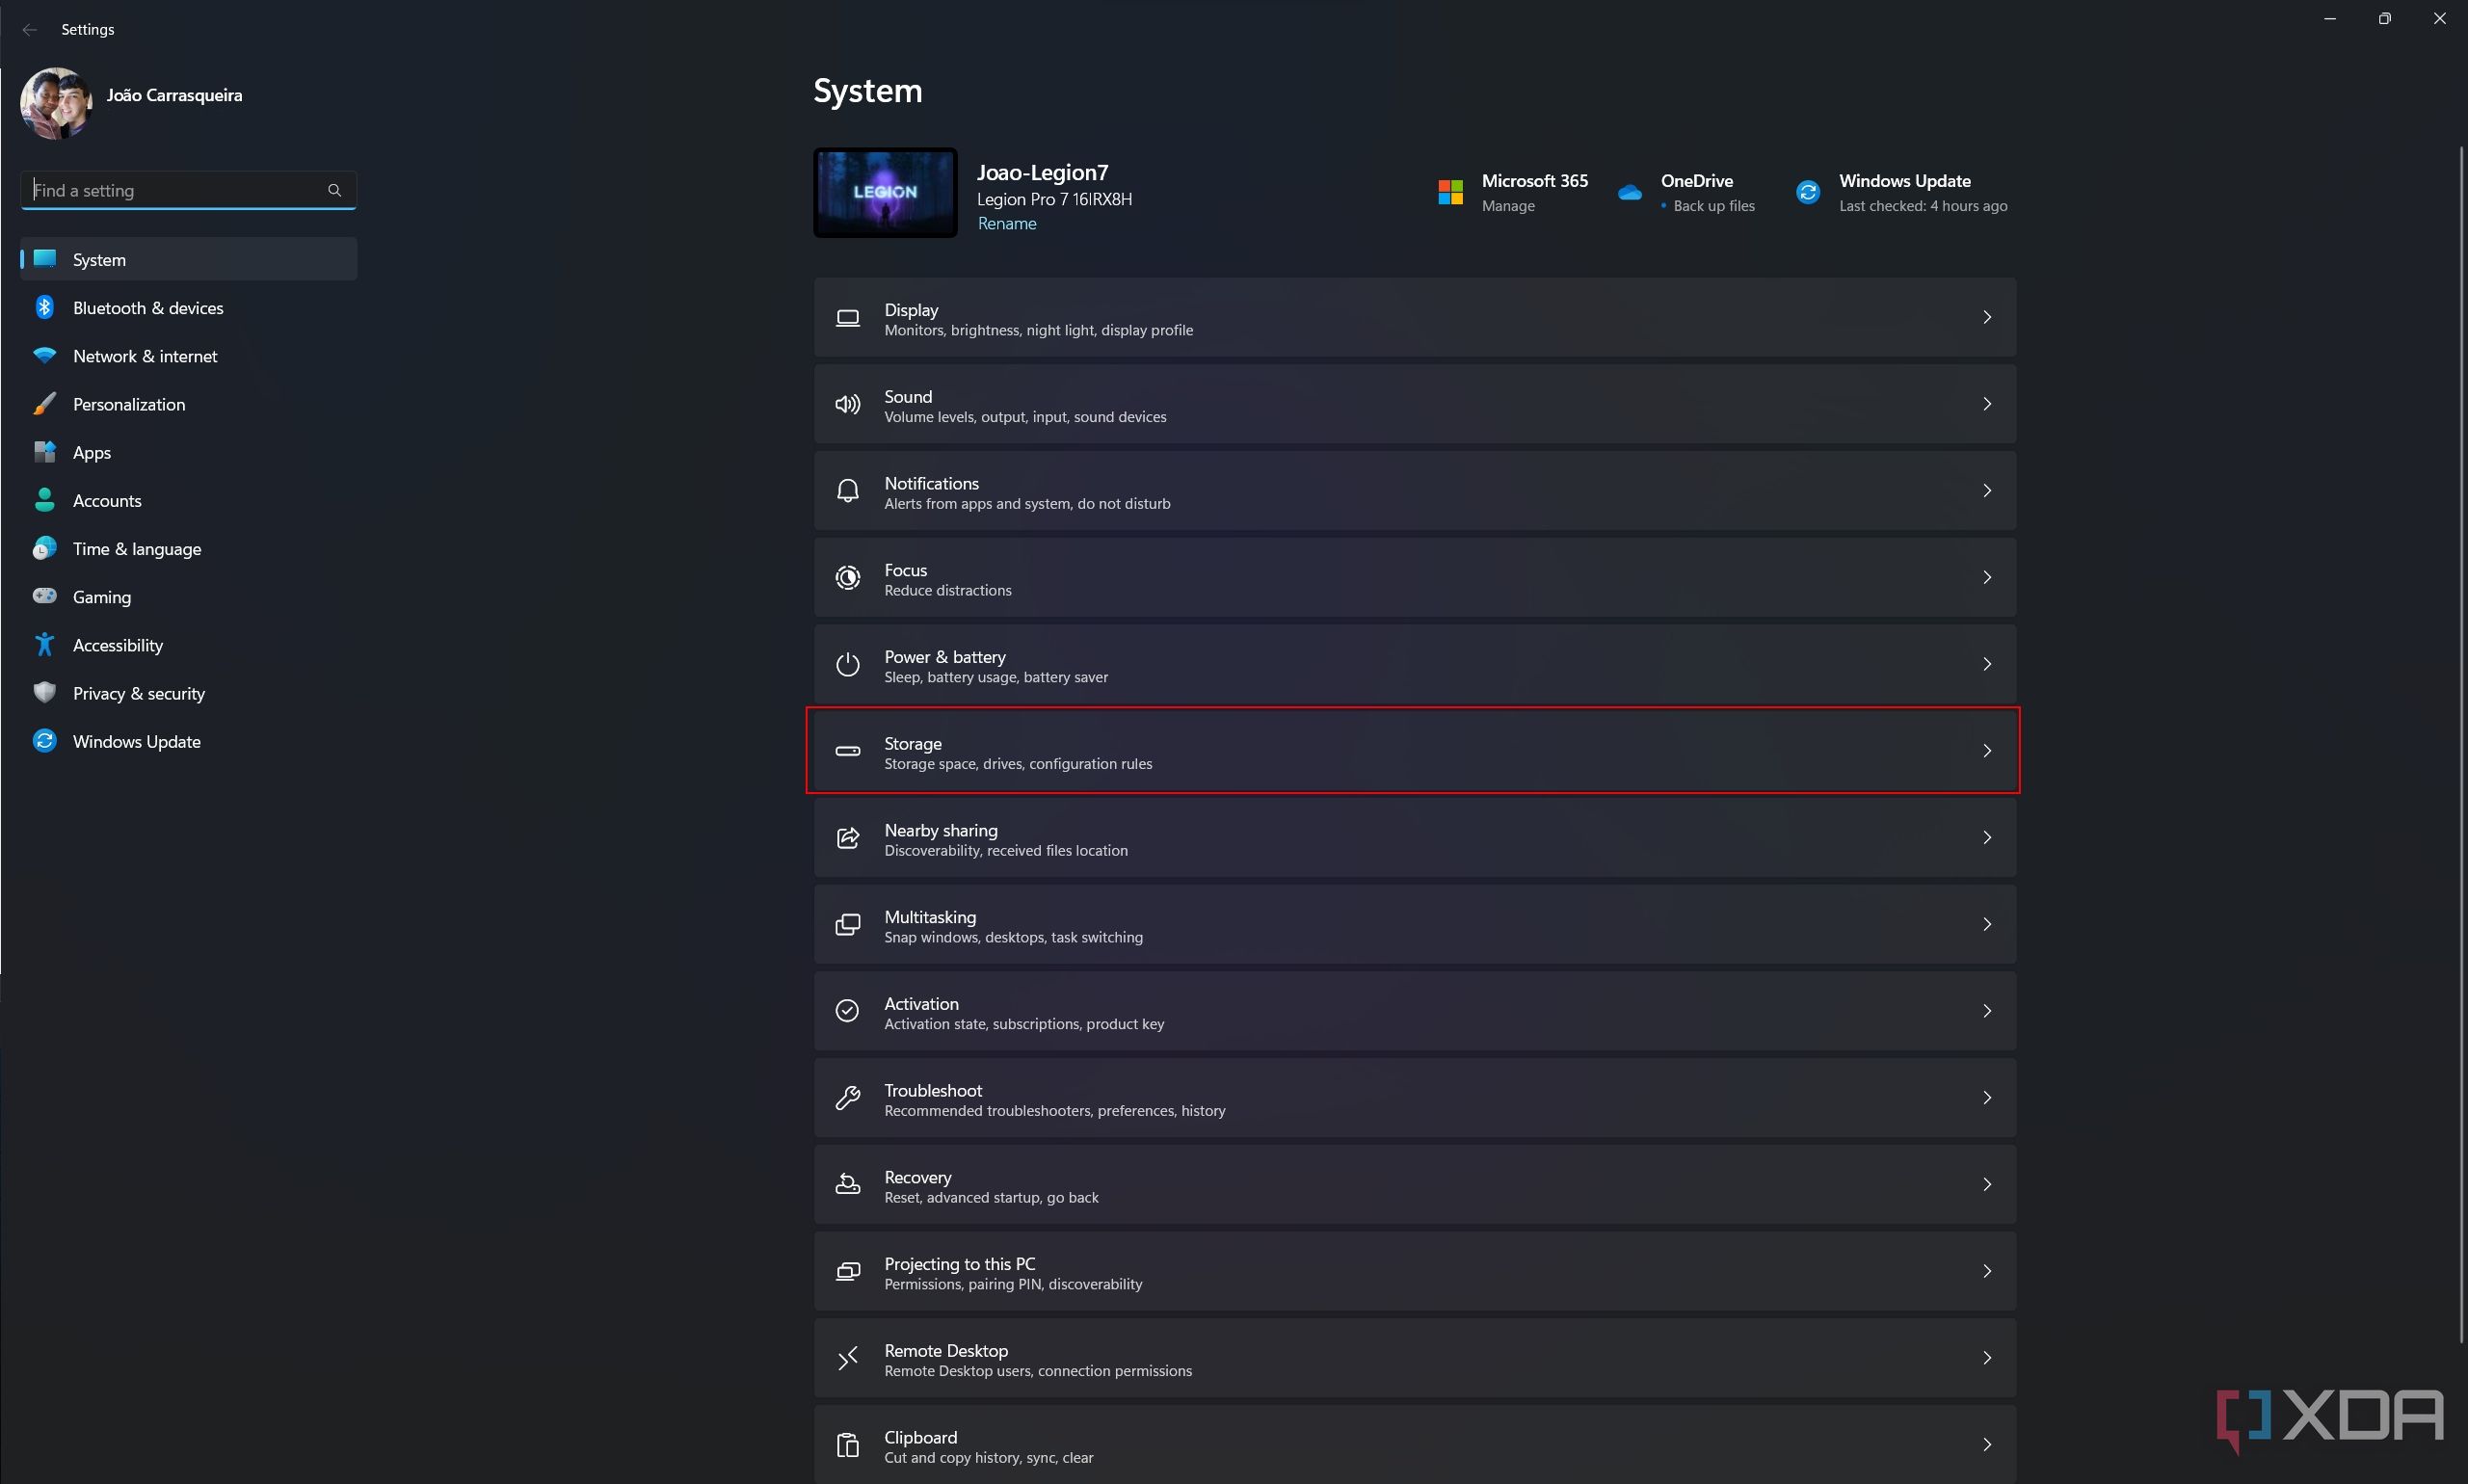
From the System section (which opens by default), choose Storage.
-
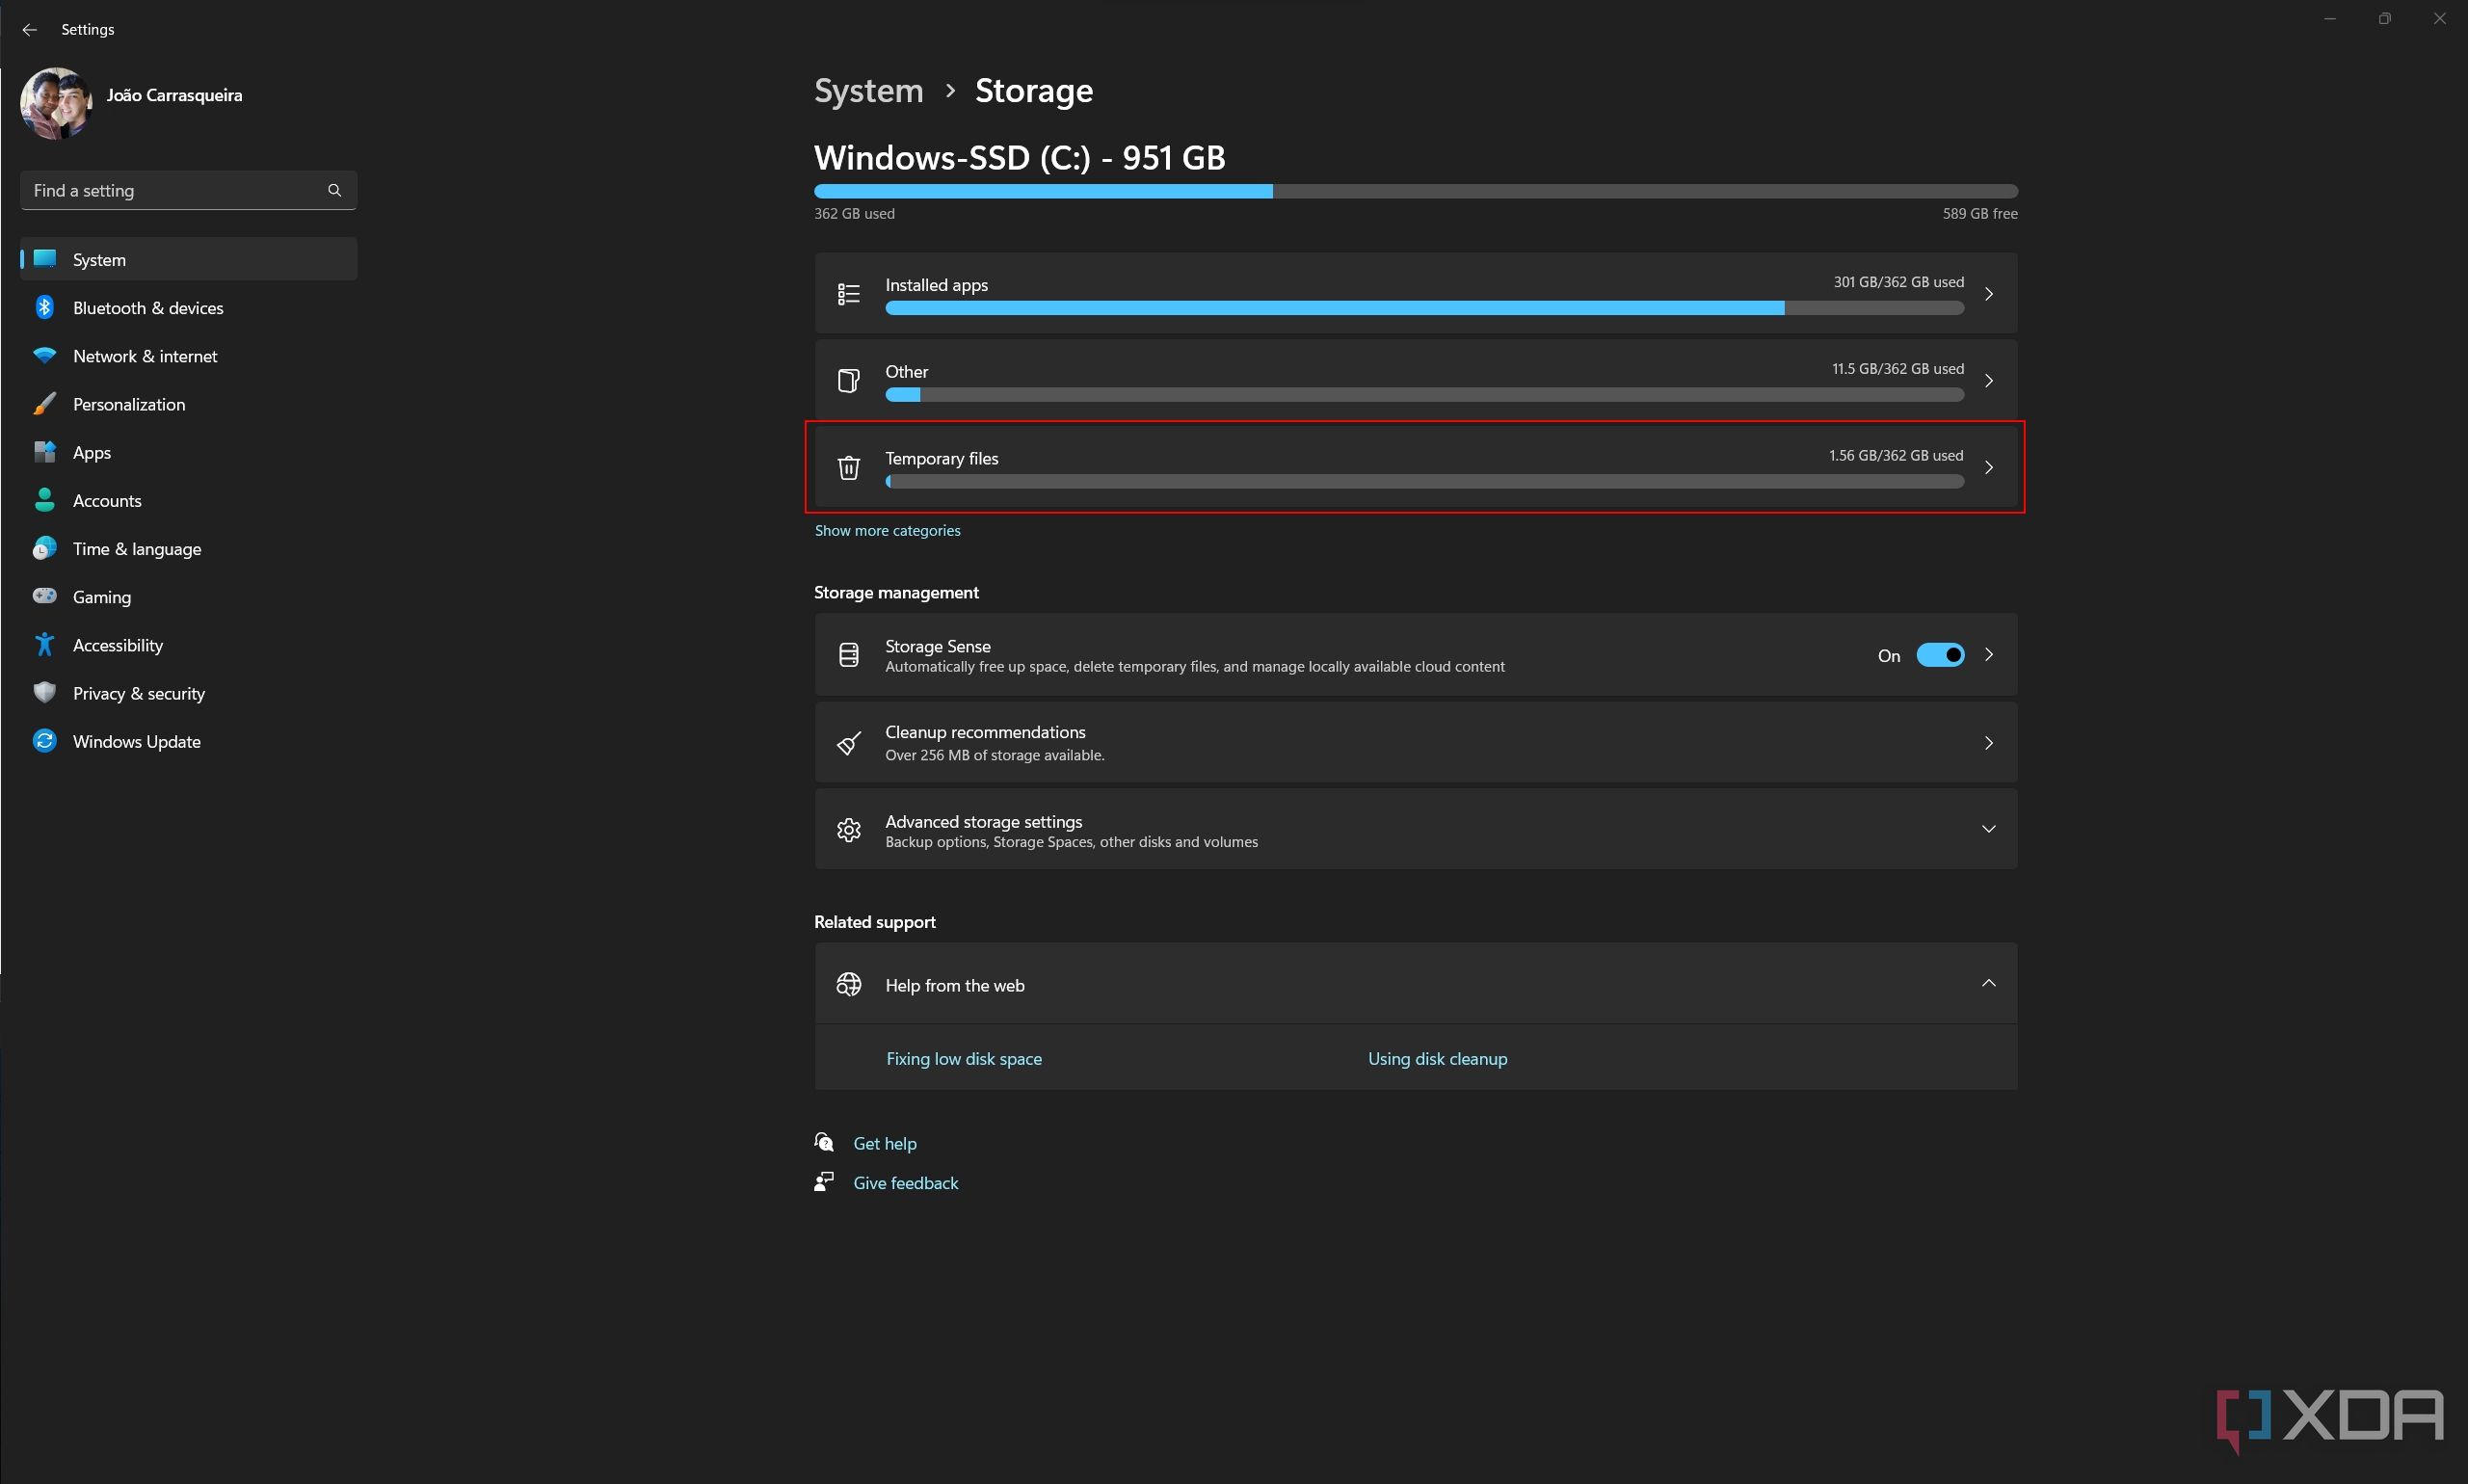
You'll see a breakdown of your storage usage. Click Temporary files.
-
Here, there are various categories containing different types of files, with explanations for each one. Check the boxes for the files you want to delete.
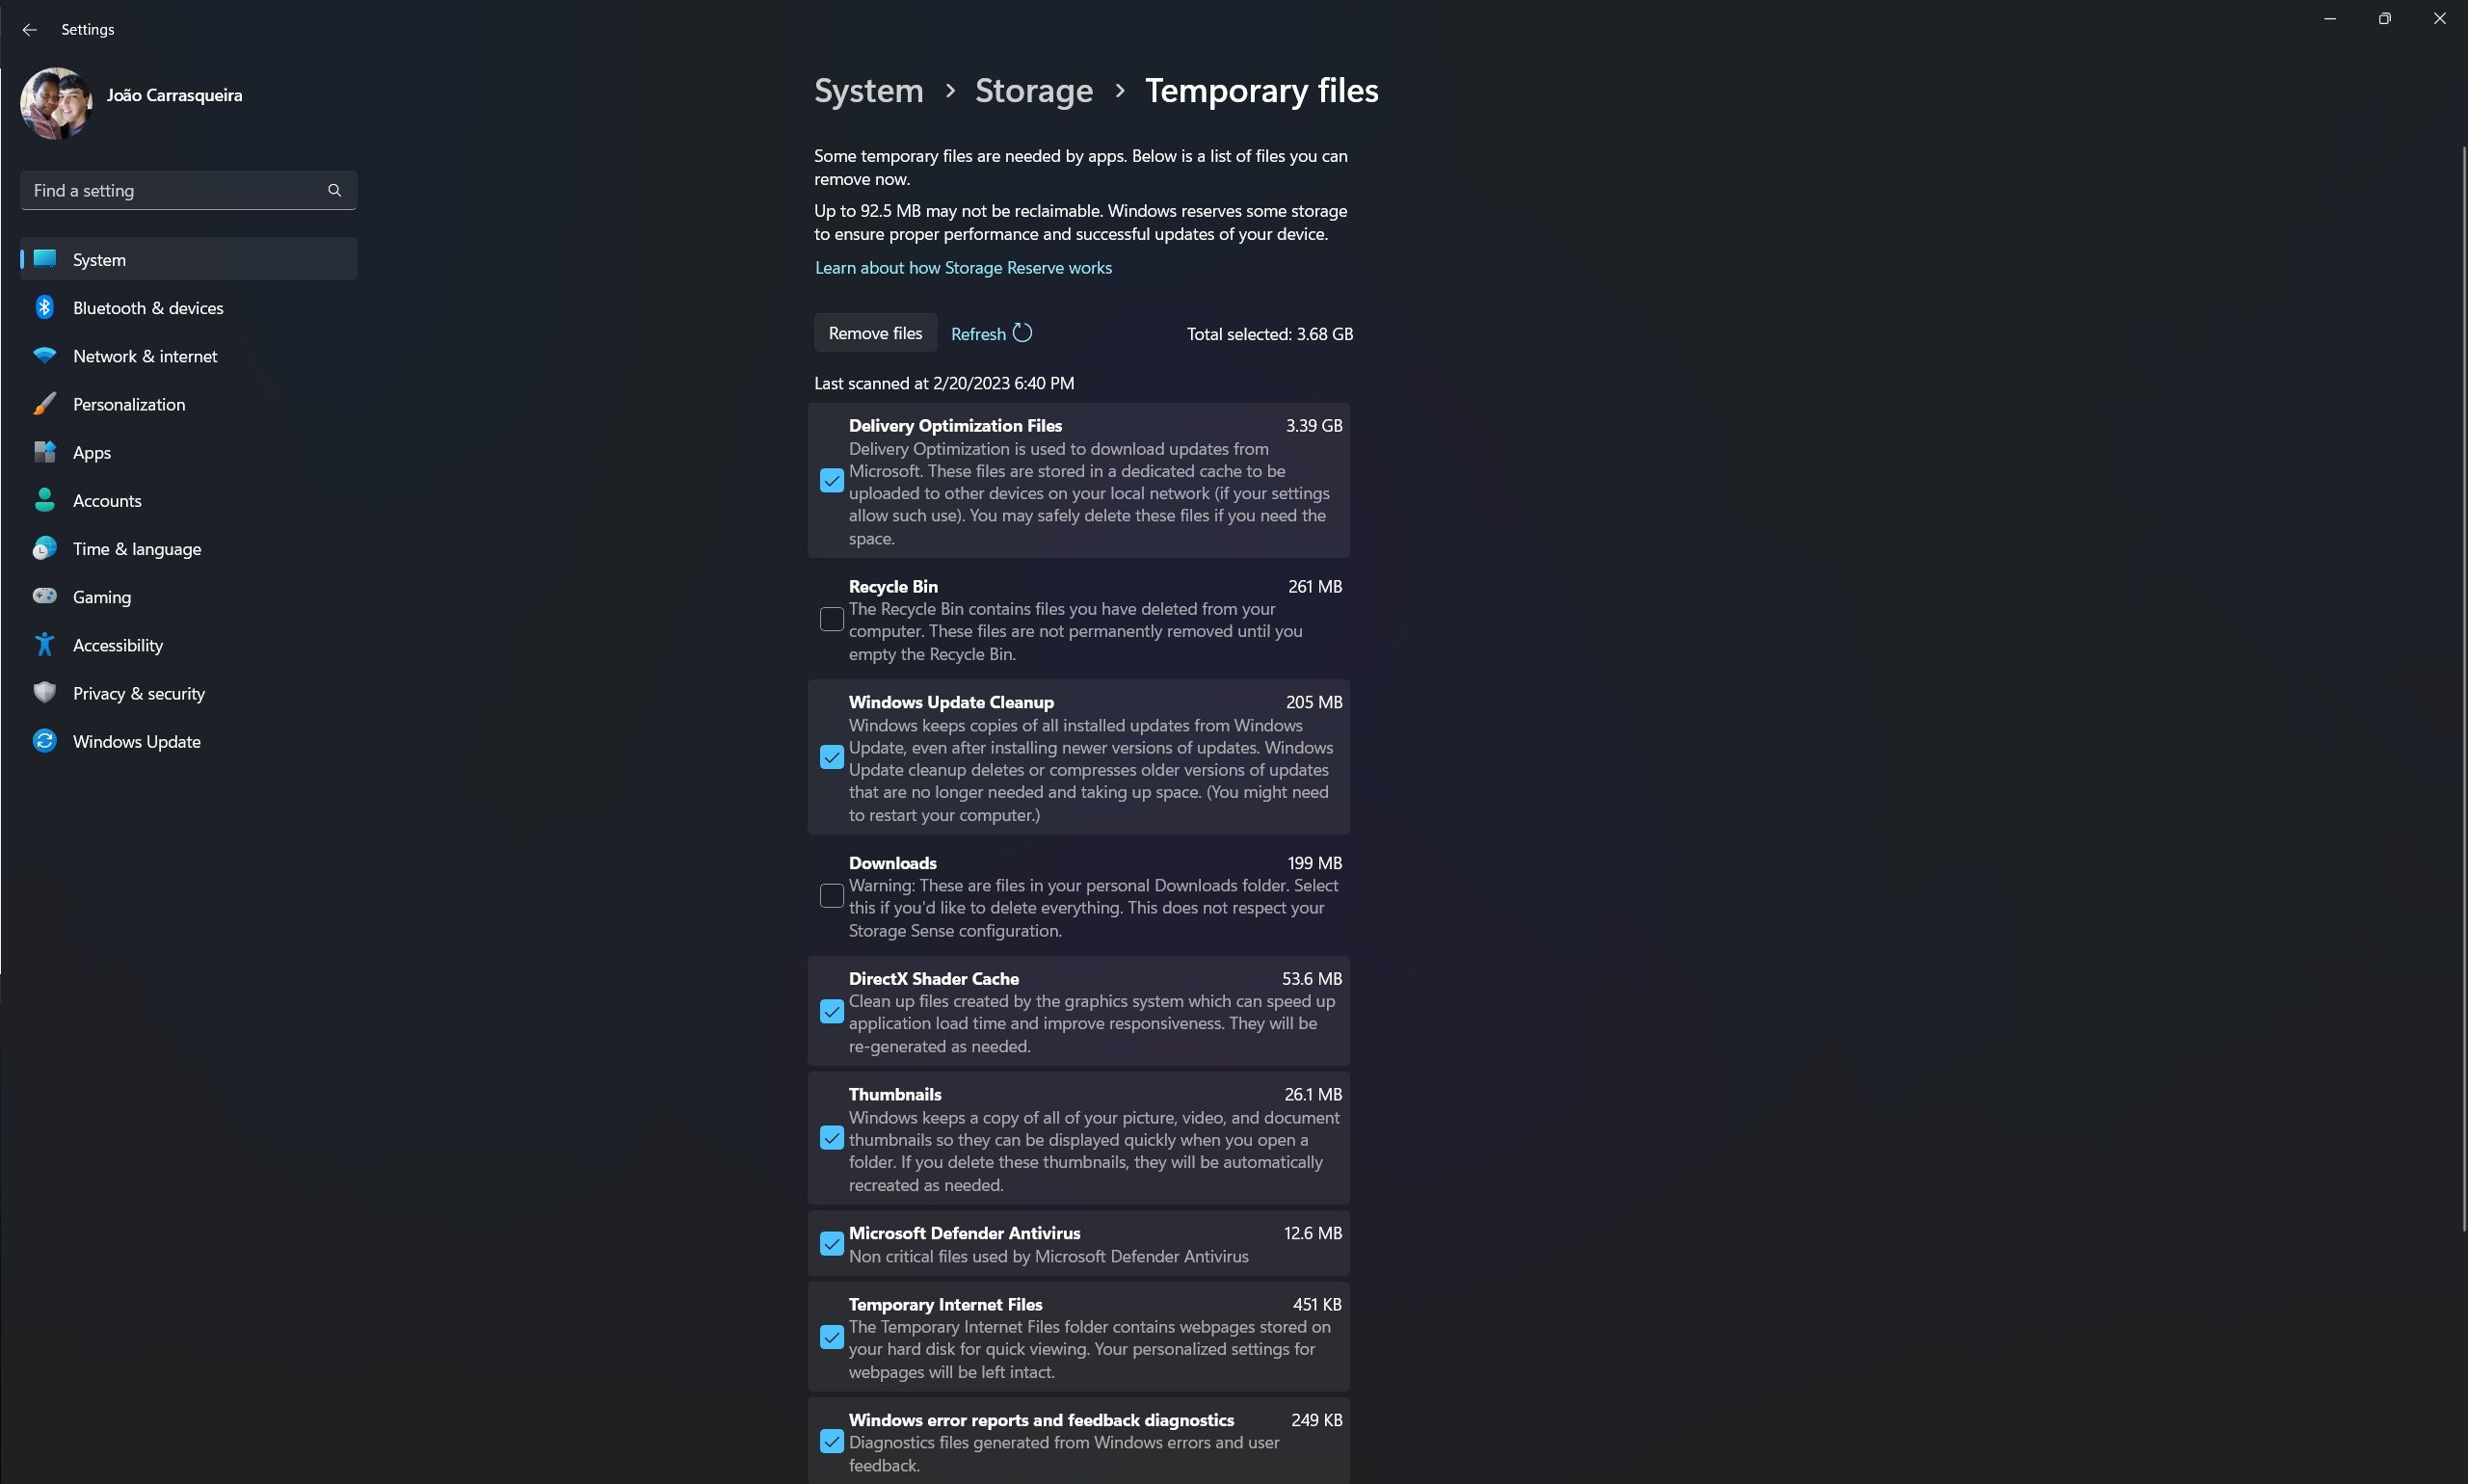
Selecting the Downloads option will delete the entire contents of your Downloads folder, which is the default storage for nearly all the files you download. We recommend deleting these files manually on a case-by-case basis instead. Additionally, selecting the Recycle Bin option will make it impossible to recover files you've previously deleted.
- Click Remove files at the top of the page to delete the temporary files you selected.


How to free up space on your PC after upgrading to Windows 11
Just updated your PC and need more space on your drive? Here's how you can free up space after upgrading to Windows 11 (or another version).Automatically remove temporary files
Windows 11 also includes a feature called Storage Sense, which can automatically delete some of these temporary files. It'll delete temporary Windows files to free up space, but there are a few configuration options you can change to make it work better for your needs. Here's how:
- Open the Settings app.
- From the System section, choose Storage.
-
Check the Storage Sense option. It may be on by default, or you can enable it by clicking the toggle on the right to change it to On.
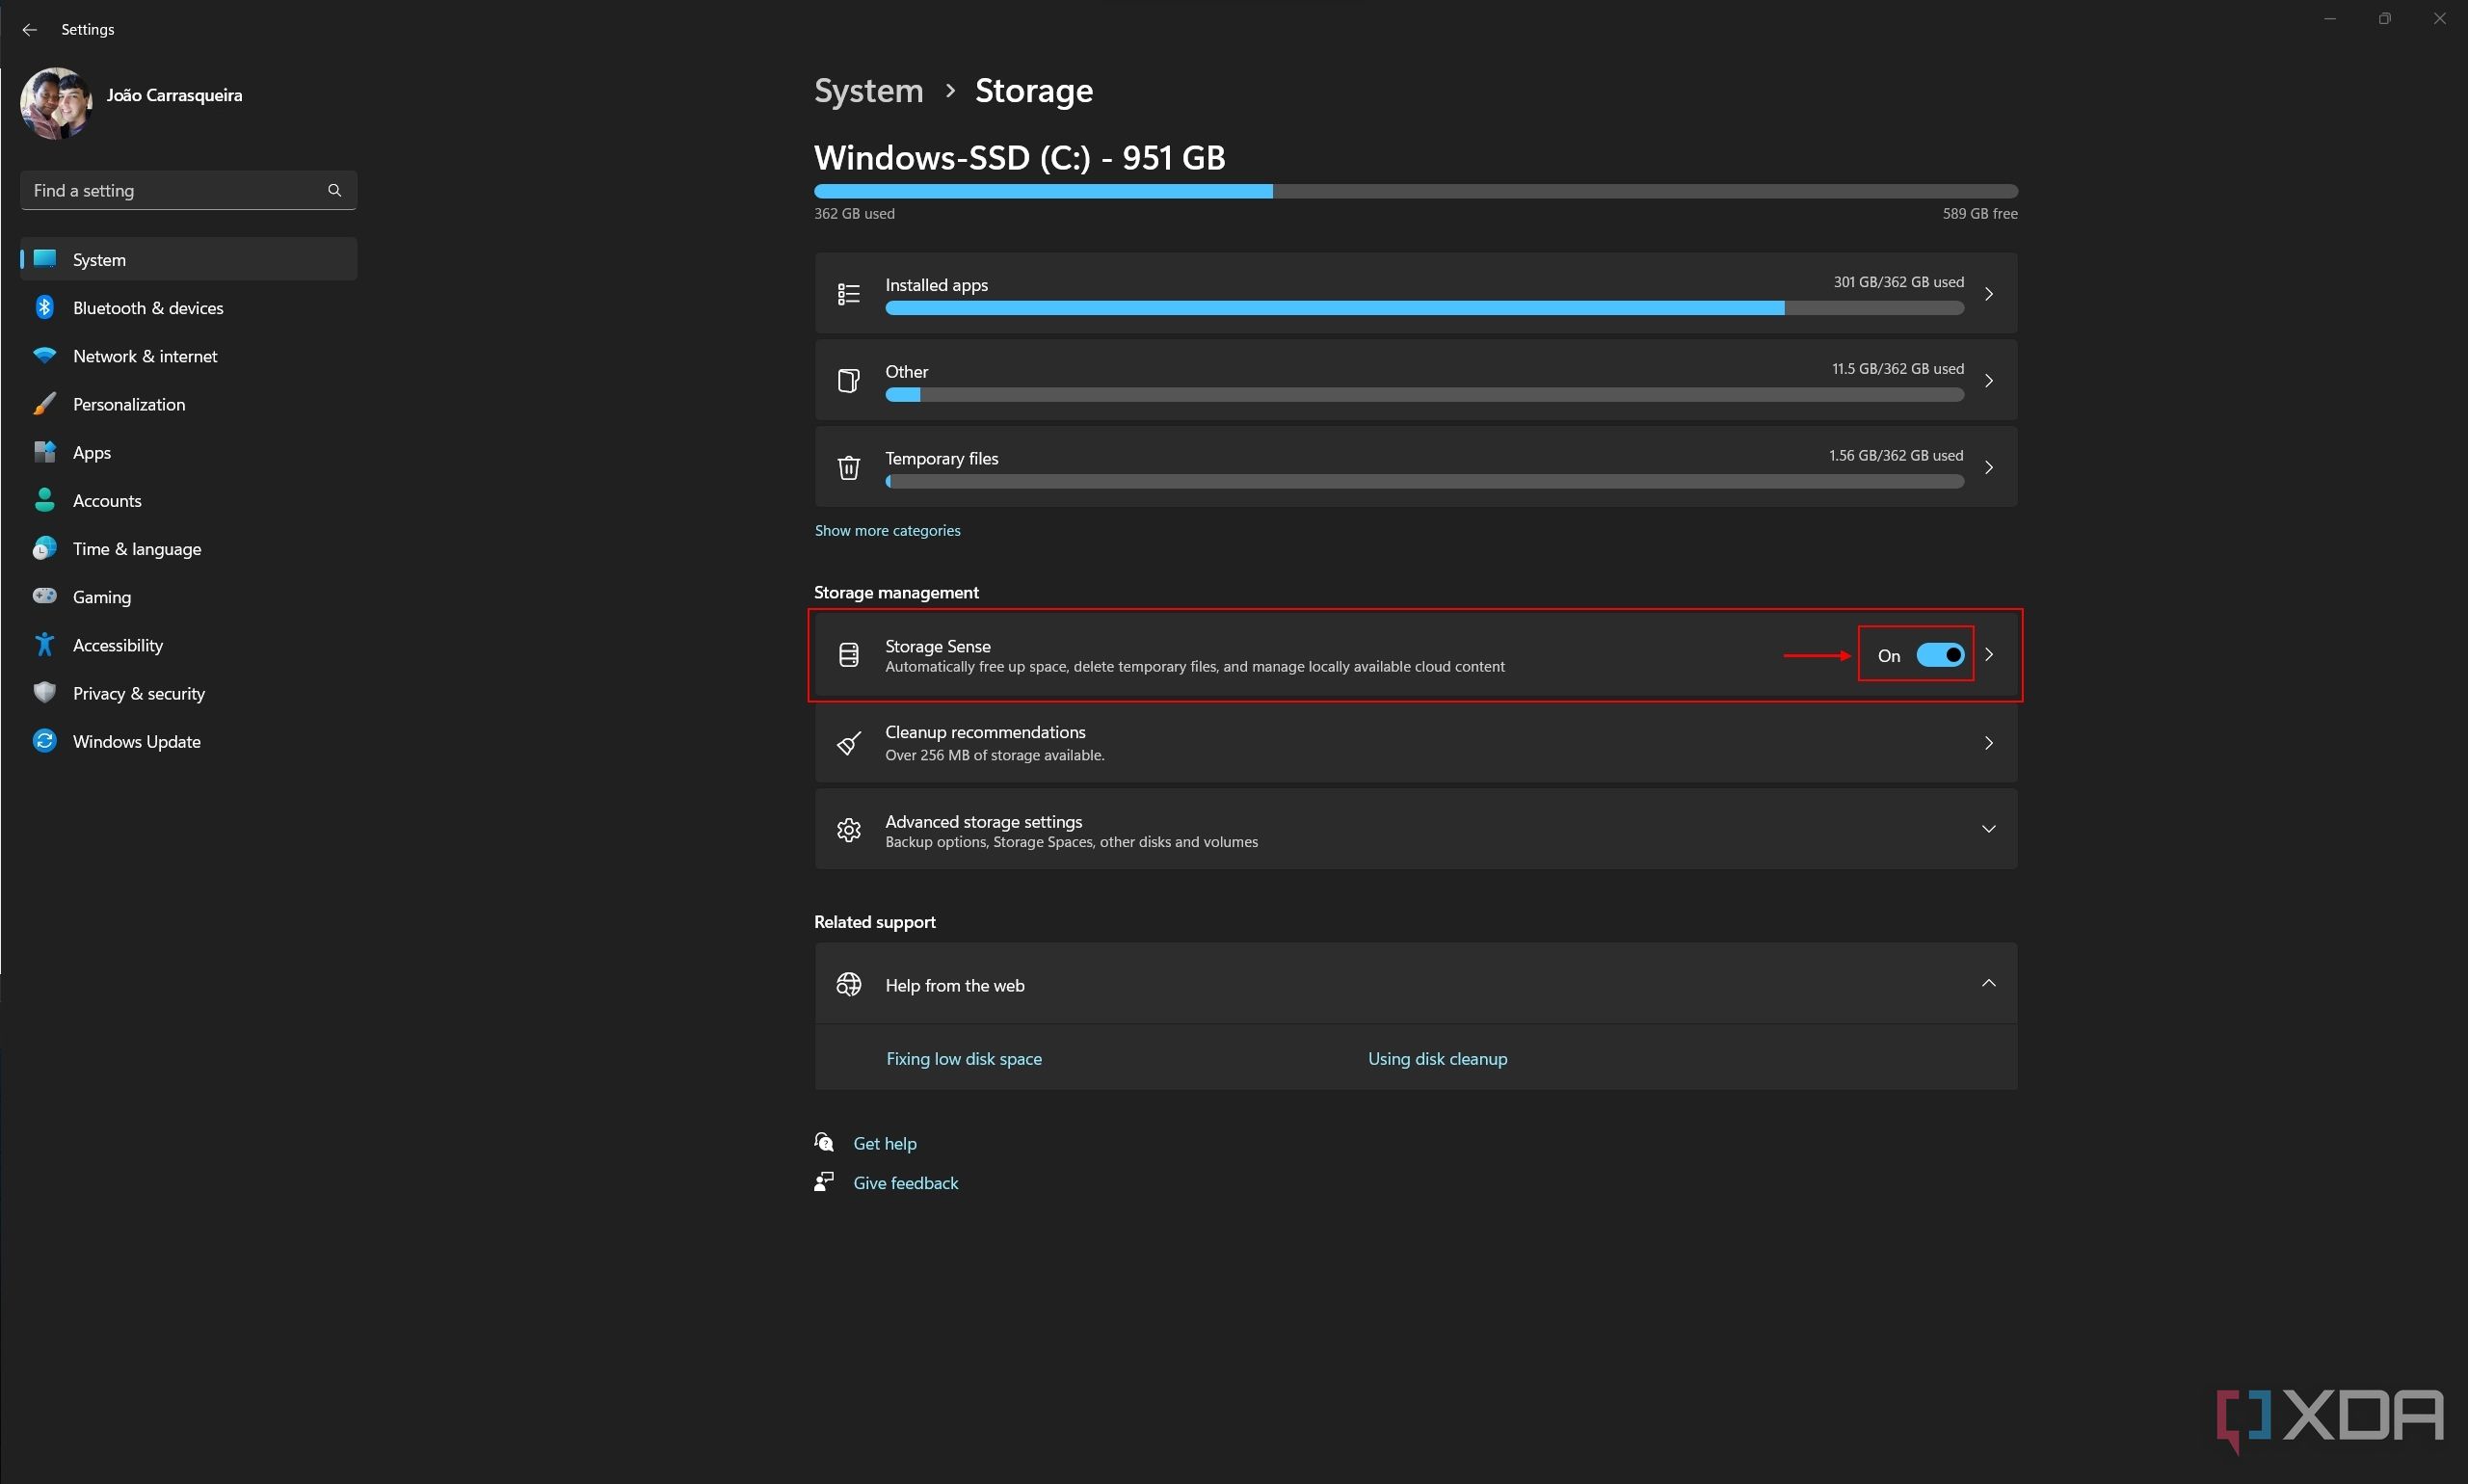
- Click Storage Sense to change how the feature works.
-
Windows 11 will automatically clean up its own system files, but you can configure it to delete your personal files regularly. Here are the options available:
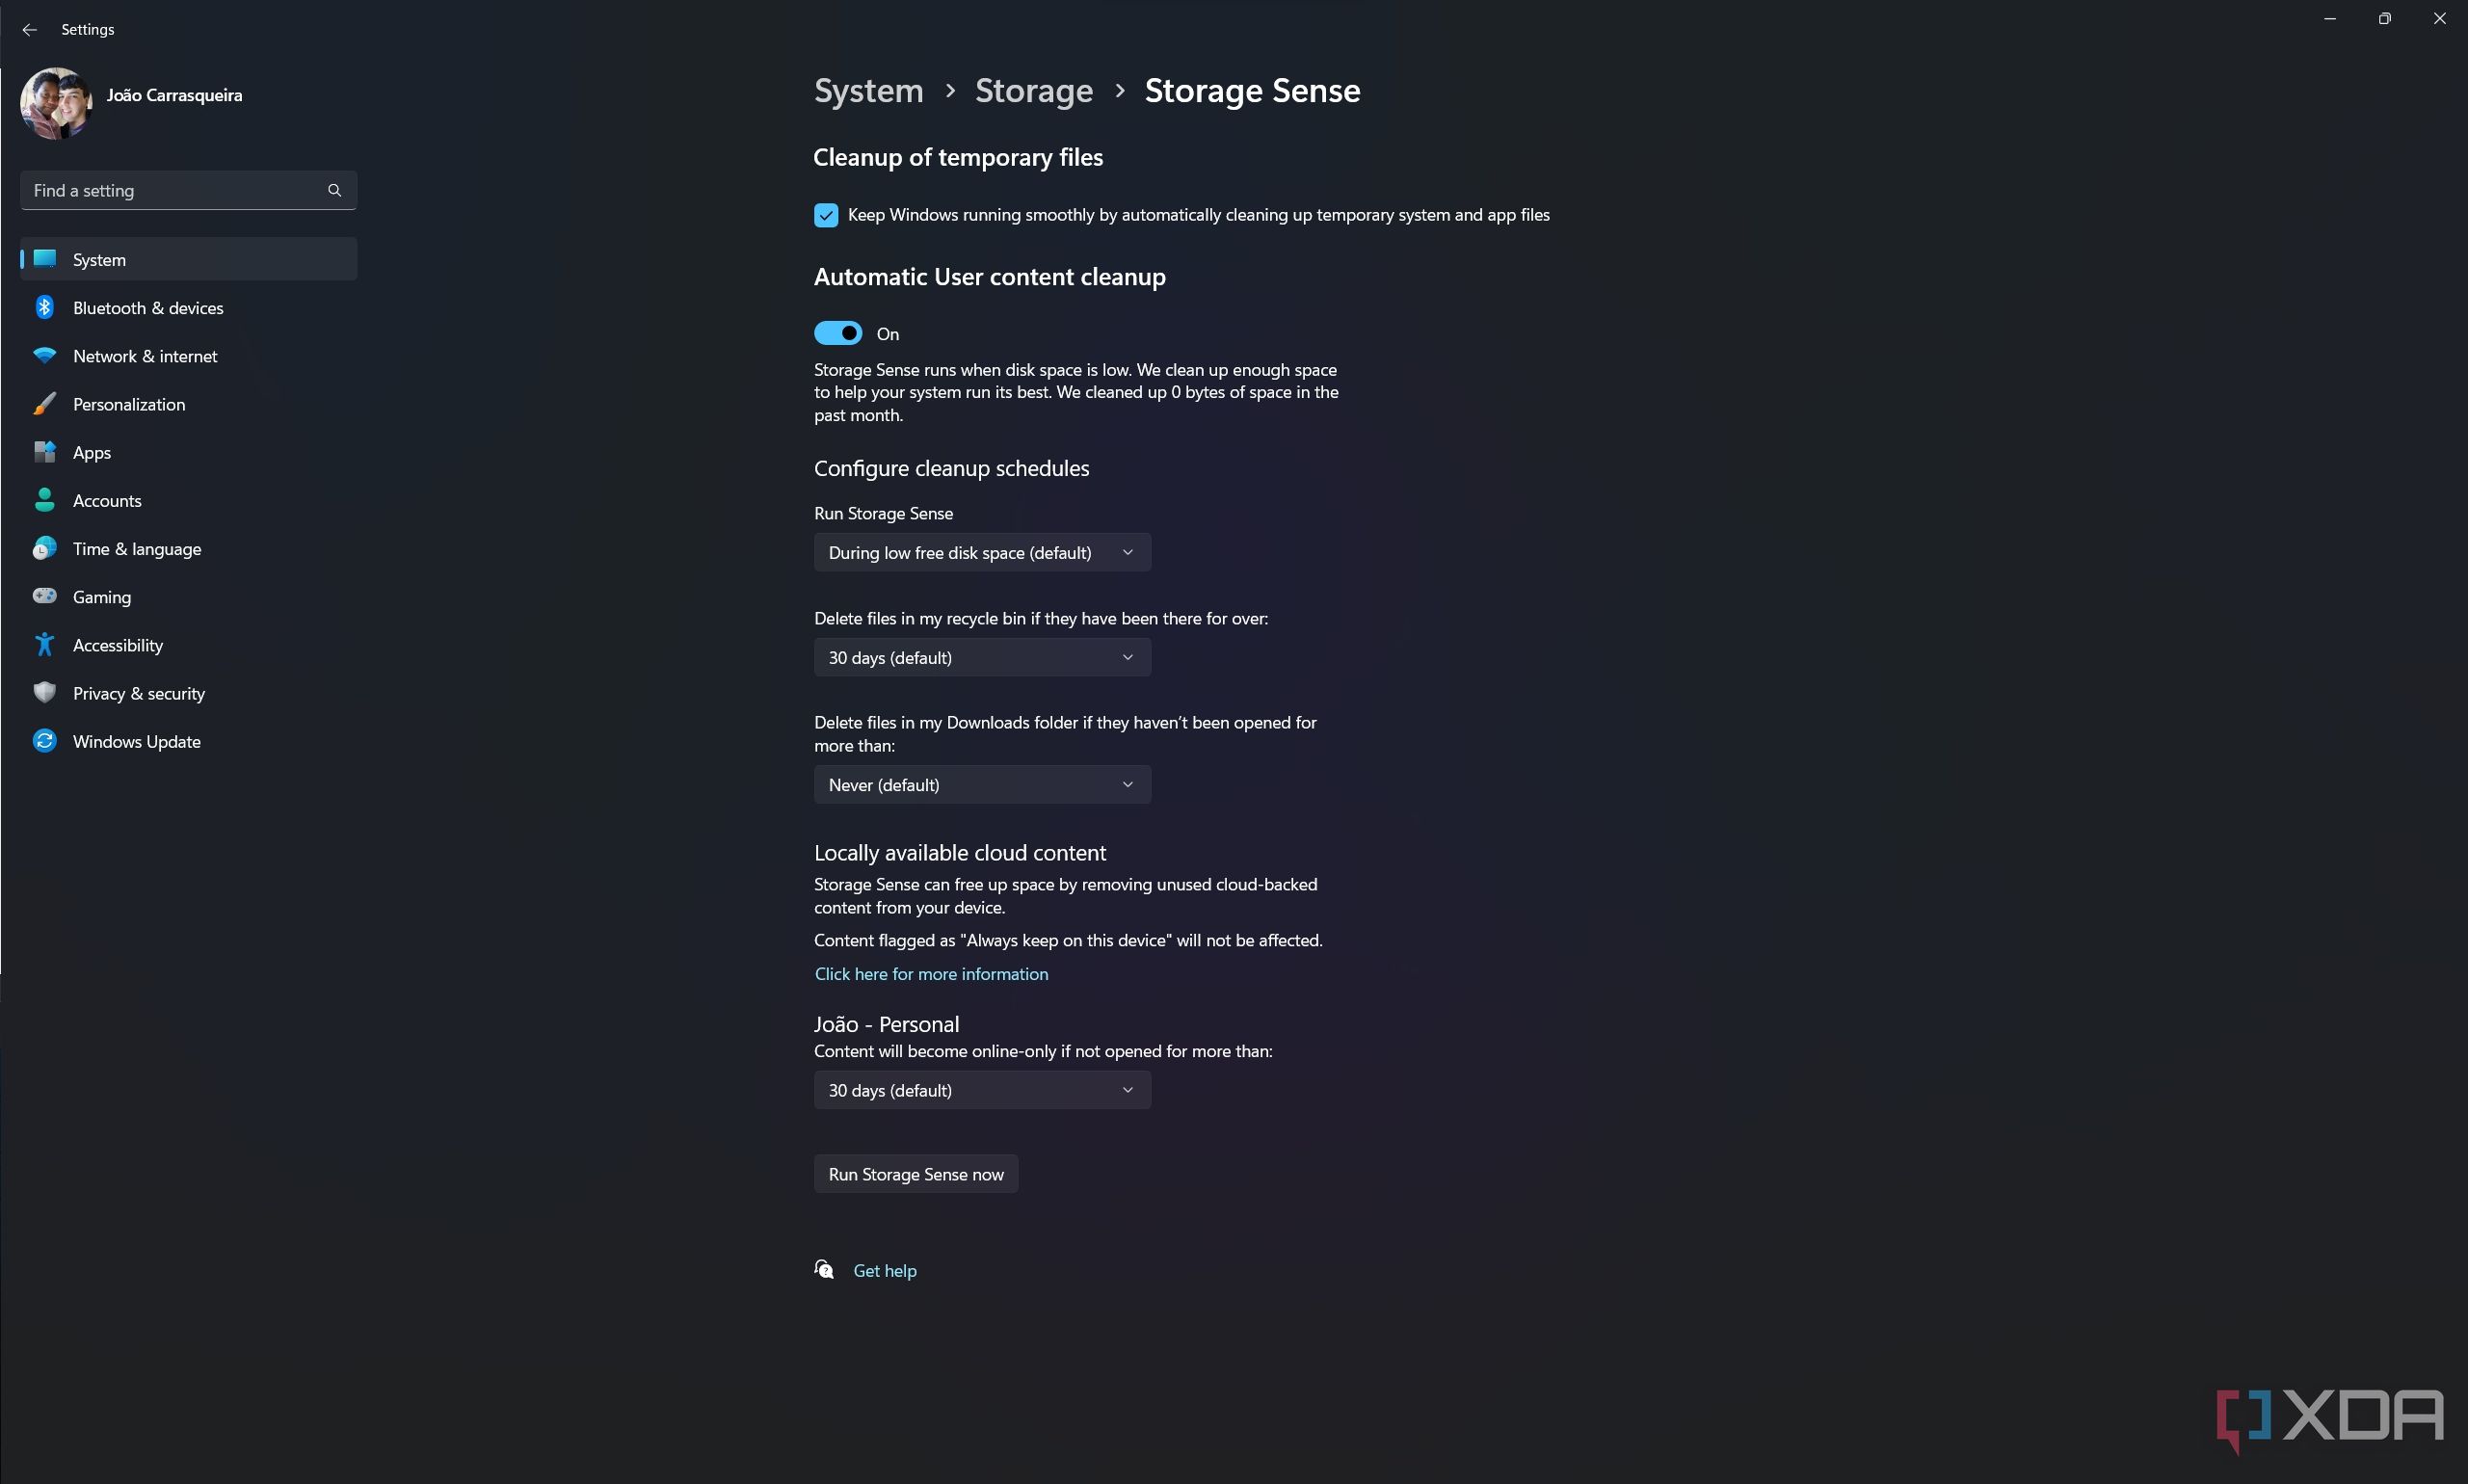
- Automatic User content cleanup: This is the core feature of Storage Sense itself, and if you enabled it on the previous page, it will be enabled here (and vice versa).
- Configure cleanup schedules: This option changes how frequently Storage Sense will clean your files automatically. You can change how often Storage Sense runs (by default, it will run only when you have low free disk space) and how long it should wait before deleting files in your Recycle Bin (the default is 30 days) or Downloads folder (by default, these files aren't deleted automatically).
- Locally available cloud content: This option allows you to automatically delete local copies of files that you've also stored on OneDrive. This only applies to files in your OneDrive folder, so if you've copied them to a different location on your PC; they won't be affected. By default, locally available OneDrive files are deleted if they haven't been opened in 30 days.
- You can also run Storage Sense by clicking Run Storage Sense now at the end of the page if you don't want to wait for the next automatic run.


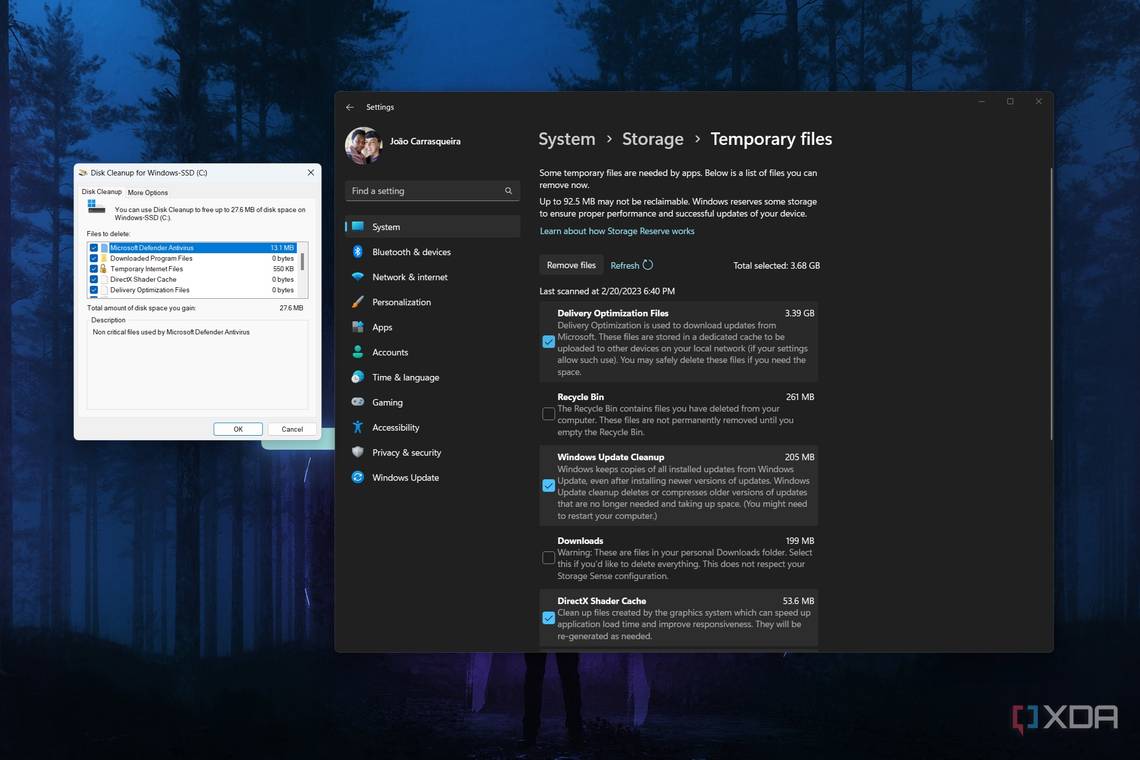
Clear cache using Disk Cleanup
If you prefer doing things the classic way, it's worth noting that a lot of the capabilities of the Settings app when it comes to cleaning temporary files actually come from Disk Cleanup. This is a feature from the classic Control panel, and it's still available alongside the new Settings app.
-
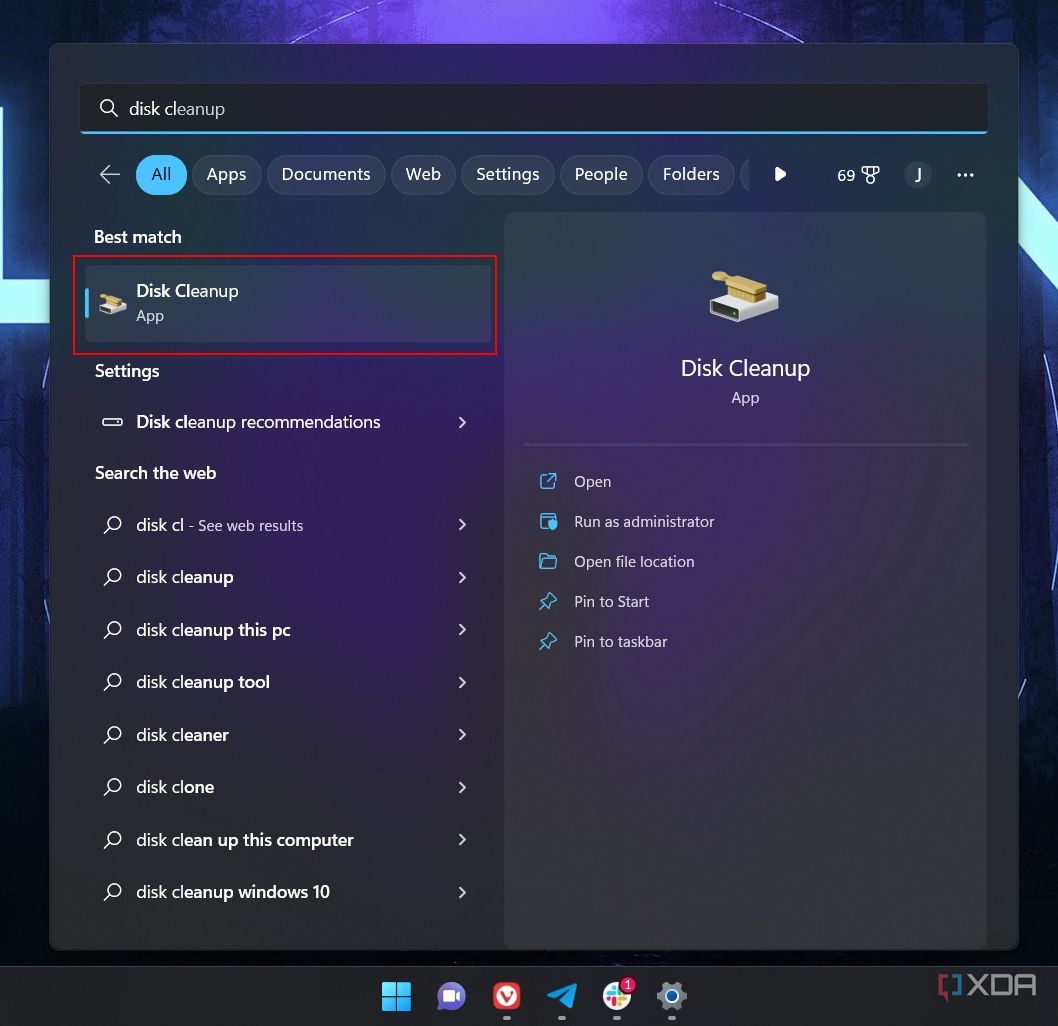
Open the Start menu and type Disk cleanup. Select the first option in the search results.
-
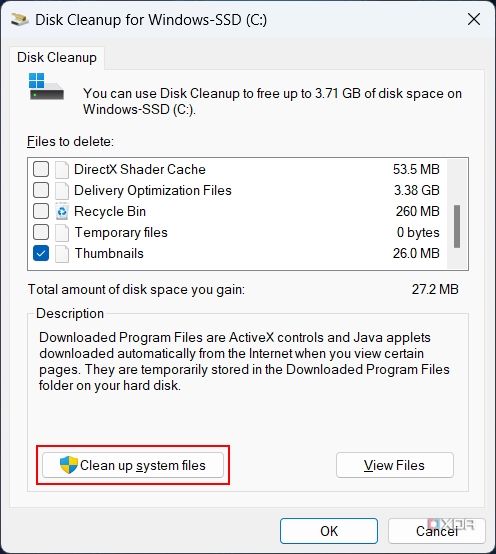
To delete additional files, click Clean up system files. You'll need administrator permissions for this.
-
Select all the boxes of files you want to delete. In this case, you don't have to worry about deleting the Downloads folder since that capability isn't available here.
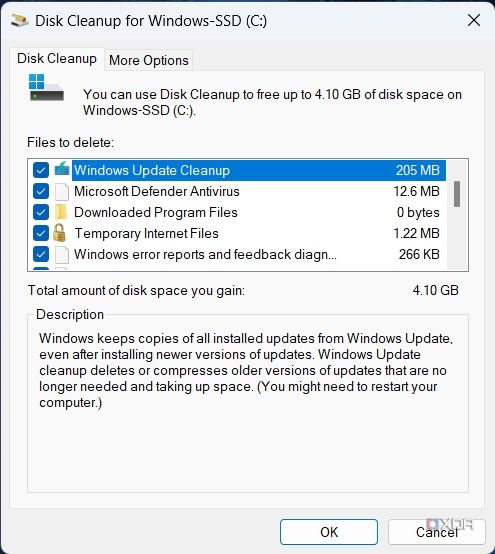
- Click OK to delete the files you selected.


That's about all there is to this method, so it's just as easy as the method above.
Clear individual app files
Another useful feature in Windows 11 is the ability to reset apps, deleting all your personal data and cache related to them. This can be very helpful if you're having trouble with some apps crashing or not working properly, though it likely won't help you save that much space. One thing to note is that this only works for modern/UWP apps, but if you want to know how to do it, here it is:
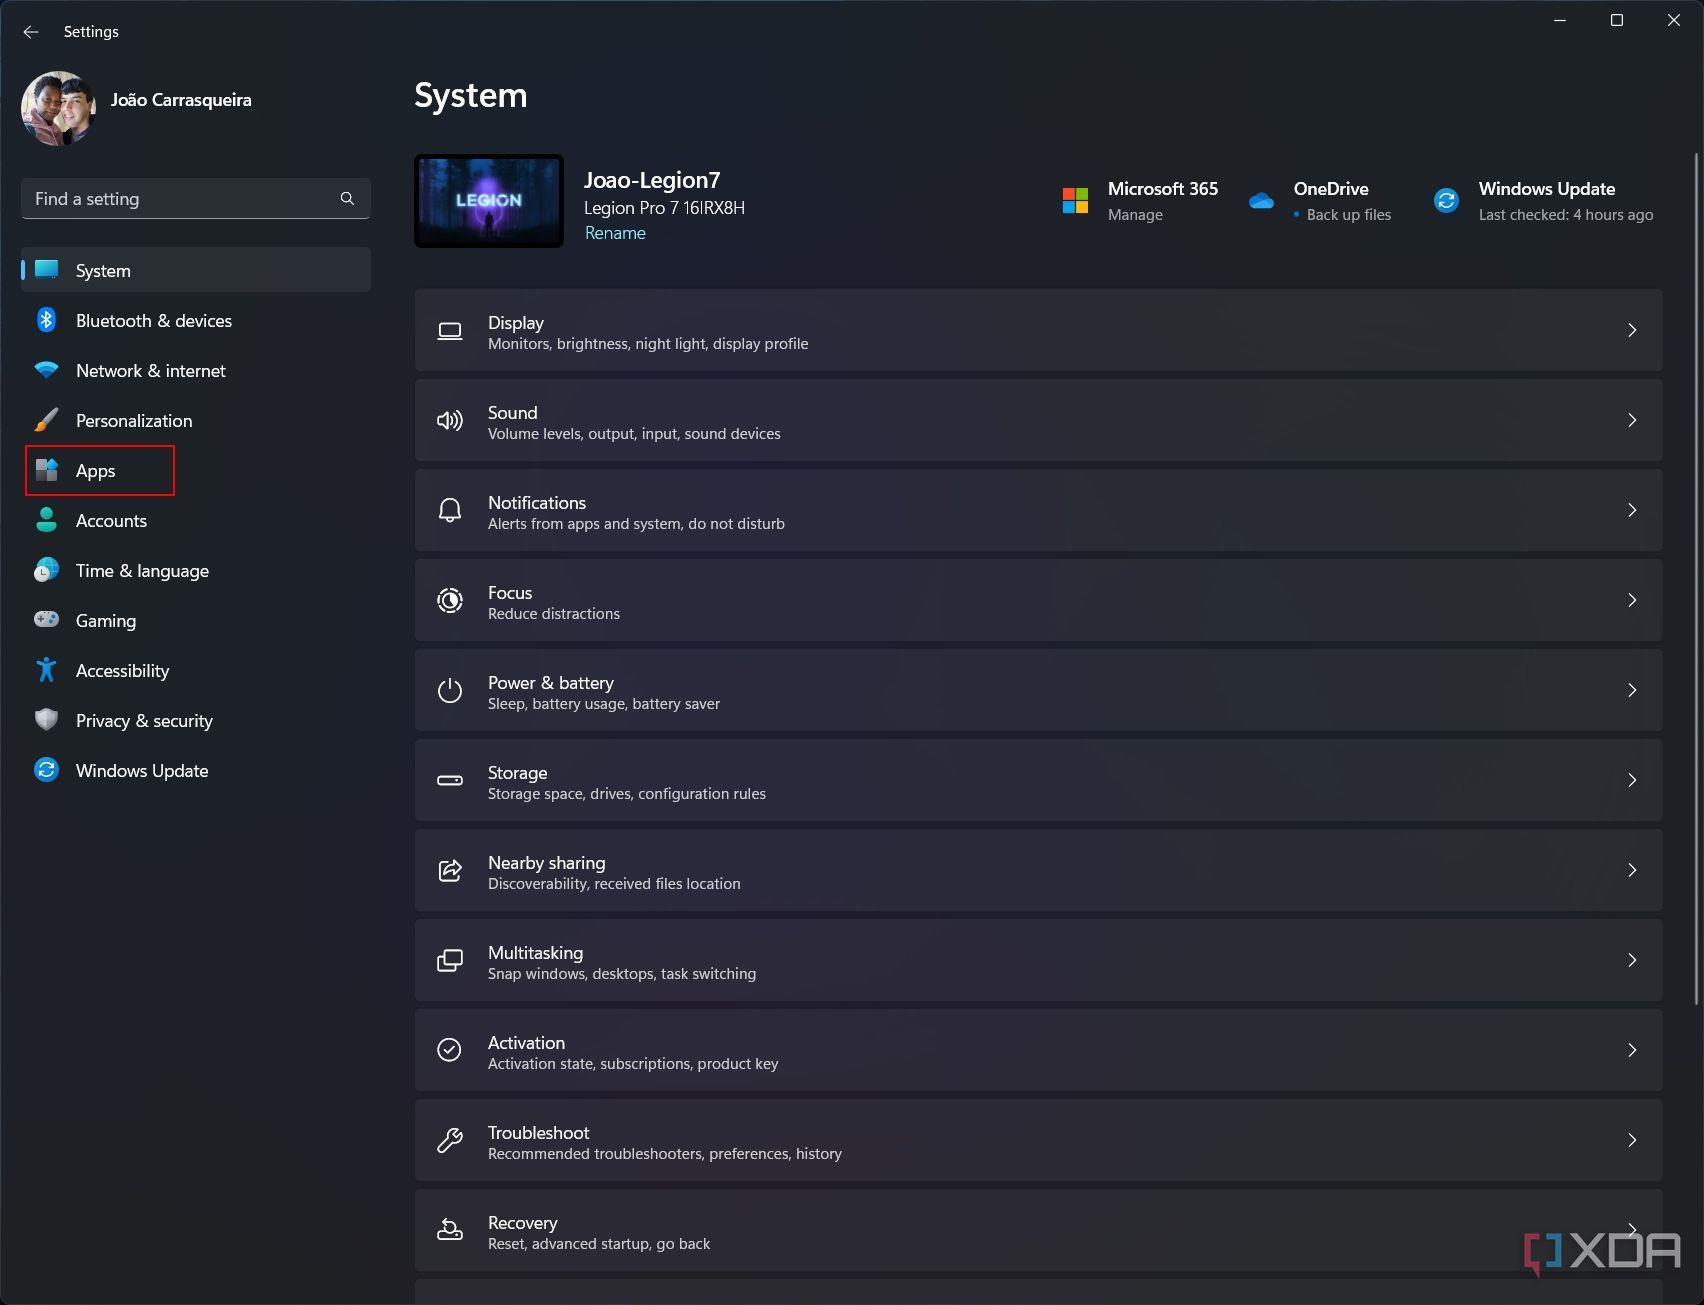
- Open the Settings app.
-
Choose Apps from the left-side menu.
-
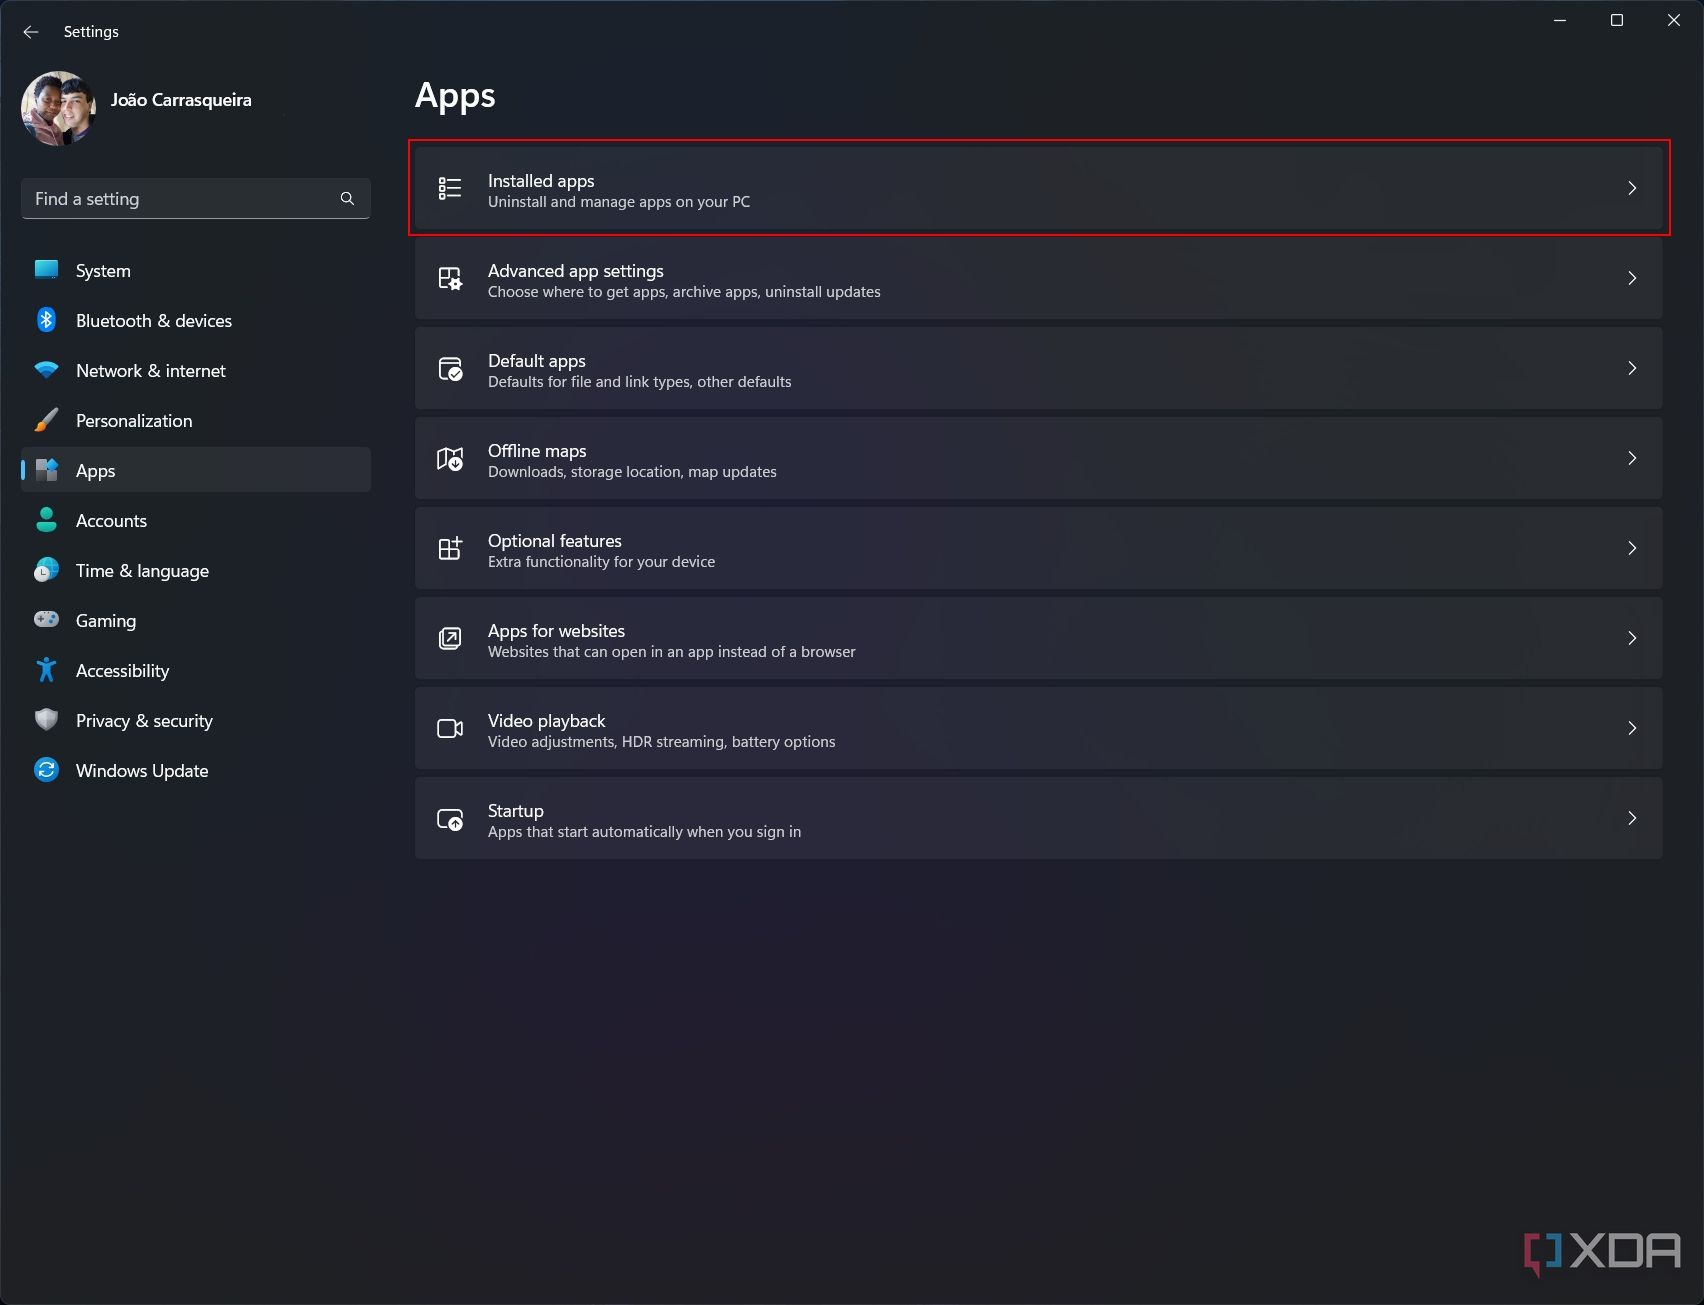
Click Installed apps.
-
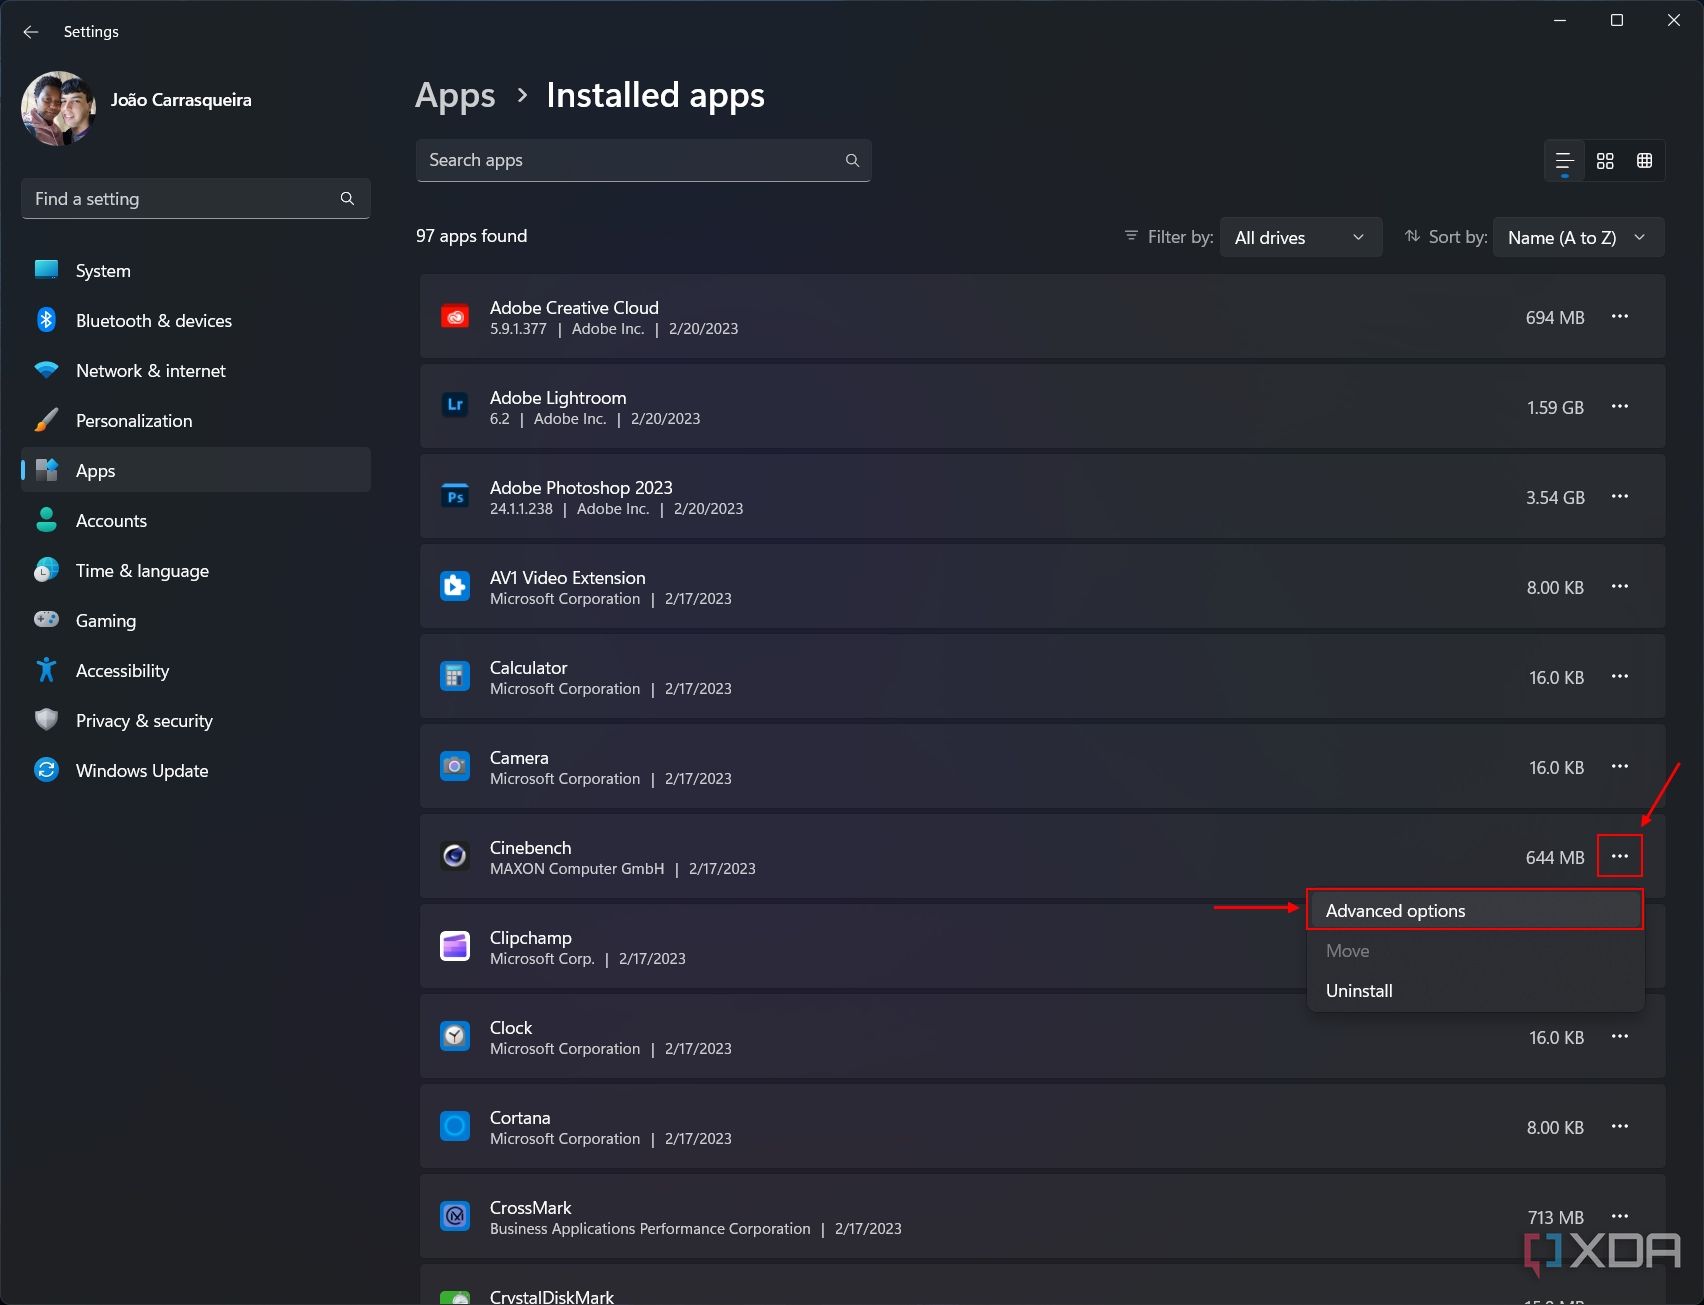
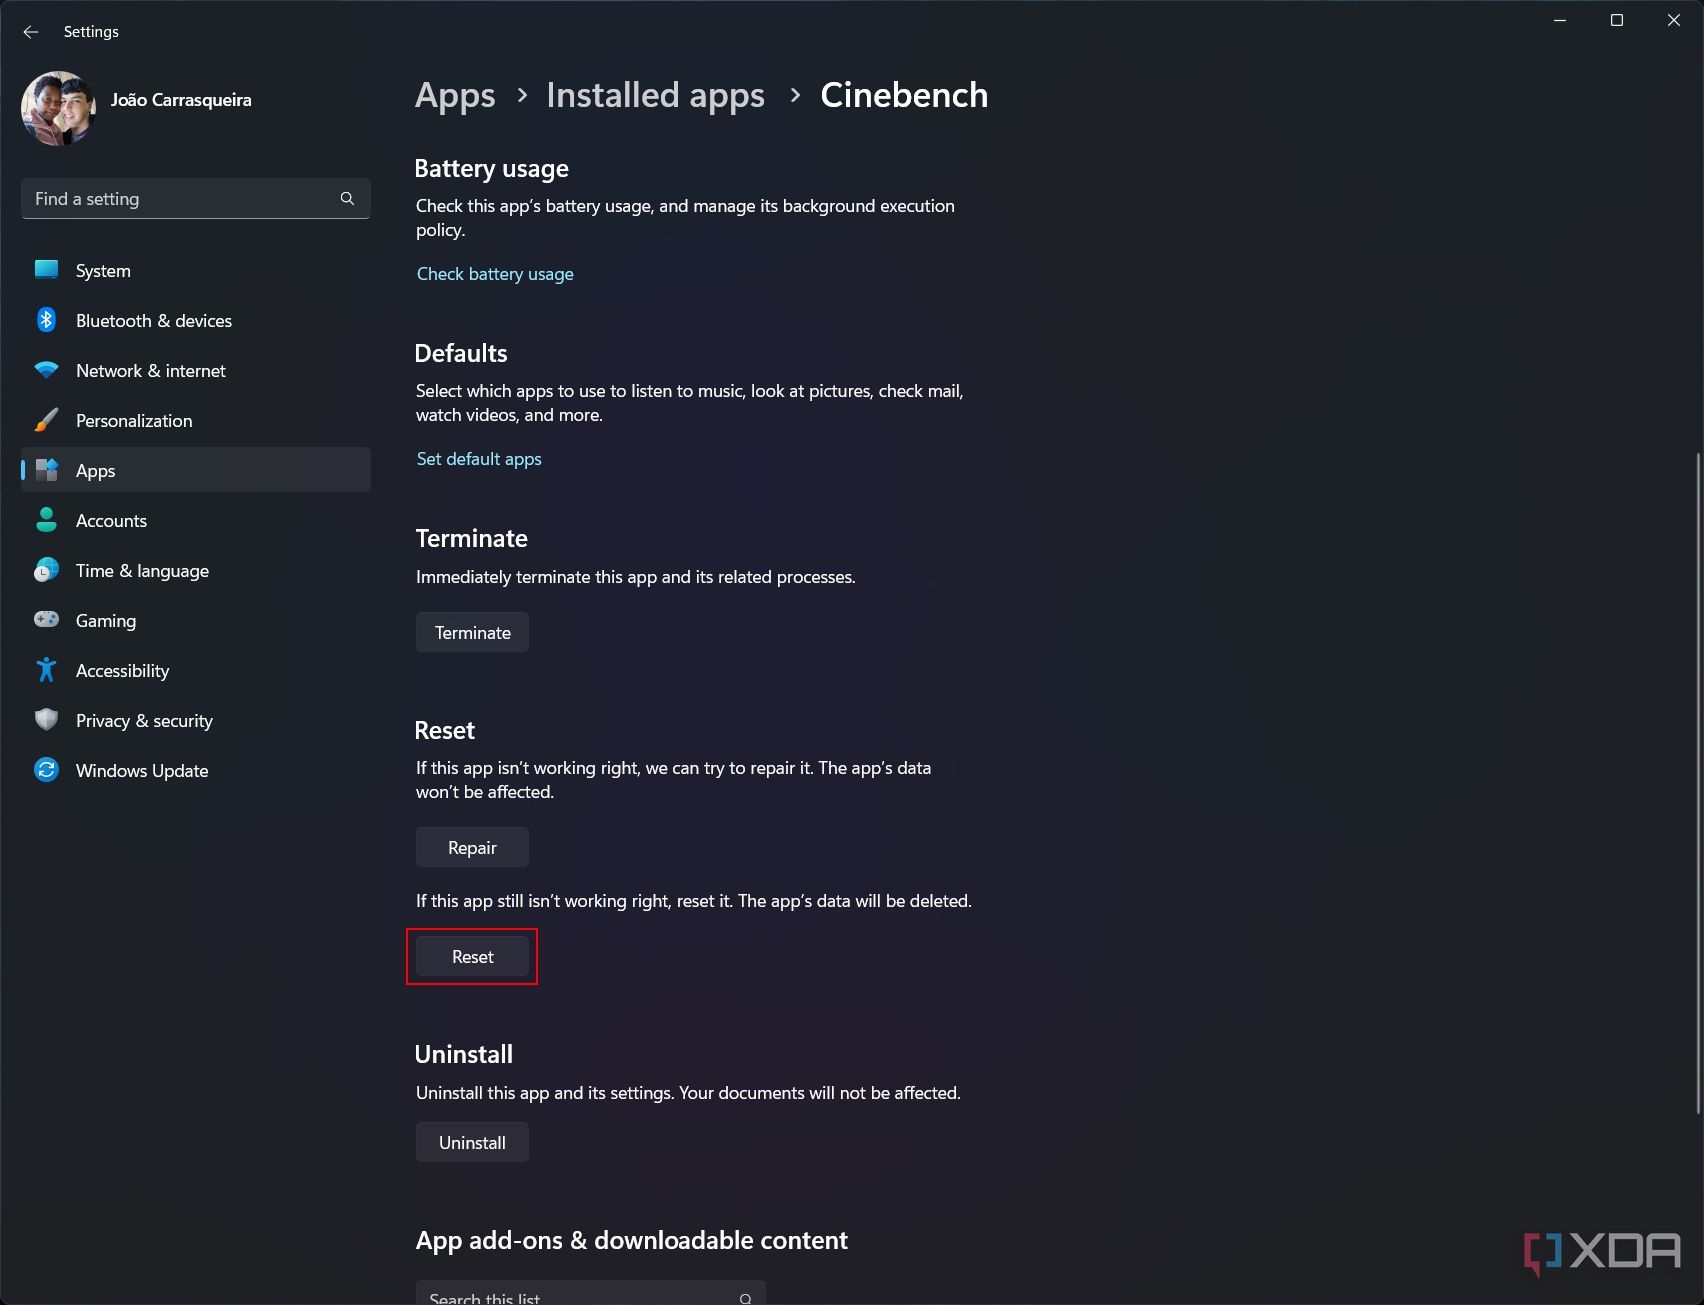
Find the app you want to reset, click the ellipsis (...) button on the right, then Advanced options.
-
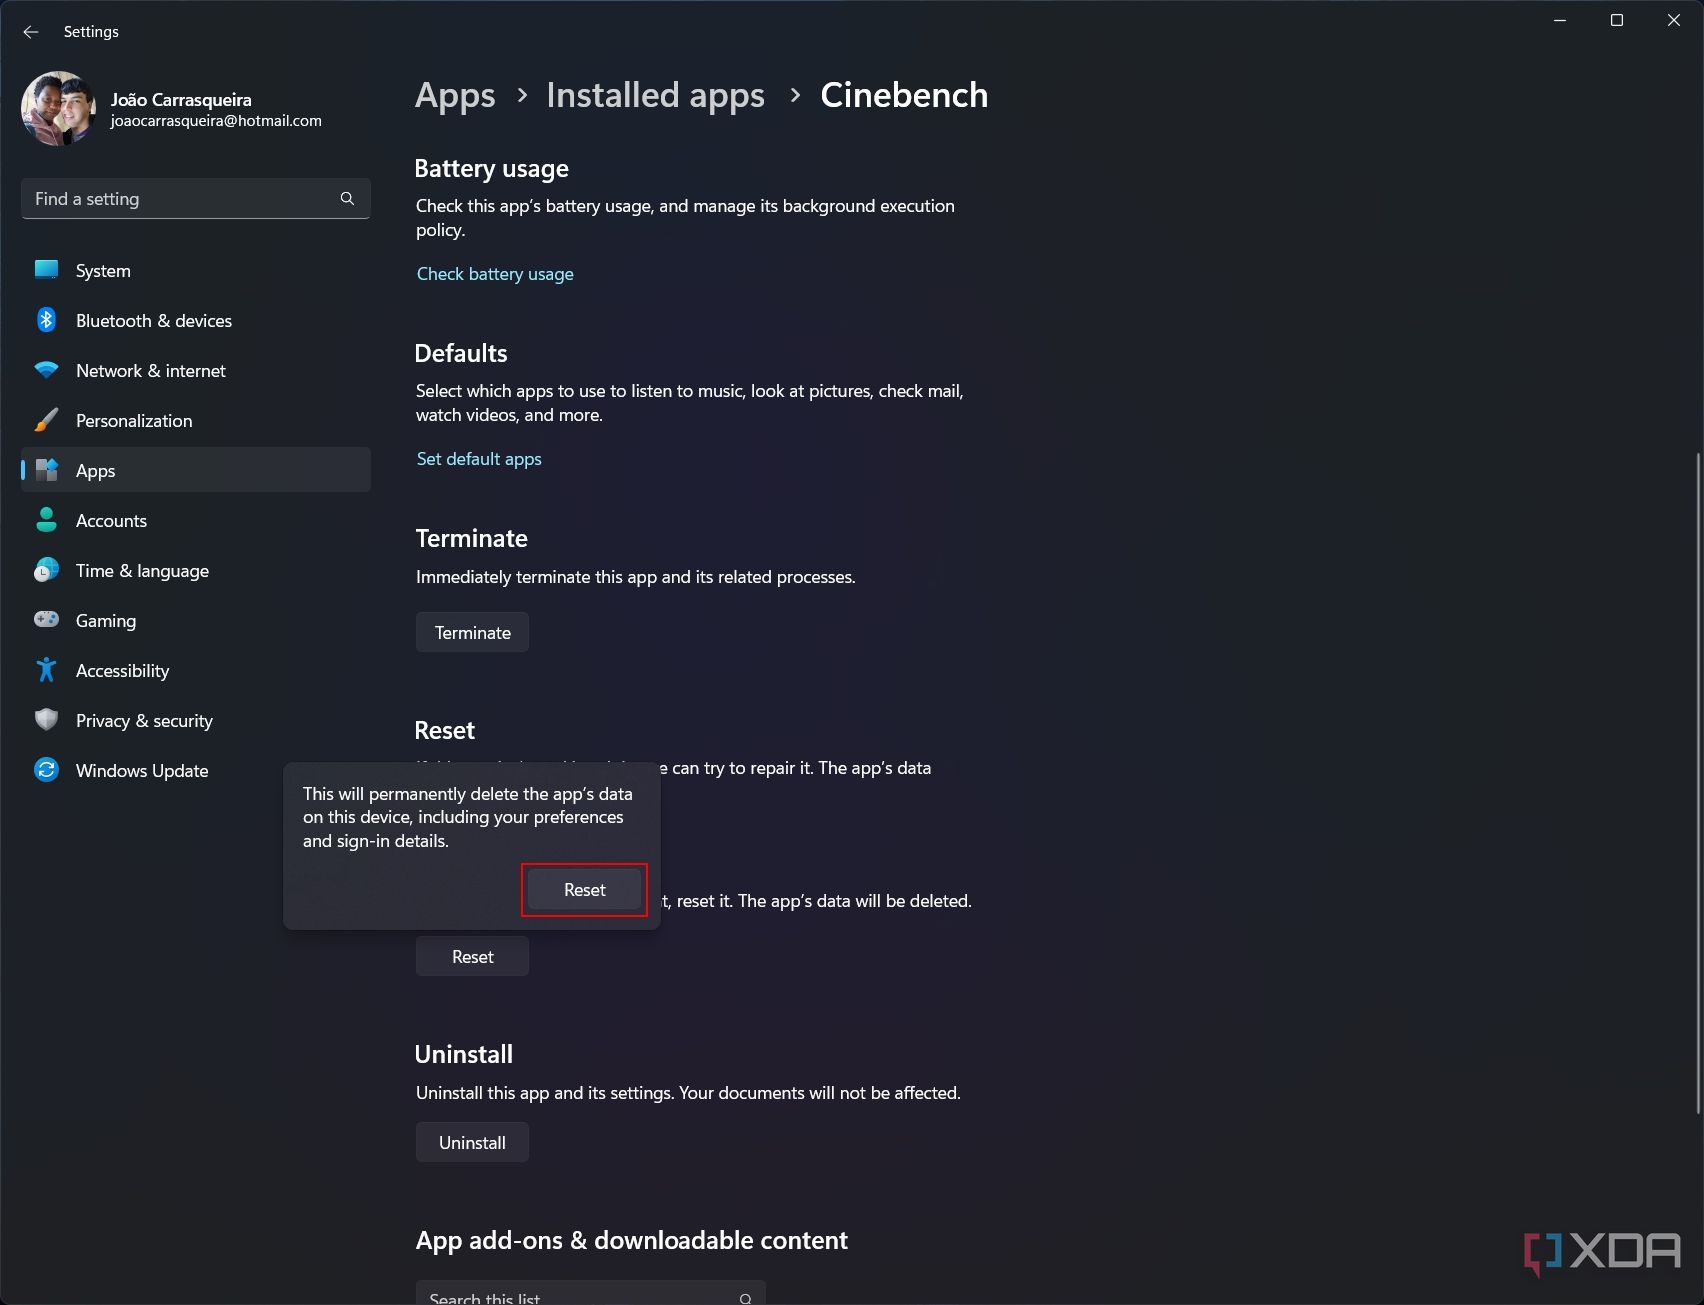
Scroll down to find the Reset button and click it.
-
Click Reset again.
- Windows 11 will delete all the files associated with the app so you can start fresh.


How to clear the Microsoft Store cache on Windows 11
The Microsoft Store can also cache files to help certain things load faster, but this can sometimes cause issues with app updates. If you need to clear the Microsoft Store cache, follow these steps:
- Press Windows + R on your keyboard to open the Run dialog
-
Type in wsreset.exe and press Enter.
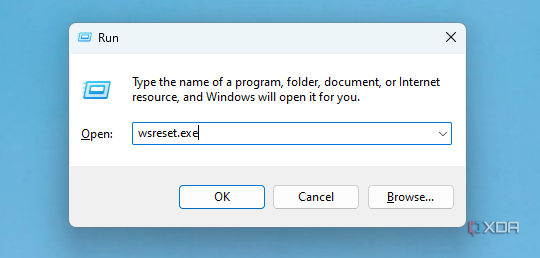
Alternatively, you can type this command directly into the search bar in the Start menu or on the taskbar.

A terminal window will briefly open and then the Microsoft Store will launch with its cache deleted so you can try what you were doing again.
How to clear (flush) the DNS cache on Windows 11
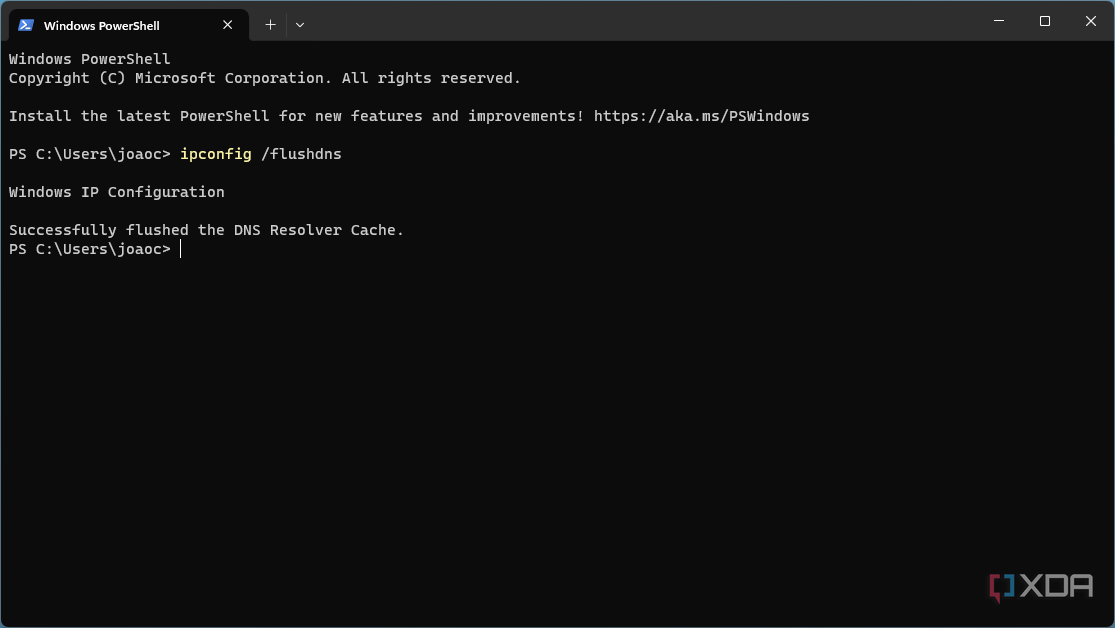
The DNS (Domain Name Server) cache can help Windows 11 connect to known websites and servers more quickly by memorizing what URLs are assigned to what IP addresses. It's rare, but this can sometimes cause issues when connecting to certain websites. To fix this, you can clear the DNS cache by following these steps:
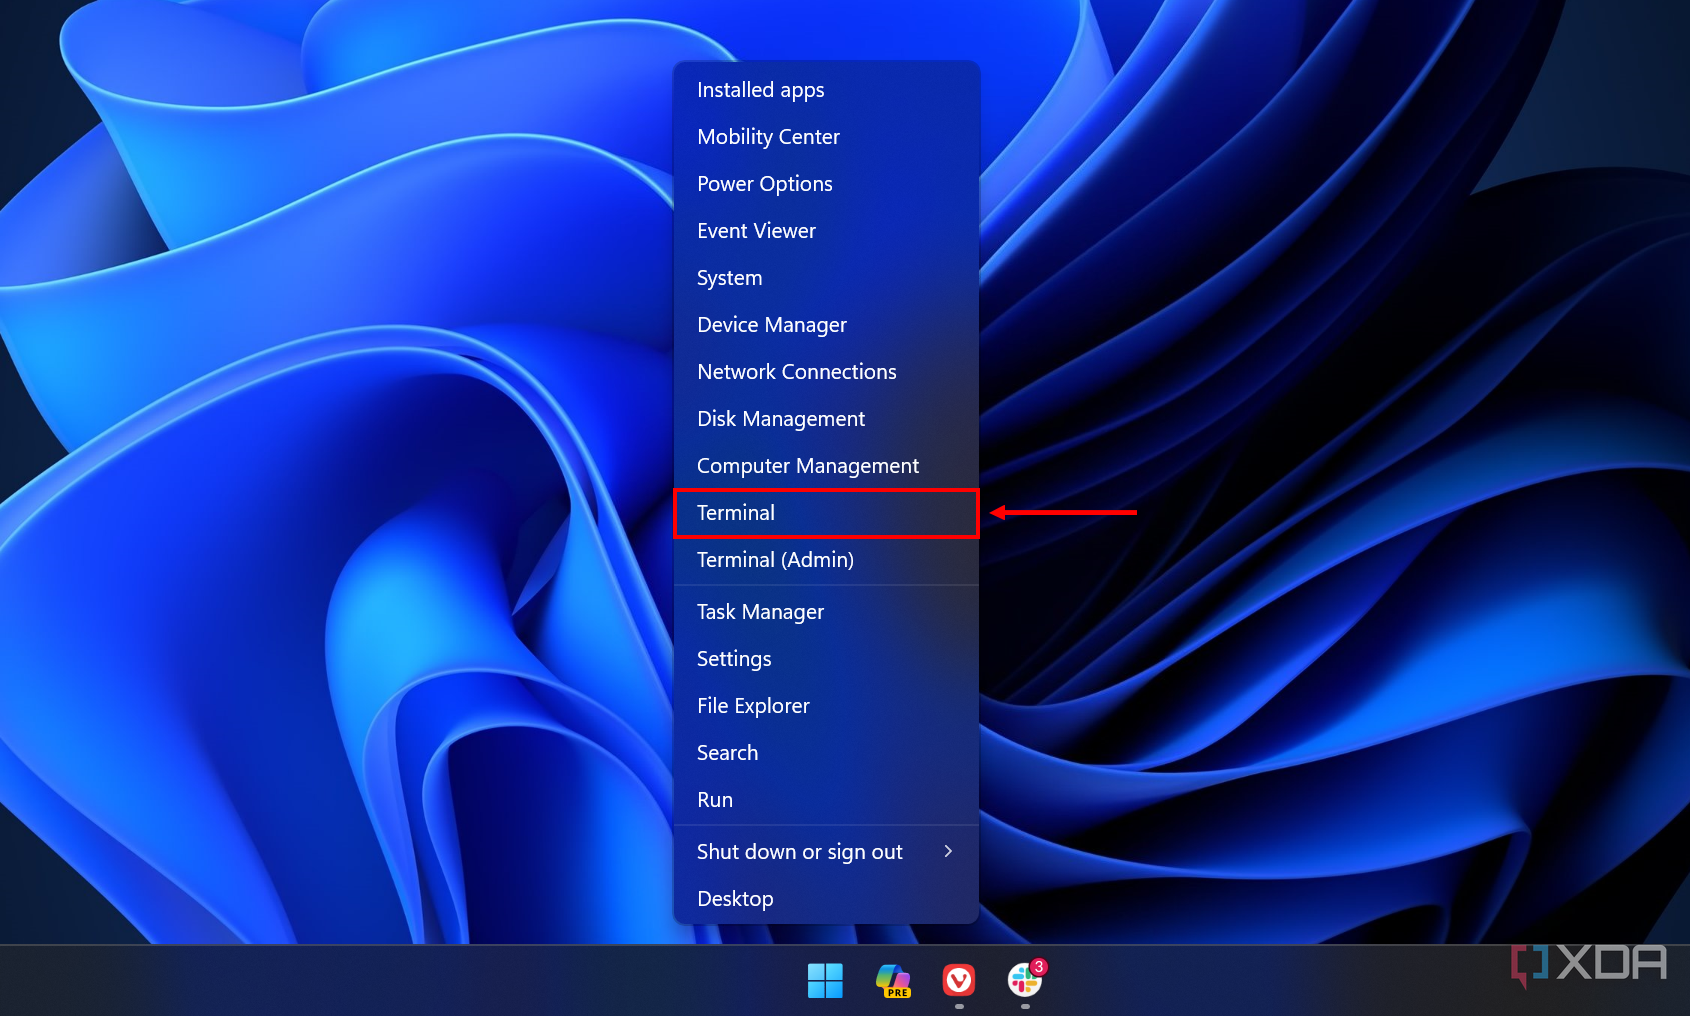
-
Press Windows + X on your keyboard (or right-click the Start menu icon) and choose Terminal.
-
Type in this code then press Enter:
ipconfig /flushdns
-
You should see a confirmation message saying the DNS resolver cache was flushed.


If you were having trouble connecting to a specific website before, this may help with that.
Bonus: Clear your location history
While this is hardly going to help with freeing up any storage, clearing your location history can be helpful if you don't want Windows 11 to know where you've been. Basically, whenever Windows 11 accesses your location (for example, for a mapping app or the weather), it keeps a record of your location for a while after that. If you want to delete this information, here's how to do it:
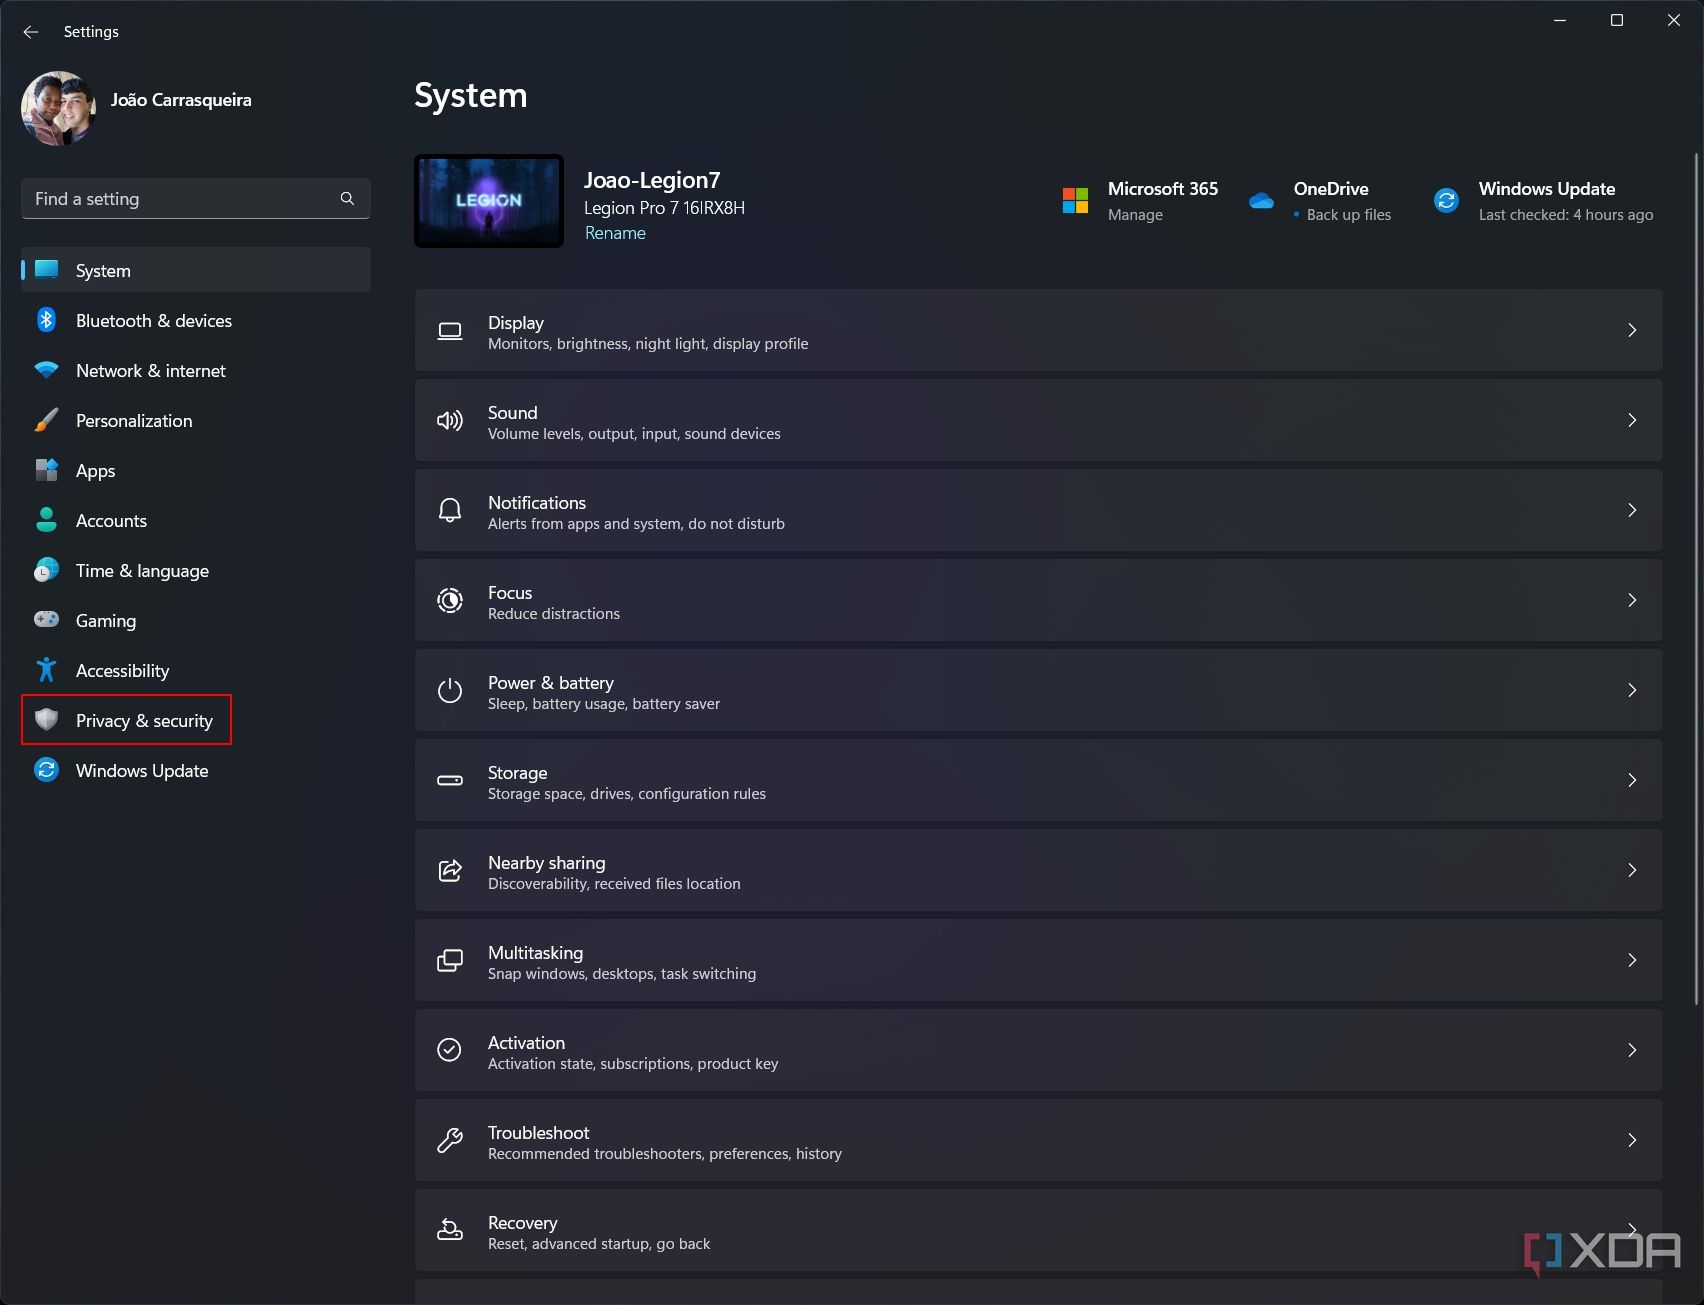
- Open the Settings app.
-
Choose Privacy & security from the menu on the left side.
-
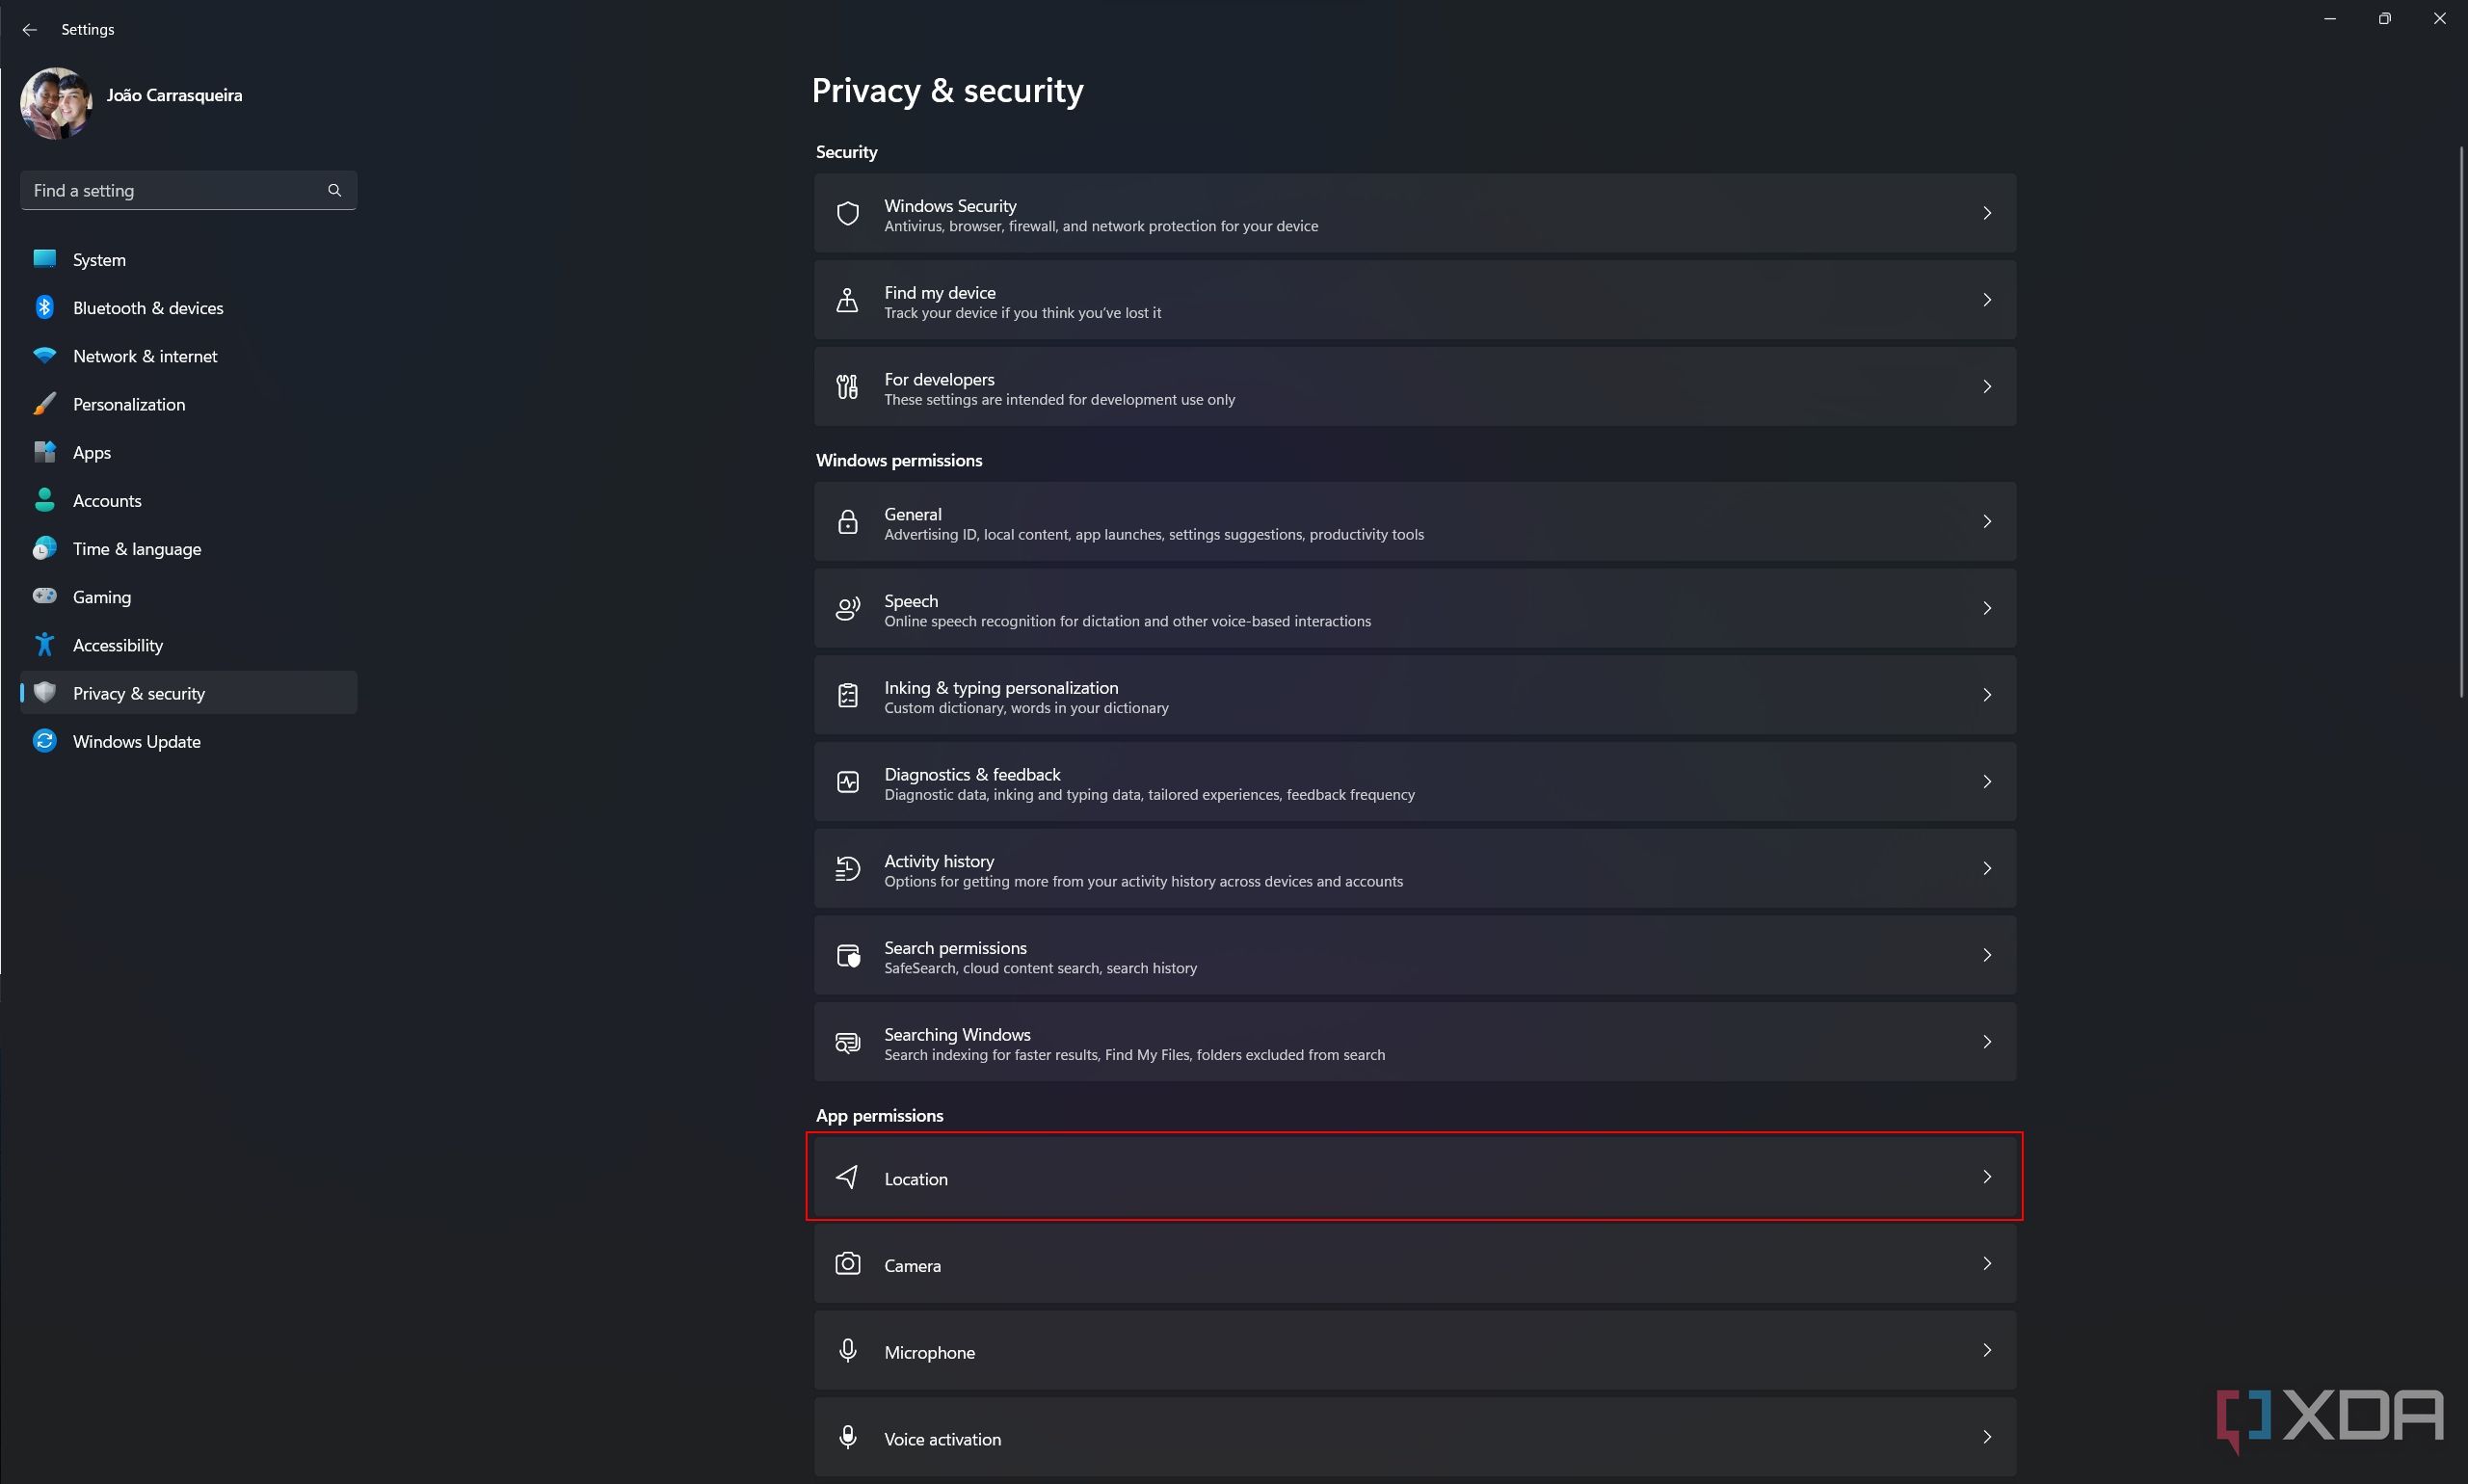
Choose Location.
-
Find the Location history option and click Clear on the right side.
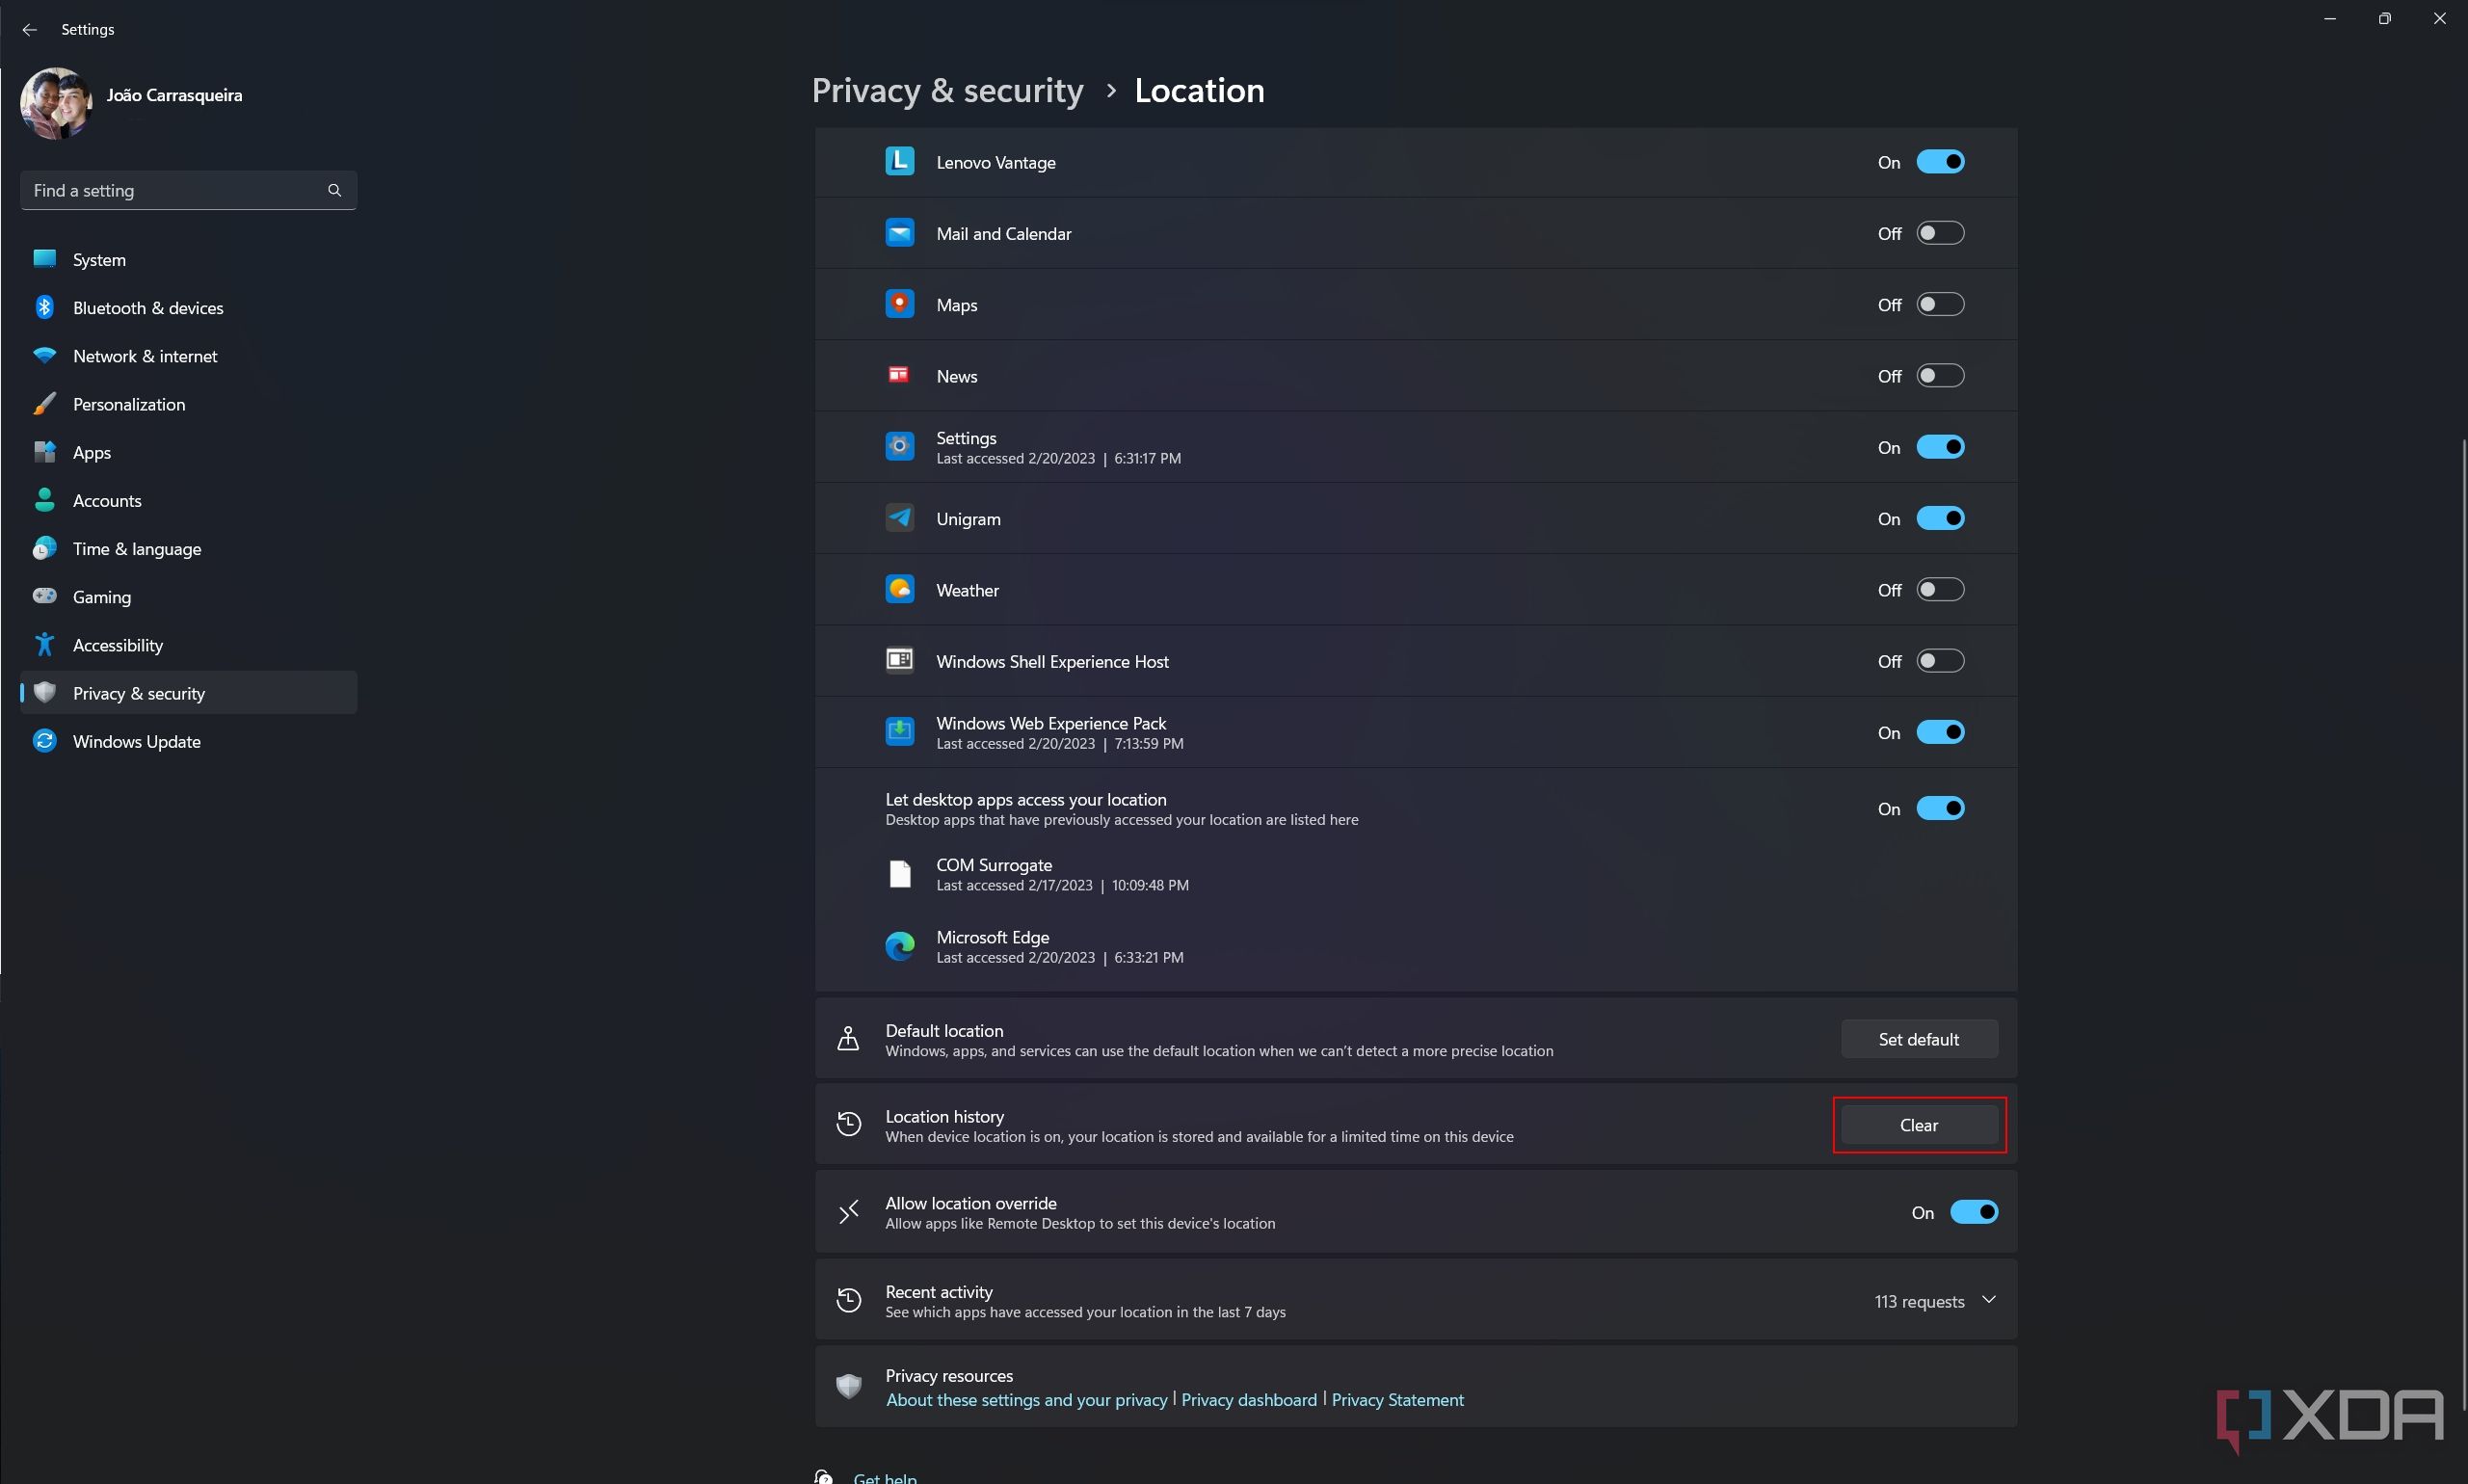
- That's it! You've now cleared the location history on your device, though it will likely build up again soon after, unless you disable location access altogether.


Clear your cache to free up space and keep things running smoothly
The steps above can help you free up space on your computer and also improve functionality in certain cases where you may be running into issues. If you're having problems with a specific browser, you can also clear the cached files for each browser in their respective settings. Sometimes, Windows Update can also fail due to some cached or leftover files, though that requires more dedicated steps to fix.
