Quick Links
Windows 11 is a great iteration of Microsoft's operating system, with many streamlined design elements and new features that make it a big upgrade. As much as we like the fresh, default look of Windows 11, though, it may not be to everyone's tastes. Thankfully, Windows has always been easy to customize, and Windows 11 is no different. It keeps many of the same personalization options from Windows 10, with some new ones, too. In this article, we'll show you how to customize Windows 11 to your liking to make your great Windows laptop or Windows desktop more distinct, both by using the built-in settings and third-party apps.
How to customize your Windows 11 PC with themes
Windows 11 comes with themes that can change the overall look and feel of the operating system. This is the easiest way to customize your Windows 11 PC. Themes include a desktop background, theme colors, and sometimes mouse pointers and sounds. To change your Windows 11 theme, follow these steps:
1. Right-click an empty area of your desktop and choose Personalize from the context menu.

2. You can see a few themes at the top of this page. Otherwise, you can click Themes to see all the ones installed on your PC.

3. You'll see a preview of your current theme, along with a list of themes below it.
4. Click a theme to choose it. Themes that show a camera icon include rotating images, such as Windows Spotlight.

5. You can also customize each element of the theme, like the background, sounds, and mouse cursor, using the links at the top of the page.
6. Click Save to apply your changes.
In addition to the default themes and the ones included by your PC's manufacturer, you can also download new themes from the Microsoft Store using the Browse themes button. If you're somebody with a vision impairment, you can also click the Contrast themes option. These are themes with high-contrast colors that make it easier to identify different screen elements. There are four options to choose from, so you can choose whatever feels the easiest for your eyes.
How to change your desktop background
If you don't want to change your whole theme in one go, you can change parts of it, such as the desktop background. This is a major one since it's what you'll see when you boot up your computer or minimize all your windows. Here's how to change it:
1. Right-click an empty area of your desktop and choose Personalize from the context menu.
2. Click Background.

3. You have a few options to choose from here:

- Picture (the default option): Choose from a preset group of pictures to change your background. You can also choose a picture from your personal library by clicking Browse photos.
- Solid color: This lets you set a plain color to use as the background for your desktop
- Slideshow: Allows you to create a slideshow based on photos you choose from your library
- Windows spotlight: Features daily rotating backgrounds downloaded from the internet. These images can be photos from all around the world and include links that let you see more information about the picture.
4. For images that don't match the exact dimensions of your screen, you can also choose a fit for your background. You can stretch the image to the full screen, crop it to fit the desktop, tile multiples of the image, and more.
5. Your settings are saved automatically when you make changes here, so you can simply close the window when you're done
How to choose light or dark mode and accent colors
You might also want to change on Windows 11 the colors in the UI. Windows has supported light and dark modes for a few years now, and you can also choose a color to be used by certain UI elements like links, window borders, and more. Here's how to do that:
1. Right-click an empty area of your desktop and click Personalize from the context menu.
2. Click Colors.
3. You can choose between light and dark mode using the option at the top of the page, and it applies to Windows itself and apps that support it.
4. You can also choose a Custom mode, which lets you separately choose a mode for Windows elements (such as the taskbar and Start menu) and apps.

5. The second option lets you disable transparency effects, which can save some resources. This makes it so your background is no longer visible through transparent elements of apps.
6. You can then choose the accent color for your PC, which you'll see with system toggles, links, and more. The Automatic setting automatically uses a color from your desktop background, but you can choose a color manually.

7. You can also click View colors to choose a more specific color using a color picker. In this dialog, you can click More to choose a color using hex codes or RGB/HSV values. This makes it easier to find a theme color online if someone shares a hex code with you.
8. Click Done when you're happy with your settings.

9. If you'd like your theme color to be more visible, you can enable Show accent color on Start and taskbar and Show accent color on title bars and windows borders. You can enable both or just either one of them, depending on your preference.

10. These settings are saved automatically, so you can close the window when you're done.
How to customize your lock screen
The lock screen is displayed every time you turn on your computer and before you enter your password or PIN. It's also visible when you lock the computer or wake it from sleep, so you'll probably want a nice image for it, too. The settings are very similar to your desktop background, but here's how to do it:
1. Right-click an empty area of your desktop and choose Personalize.
2. Click Lock screen.
3. You can choose from one of three options for the lock screen background:

- Windows Spotlight (default): A daily rotation of random pictures curated by Microsoft.
- Picture: Choose a picture from your personal library.
- Slideshow: Play a slideshow of pictures from the folders you choose.
- The other two options are fairly straightforward, but the Slideshow option lets you change various settings, like enabling ticks and trips on the lock screen, disabling the slideshow on battery power, and more.

4. Below that, you can also choose one app to show detailed status information on the lock screen. For example, you can choose the Weather app to show the forecast or the Calendar app to see upcoming events.
As usual, these settings are automatically saved and applied, so you can close the app when you're done.
How to customize the touch keyboard and other input panels
One cool new feature in Windows 11 is the ability to customize the touch keyboard for tablets and convertibles. These customization settings also apply to the emoji and clipboard panels, the handwriting panel, or the voice dictation window.
1. Right-click an empty area of your desktop and choose Personalize.
2. Click Text input.
3. You can choose from 15 preset themes, which apply to all the input panels across the operating system.

4. If you want something even more tailored to you, click the + button next to Custom themes.
5. Here, you can choose the background color for the input panels or choose a background image from your library. You can also choose an accent color and text color to create the ideal look.

6. You can also expand the Touch keyboard options to change the background and text color for the keys on the touch keyboard.
7. You can preview your changes at the top of the page or click Open keyboard to preview the changes.
8. Click Save to save your custom theme and return to the Text input page.
9. Your custom theme will be displayed at the bottom of the list. You can only have one custom theme at any time, so you'll have to edit the one you have if you want to make any changes.

You can expand the Touch keyboard options at the bottom, which allow you to change the keyboard size, disable the background color for the keys, or change the size of the key text. You can preview your settings at the top or click the Open Keyboard button to visualize your settings. These settings will be saved automatically, so you can quit the page when you're done.
How to customize the Start menu on Windows 11
The Start menu in Windows 11 is very different from previous versions, but it still has some customization options you can use to make the experience a bit more to your liking.
Reorganize apps
The most basic way to customize the Start menu is to organize your apps. A few apps are pinned to the Start menu by default, and you can easily click to drag them around and organize them the way you want. You can also add or remove apps by following these steps:
1. Remove an app by right-clicking the app icon and choosing Unpin from Start.

2. To add an app to the pinned area, click All apps near the top right corner of the Start menu.
3. Find the app you want, right-click it, and click Pin to Start.

4. Alternatively, if the app you want to pin has been recently installed, you can find it in the Recommended section below the pinned area. Right-click the app and click Pin to Start, and the app will move to the pinned area.
Windows 11 also lets you create folders with multiple apps in the pinned area. To create a folder, simply drag one app icon over another, and a folder will automatically be created. You can then drag more apps into the same folder. You can check out our full guide on using Start menu folders on Windows 11 if you need more detailed instructions.
Customize other Start menu settings
In addition, Windows 11 gives you more options to change how your Start menu looks and how useful it is. You can find these in the Settings app by following these steps:
1. Right-click an empty area of your desktop and choose Personalize from the context menu.
2. Click Start.
3. Here, you can choose the layout of the Start menu.
- The Default option shows three rows of items in the pinned area and three rows in the recommended section.
- Choose More pins if you'd like to have four rows in the pinned area.
- Hit More recommendations if you want a bigger recommended section.

4. You can also customize the recommended section with a few options:
- Show recently added apps (on by default): Choose whether apps should appear in the Recommended section when you install them.
- Show most used apps (off by default): Choose whether you want your most used apps to show up in the Recommended section.
- Show recently opened items in Start, Jump Lists, and File Explorer (on by default): This setting affects more than the Start menu. It allows you to choose whether you want to see files you've recently opened in the Recommended section, as well as on the Home page of File Explorer.
5. Below that, you can click the Folders option, which lets you choose the shortcuts you want to see at the bottom of the Start menu.

You can enable or disable links to the Settings app, File Explorer, and various specific folders on your PC. All the changes you make here are saved automatically, so you can quit the app when you're done.
How to customize the taskbar in Windows 11
Microsoft changed the taskbar a lot in Windows 11, and some of the customization options of the past have been removed. However, there are still a few things you can do to make the taskbar your own. Let's take a closer look.
Add or remove app shortcuts from the taskbar
First, let's look at how to disable or enable some of the icons that appear on your taskbar. Some apps appear here by default, but more may be added automatically when you install them. You can also add more apps to the taskbar if you'd like.
1. To remove an app from the taskbar, right-click its icon and choose Unpin from taskbar. If the app is open, it will still appear there.

- To add an app to the taskbar, open the Start menu, and find the app you want. It may be in the pinned area, or you may need to click All apps to find it.
- In the pinned area of the Start menu, right-click the app you want to add to the taskbar, then choose Pin to taskbar. If you're using the All apps list, right-click the app.
- Select More and then Pin to taskbar.
2. You can also pin apps that aren't on your Start menu. Find the executable file for the app you want using File Explorer, then right-click it.
3. Choose Show more options and then Pin to taskbar.
4. Alternatively, you can also right-click any open app on the taskbar and choose Pin to taskbar to ensure it stays there.

Add or remove system icons from the taskbar
Some buttons on the taskbar can't be removed with the steps above, and that's because they're system features, like Widgets (which shows weather information), Chat, and Search. Here's how to remove or add them
1. Right-click an empty area of the taskbar and choose Taskbar settings.
2. Three main sections on this page matter for this part of our guide:

- Taskbar items: This is where you can disable icons like Widgets, Search, and Chat. Simply click the toggles to switch them Off or On. These features are still accessible with keyboard shortcuts.
- System tray icons: This section includes icons for a few Windows 11 features focused on touch devices. This includes the touch keyboard, pen menu, and virtual touchpad. These icons are disabled by default, and they'll show up in the system tray near the bottom right corner. You can click the toggles on the right to change them to On or Off.
- Other system tray icons: This is where you can enable system tray icons for your installed apps. The items you see here mostly depends on the apps you have installed, and you can choose to make them visible on the system tray or not. Icons you disable can be accessed by clicking the arrow next to the system tray.
Move the Start menu to the left (and other taskbar behaviors)
A big one you may be looking for is the ability to move the taskbar icons, including the Start menu, back to the left corner of the screen. Indeed, Windows 11 brings most of your icons to the center of the taskbar by default, but you can change that. Here's how:
1. Right-click an empty area of the taskbar and click Taskbar settings.
2. Near the bottom of the page, expand (click) the panel called Taskbar behaviors.

3. Click the dropdown menu (Center) next to Taskbar alignment, and choose Left to move your taskbar icons to the left. When you do this, the Widgets icon in the left corner will be moved to the right of the Start icon, and it will no longer show text.

4. There are a few other taskbar behaviors you can change on this page:
- Automatically hide the taskbar (off by default): When enabled, it hides the taskbar when it hasn't been used in a few seconds.
- Show badges on taskbar apps (on by default): Allows apps to display a badge, such as a notification counter, next to their icon on the taskbar.
- Show flashing on taskbar apps (on by default): Allows apps on the taskbar to show an orange color when there's a new notification or an important update.
- Show my taskbar on all displays (on by default): Changes whether the taskbar should be visible on all screens when using multiple monitors.
- Show recent searches when I hover over the search icon (on by default): If you have the search icon or search bar enabled, this setting allows you to see your recent searches by hovering your mouse cursor over the icon.
- When using multiple displays, show my taskbar apps on: Changes whether your open apps should show on the taskbar for all your displays (the default choice) or only on the display where the respective app is open. There's also an option for apps to be shown on your main display in addition to the display where the app is open.
- Share any window from my taskbar (on by default): Allows you to share your window directly from the taskbar in supported apps, such as Microsoft Teams for work and school
- Select the far corner of the taskbar to show the desktop (on by default): Choose whether you want to be able to minimize all your apps by clicking the right edge of the taskbar.
5. These settings are automatically saved, and you can close the window when you're done.
That rounds out all the settings you can change using Windows 11's built-in options. However, if you find these too limiting, there are other tools you can use to make your experience even more tailored to your needs.
Change your desktop background with third-party apps
While Windows 11 already gives you plenty of options for wallpapers, especially with Windows Spotlight, you may still want something different, and thankfully, there are a few options out there. Microsoft itself provides the Bing Wallpaper app, which changes your desktop wallpaper to use the daily image from Bing. Here's how to use it:
1. Download the Bing Wallpaper app.
2. Run the installer file.
3. The installer will try to set Bing as your default search engine, so you might want to disable those options. You can also click No thanks to skip those changes.

4. Let the installer finish, and your wallpaper will automatically change. It will also rotate daily from now on.
5. If you'd like to learn more about a specific picture, you can click the Bing Wallpaper icon on your system tray to see where it was taken and more.

Bing Wallpaper isn't the only wallpaper app around, not by a long shot. The Microsoft Store has plenty of them, such as Lively Wallpaper, which includes interactive wallpapers with various designs, features, and customization options.
Customize your taskbar and Start menu with Start11

While Windows 11 does give you a few options for changing the way your Start menu and taskbar look and act, you're pretty limited in terms of what you can do with the built-in options. Thankfully, if you want to make bigger changes, there are tools like Start11 from Stardock, which has been in the business of customizing Windows for a long time, and we'll be talking about the company again below.
The downside is that it's a paid app, and it will set you back $5.99. That's not a huge amount, though, so if you think your productivity would benefit from these features, it's worth the asking price. You can buy Start11 from Stardock's website or Steam.
Start menu
Start11 is a tool for customizing both the Start menu and taskbar on Windows 11, as well as some of the elements surrounding it. The focus is on allowing you to use older Start menu designs, such as the Windows 10 menu or the Windows 7 style. Four styles are available, including the Windows 7 design, a "modern" style inspired by Windows 8, Windows 10, and Windows 11.
However, the customization options go far beyond that. For each style, you can change the color of the menu, choose a background image, add or remove links to specific folders, and so much more. There are a ton of options here, and it would be impossible to cover them all, but once you dive into the options, you'll find plenty of ways to make the Start menu work for you. You can also stick to the standard Windows 11 Start menu and disable the Start11 menu if you just want to change the taskbar.
Another option you have is to change the Start icon on the taskbar to something else, though this only works if you align the taskbar icons to the left or if you enable taskbar customization in Start11.
Taskbar and search
Start11 also includes a ton of options for changing how your taskbar behaves. If you check the Taskbar section on the left side menu, the first thing you'll see is the ability to change whether taskbar buttons should be combined. You'll need to enable the Let Start11 enhance the taskbar option at the top first, but after that, you're good to go. You can also change settings for multiple monitors by clicking More Start11 taskbar settings.

You can also change settings like the taskbar color, transparency, or even apply a custom texture. Other options include the ability to resize the taskbar and even move it to the top of the screen. However, Stardock warns this feature may break in the future as it relies on hidden Windows 11 features that could be removed at any time by Microsoft.

Beyond that, Start11 also gives you the option to change some settings related to the search feature, such as the ability to remove Microsoft Edge tabs from search results or include shortcuts on your desktop. There are a lot of finer tweaks and smaller changes you can make here.
If you don't like Start11, there's also another app called StartAllBack, which has a similar goal. It lets you revert to old Windows Start menu designs, move the taskbar, and improve other aspects of the UI, like the File Explorer.
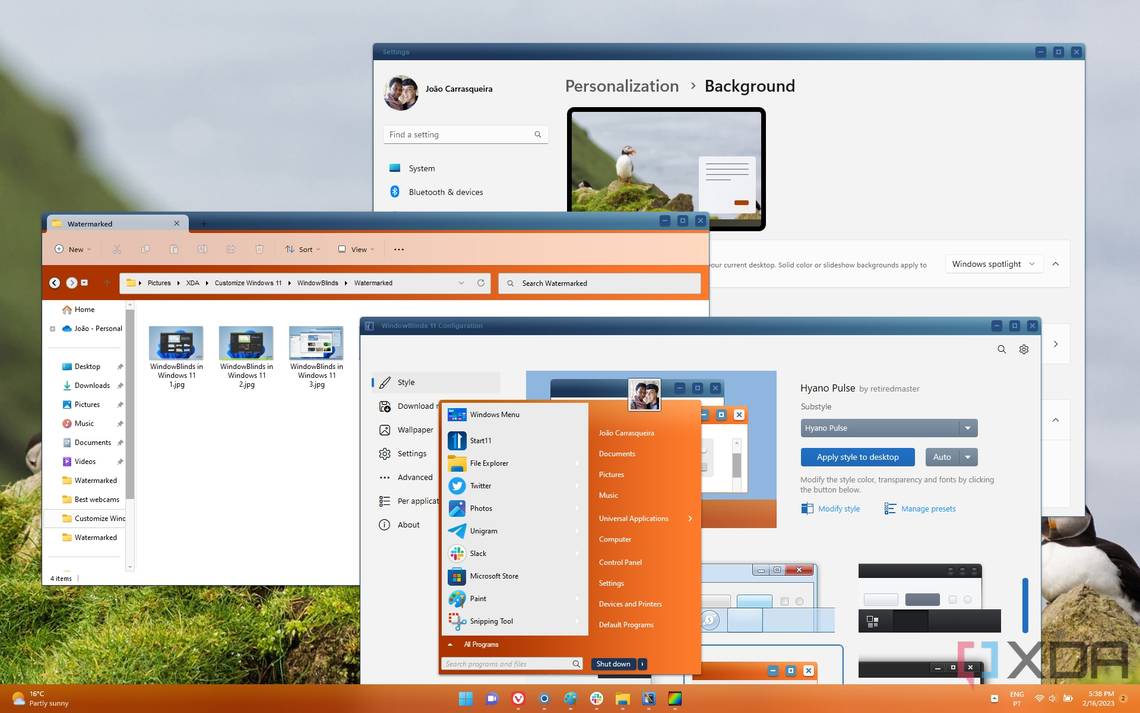
Change your Windows 11 theme with WindowBlinds

As we promised, Stardock is making another appearance on this list with WindowBlinds, one of the company's oldest apps. This is a heavy customization tool that lets you change the look of Windows 11 in a more profound way. This allows you to change the look of windows themselves, the taskbar, and other Windows UI elements, specifically more classic-style ones. Just like Start11, it's a paid app, but this one costs $19.99 on Stardock's website and Steam.
WindowBlinds comes with a few themes by default, including many based on past Windows versions such as Windows 7, XP, and even one based on macOS. For each theme, you can change settings like the color of UI elements and whether to use dark or light mode.

If the default themes don't do it for you, the Download more styles tab goes even further by letting you download custom themes made by the community, and that's where the real power of WindowBlinds comes into play. There are dozens of themes available here, so you can really make WindowBlinds look how you want it to.

Because it's also developed by Stardock, a lot of the themes in WindowBlinds also tie into Start11, so if you're using a custom Start menu, you'll see the WindowBlinds theme you chose applied there (though you can change this in the Start11 settings).

There aren't a lot of tools that provide the degree of customization you can get with WindowBlinds, so it's definitely worth a look. You can use the 30-day free trial to see if it's worth the asking price.
That should give you a good overview of all your customization options if you're using Windows 11. If you'd like other Windows 11 guides, check out how in our deep dive on Snap Layouts or the touch gestures that were recently added in Windows 11 version 22H2.