If you've ever used Linux, maybe on the Steam Deck, or Homebrew on macOS, you're probably familiar with package managers. On Linux, especially, this is how most users install software even though traditional installers are still a thing. The package manager can be accessed through the command line, allowing for quick, silent installation and updating.
Windows has had third-party package managers before, such as Chocolatey, but Microsoft now has its own. Windows Package Manager can be used by virtually anyone that uses Windows 10 or Windows 11. In many cases, it's pulling software from all over the web through its manifests. But it also now integrates with the Microsoft Store as well. Windows Package Manager is open-source and its directory is built on community contributions.
Windows Package Manager isn't necessarily going to be for everyone, especially if you primarily get your apps from the Microsoft Store. For developers who spend a lot of time in the terminal, enterprise deployments, or just those who get software from all over the web, it can certainly improve your workflow. Here's how to install it and get started using it.
Requirements to use Windows Package Manager

The requirements to use Windows Package Manager are as follows:
The client requires Windows 10 1809 (build 17763) or later at this time. Windows Server 2019 is not supported as the Microsoft Store is not available nor are updated dependencies. It may be possible to install on Windows Server 2022, this should be considered experimental (not supported), and requires dependencies to be manually installed as well.
There are no specific requirements beyond those above and there are some different methods you can use to get access to Windows Package Manager.
How to install Windows Package Manager
The easiest way to make sure you have Windows Package Manager on your PC is to grab the latest version of App Installer from the Microsoft Store. This is usually used to sideload Windows App Packages. But it also contains what you need for the Windows Package Manager.
Alternatively, you can join the Windows Package Manager insider program, or use a Windows Insider build. In both of these cases, you'll get access to the latest development version without the need to install anything else.
You can check if it is installed correctly by simply opening up a PowerShell window and entering winget then pressing enter. If you see a response then you know you enabled it correctly.
Installing apps with Windows Package Manager

The repository of apps available through winget is pretty expansive, and installation is a simple command. But you'll want to be able to find what you're looking for as well, and there are a couple of methods for that.
The first is using the excellent third-party tool, winstall.app. This is a GUI front end for the winget library. It lets you browse and search like you would any other store. It'll also provide you with the commands you need to install, and you can pull many different apps with one single string.
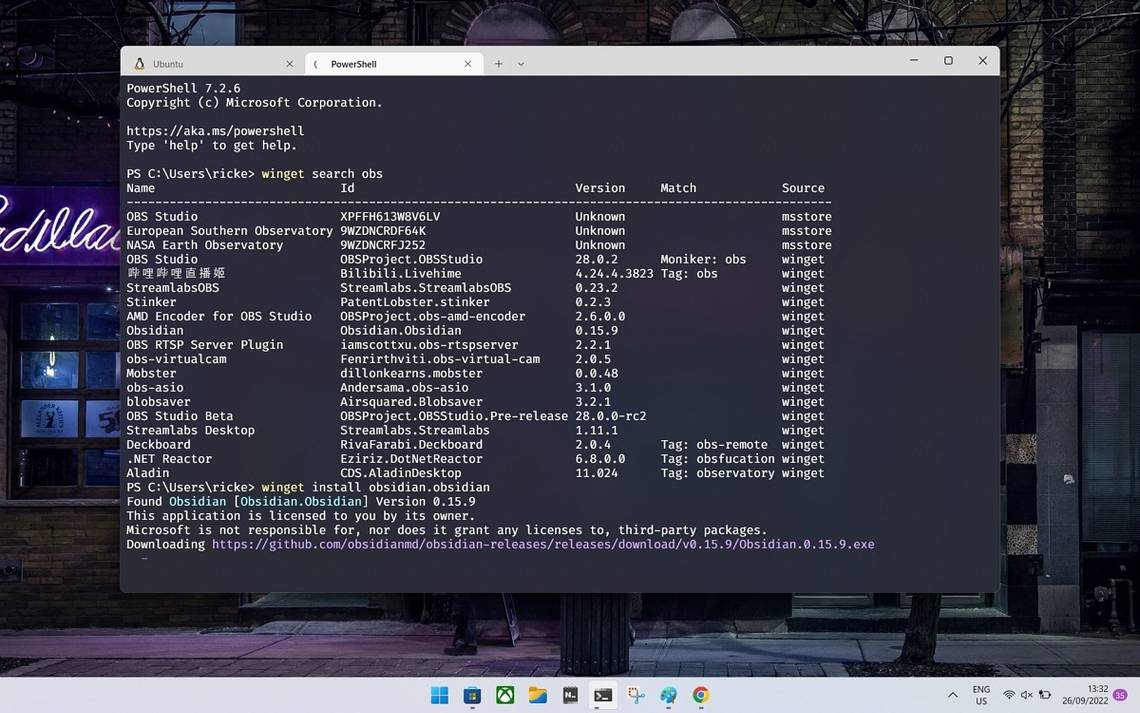
Alternatively, you can search from within PowerShell with the winget search command. As in this example:
winget search chrome
This will return any winget manifests that match the search term. In this case, you'll see something resembling the image below.

Once you know what you want, the template to install is simple:
winget install <your-app-here>
The Windows Package Manager will now use the manifest for your desired application. to pull it from its remote location and where possible install it silently. Some will still pop-up installation boxes you will have to interact with, though, so it's worth staying close by.
That's the most basic setup and use case of the Windows Package Manager. As already mentioned, it won't be for everyone. But those doing development work, for example, or anyone who just wants something leaner than the Microsoft Store to use, may well find it useful.