When you're on a secure shared network, it's possible to access files and folders on other PCs on the network as long as you have the address for that PC and the folder you want. However, it may seem daunting to remember the exact address to use every time. Thankfully, you can map a network drive on Windows 11 to make it easier to access any time you need it. We'll show you how to do exactly that.
Of course, before you can do that, you'll need to make sure your PCs are discoverable on the network. This should be the default setting if you're on a secure network, but if the option is disabled, we'll show you how to do that as well.
Step 1: Set a private network
Network discovery is enabled automatically for private networks on Windows 11, but most networks are labeled as public by default to avoid exposing your computer to untrusted users. The ideal way to enable network discovery is to set your network as a private network. While it is possible, it's not recommended to enable network discovery for public networks. Here's what you need to do:
-
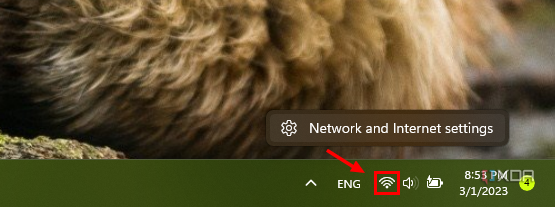
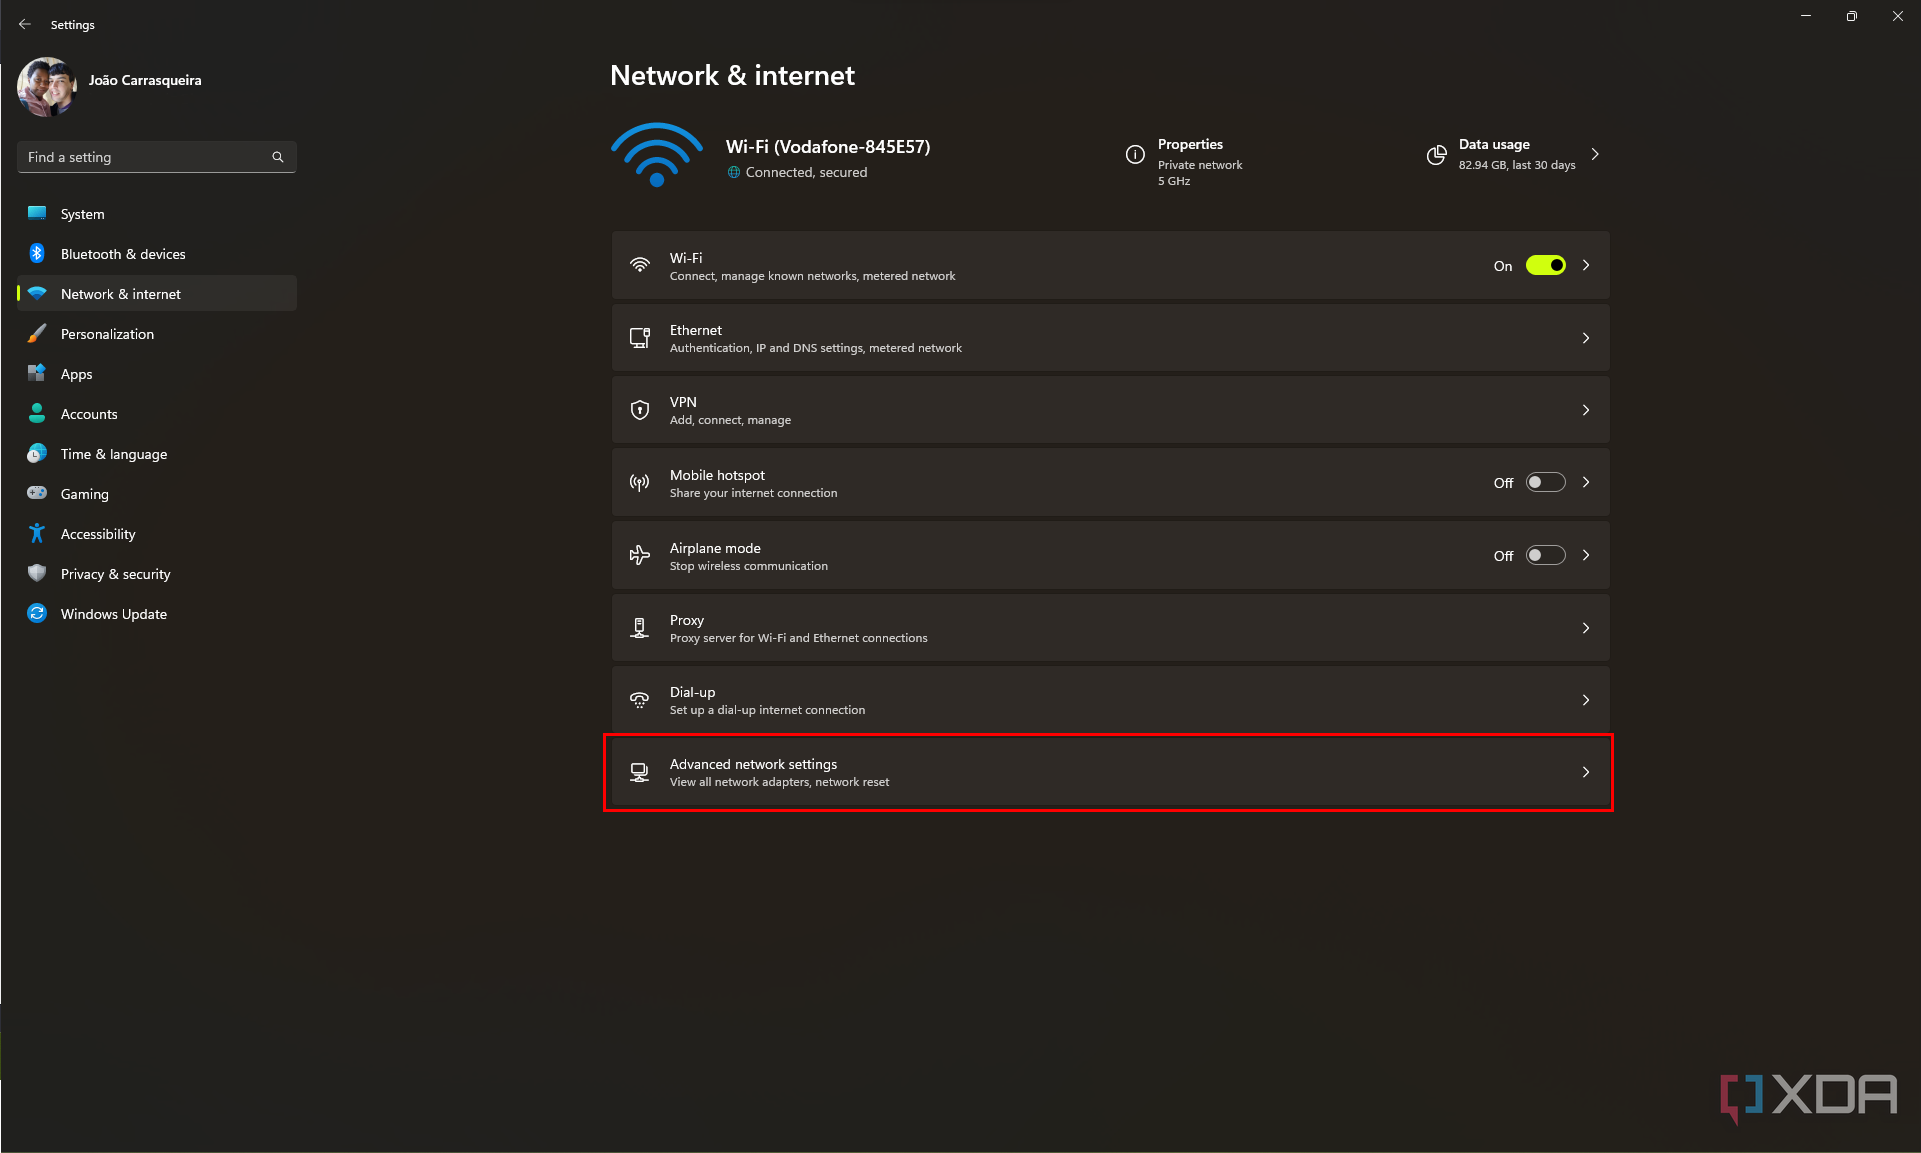
Right-click the internet icon on the right side of your taskbar and select Network & Internet settings.
-
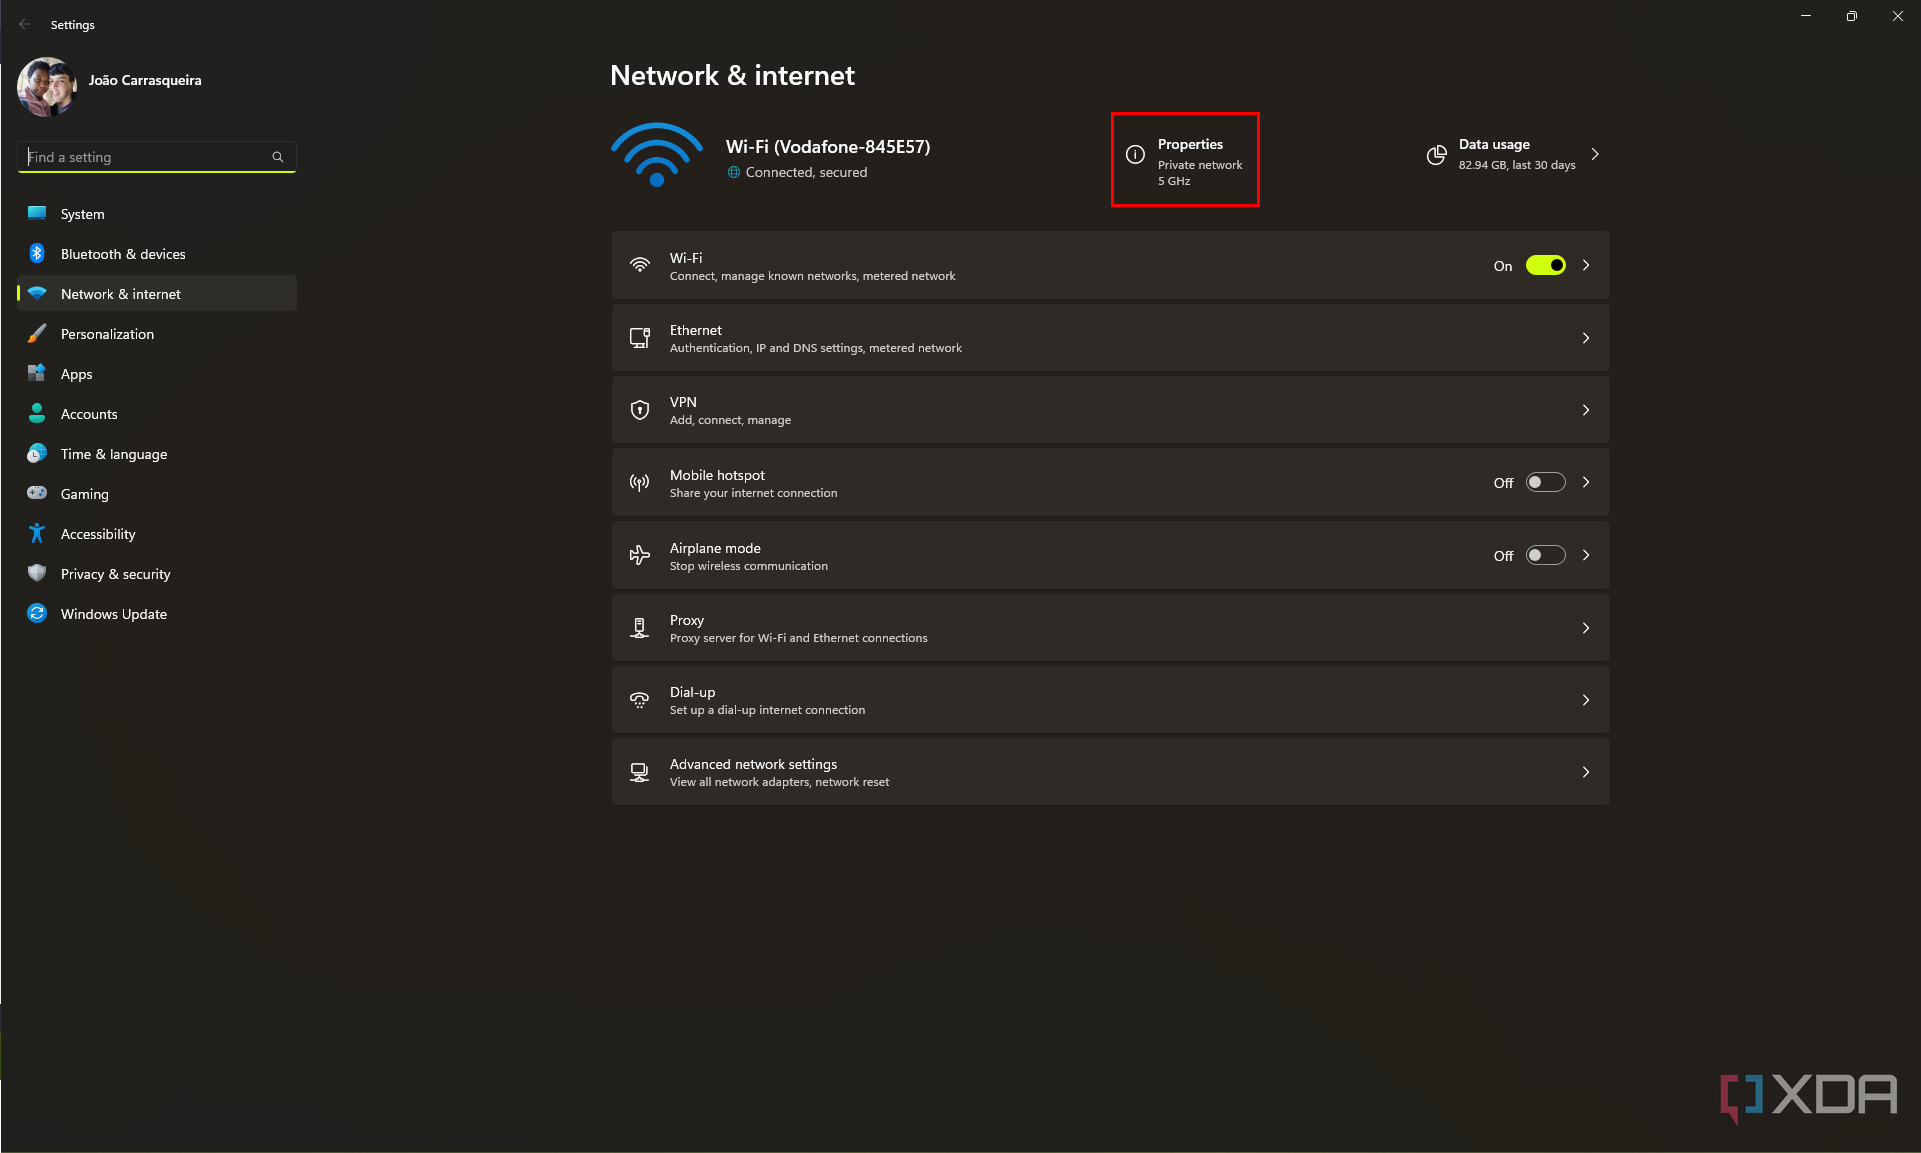
Check that the Properties button at the top says Private network. If not, click it.
-
Under Network profile type, make sure Private network is selected. Make sure this is a secure network and that you trust all the devices connected to it.
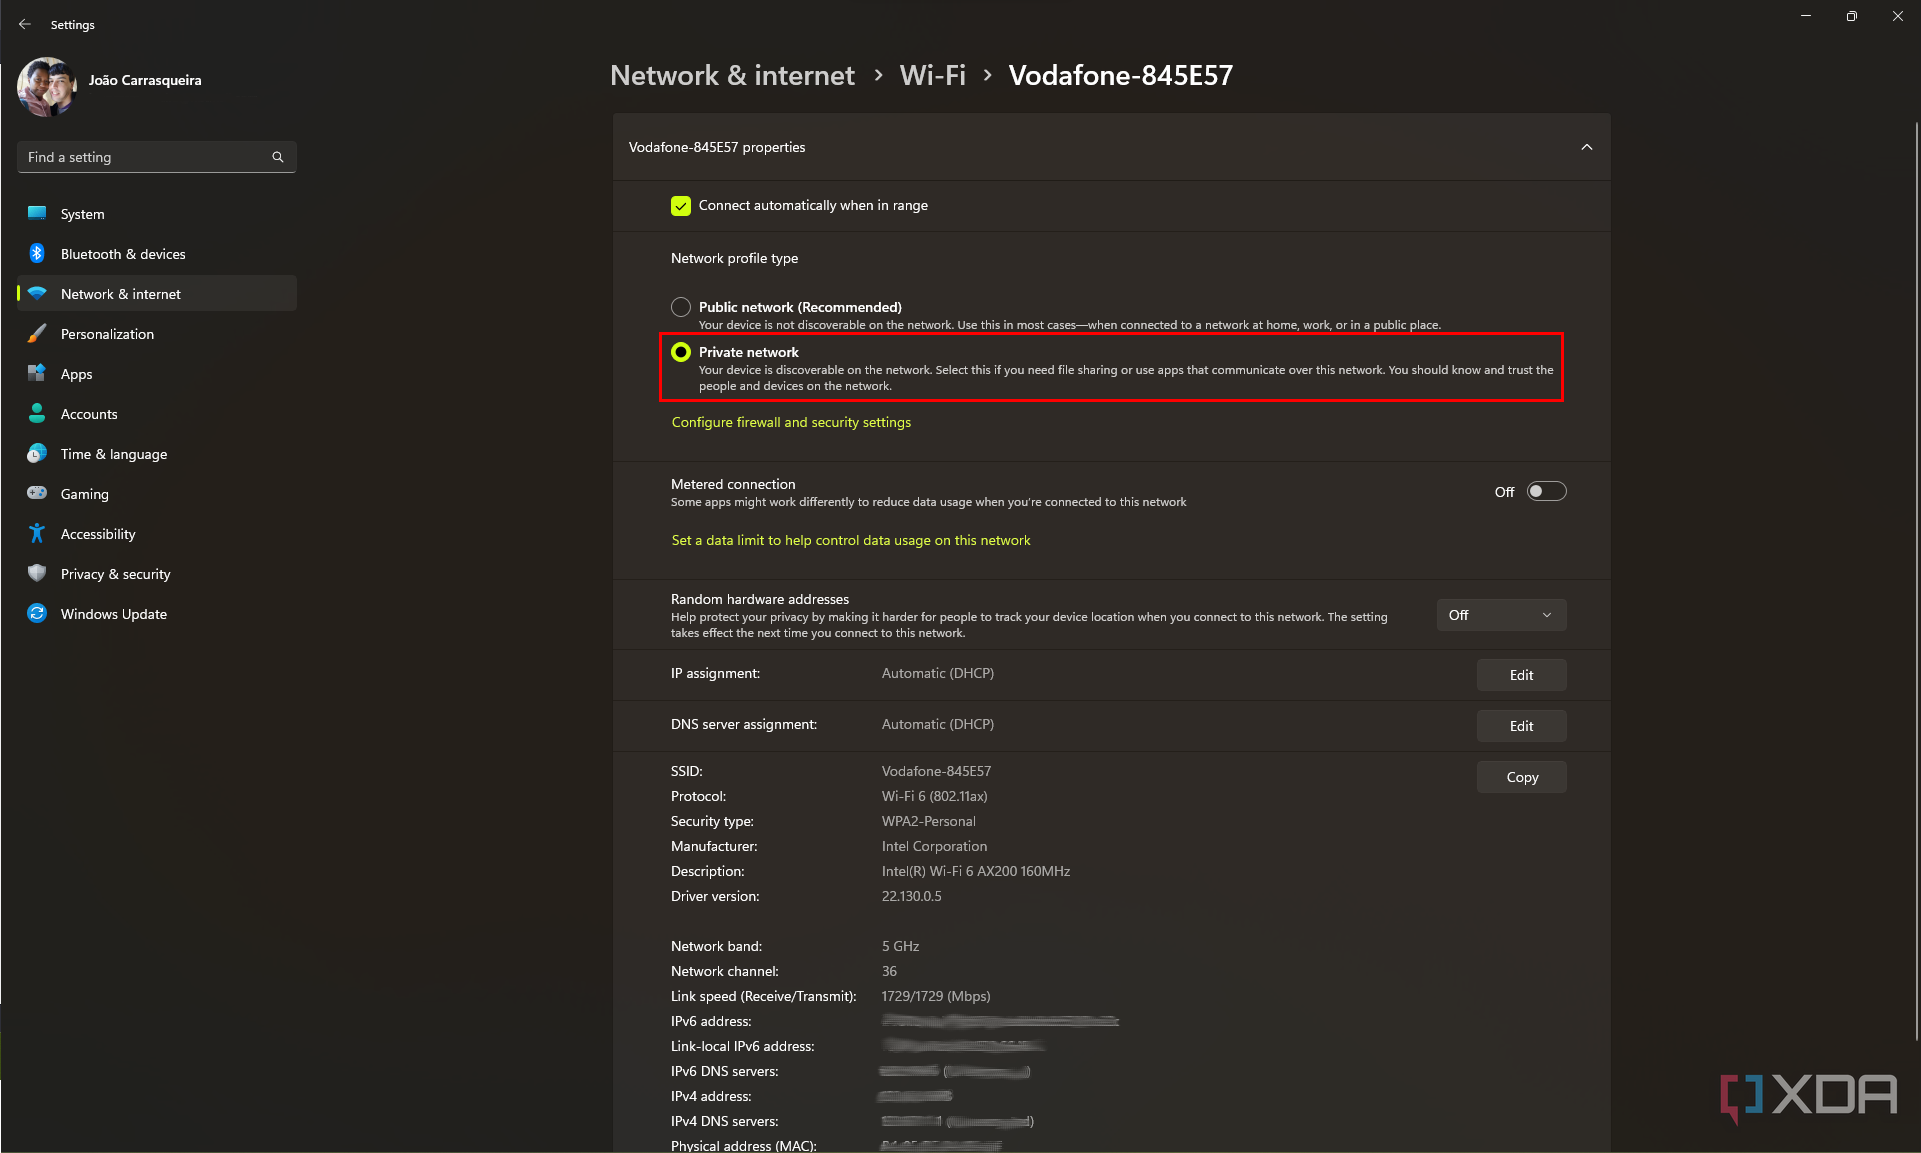


You'll need to do this for the device you want to connect to and the device you're using to connect to it.
Step 2: Make sure network discovery and file sharing are enabled
That should be enough, but if you want to make sure network discovery is enabled, follow these steps:
- Right-click the internet icon on the right side of your taskbar and select Network & Internet settings.
-
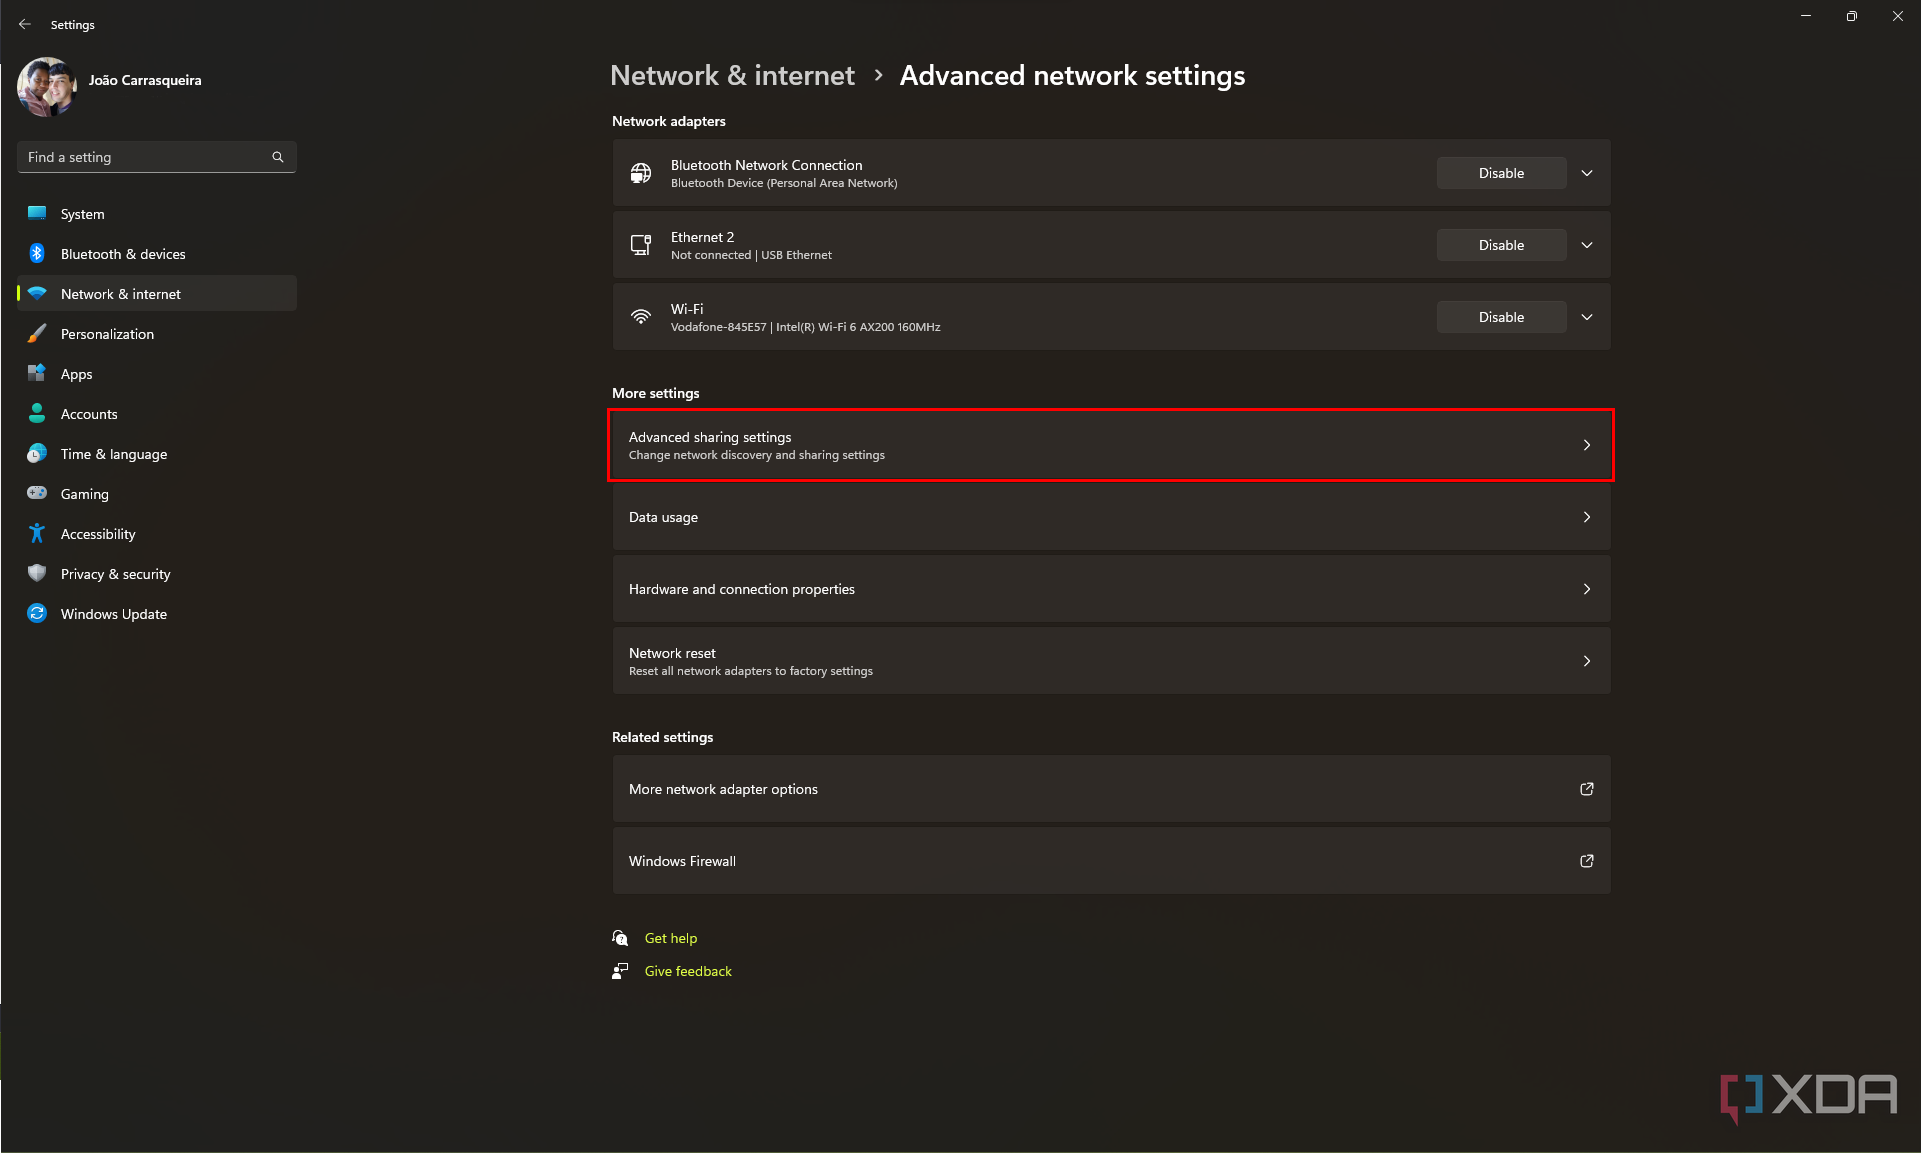
Click Advanced network settings.
-
Choose Advanced sharing settings.
-
Make sure Network discovery is enabled. Click the checkbox on the right if it isn't.
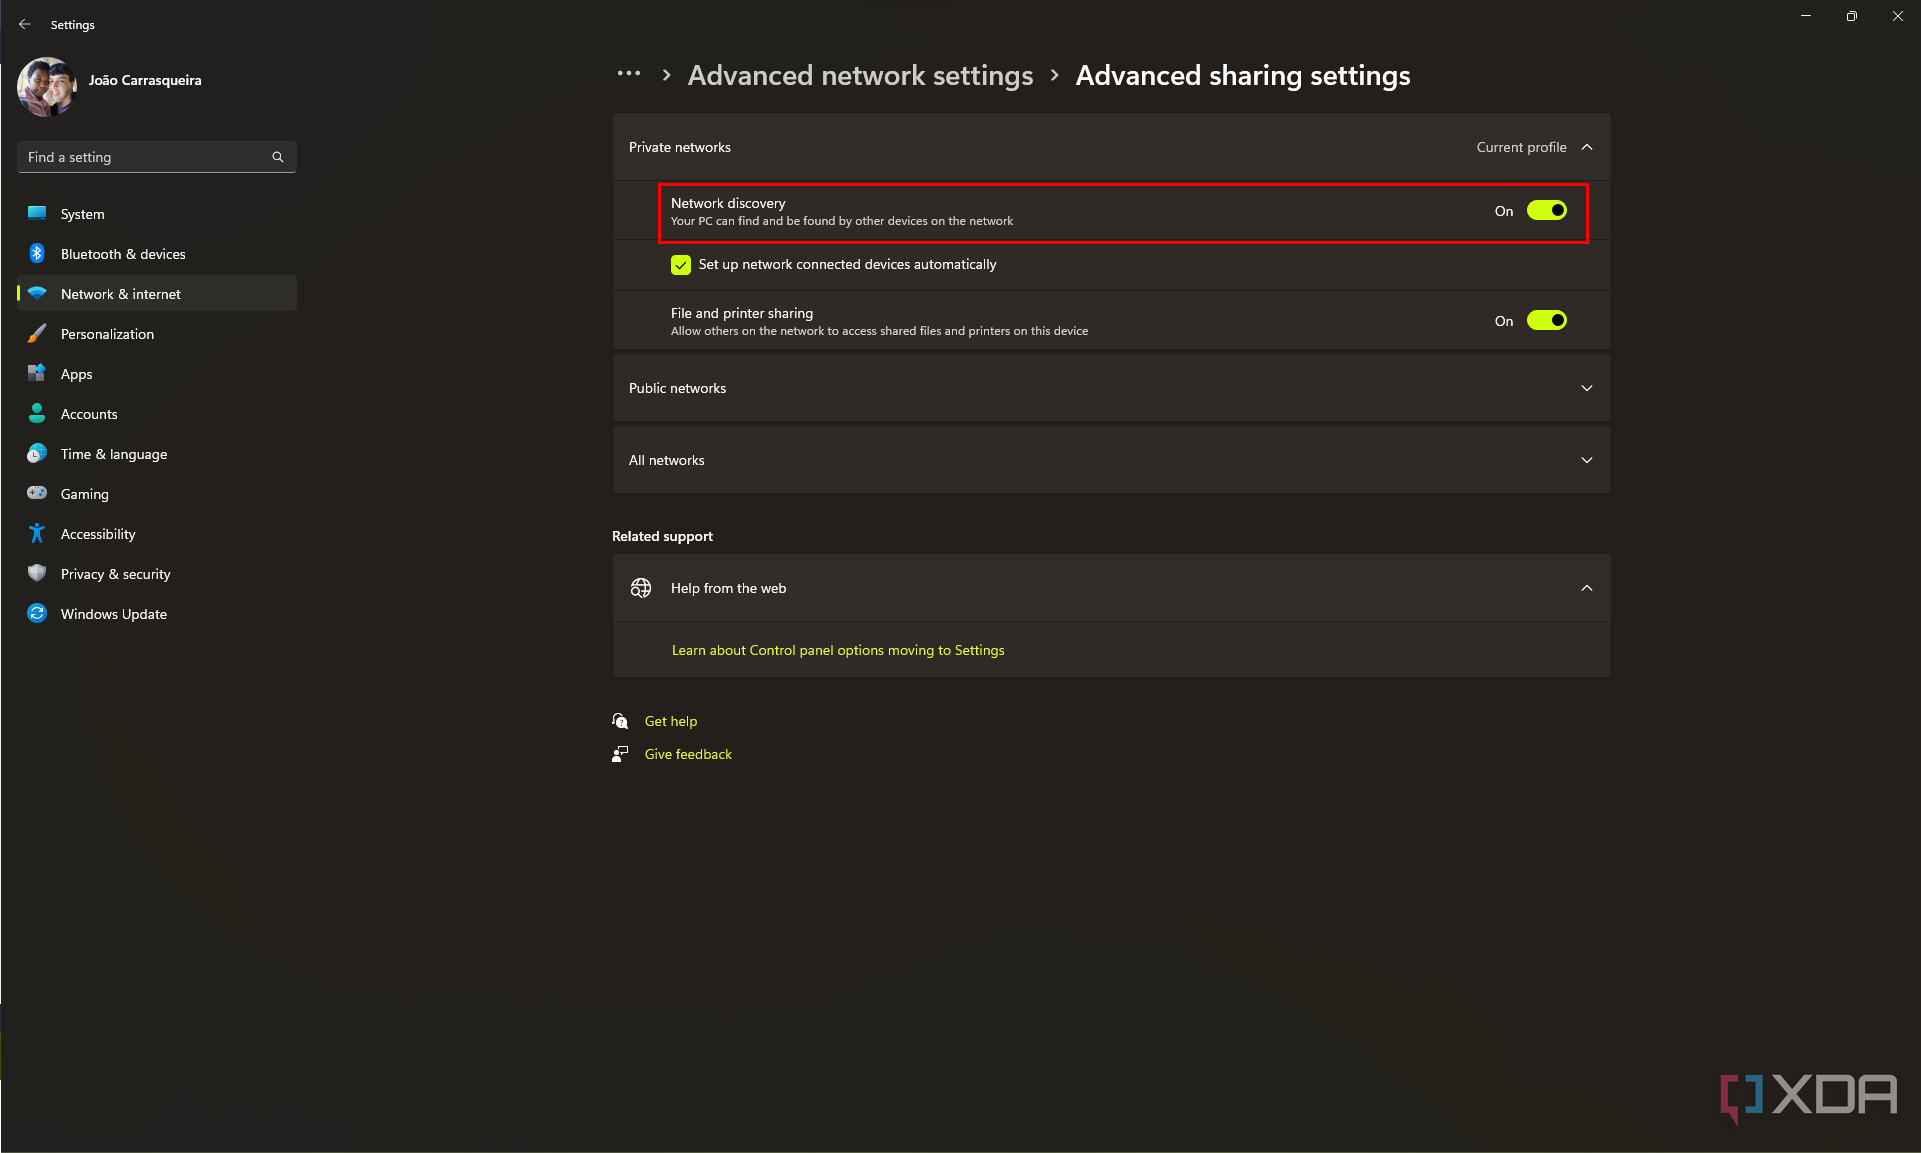
- Additionally, make sure the File and printer sharing option is enabled on the host PC (where the shared folder is stored).


With that, you should be able to access shared folders on the network. By default, this will require authentication with a user account on the PC where the shared folders are stored. If it has a different account, you'll need to share folders with all users on the network to make it accessible.
Step 3: Map a network drive on Windows 11
Once network sharing is up and running, you can map a network drive to link to the shared folder. Follow these steps:
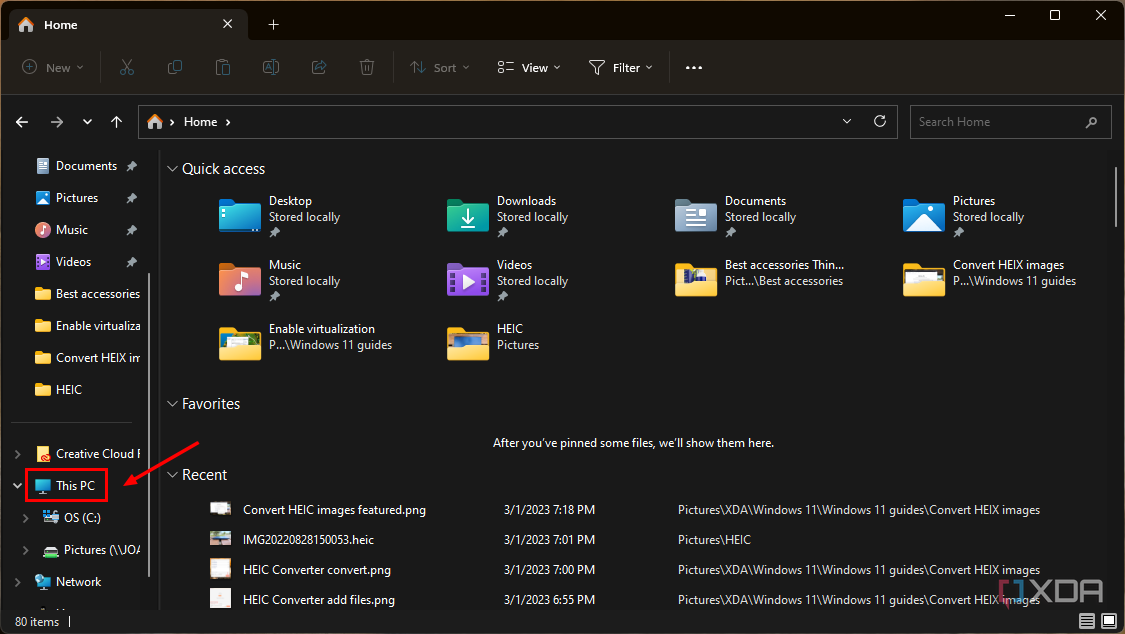
- Open File Explorer.
-
Navigate to This PC using the navigation pane on the left.
-
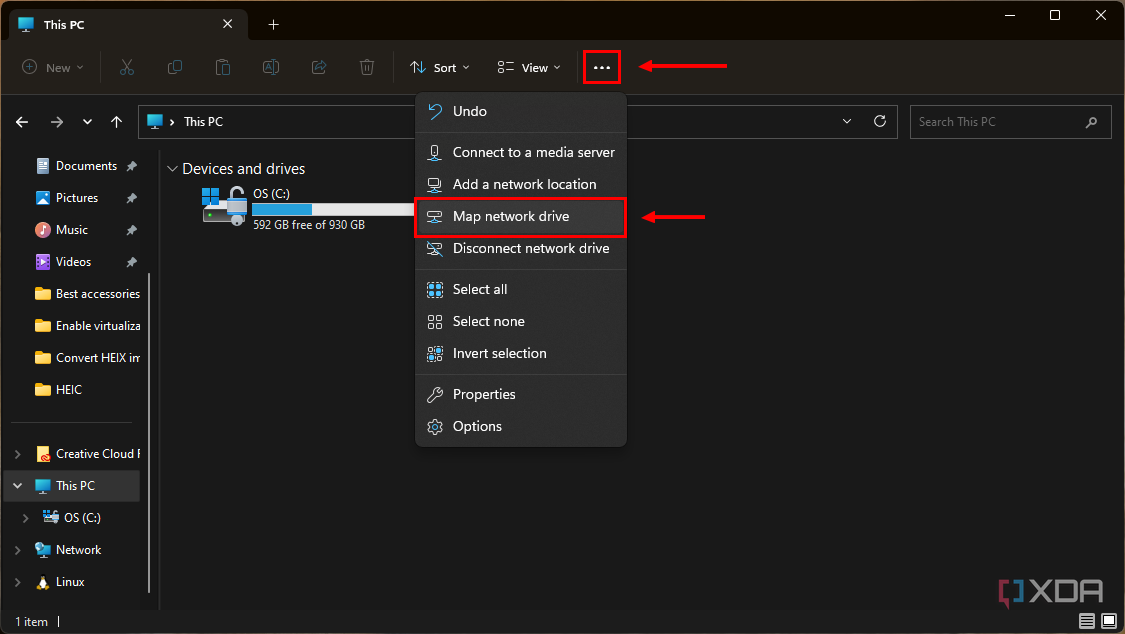
Click the ... (ellipsis) icon in the toolbar at the top and choose Map network drive.
-
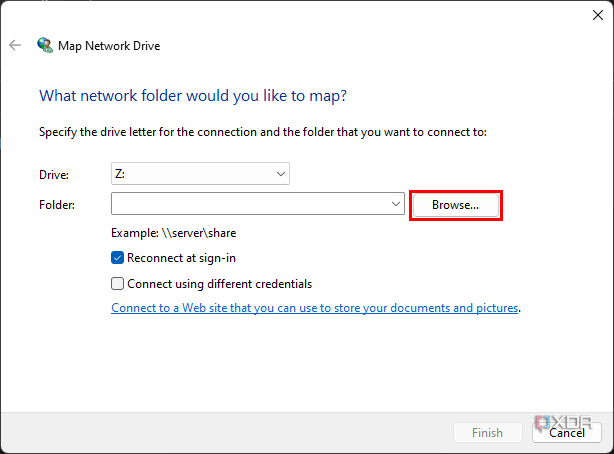
Assign a drive letter to the drive (it can be any letter that isn't already assigned on your PC), then click Browse.
-
Choose the folder you want to map to the network drive and click OK.
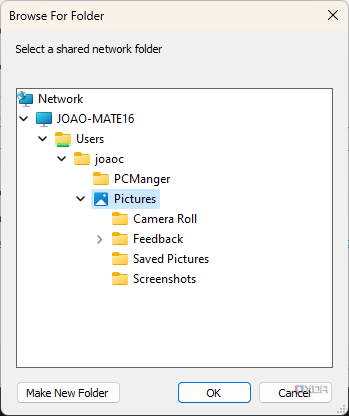
- Make sure the Reconnect at sign-in option is enabled if you want to connect to the shared folder every time you log in.
- Click Finish.
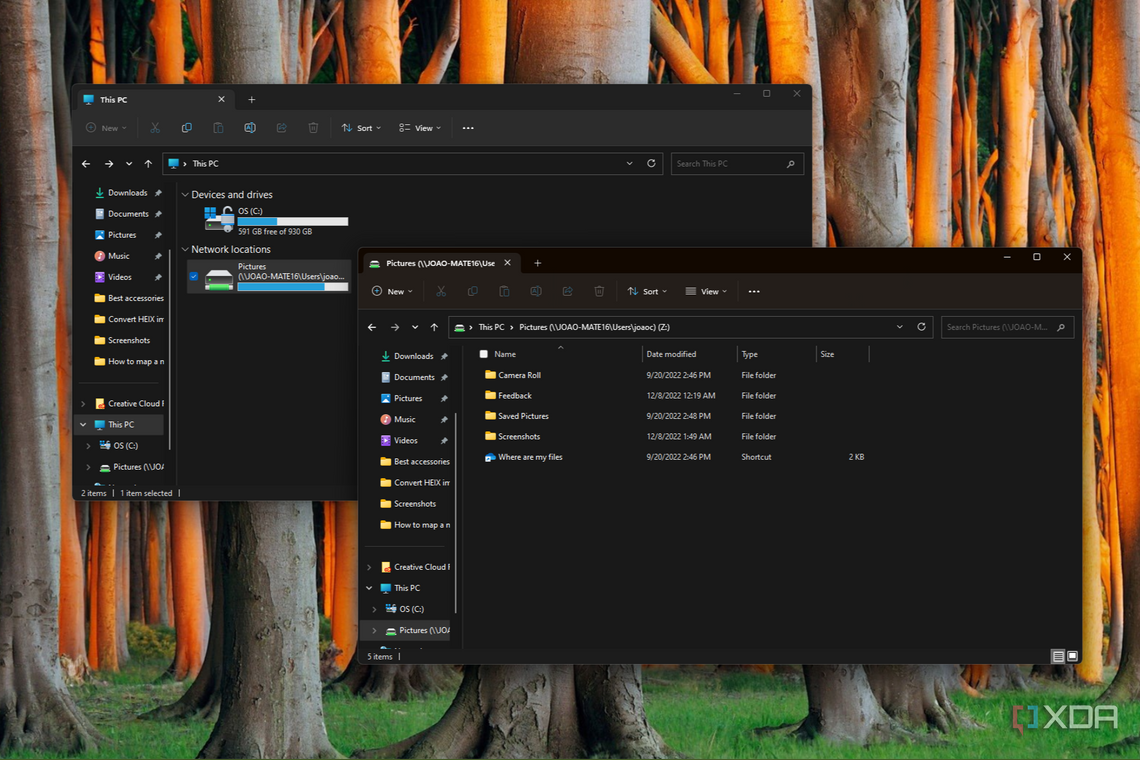
- You'll now see the shared folder in File Explorer on the This PC page.


With that done, you'll now have quick access to the folder you mapped as a network drive. This makes it easier to quickly access shared files from your PC without physically accessing the host computer. You can always disconnect from a network drive if you no longer need access by right-clicking the drive and choosing Disconnect.
If you're looking for other Windows 11 tips, check out how to use Smart App Control on Windows 11 version 22H2, or maybe how to use the Event Viewer in Windows 11 to check for potential errors on your PC.