If you just purchased a great new Chromebook or already have one, you should know you don't need to stick with how it looks by default. You can customize it to suit your needs. Asides from the basics like downloading apps from the Google Play Store, you can tweak the wallpaper, pin your favorite apps to the shelf, and even create folders in the ChromeOS launcher. Here's a look at those three ways to make your Chromebook your own.
How to change the wallpaper in ChromeOS

The easiest way to personalize your Chromebook is to change the wallpaper. Doing so requires a quick trip to the ChromeOS settings app. And the good news is that there are a ton of preset wallpapers that you can choose from.
- Press Alt+ Shift + S on your keyboard to open the ChromeOS settings app.
- Select the Settings cog icon at the top of the clock area.
- In the sidebar, choose Personalization.
- Pick the Set your wallpaper & style option from the list.
-
Choose Wallpaper in the popup window.
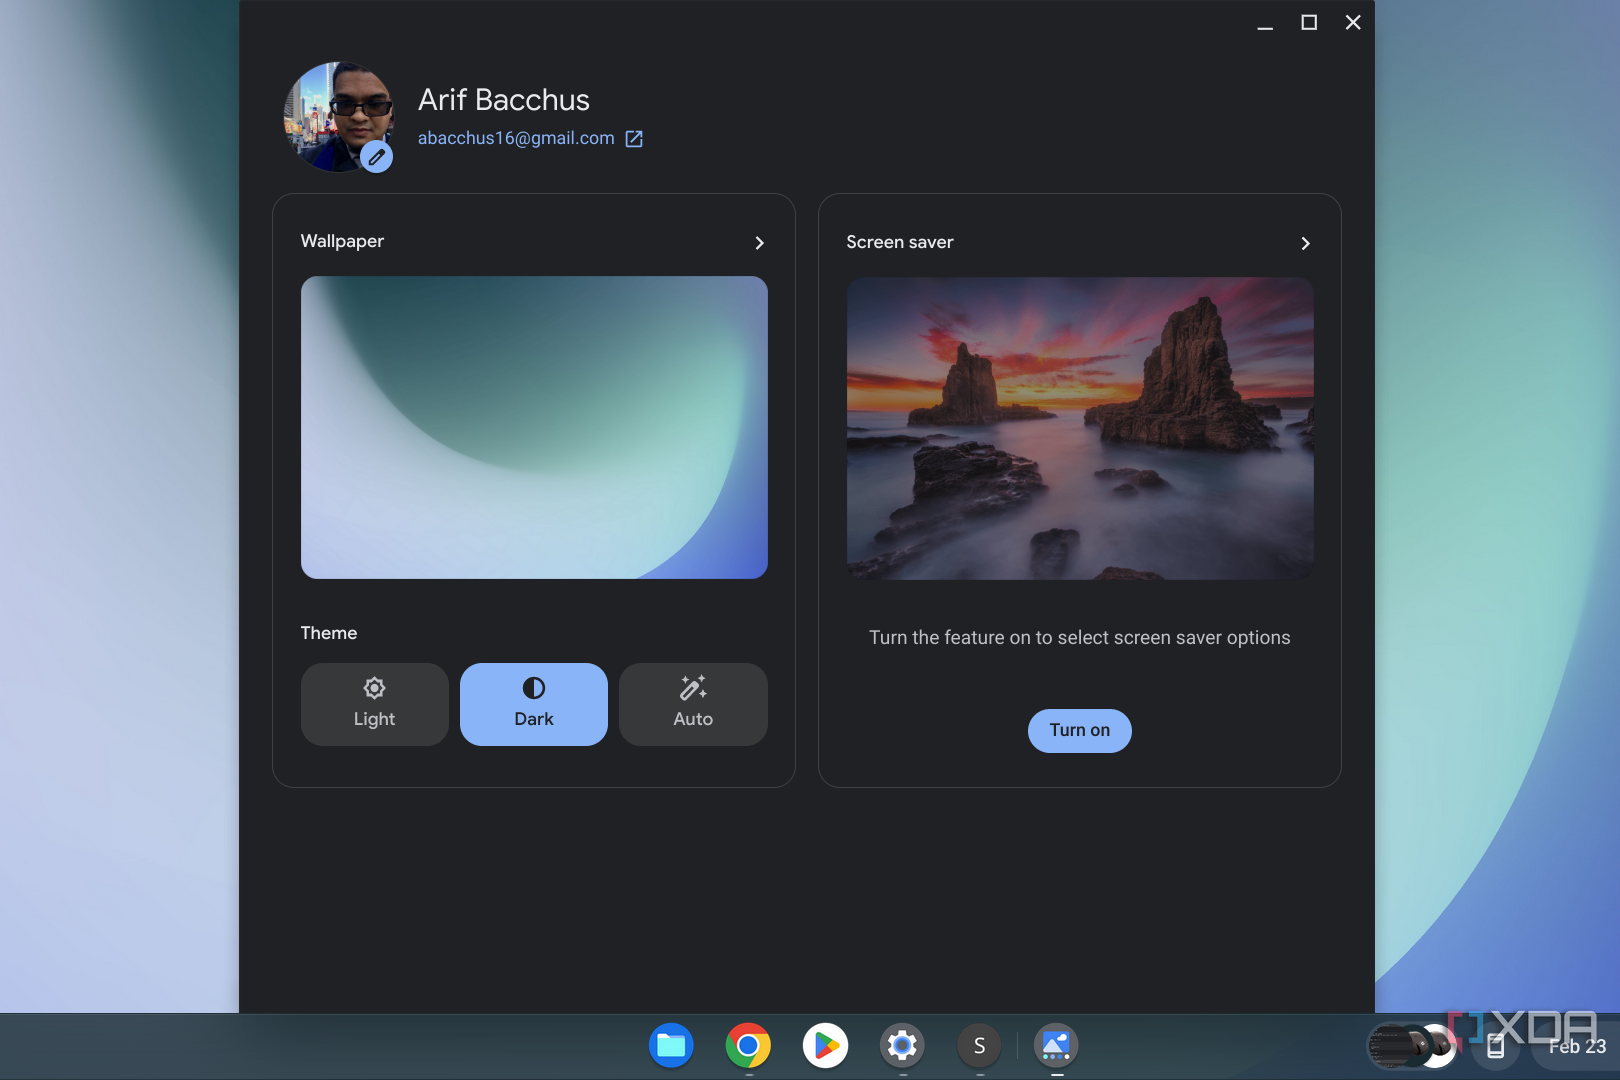
- You'll see a collection of wallpapers. Click on one to apply it.
- If you want to set your own wallpaper, choose My images and select the image.

Google has a great selection of images that can change the way your Chromebooks' background looks. You even can select the Change daily option to change it to a new wallpaper every day, although this method does have limitations.
How to pin apps to the shelf or move it in ChromeOS

Another way to personalize your Chromebook is to pin apps you frequently use to the shelf in ChromeOS at the bottom of your screen. You'll see running apps here, too.
- Open the ChromeOS launcher by clicking on the circular icon in the lower left corner of your screen. You also can press the everything button (the button with the circular icon) on your keyboard.
- Find the app you want to pin to the shelf.
- Hover your mouse over the icon. If you have a great ChromeOS tablet, you also can long-press the icon to summon a menu.
- Hold down the Alt button on your keyboard and right-click while hovering over the icon.
- Select the Pin to shelf option.
- If you want to remove it, right-click and select Unpin.
Once the app is pinned, you can long-click on the icon to drag it around. You even can move the shelf to the left or right side of the screen. Just right-click on the shell and choose Shelf position and then select where you want it to go.
How to rearrange apps on the ChromeOS launcher
The final way to personalize your Chromebook is to rearrange the apps on the ChromeOS launcher. This is the home for all the apps you've downloaded or installed, so why not make folders to put these apps in?
- Open the ChromeOS launcher.
- Hover over the app's icon with your mouse to rearrange an app.
- Click and hold it, and then drag where you want it to go.
- On a touchscreen, tap and hold on the icon and then drag it to an empty space.
- To create a folder on the ChromeOS launcher, hover over the app's icon with your mouse, long-click, and then drag it on top of another icon.
- You'll get a pop-up that lets you name the folder. If you drag all the icons out of the folder, it'll delete the folder.
ChromeOS isn't nearly as customizable as Windows, where apps like Start11 can tweak system elements, but these are the basic ways to personalize your Chromebook experience. We invite you to check out our other tutorials on how to edit Office files on a Chromebook or how to sideload apps to a Chromebook if you want to get more use out of your device.