If you're anything like me, Windows 11 is one of the most exciting Windows releases to happen in many years. It's all in the name, really. We've been on Windows 10 since 2015, and while there have been pretty major updates in that time, it's felt a little stale for a while. Windows 11 looks radically different in more ways than one, and the name symbolizes that. But as excited as some of us are, it might not be for everyone. If you don't like Windows 11 or it's causing problems for you, we'll show you how to roll back to Windows 10.
There are two major ways you can do this. If you upgraded to Windows 11 without a clean install and it's been less than 10 days, you can roll back while keeping all your data. If it's been more than 10 days, you're going to need to clean install Windows 10 on your PC. We're going to cover both options here.
Roll back to Windows 10 using the Settings app
If you upgraded to Windows 11 by joining the Windows Insider program via Windows Update, or if you performed an in-place upgrade using an ISO, you can roll back without losing any data. When you install a major update like that, the files for your previous installation are backed up for 10 days. That means you can always go back without losing your data, as long as it's been less than 10 days.
However, while the process should keep your data intact, it might be best to have a backup anyway just to be safe. Use a cloud service like OneDrive or an external storage device to save your most important files. Once that's done, here's what you need to do.
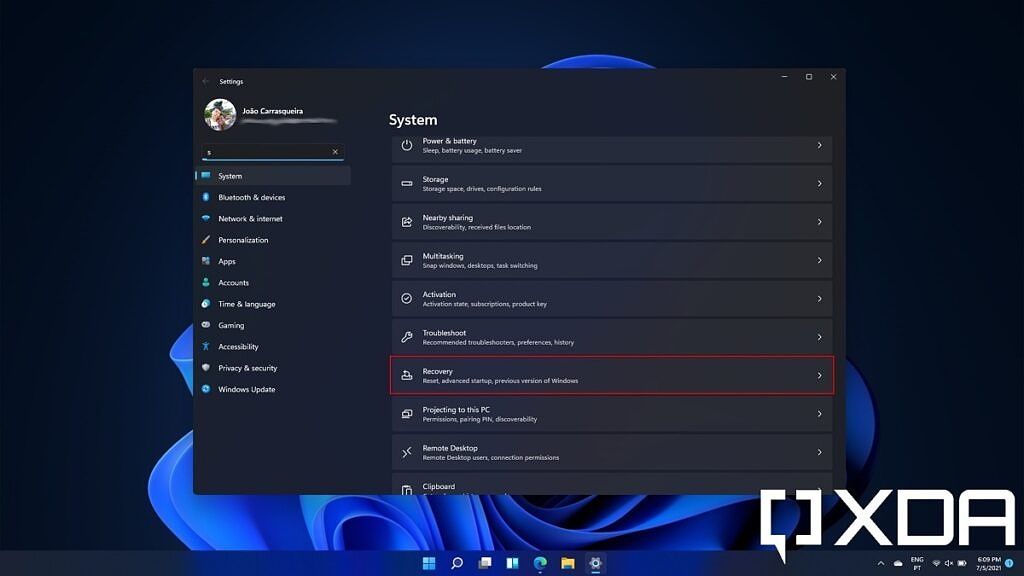
- Open the Settings app.
- Scroll down to find the Recovery option.
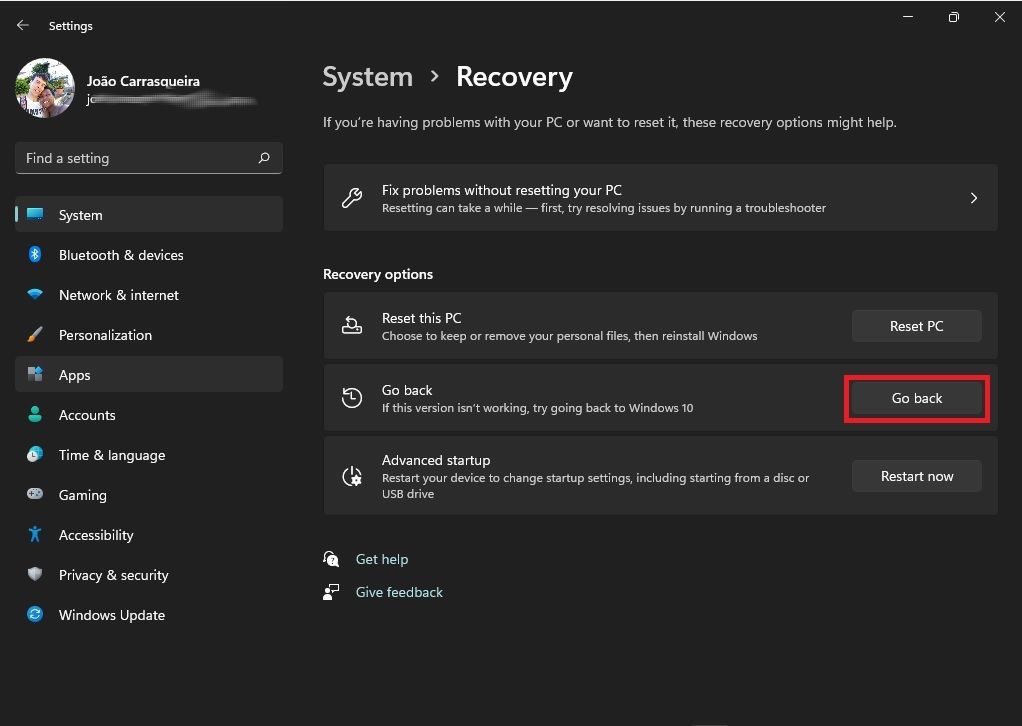
- If you can still roll back, you'll see the option to go back to the previous build. Click Go back.
- You'll see a few screens making sure you want to roll back. First, choose a reason why you want to go back to Windows 10, and click Next.
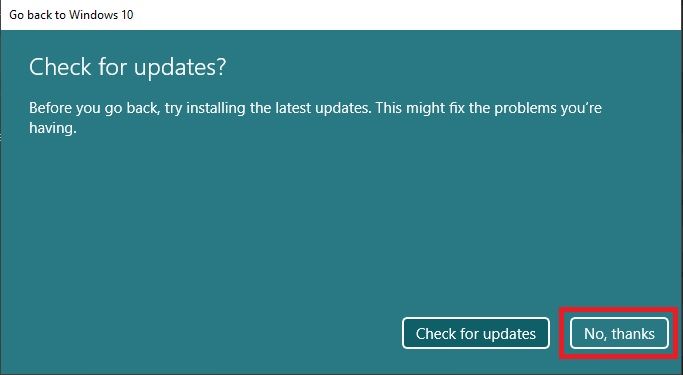
- Windows will ask you to check for updates before rolling back in case they fix any issues you have. Click No, thanks.
- Click Next a couple more times, and finally choose Go back to previous build. You'll be rolled back to Windows 10.
At this point, if you downloaded Windows 11 using the Insider program, make sure to leave the program after rolling back. This will prevent you from downloading Windows 11 again. To do this, open the Settings app and go to Update & Security, then Windows Insider Program to check your settings.
Again, this option is only available if you upgraded from Windows 10 in the last 10 days, and you can't have installed other major updates in the meantime after first upgrading to Windows 11. If you did, this will just roll you back to the previous Windows 11 build. You also can't have used Disk Cleanup to delete temporary Windows installation files, as those are necessary for rolling back. Additionally, if you installed the initial Windows 11 release and then upgraded to Windows 11 version 22H2, your temporary files for Windows 10 will be removed as well. However, if you updated straight from Windows 10 to Windows 11 version 22H2, that won't be a problem.
Performing a clean install
If you can't use the option above to roll back, you're going to have to reinstall Windows 10 from scratch. That means losing all your data, so you'll want to create a backup if there's anything important on your PC. Here's what you need to do to install Windows 10 again.
- Go to the Windows 10 download page and click the Download now button under Create Windows 10 installation media. You may need to scroll down a bit -- don't use the Update now button.
- Run the file you downloaded and accept the license terms.
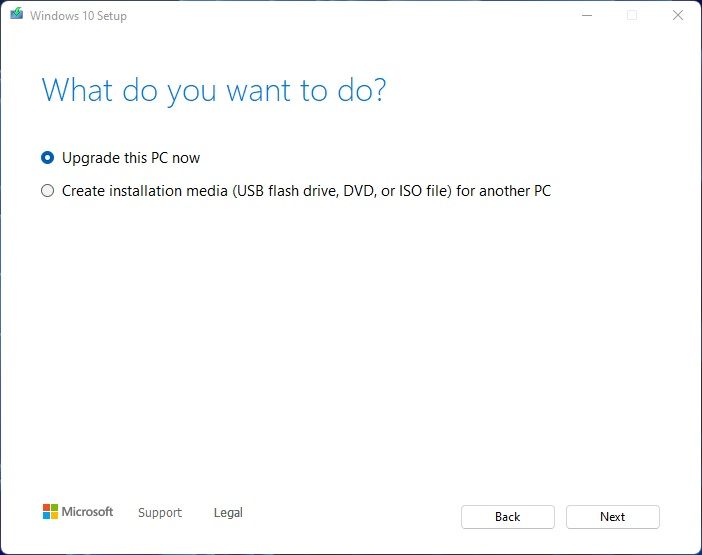
- You'll be asked whether you want to upgrade your PC now or create installation media. If you want to create installation media, we have a separate guide covering how to install Windows 10. It's a lengthier process, so we're going to go the other route in this guide. Choose Upgrade this PC now and click Next.
- Windows 10 will start downloading, and the tool will restart. Accept the license terms again, and you'll be asked if you want to keep your files. However, because you're rolling back to a previous version of Windows, you can't do that. You'll have to choose Nothing, then click Next.
- Finally, click Install.
From there, you can set up your Windows 10 PC as a brand-new machine. If you don't want to get on Windows 11, you won't have to anytime soon. Windows 10 is still supported until 2025, so you can stay on it until Windows 11 is good enough for you. You might see the option offered on Windows Update, but you won't be forced to install it unless you want to.
However, if you joined the Insider program on a PC with unsupported hardware, keep in mind you can no longer test Windows 11. You won't be able to rejoin the Dev or Beta channels of the Insider program. Only the Release Preview channel will be available, and you'll only be able to test future Windows 10 updates.
If you want to get Windows 11 again and you can't, you may want to check the system requirements, including the list of supported CPUs. We also have a list of PCs that support the Windows 11 upgrade if you're wondering whether yours is supported.

