After more than a decade of making iPhones, there are a ton of great features you'll find on the iPhone 15 series. Some of the most useful features can be the simplest ones, including the ability to take a screenshot or record your screen. You might want to do this for a few reasons, like saving something for your records or sharing with somebody else. After you take a screenshot, you can even edit and share your screenshot or screen recording with just a few taps. In this guide, we'll show you exactly how to do it on all our favorite iPhones.
How to screenshot on an iPhone
First up is how to take a screenshot on an iPhone. This should work with all iPhones regardless of the operating system.
- Press the Side and Volume Up buttons simultaneously. If you have an iPhone with a physical home button, press the Side and Home buttons instead.
-
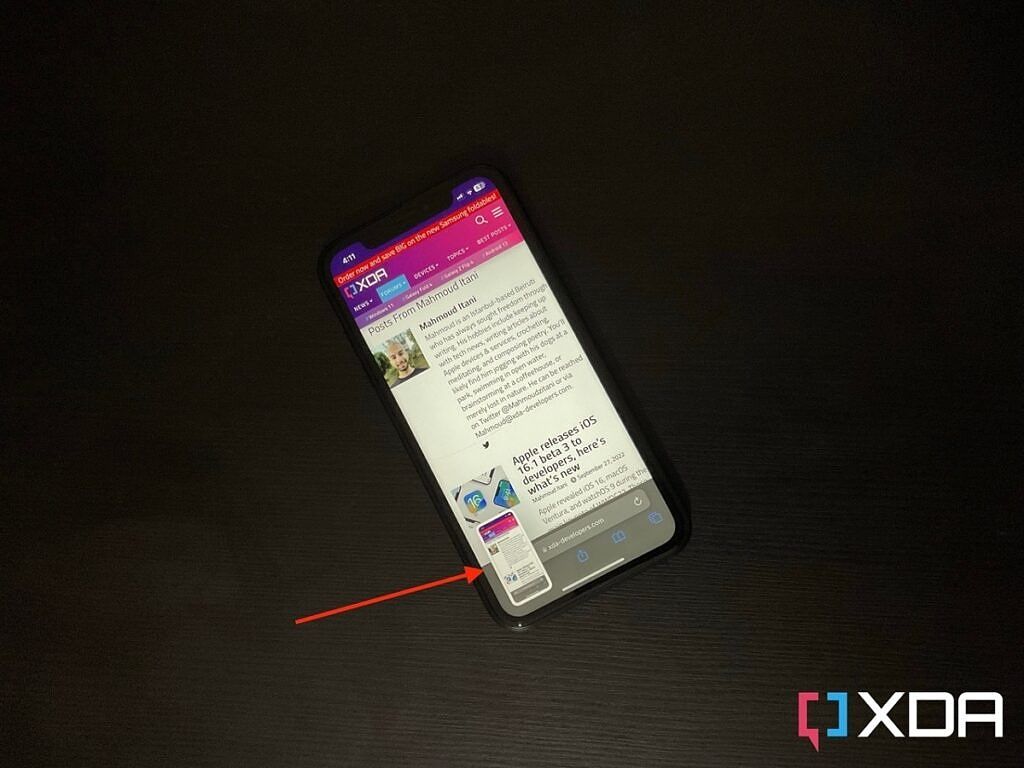
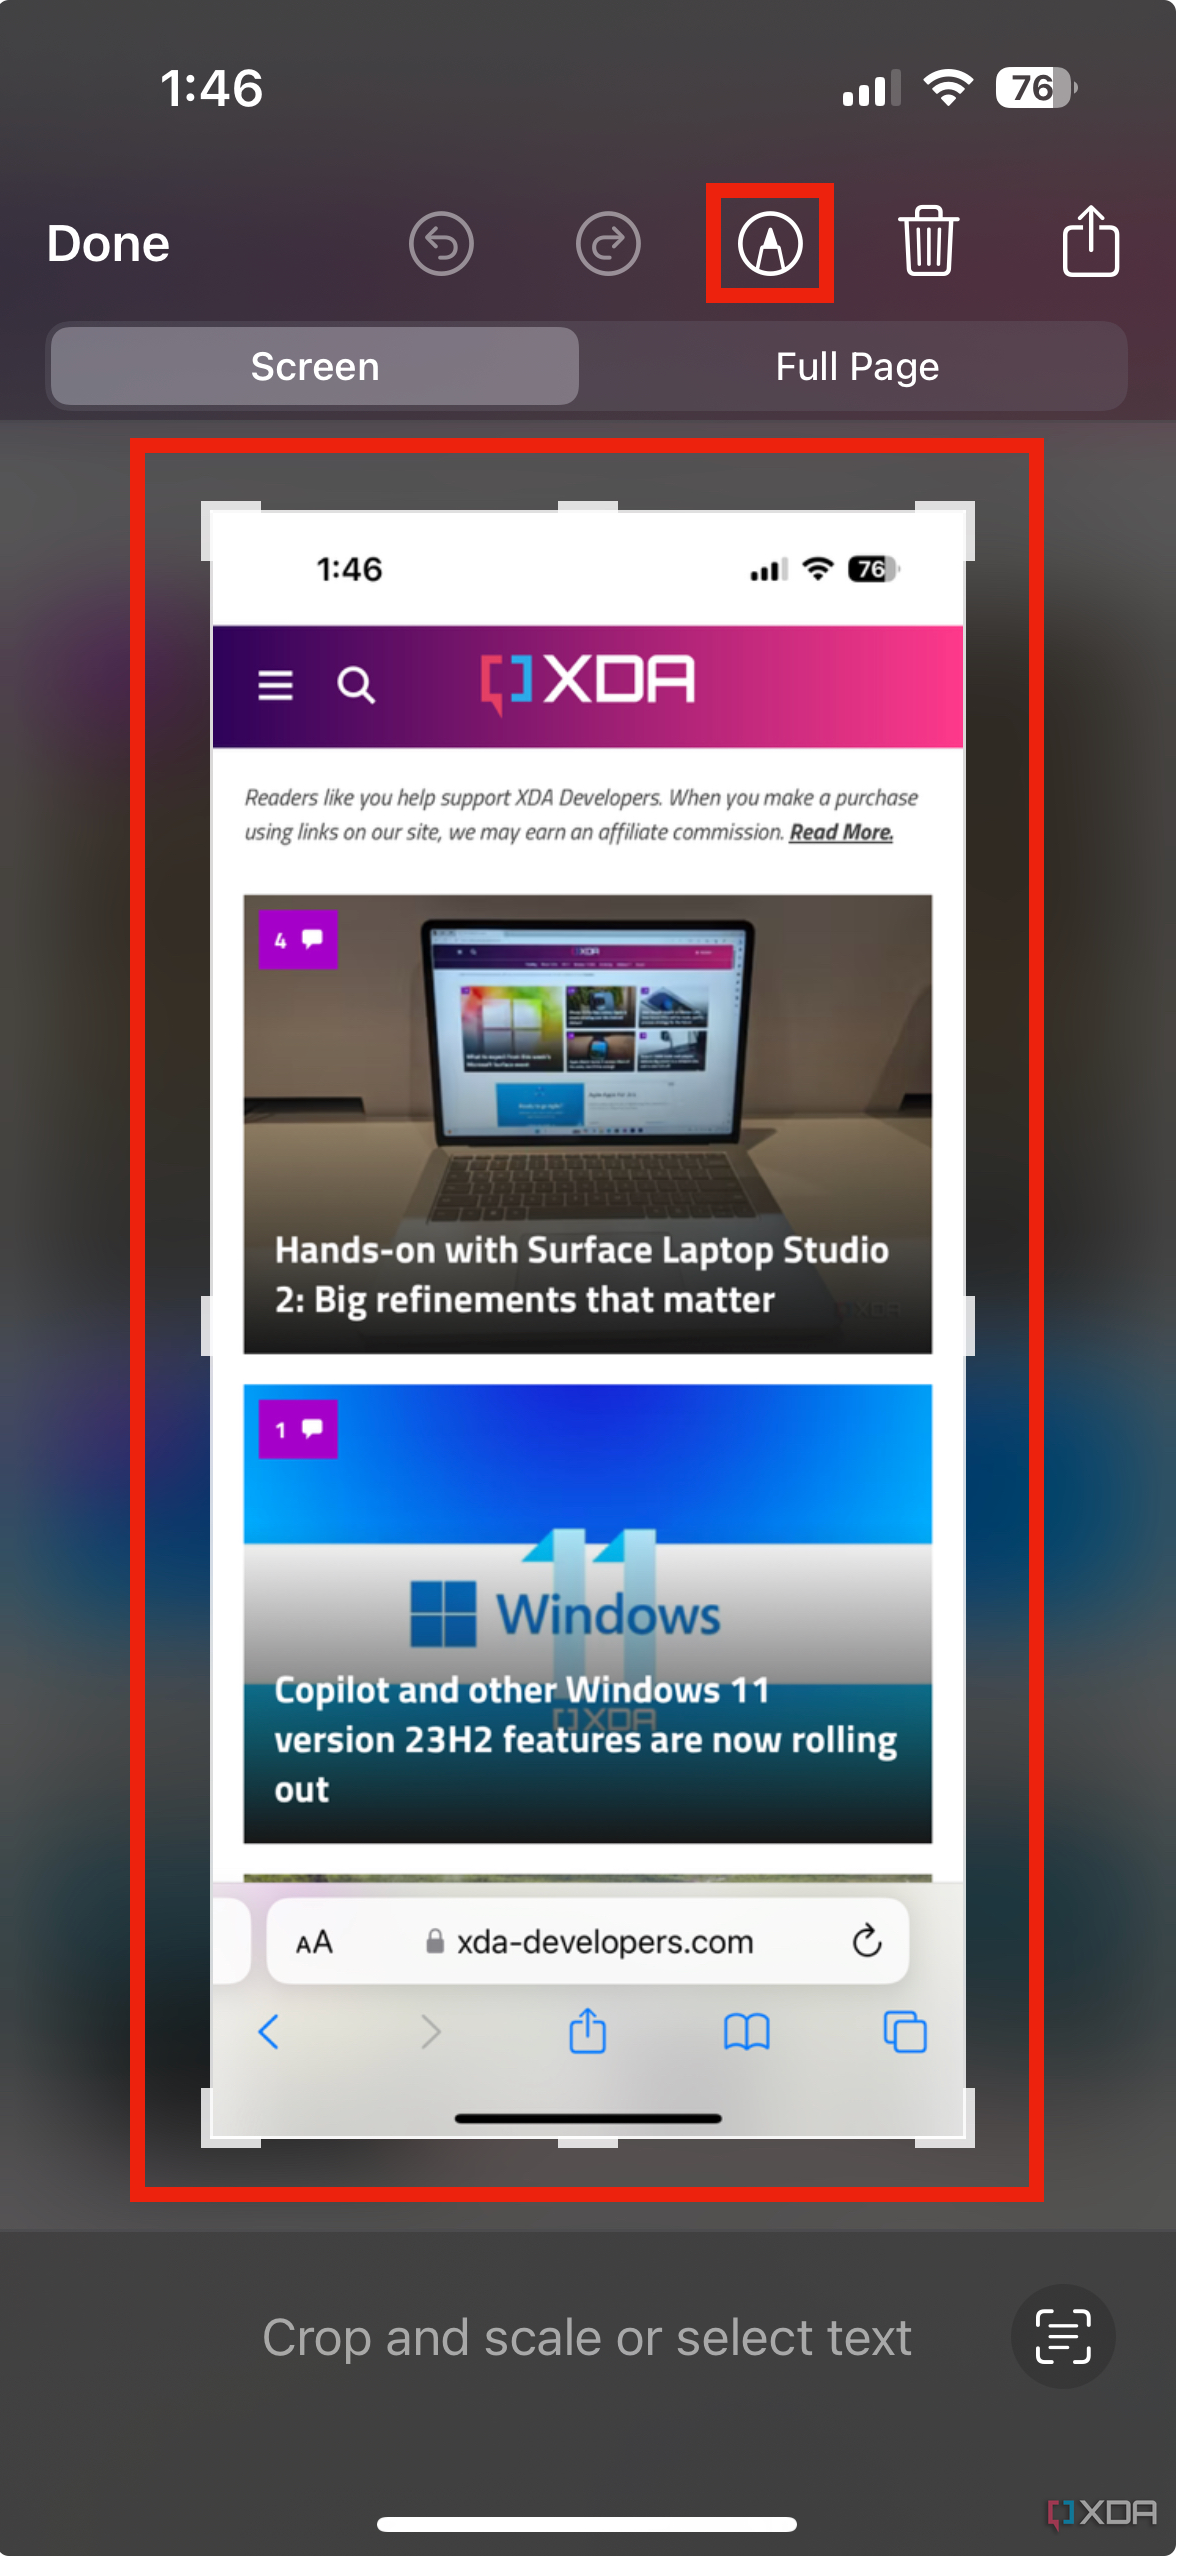
Tap on the thumbnail that appears in the bottom left corner to edit your screenshot.
- Use the Markup or crop tools to edit your screenshot.
-
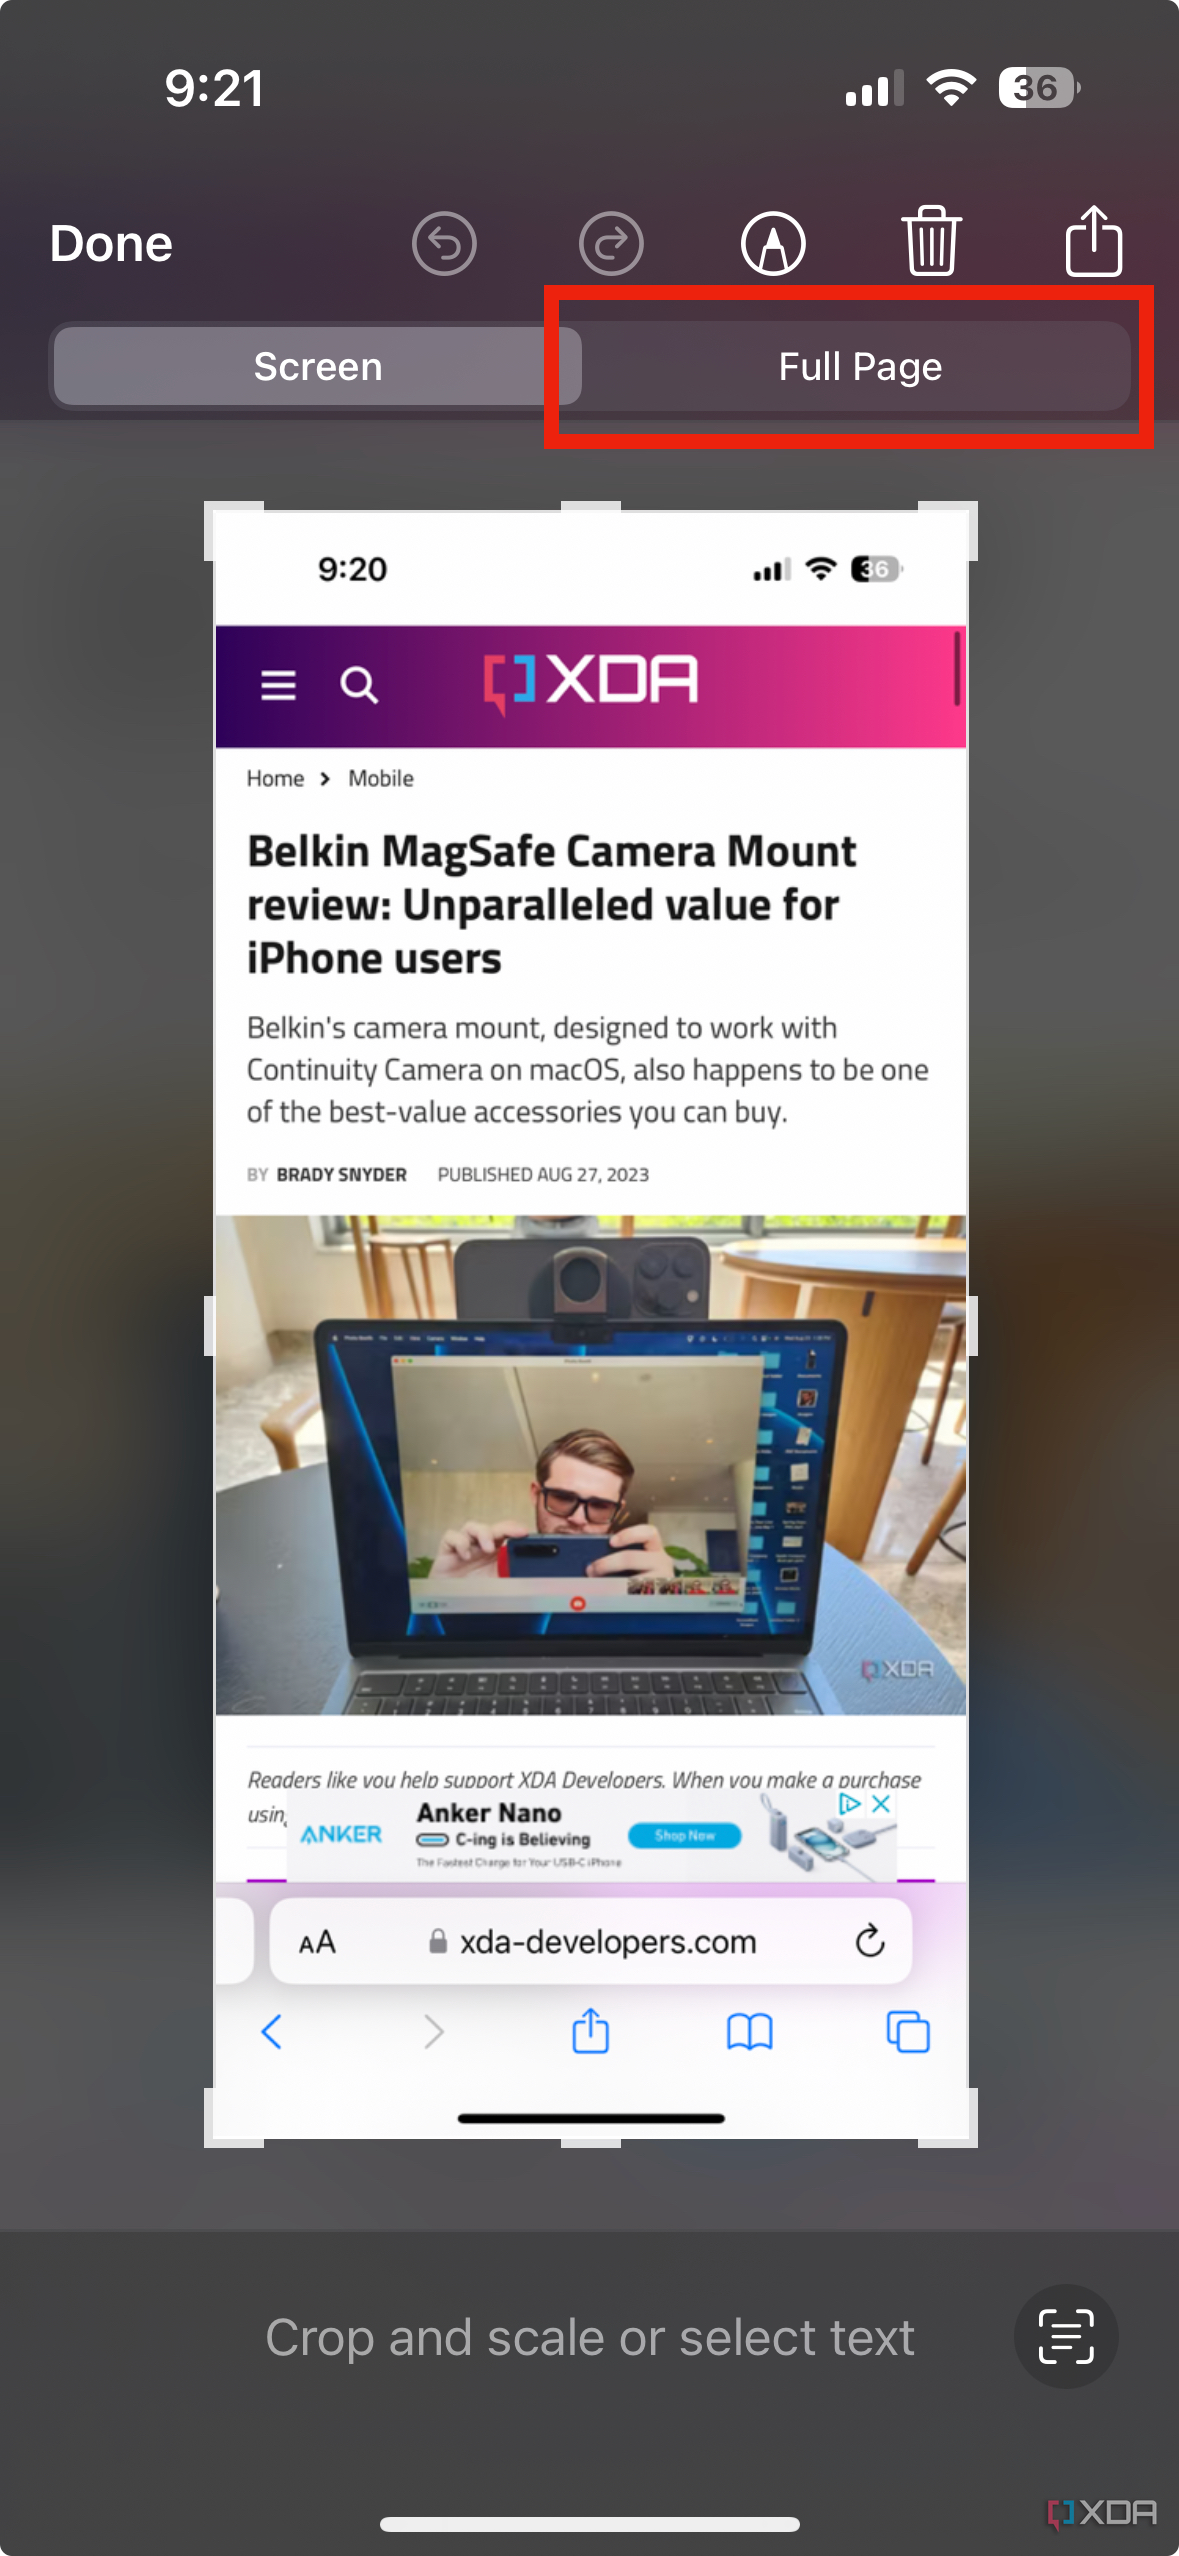
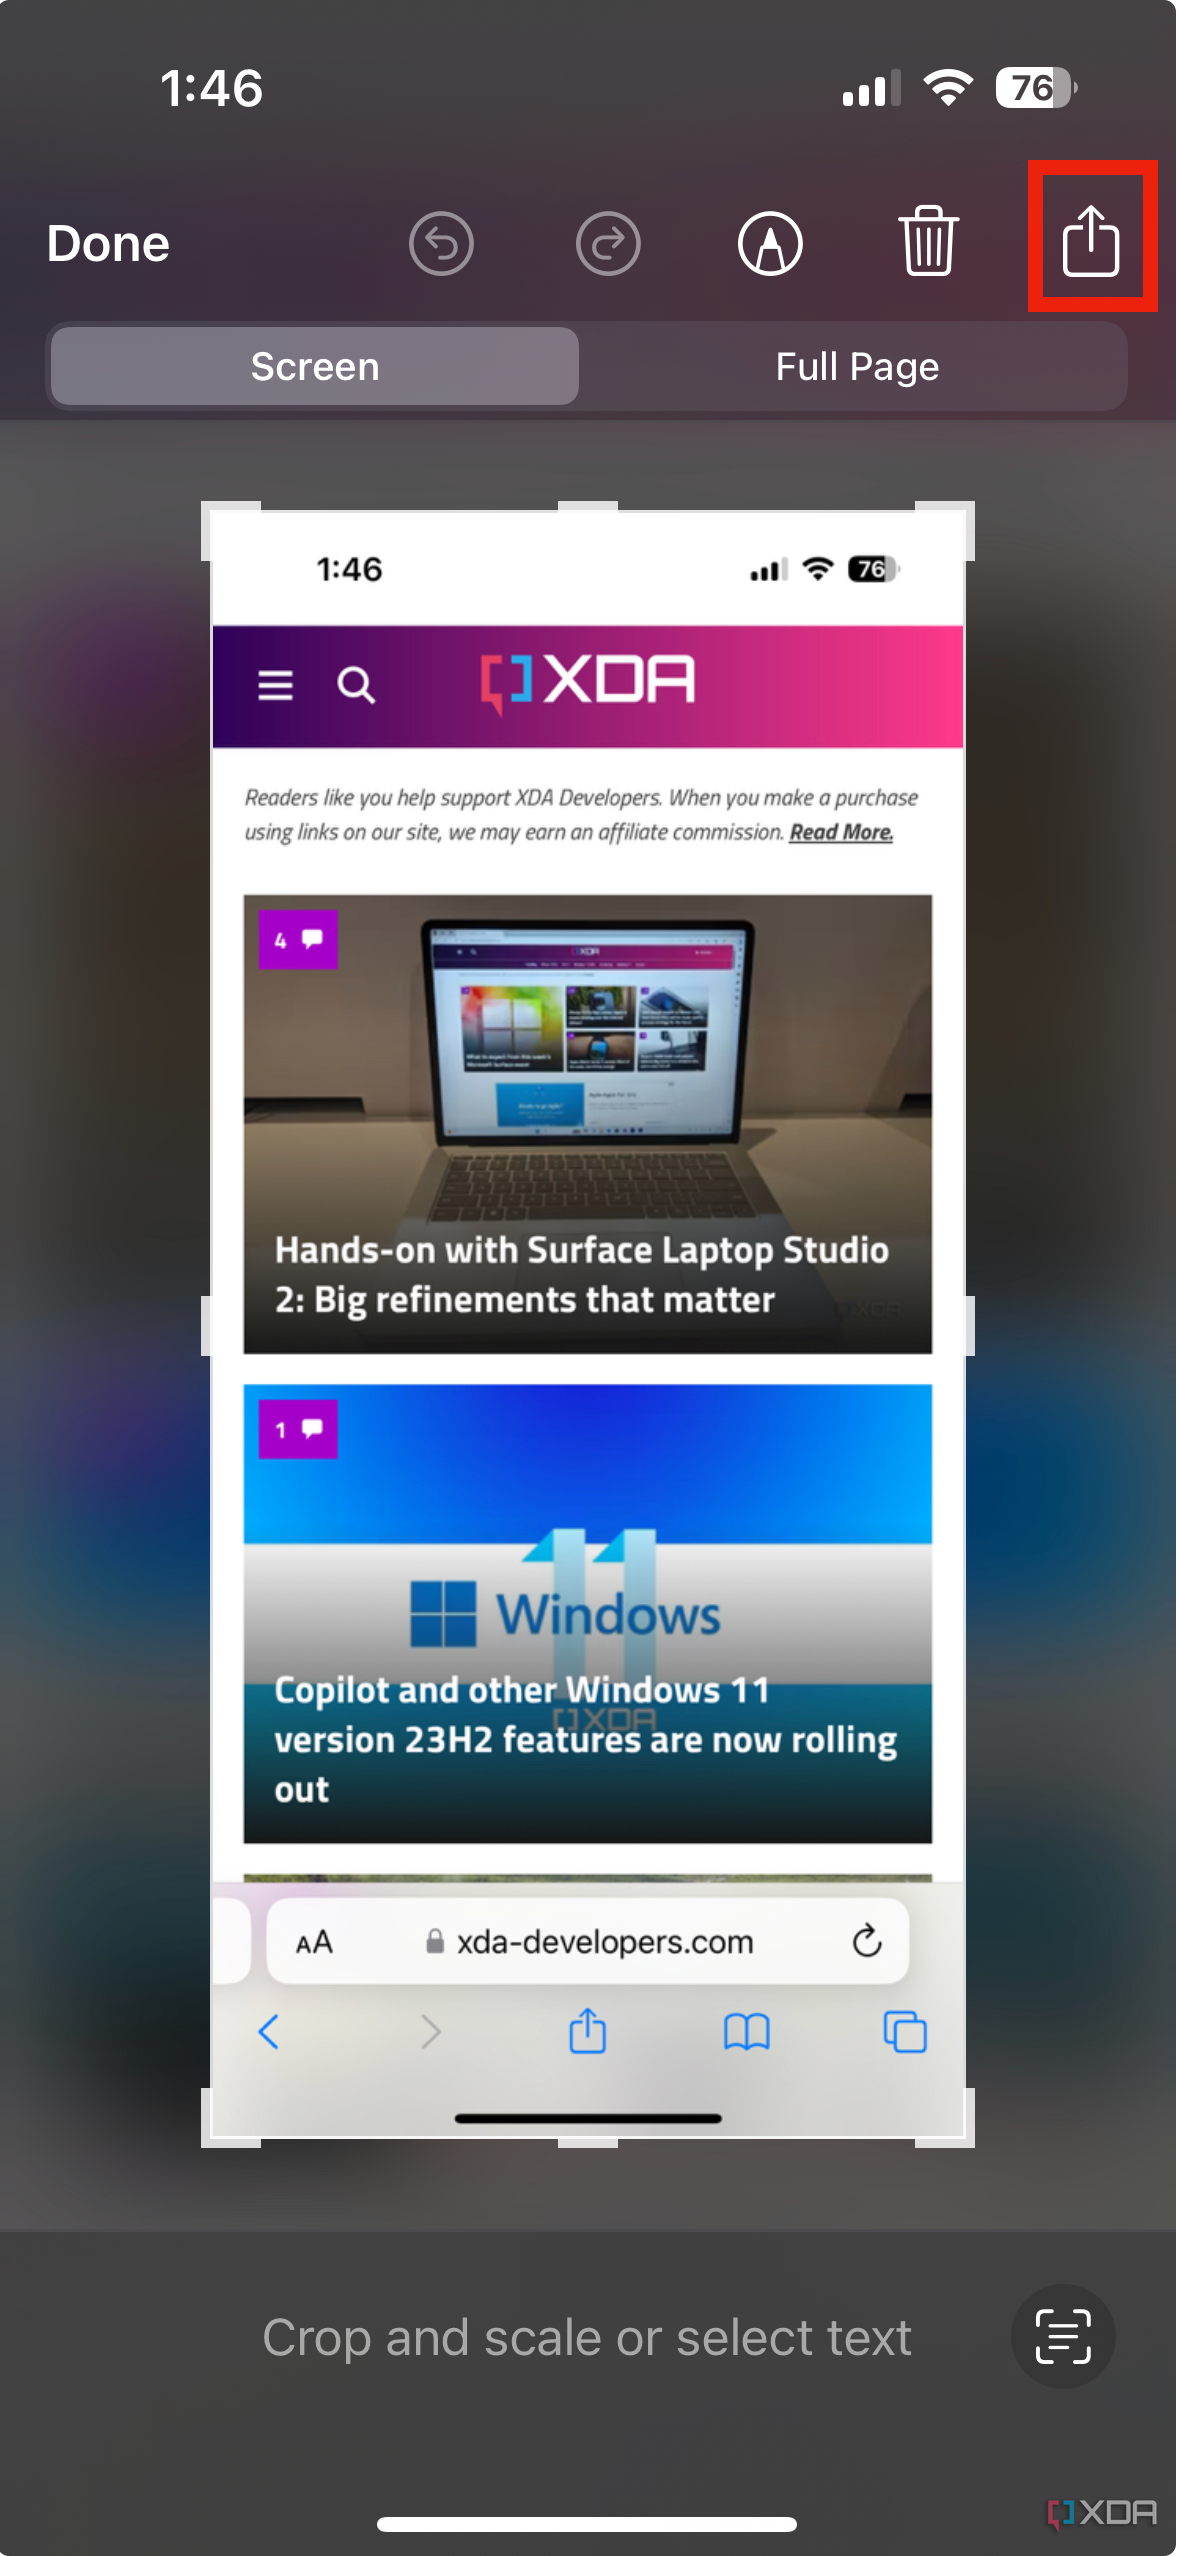
If you're viewing a document or webpage that is longer than your screen, you can take a Full Page screenshot. At the top of the page, tab the Full Page tab.
- Tap the Share button to send the screenshot directly to another person.
-
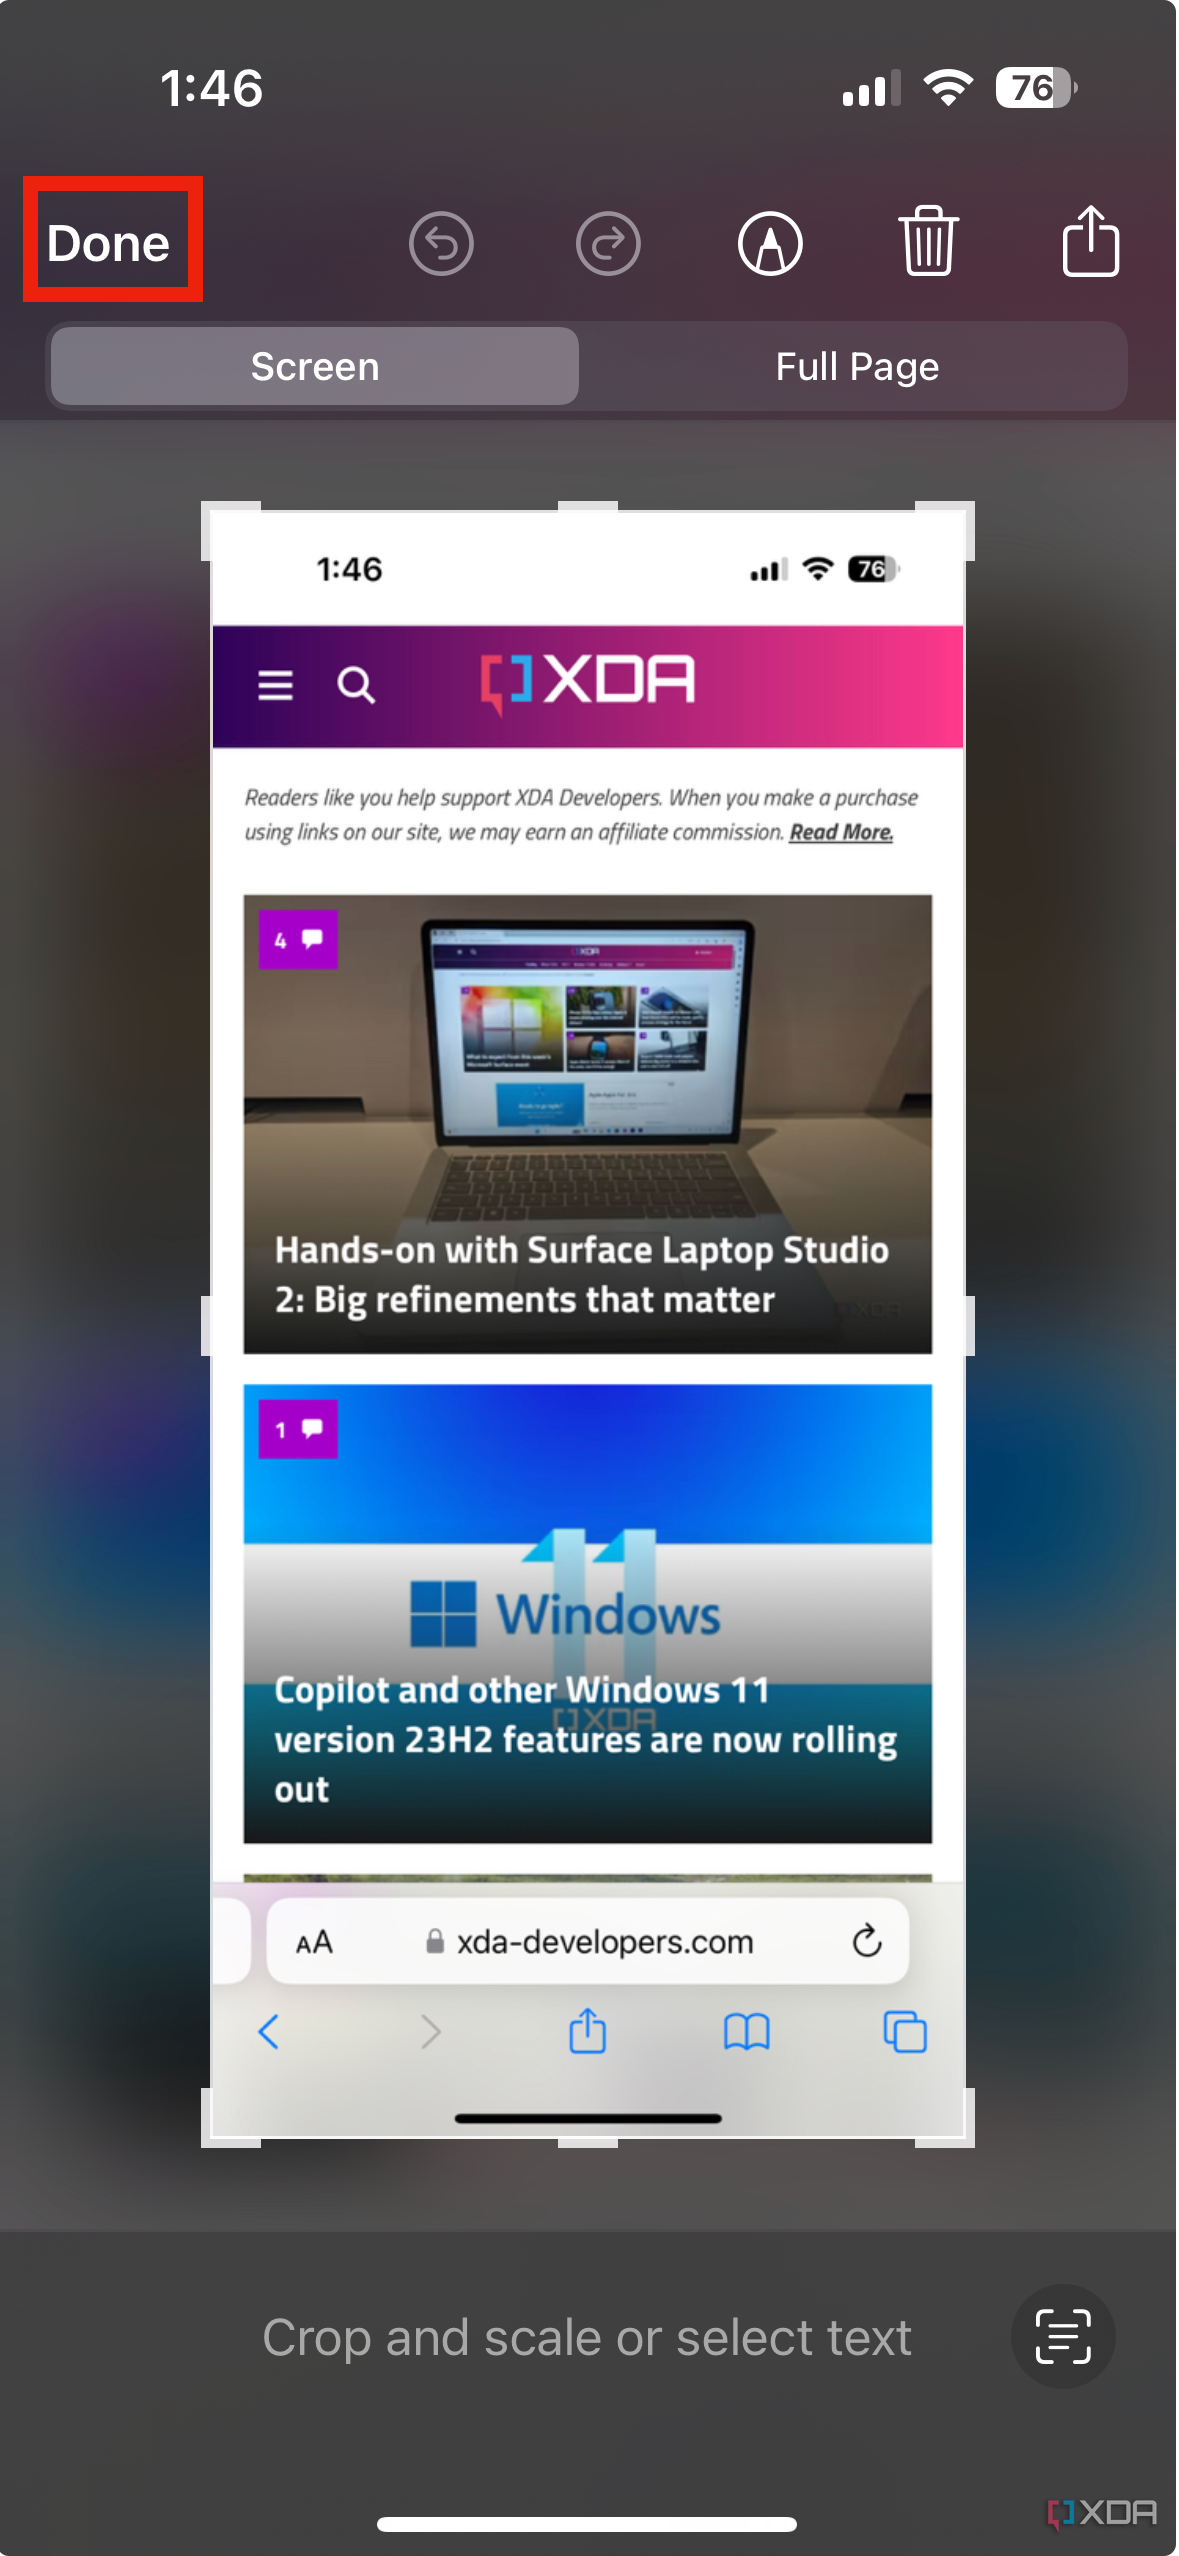
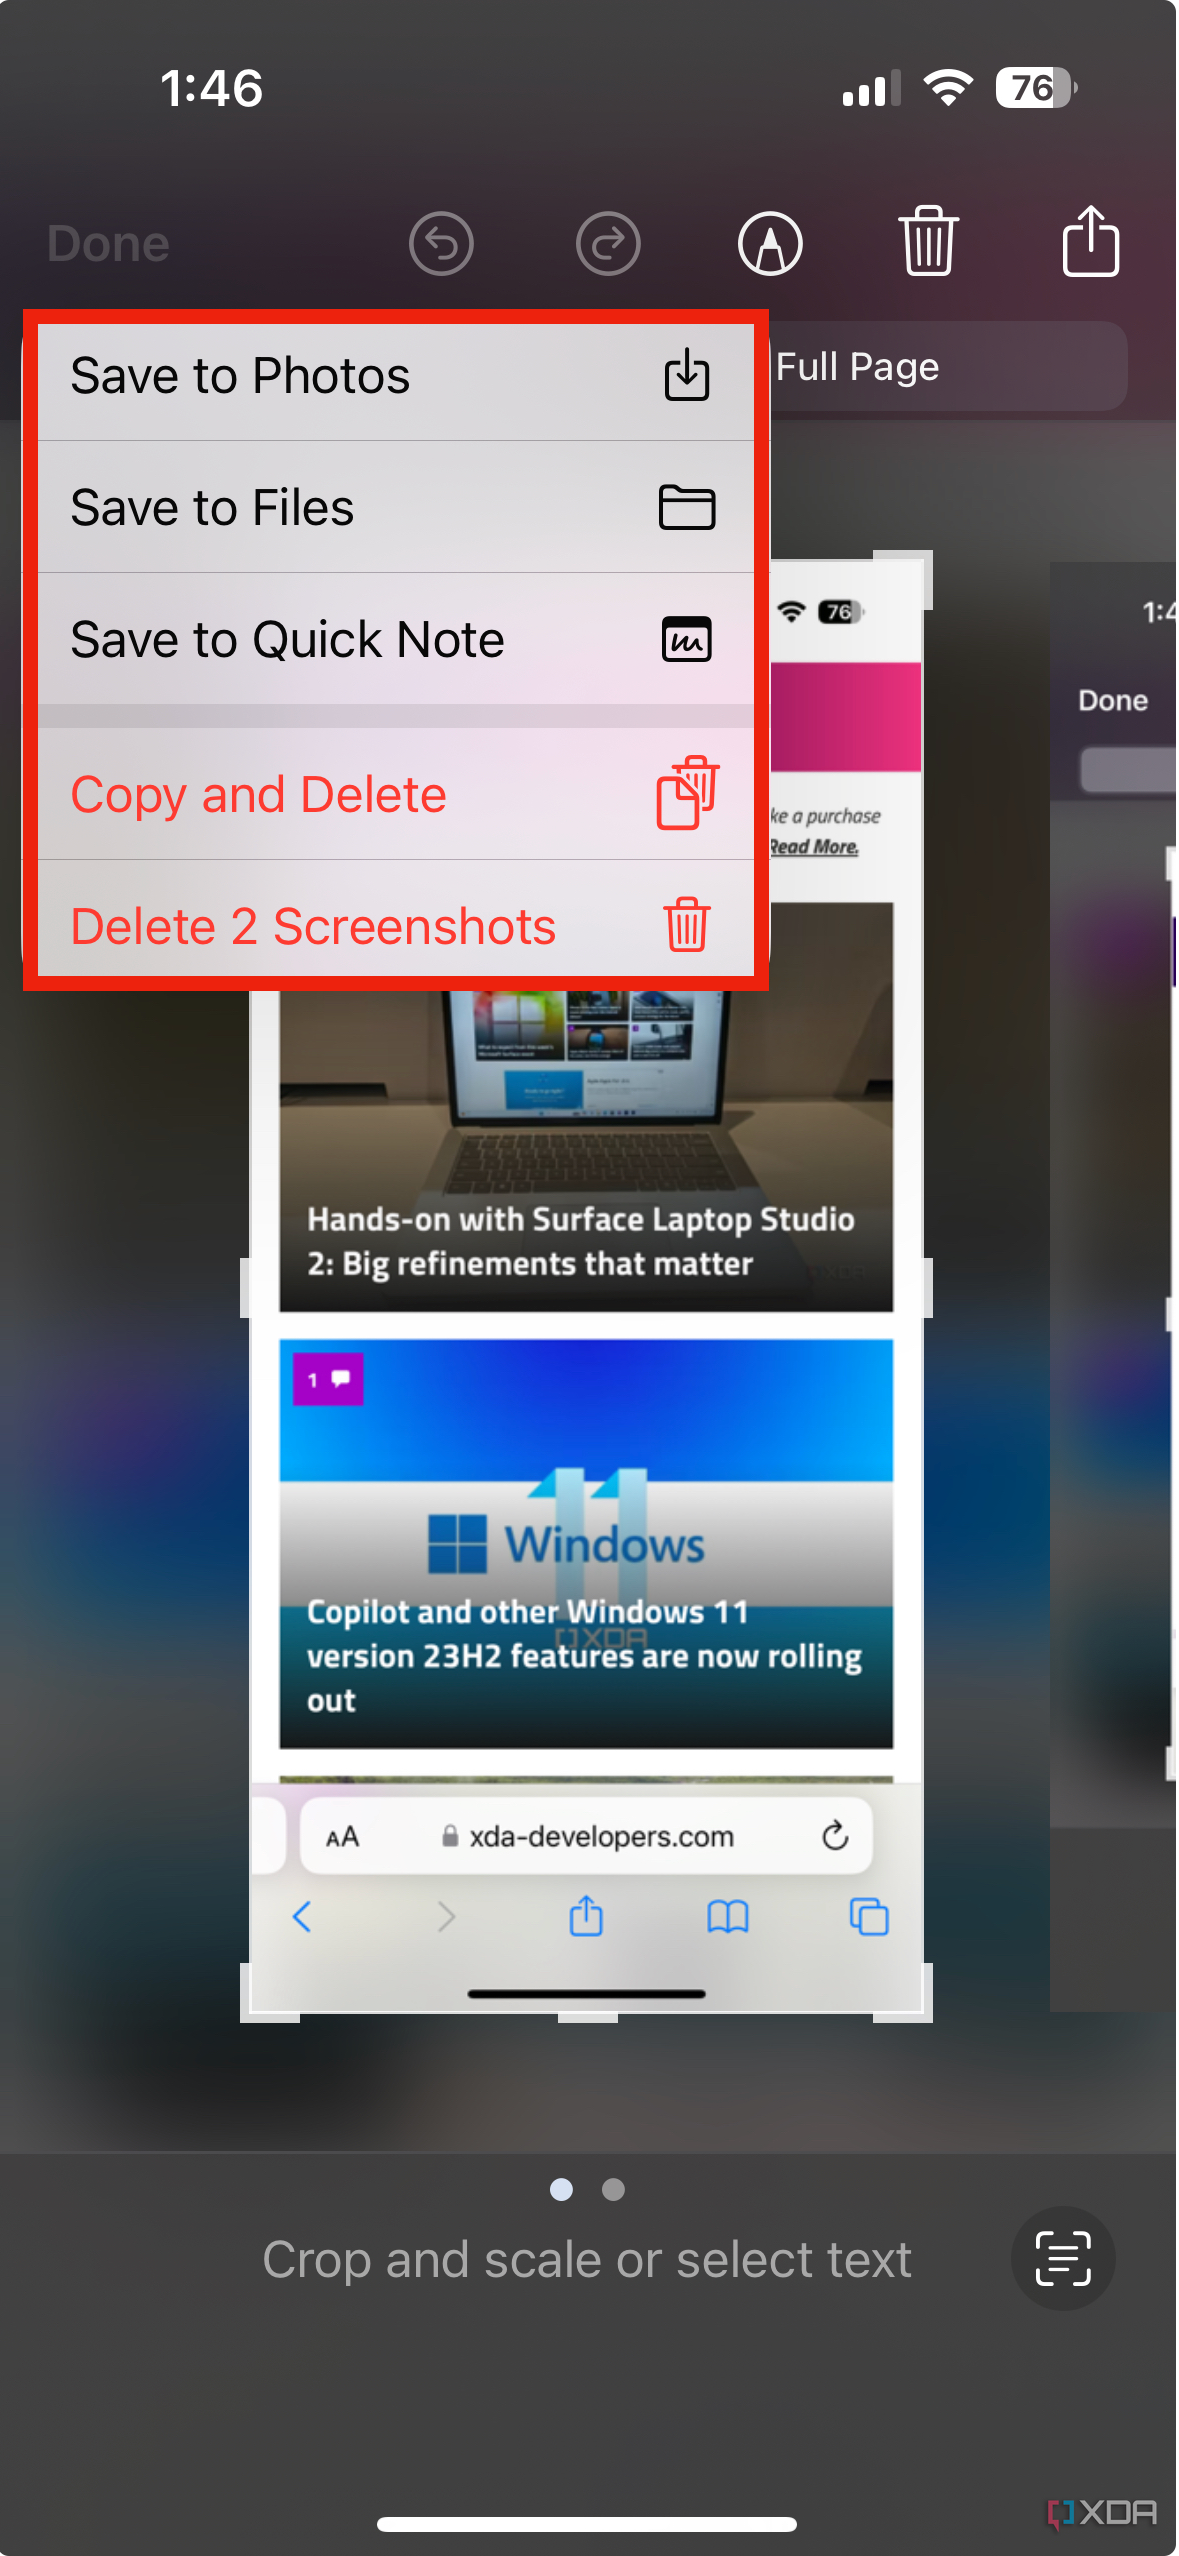
Tap the Done button to save the screenshot to Files, Photos, or Quick Note. Alternatively, you can delete or copy and delete the screenshot.


How to record your screen on an iPhone
If you'd rather capture a video recording of the iPhone screen instead of taking a static screenshot, you can do that, too. Screen recordings will typically record both your phone's screen and audio coming from the device, but this can vary. For example, if you're currently using your microphone, the system will not be able to record your device's audio. Certain apps can also prevent you from recording your screen's contents, like ticketing apps or streaming apps. For most apps, though, you can record your screen and audio through these easy steps.
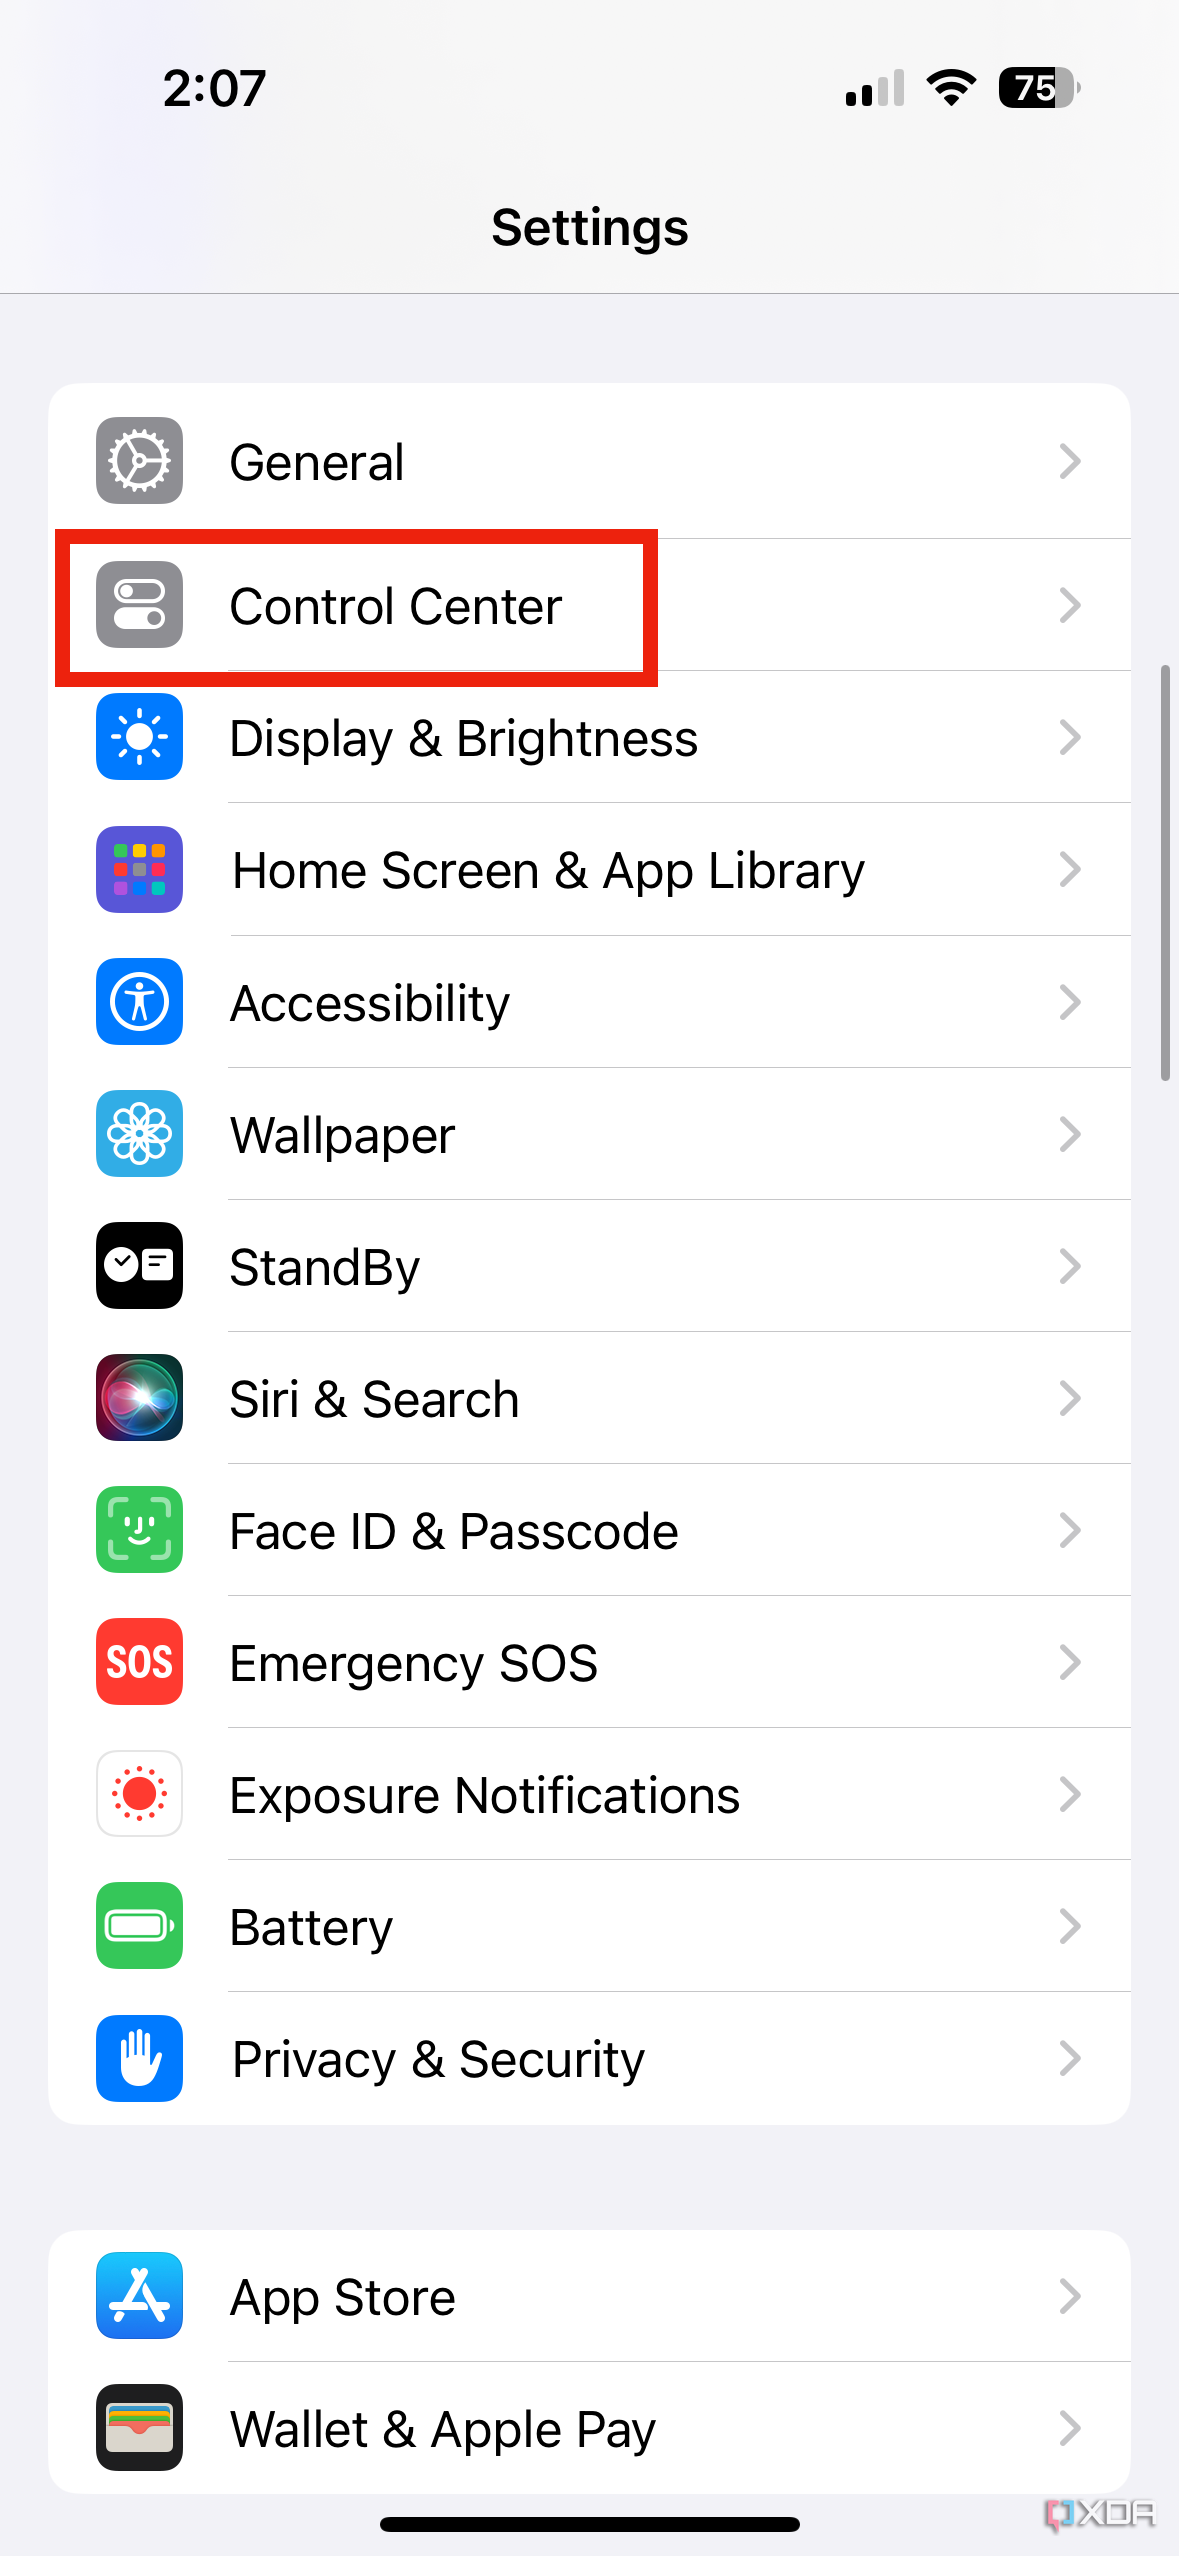
- Launch the Settings app.
- Click on Control Center.
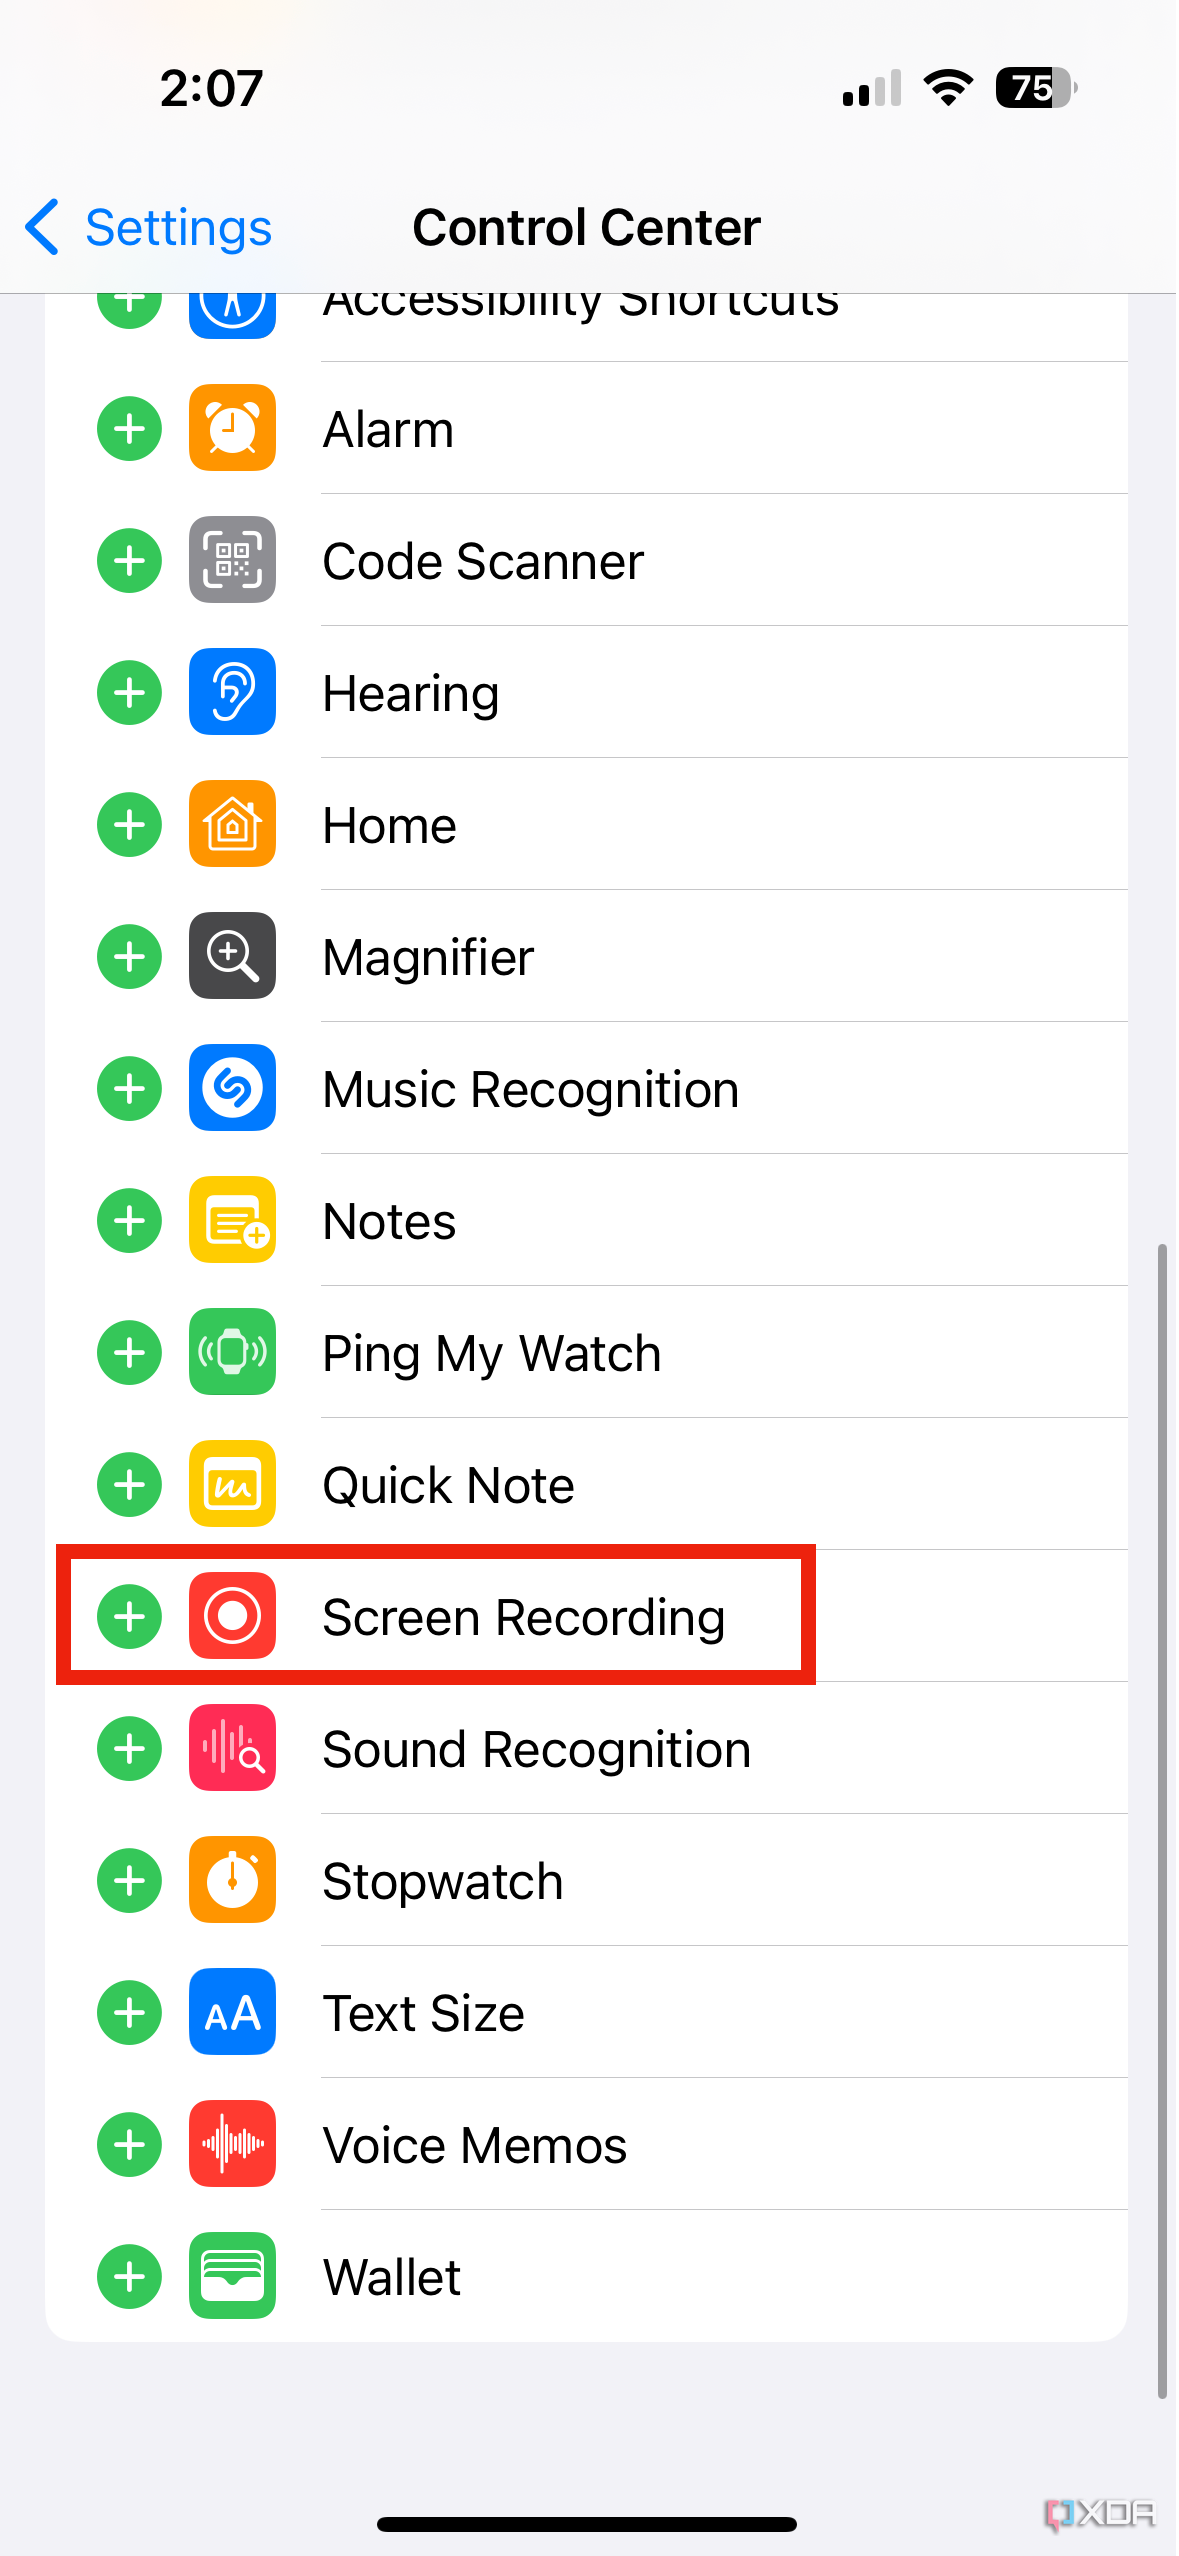
- Scroll down and add Screen Recording to the list of toggles if it's not already there.
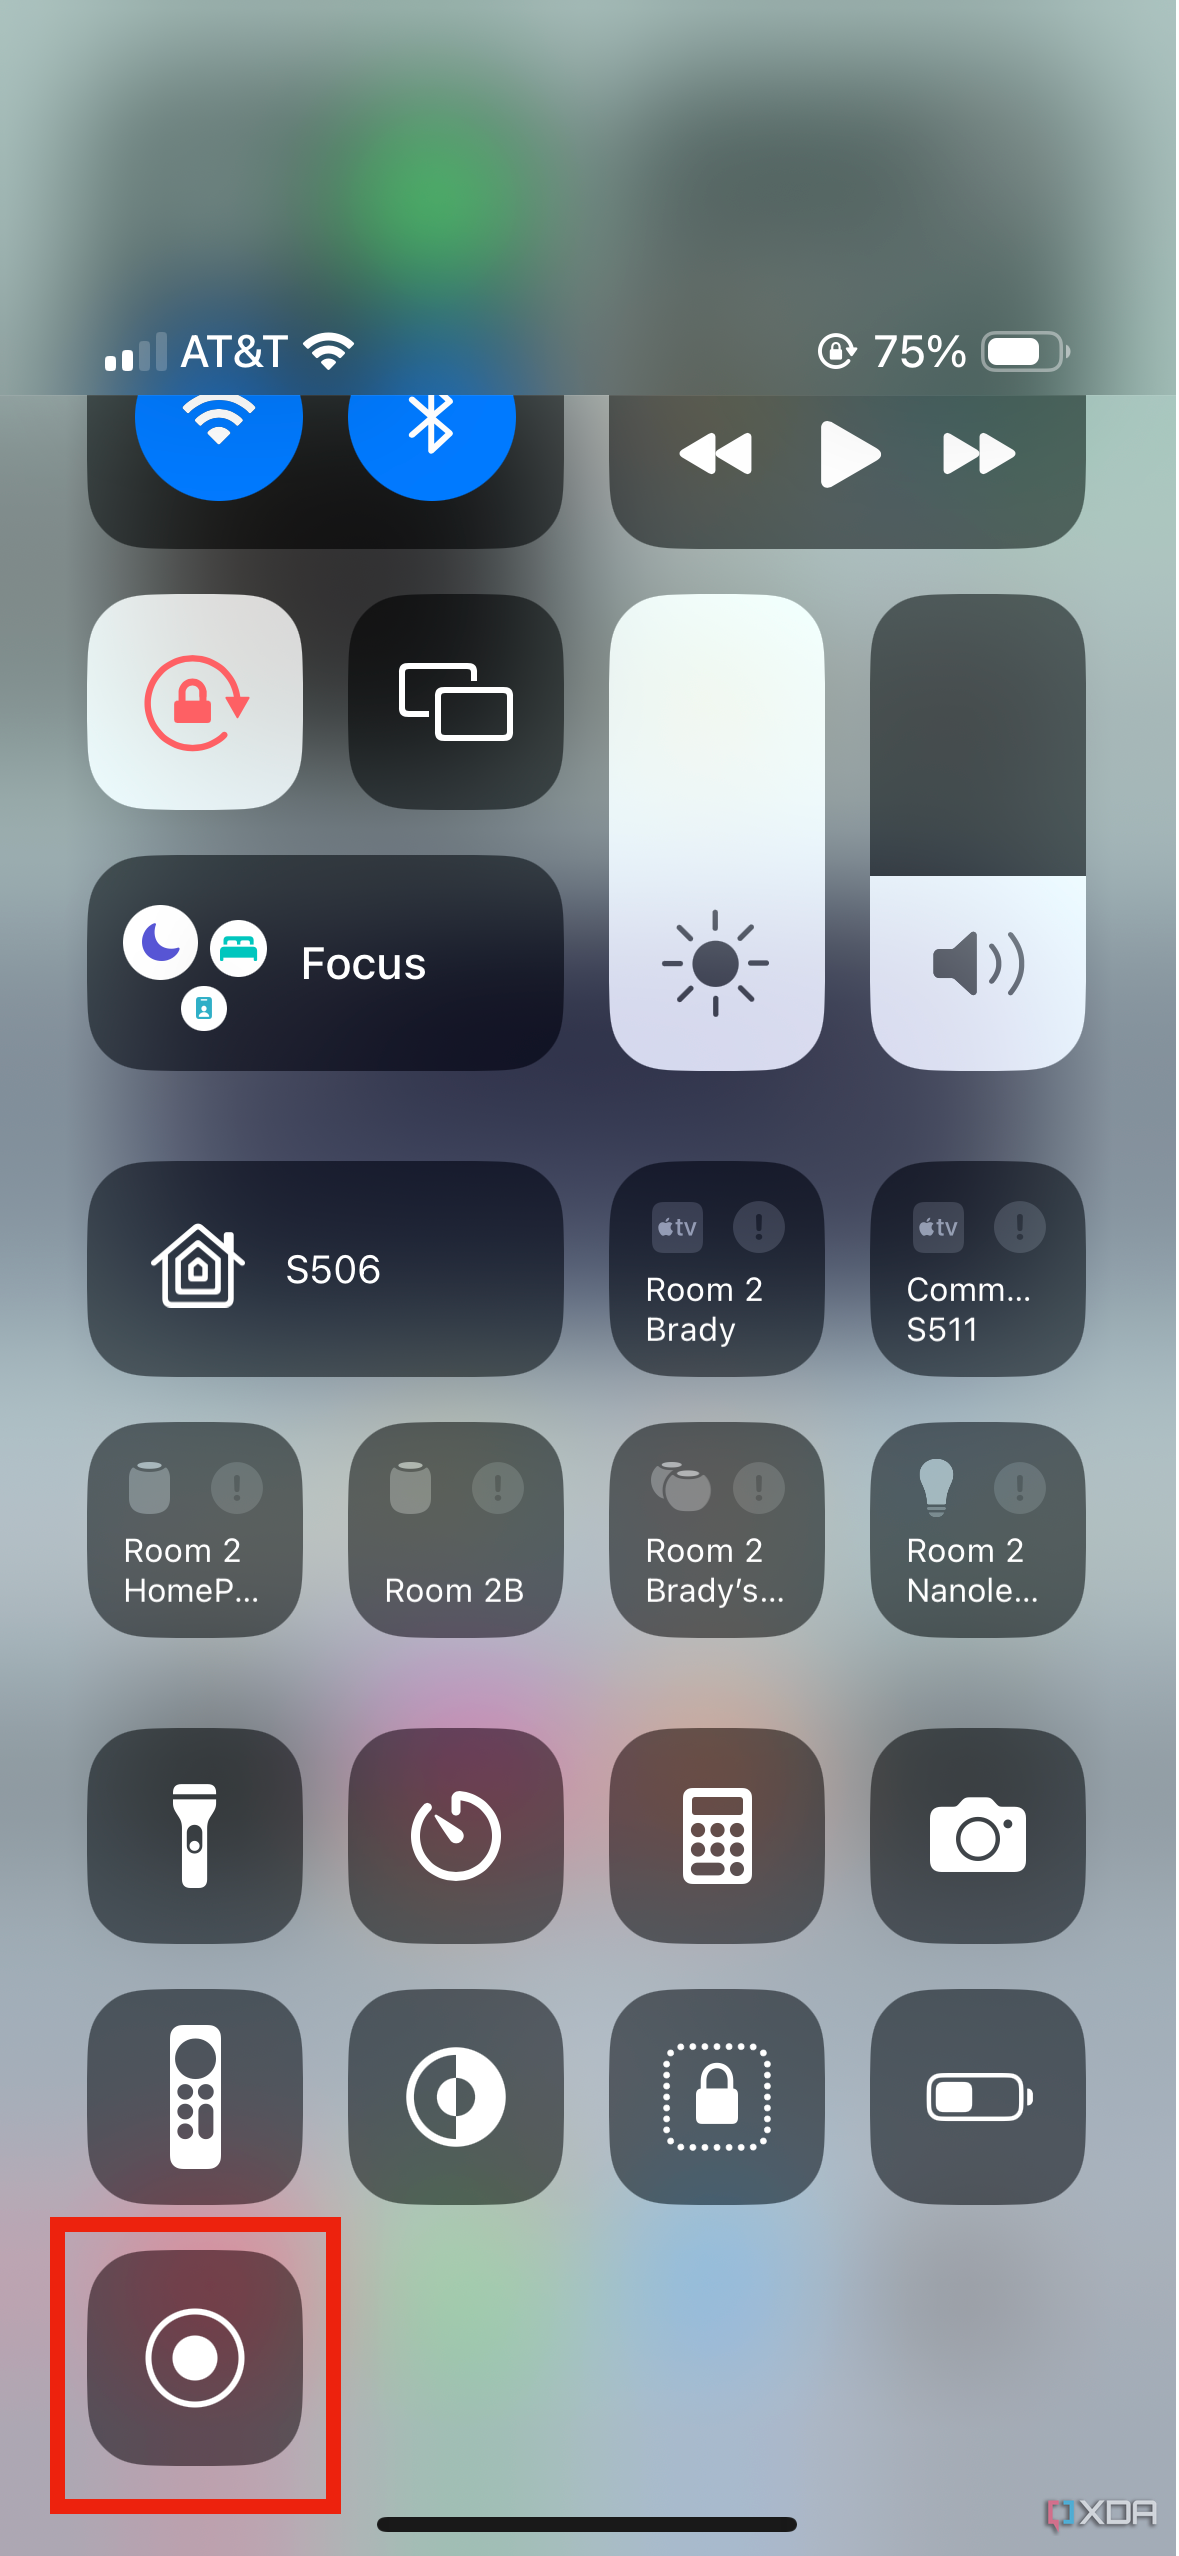
- Swipe down from the top right corner of your screen to open the Control Center.
-
Tap the Screen Recording icon in the grid.
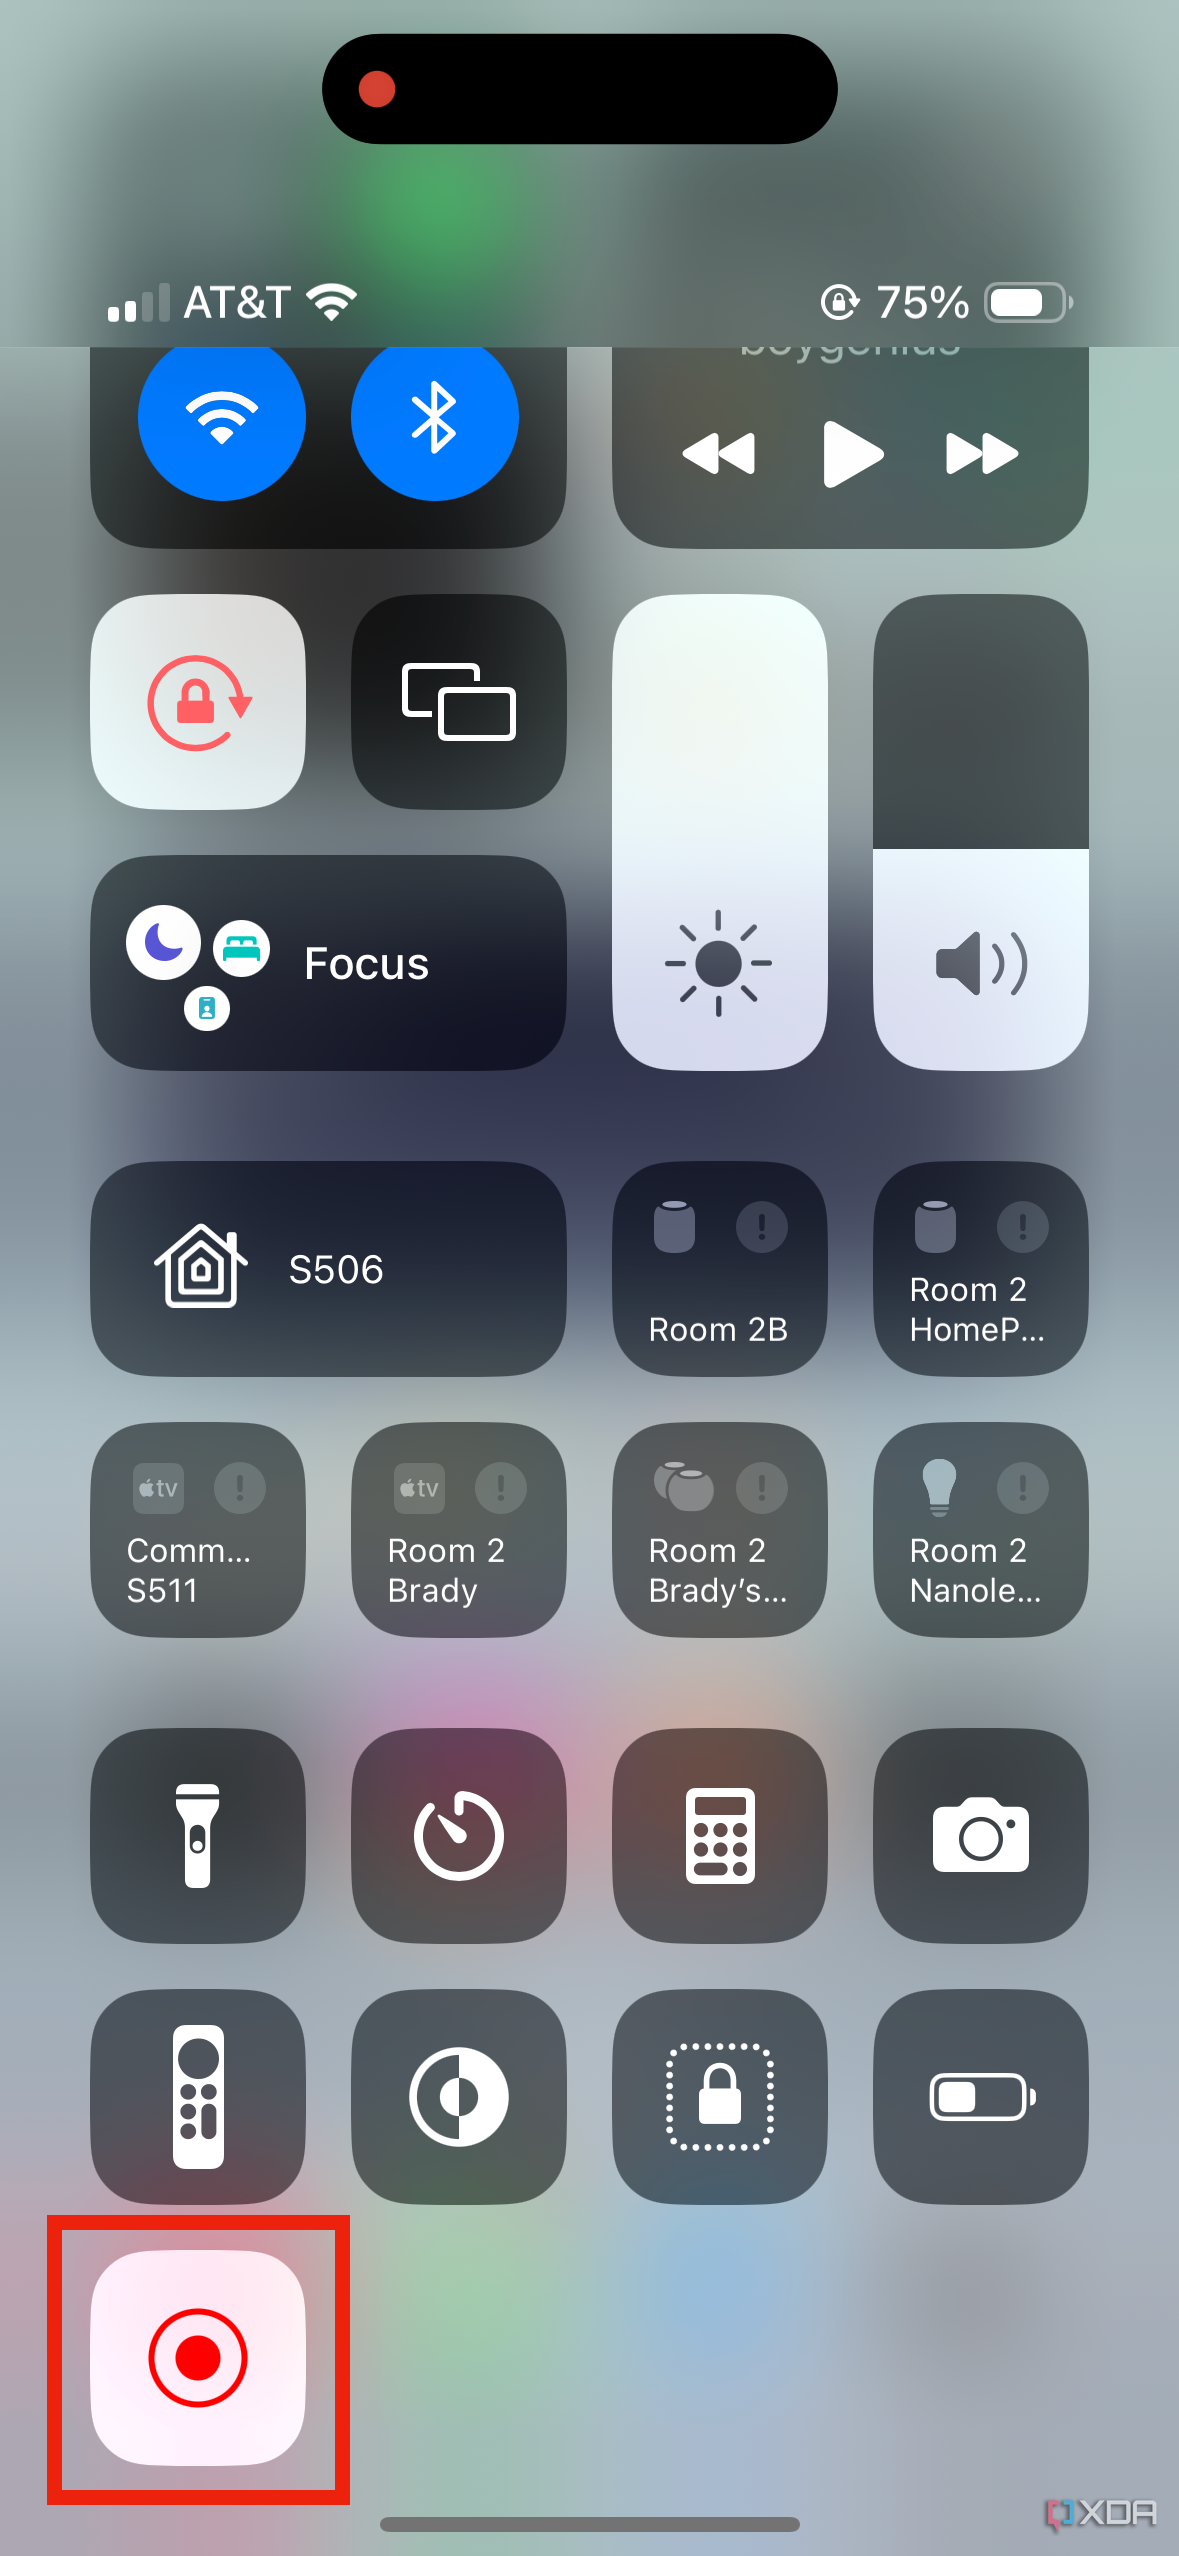
- A countdown will start before the screen recording begins.
- After you're done, open the Control Center and click on the toggle again to stop the recording process.
-
Tap the notification that appears to access the footage from the Photos app.
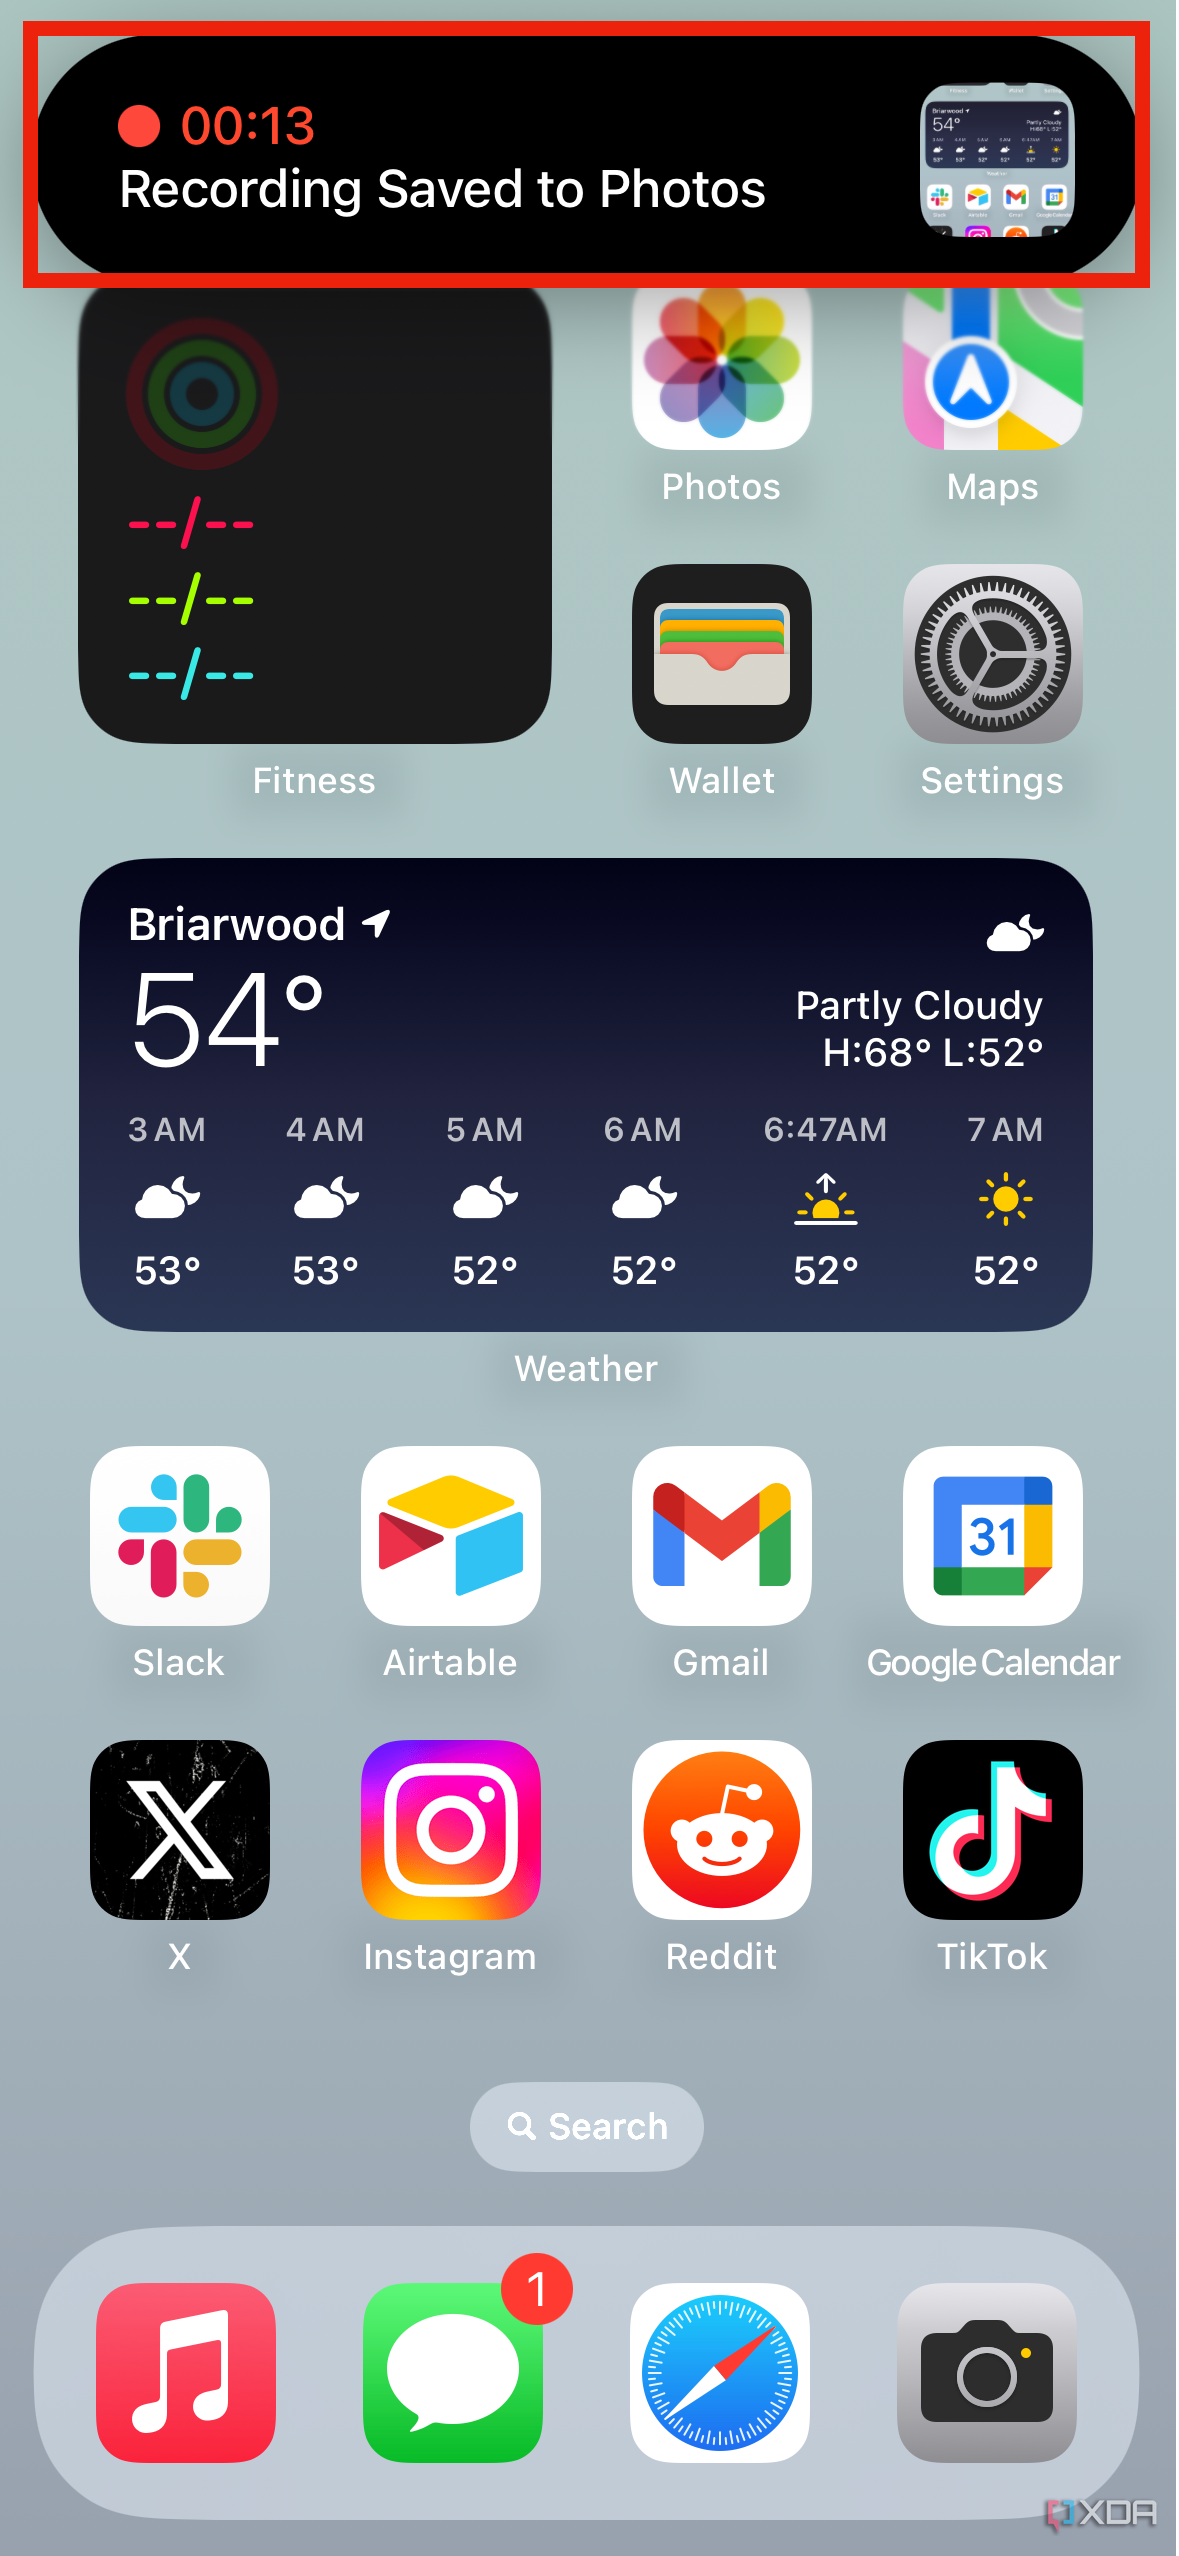


If your iPhone features the Dynamic Island, you can manage your screen recording by long pressing the Dynamic Island. Then, press the red square to end your screen recording. The Dynamic Island will then expand, showing a preview. Tap it to launch the Photos app and manage your screen recording.
Viewing your screenshots and screen recordings
After you've followed the above steps, you can successfully capture screenshots and screen recordings with your iPhone. You can access your screenshots and screen recordings just like any other type of photo or video in the Photos app. If you just want to see your screenshots and screen recordings, you can sort by media type in the Photos app as well. Previously, you needed to use a third-party app to screen record on an iPhone. Now, you can take screenshots and screen recordings with the standard version of iOS, including the latest iOS 17.