Windows has allowed you to create different accounts for multiple users for a long time, and it's a great way to ensure family members can use the same computer without risking losing data. Each user gets their own space, so everyone can feel like they have their own PC. In Windows 11 (as well as Windows 10), it's also possible to specifically create a child account, so you can let your kids use your PC while also keeping them safe and overseeing their activities.
Child accounts on Windows 11 tie into the Microsoft Family app, so it's more than just a separate user account. You can manage certain settings for their Microsoft account, like spending, screen time limits, and web filters. That also means you need a Microsoft account of your own to create a child account for someone else. You should be logged in to yours by default. With that in mind, let's get into how to create and manage a child account.
How to create a child account in Windows 11
Setting up a child account in Windows 11 can take some time, but it's not a terribly difficult process. Here's what you need to do:
- Open the Settings app on your PC.
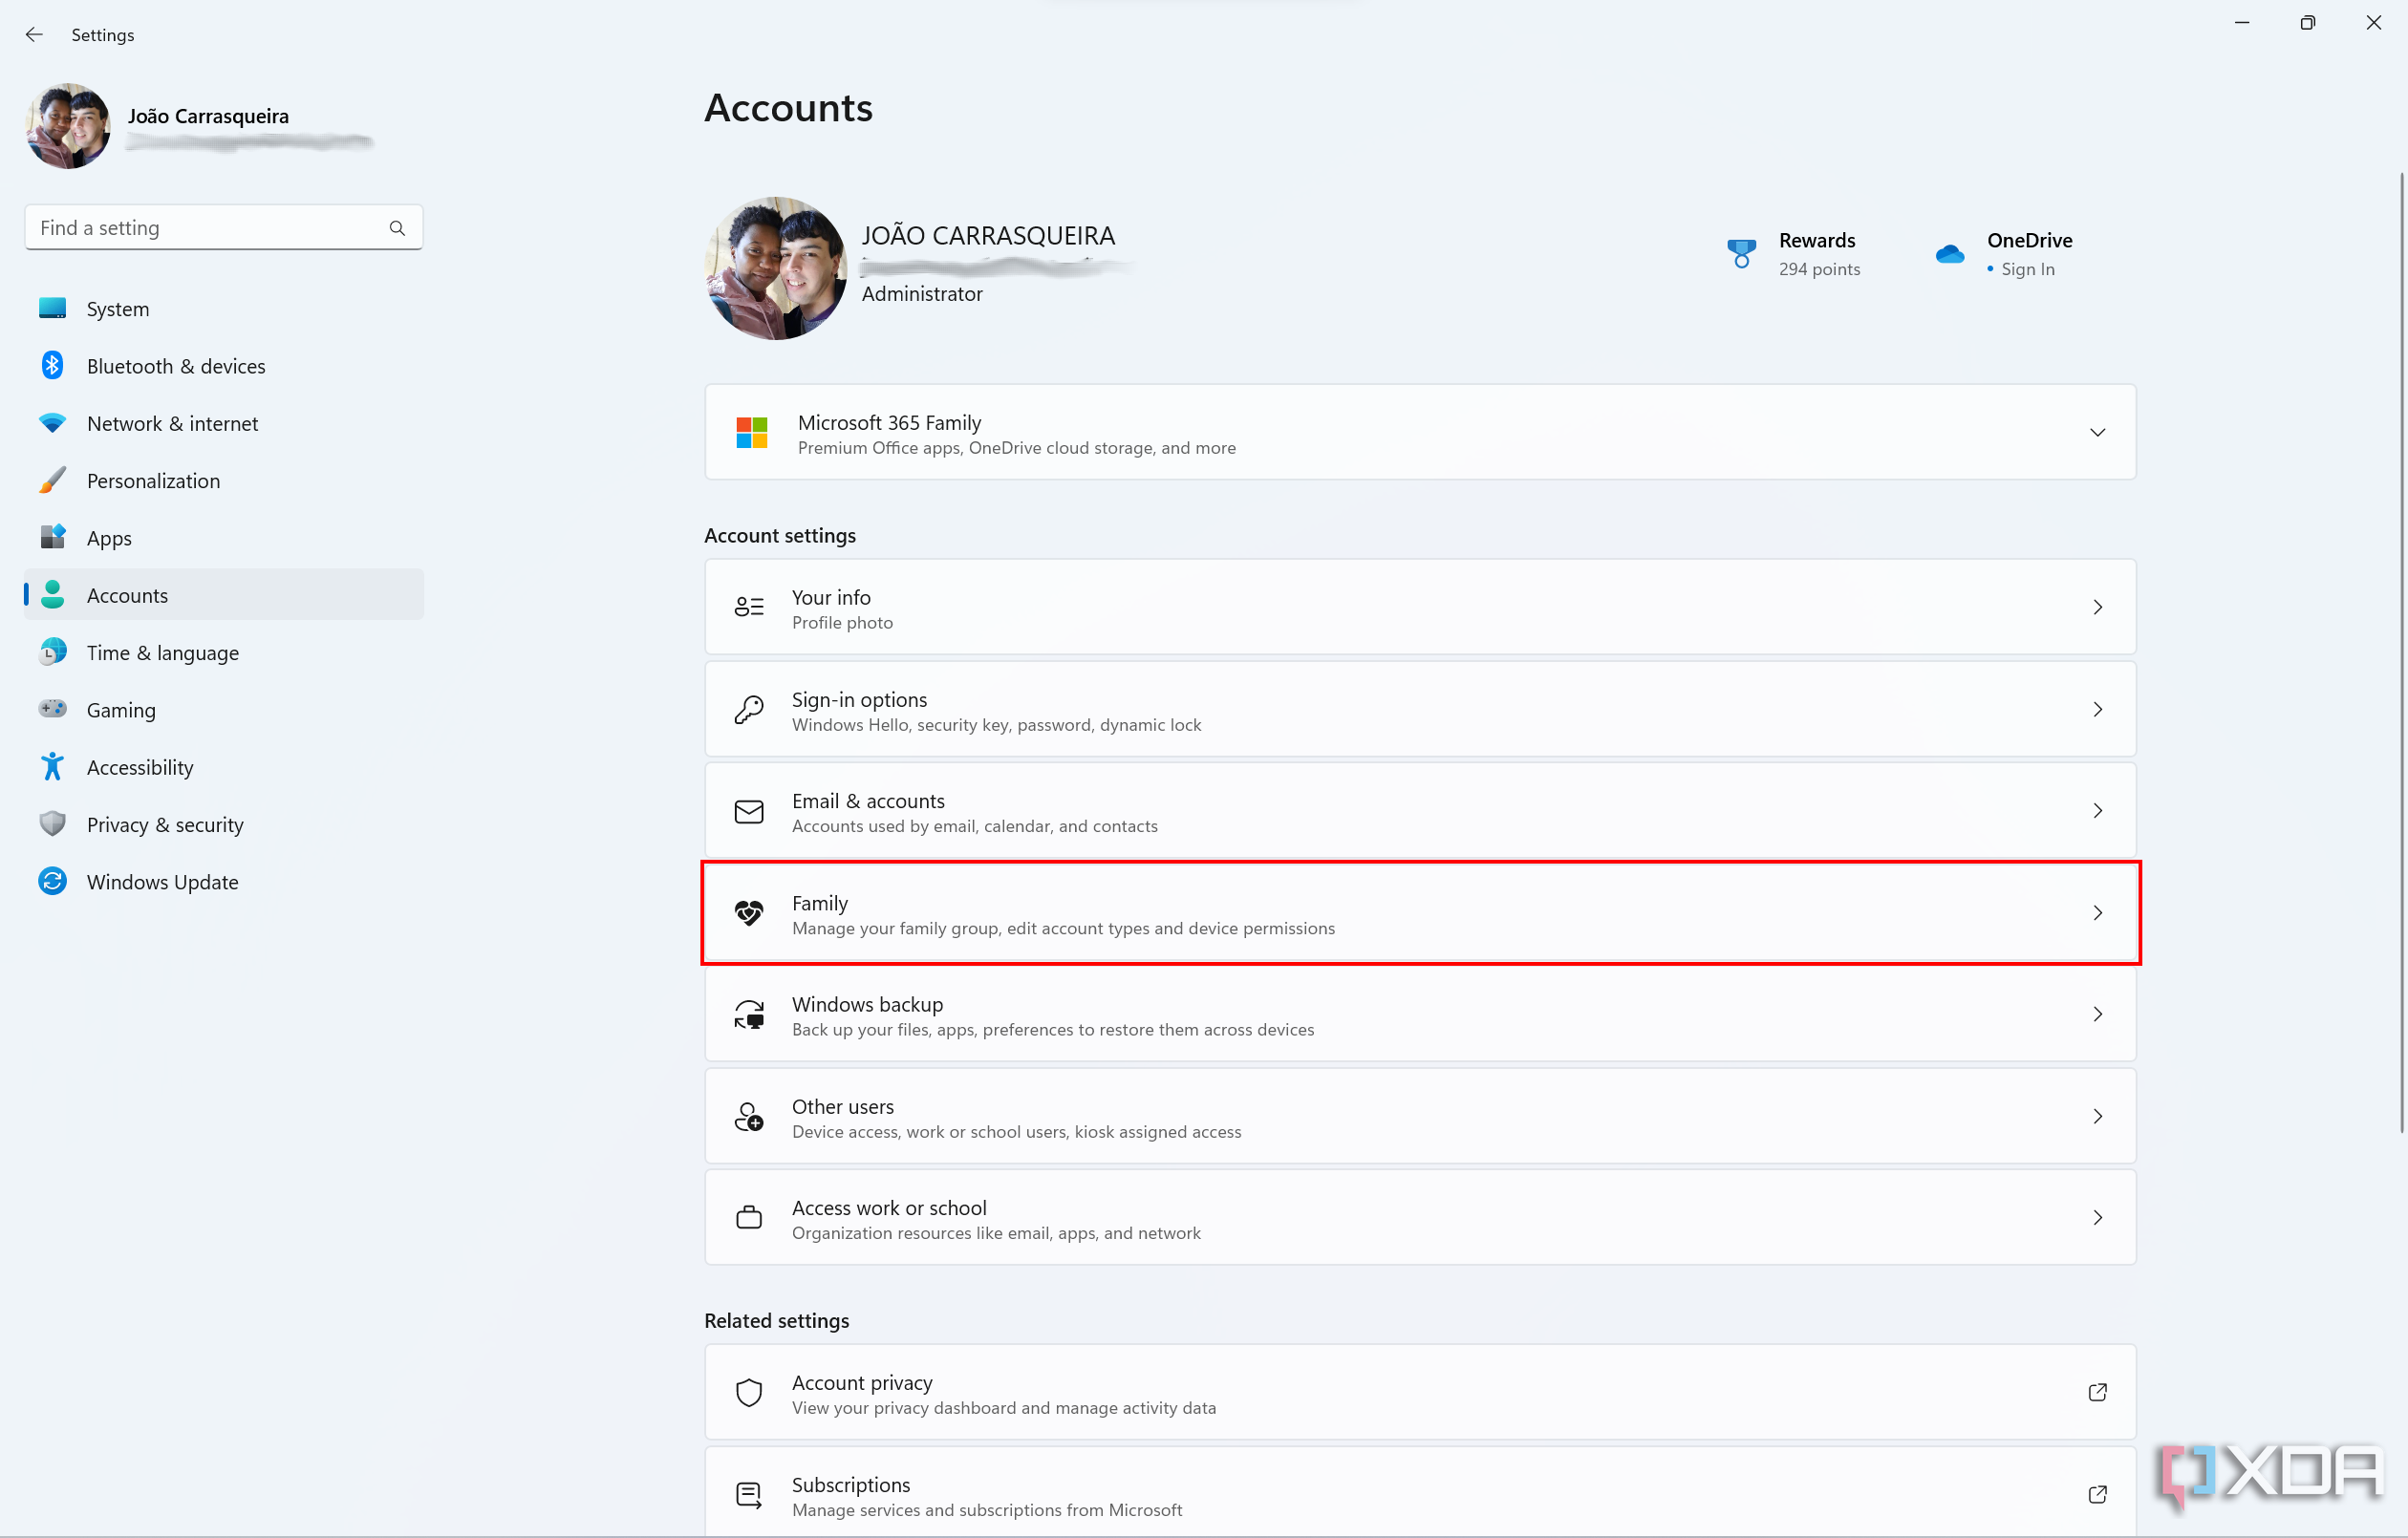
- Choose the Accounts section from the menu on the left side.
-
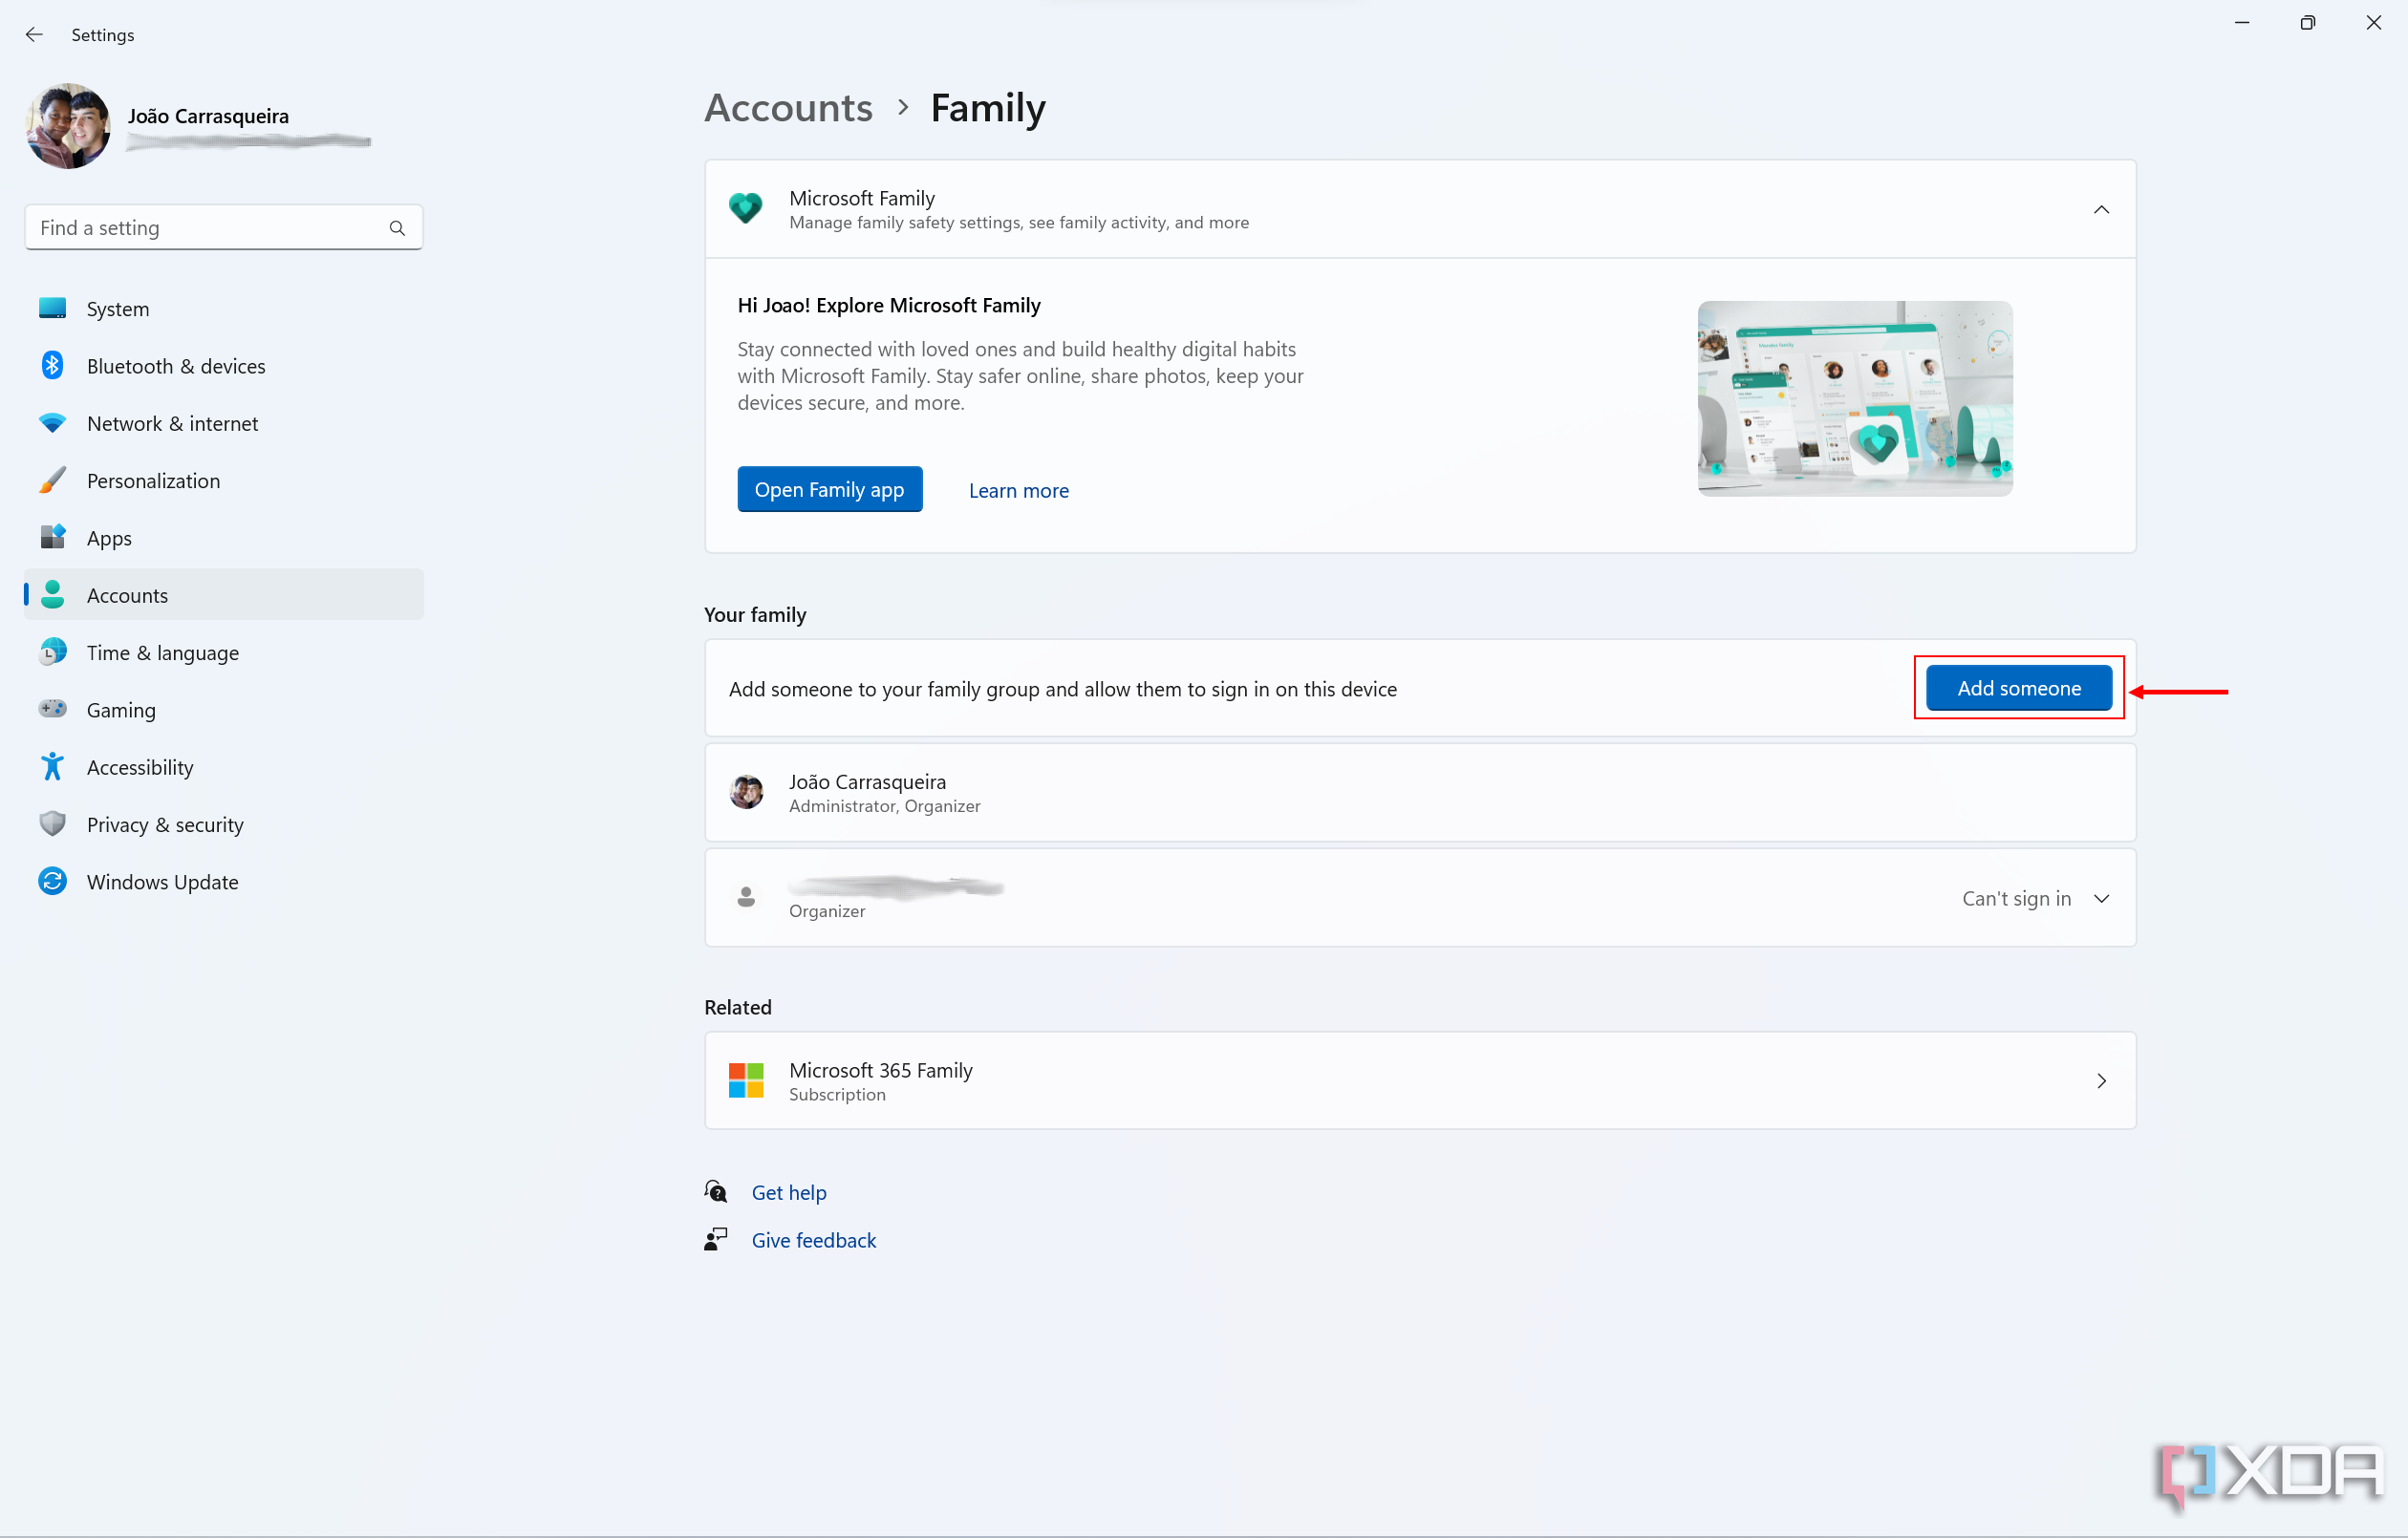
Click Family.
-
Click Add someone.
-
You'll be prompted to enter an email address if your child has one (it has to be a Microsoft account), or you can create a new one, which is what we'll do here.
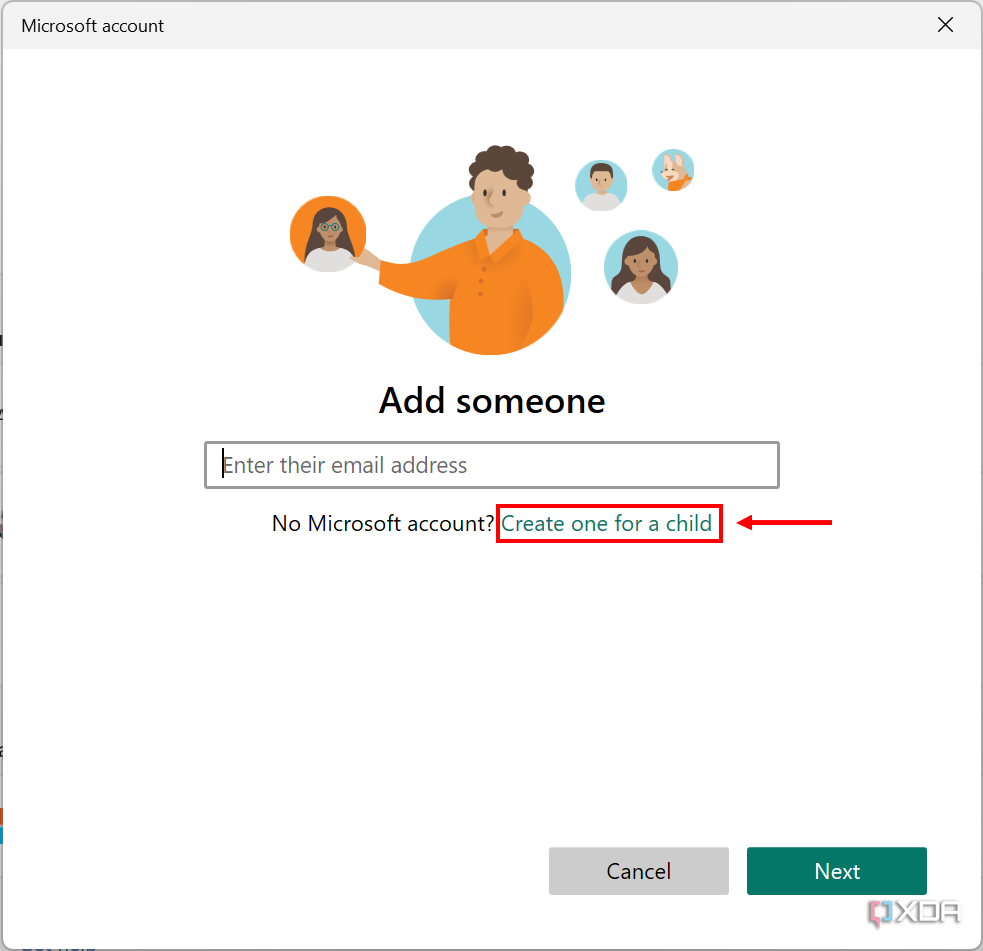
- To create a new email address, start by entering your child's first and last name
-
Enter your country and your child's birth date.
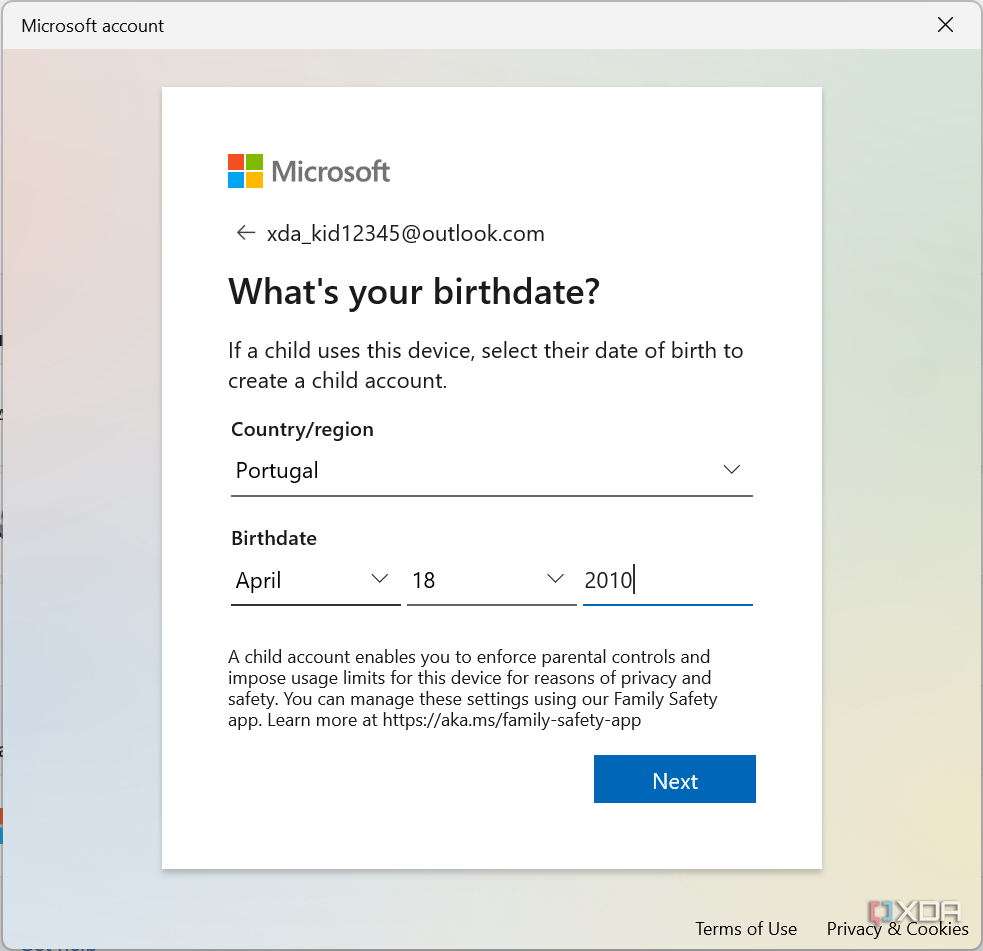
Depending on the child's age, the process may vary from here. For younger children, you'll need to complete the steps below, but for older kids, the initial setup process ends here.
- For younger children, you'll then have to sign into the account you just created using their email and password.
-
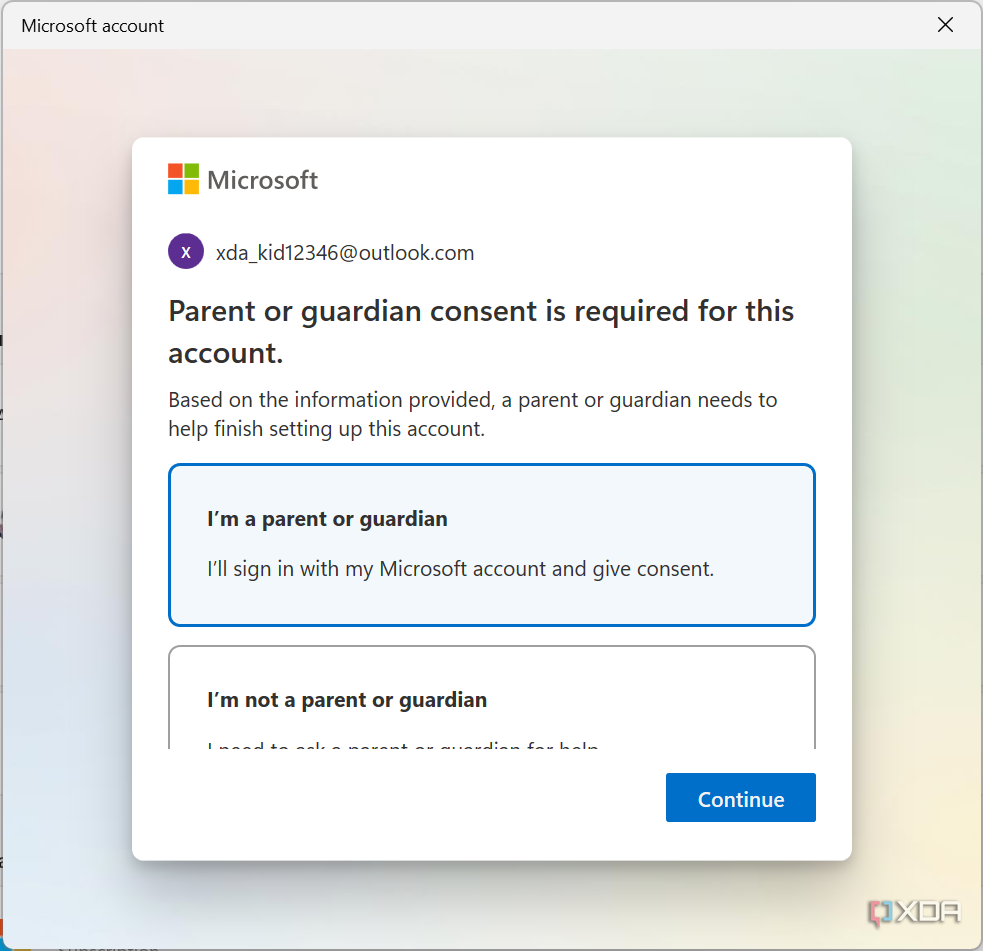
Confirm that you're the child's parent or legal guardian and click Continue.
-
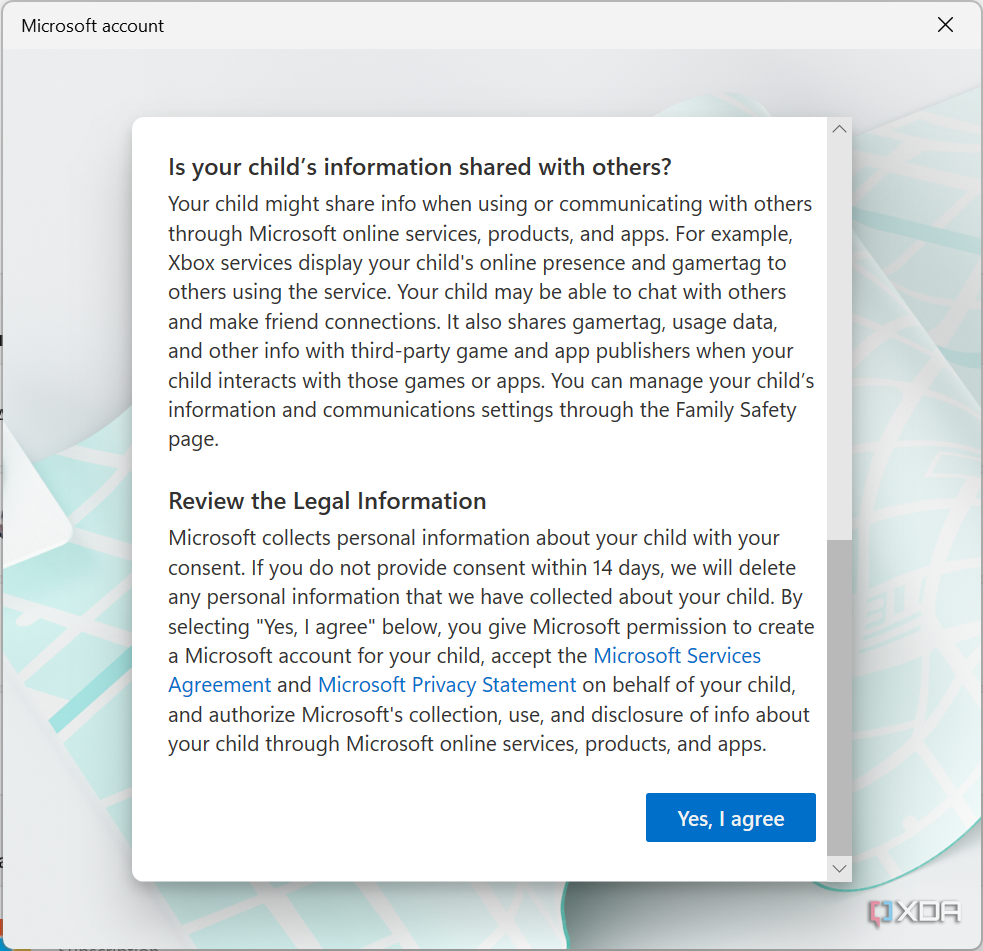
Sign into your Microsoft account and confirm that you consent to create the account by clicking Yes, I agree.
-
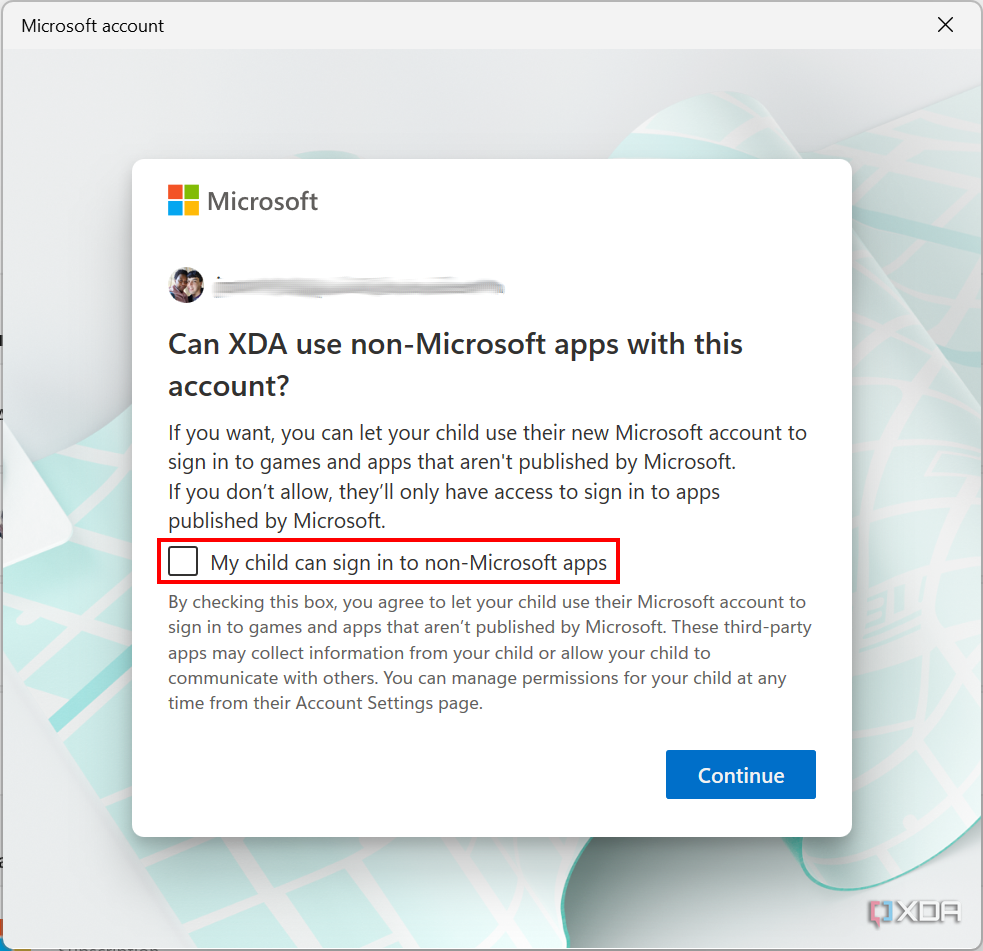
Confirm whether you want your child to be able to sign into non-Microsoft apps, and then click Continue.
-
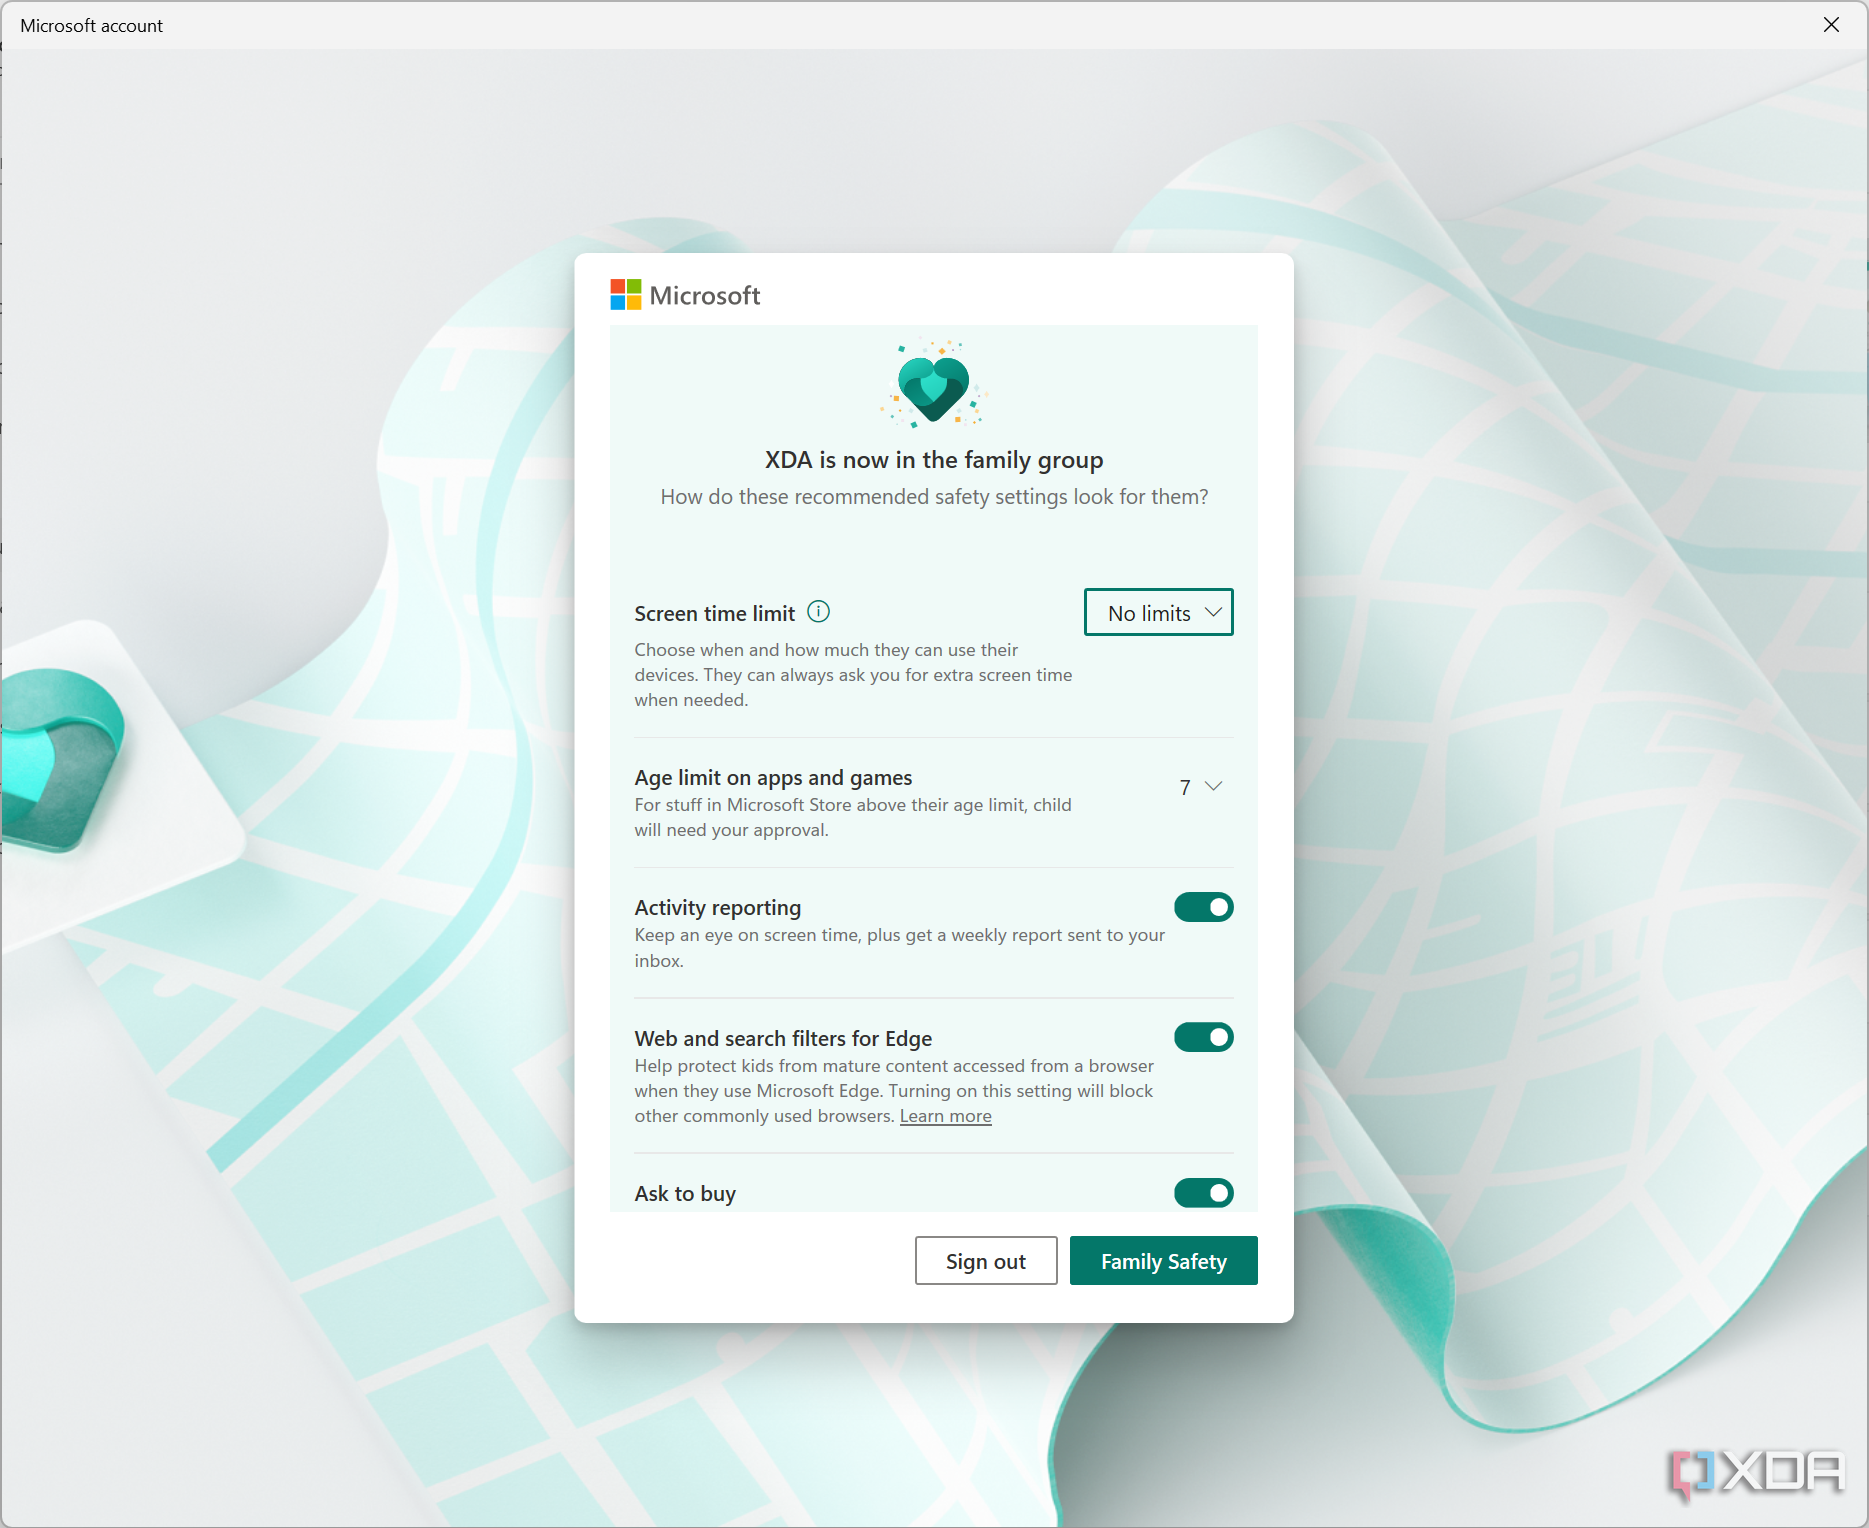
Finally, confirm the settings you want for the child account. You can create screen time limits, set age restrictions for apps, and enable features like activity reporting and web filters.
- Click Sign out to close the window and save your settings.


With the account created, you'll then have to sign into your child's account on the PC to finish setting it up. You can press the Windows key + L on your keyboard to go to the lock screen, and your child's account will be on the left side. Select it to sign in and set it up. This will be identical to when you set up your own account for the first time but simplified. For example, you can set up a PIN or Windows Hello to sign in.
Manage your child's settings with Microsoft Family
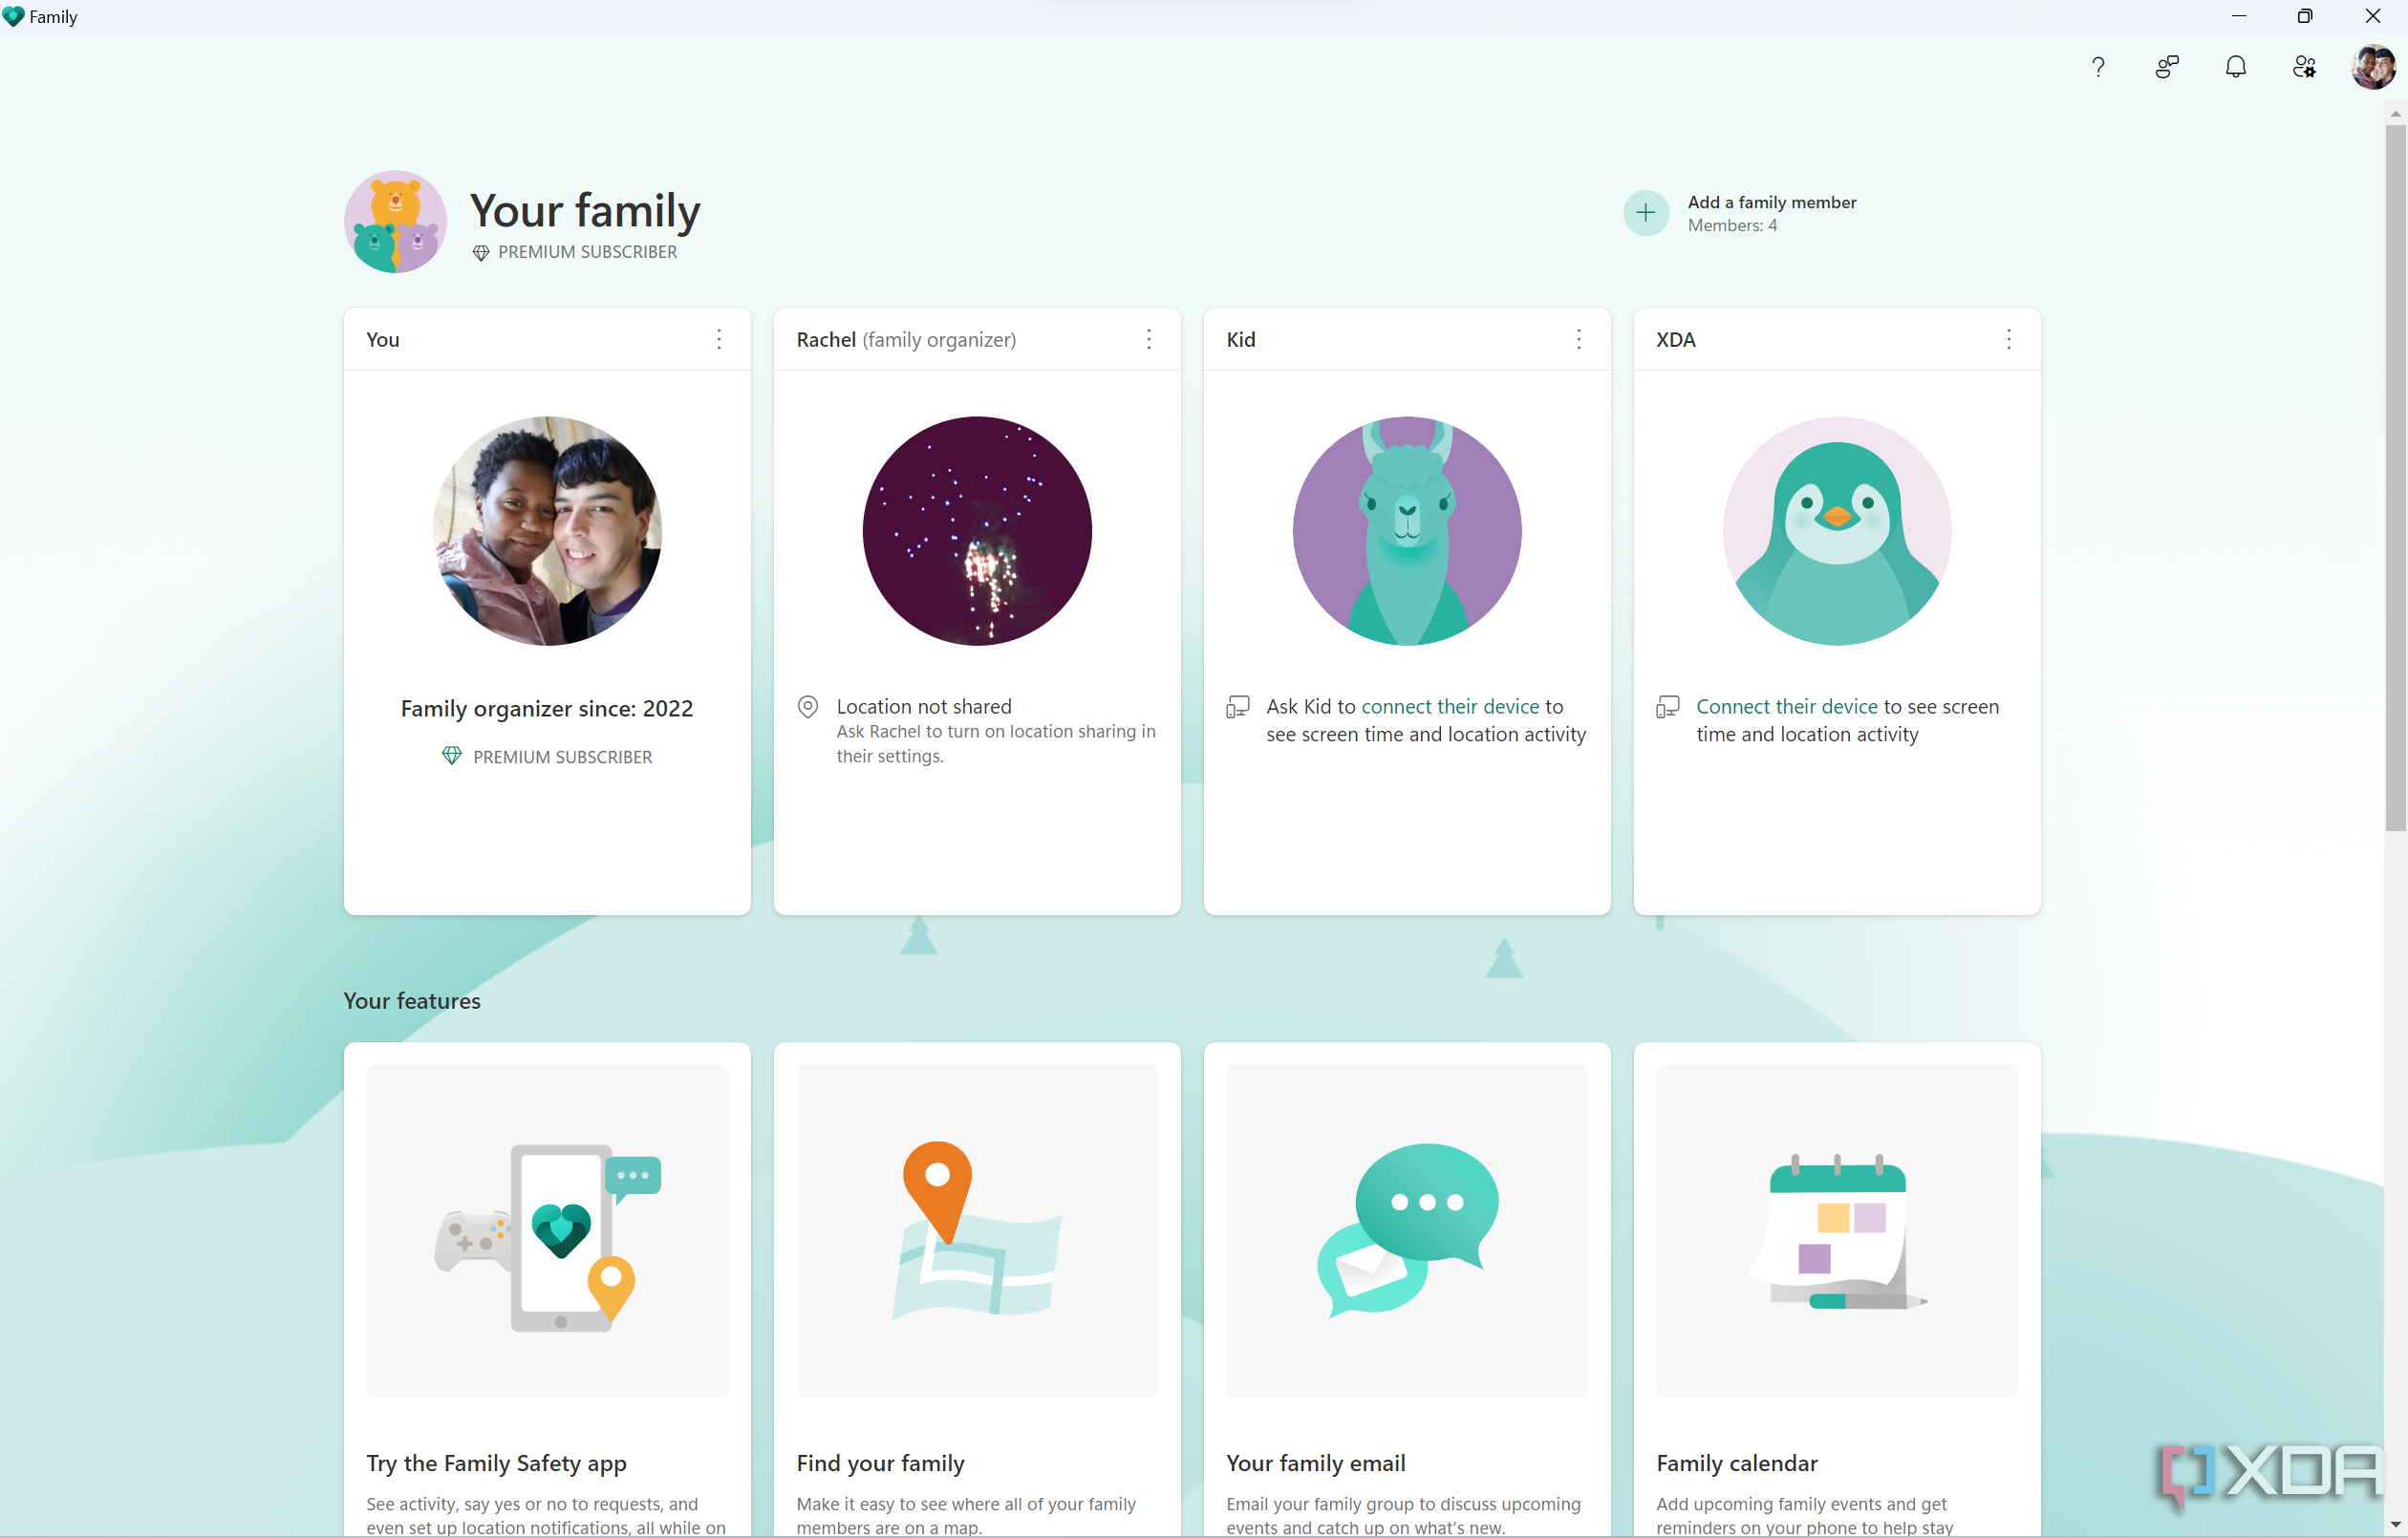
With Microsoft Family Safety, you can manage a wide range of settings for your child's account. You can use the new Family app for Windows 11 or go to Microsoft's family group website to see your family and change settings for each account. You can also manage these settings with the Microsoft Family app for Android or iOS. Here's a quick rundown of how you can manage a child's account with Microsoft Family Safety:
-
Launch the Family app on your PC (you can download it from the Microsoft Store). Alternatively, visit Microsoft's Family Safety website to access these settings.
-
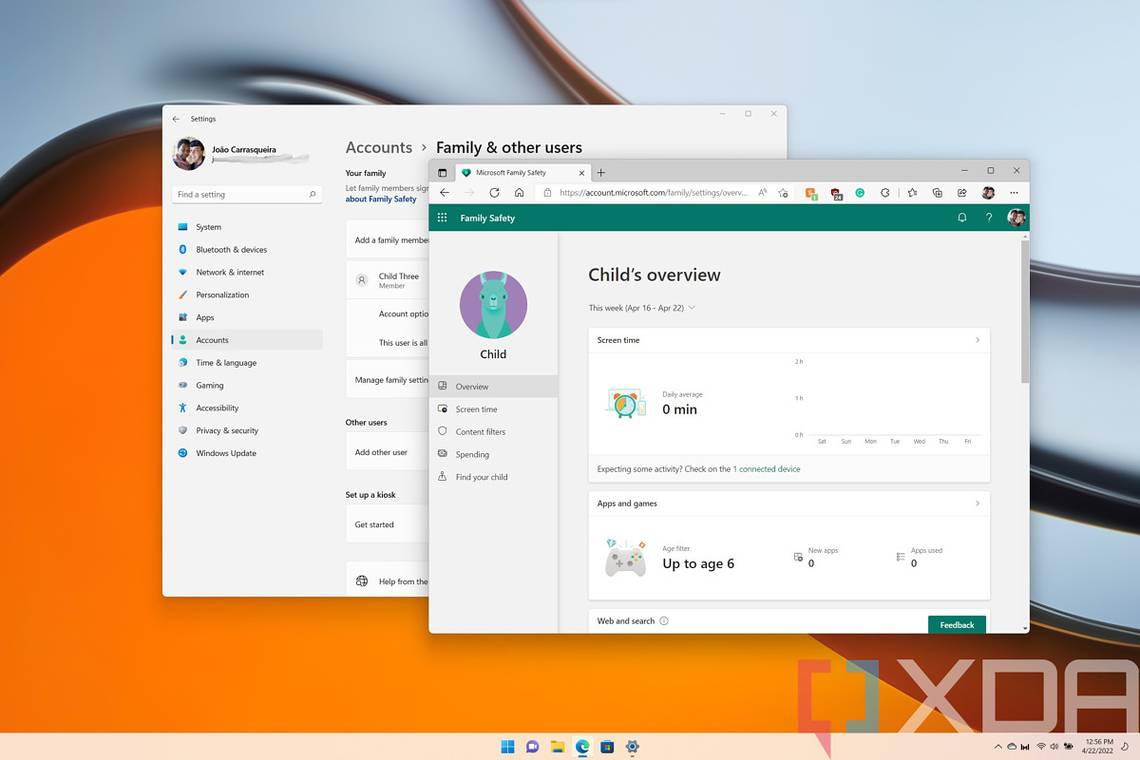
Click on your child's profile picture to see their current settings. This page shows a rundown of all the settings as well as your child's activity.
-
You can use the side menu on the left to change specific settings:
-
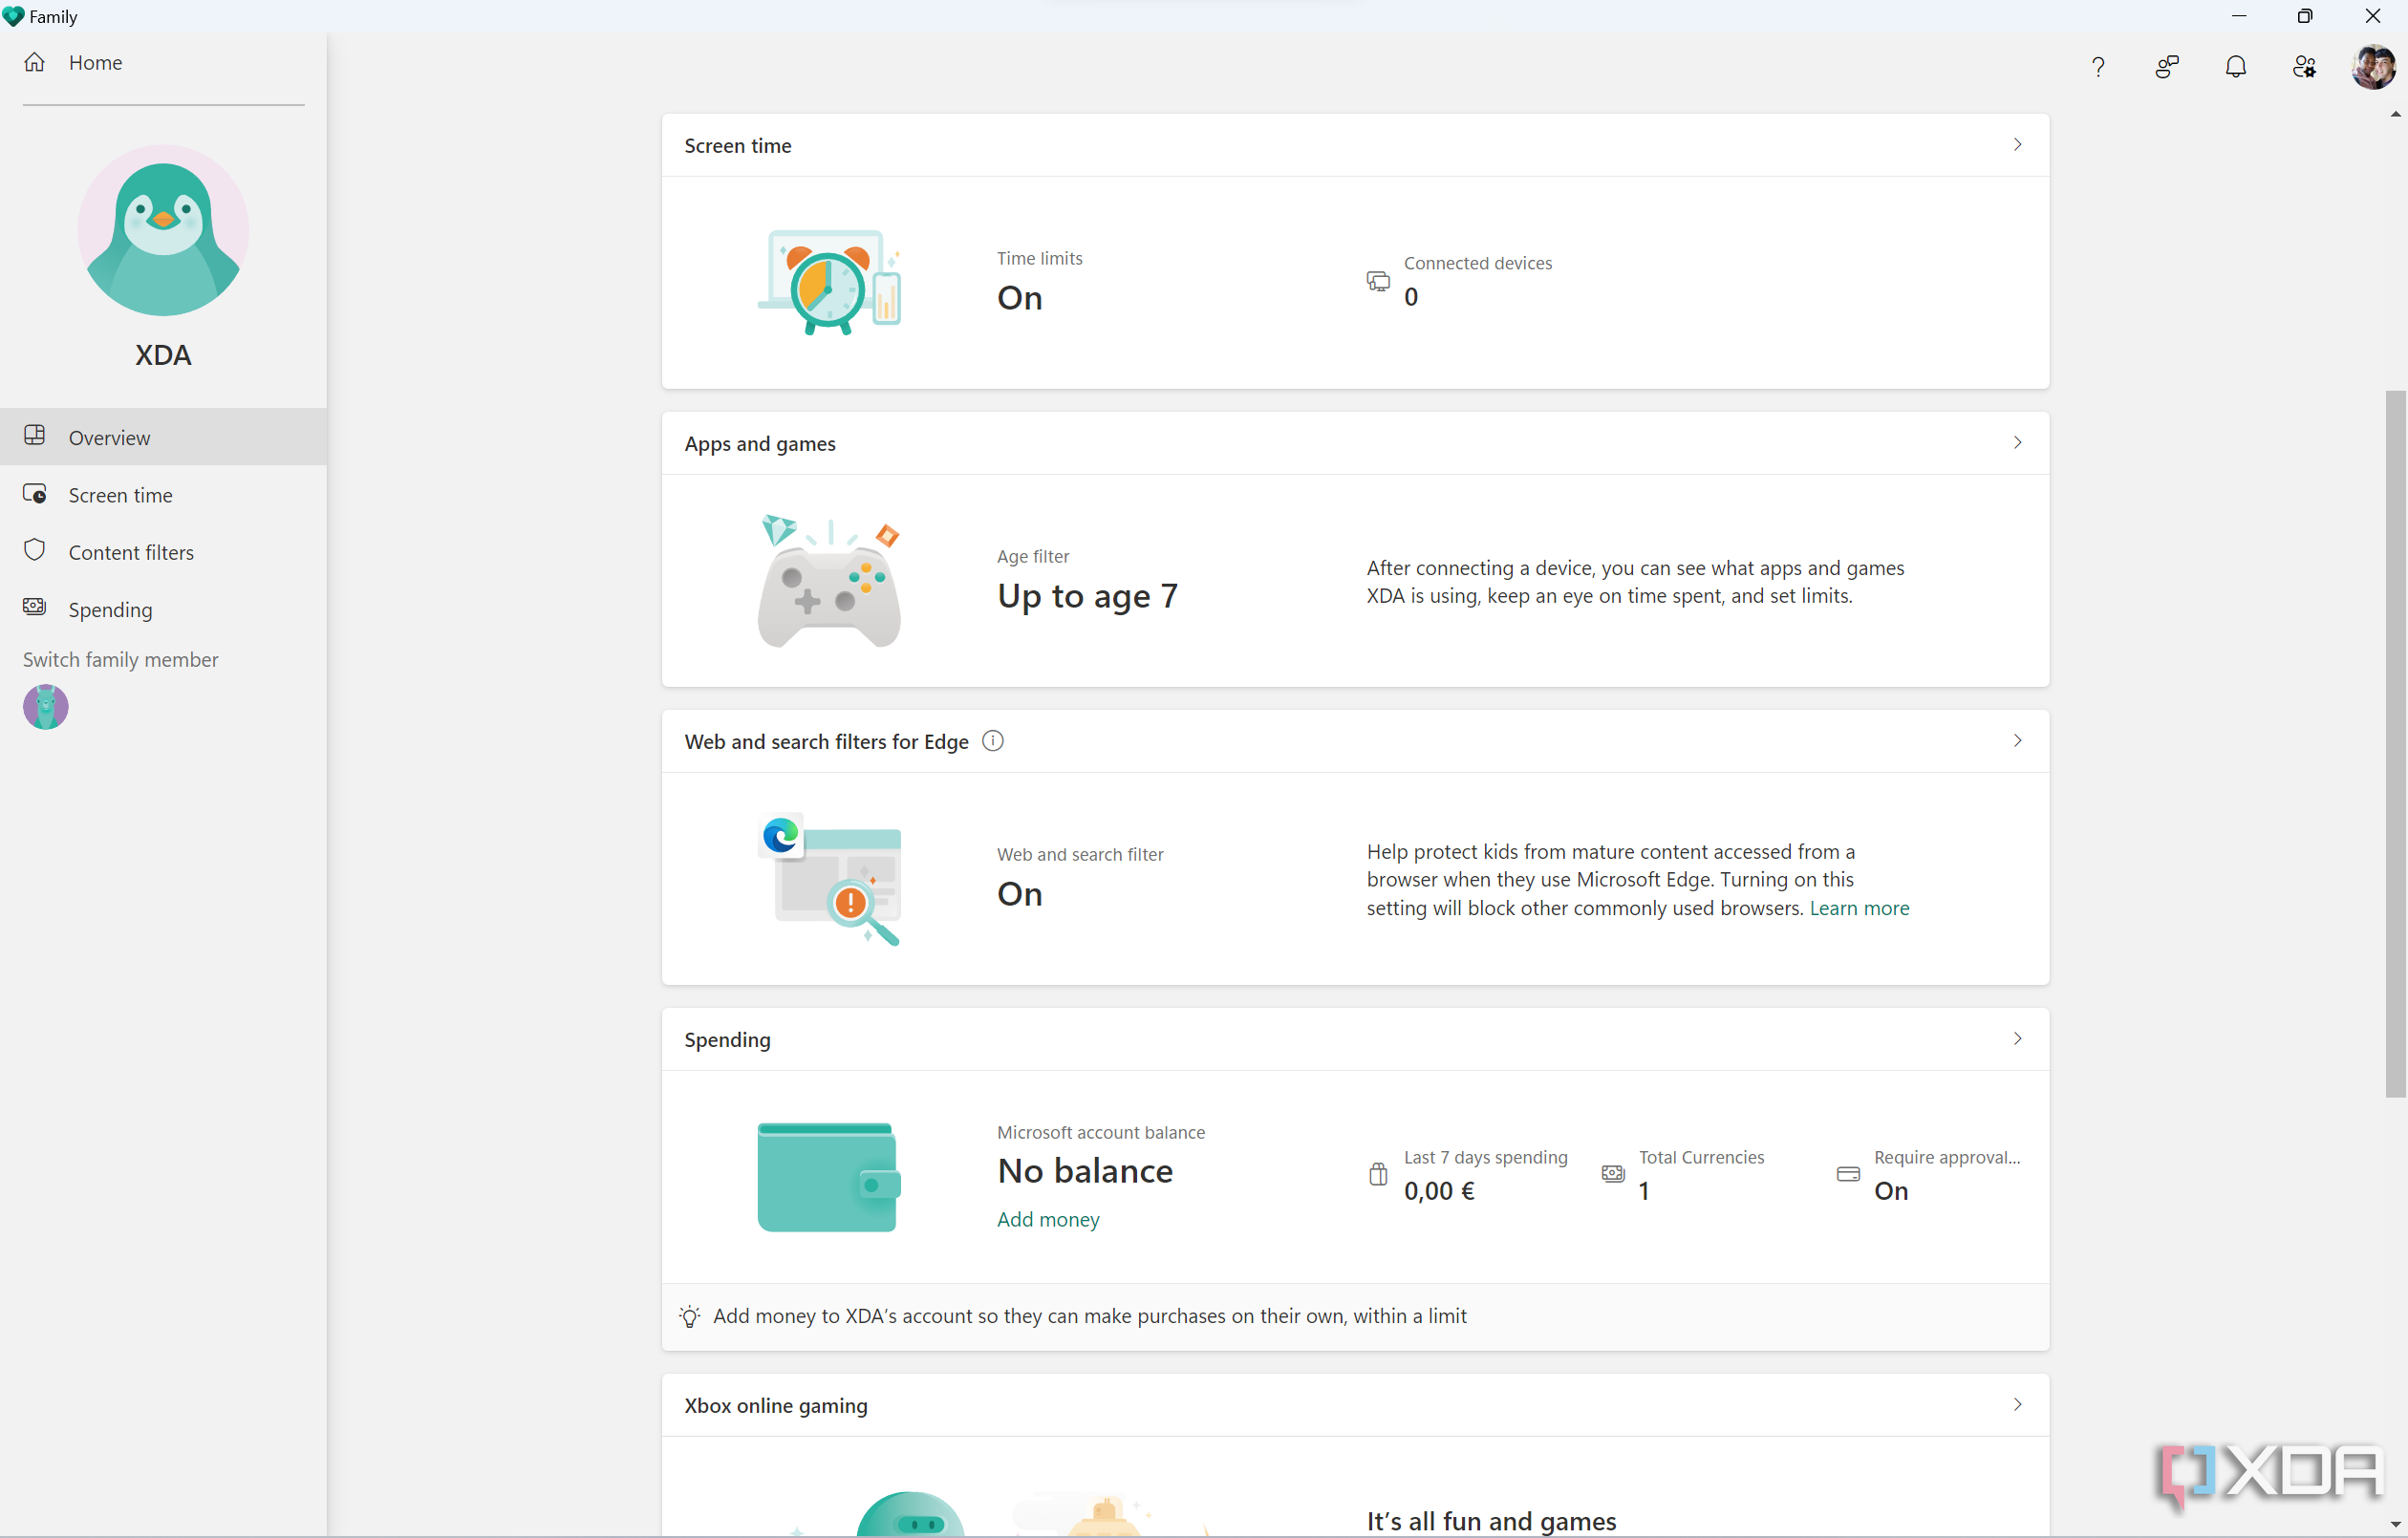
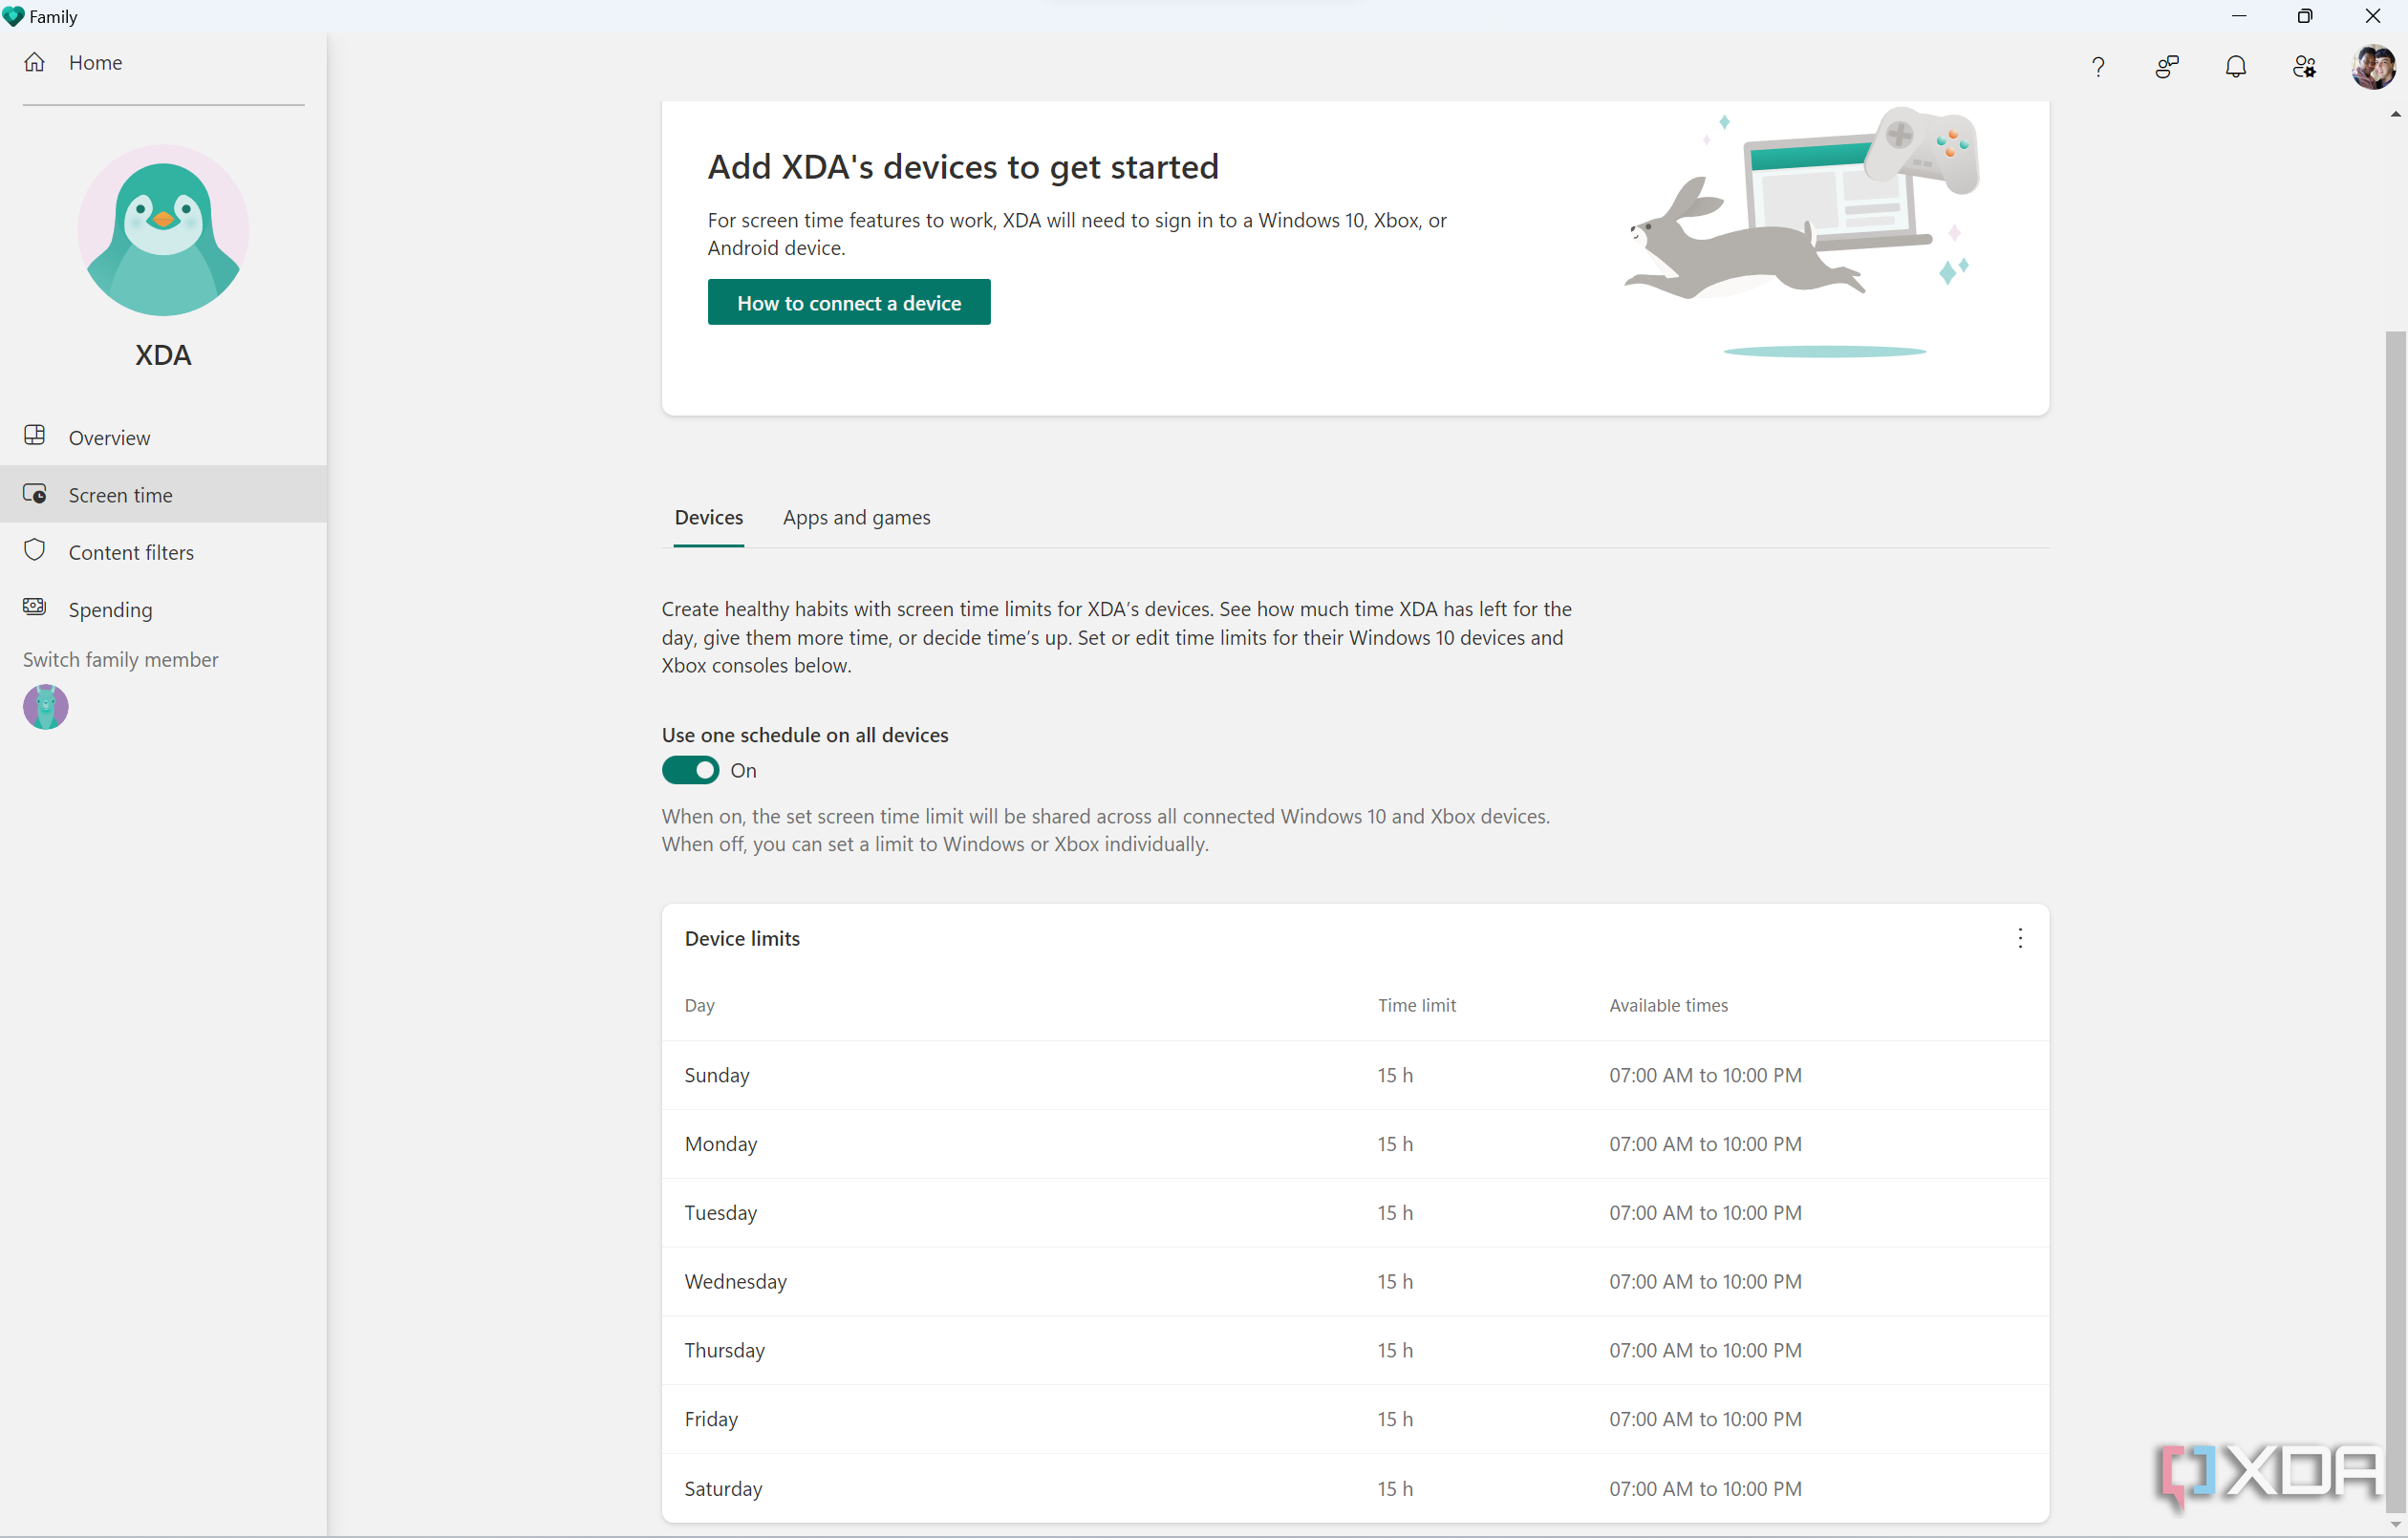
The Screen time section lets you see how much time your child has spent using their devices. You can see a breakdown per device (if they have more than one) as well as per app. You can also set time limits for specific apps as well as general screen time limits for each device, or apply the same time limits to all devices in one go. This includes Windows PCs, Xbox, and Android phones with the Microsoft Family Safety app.
-
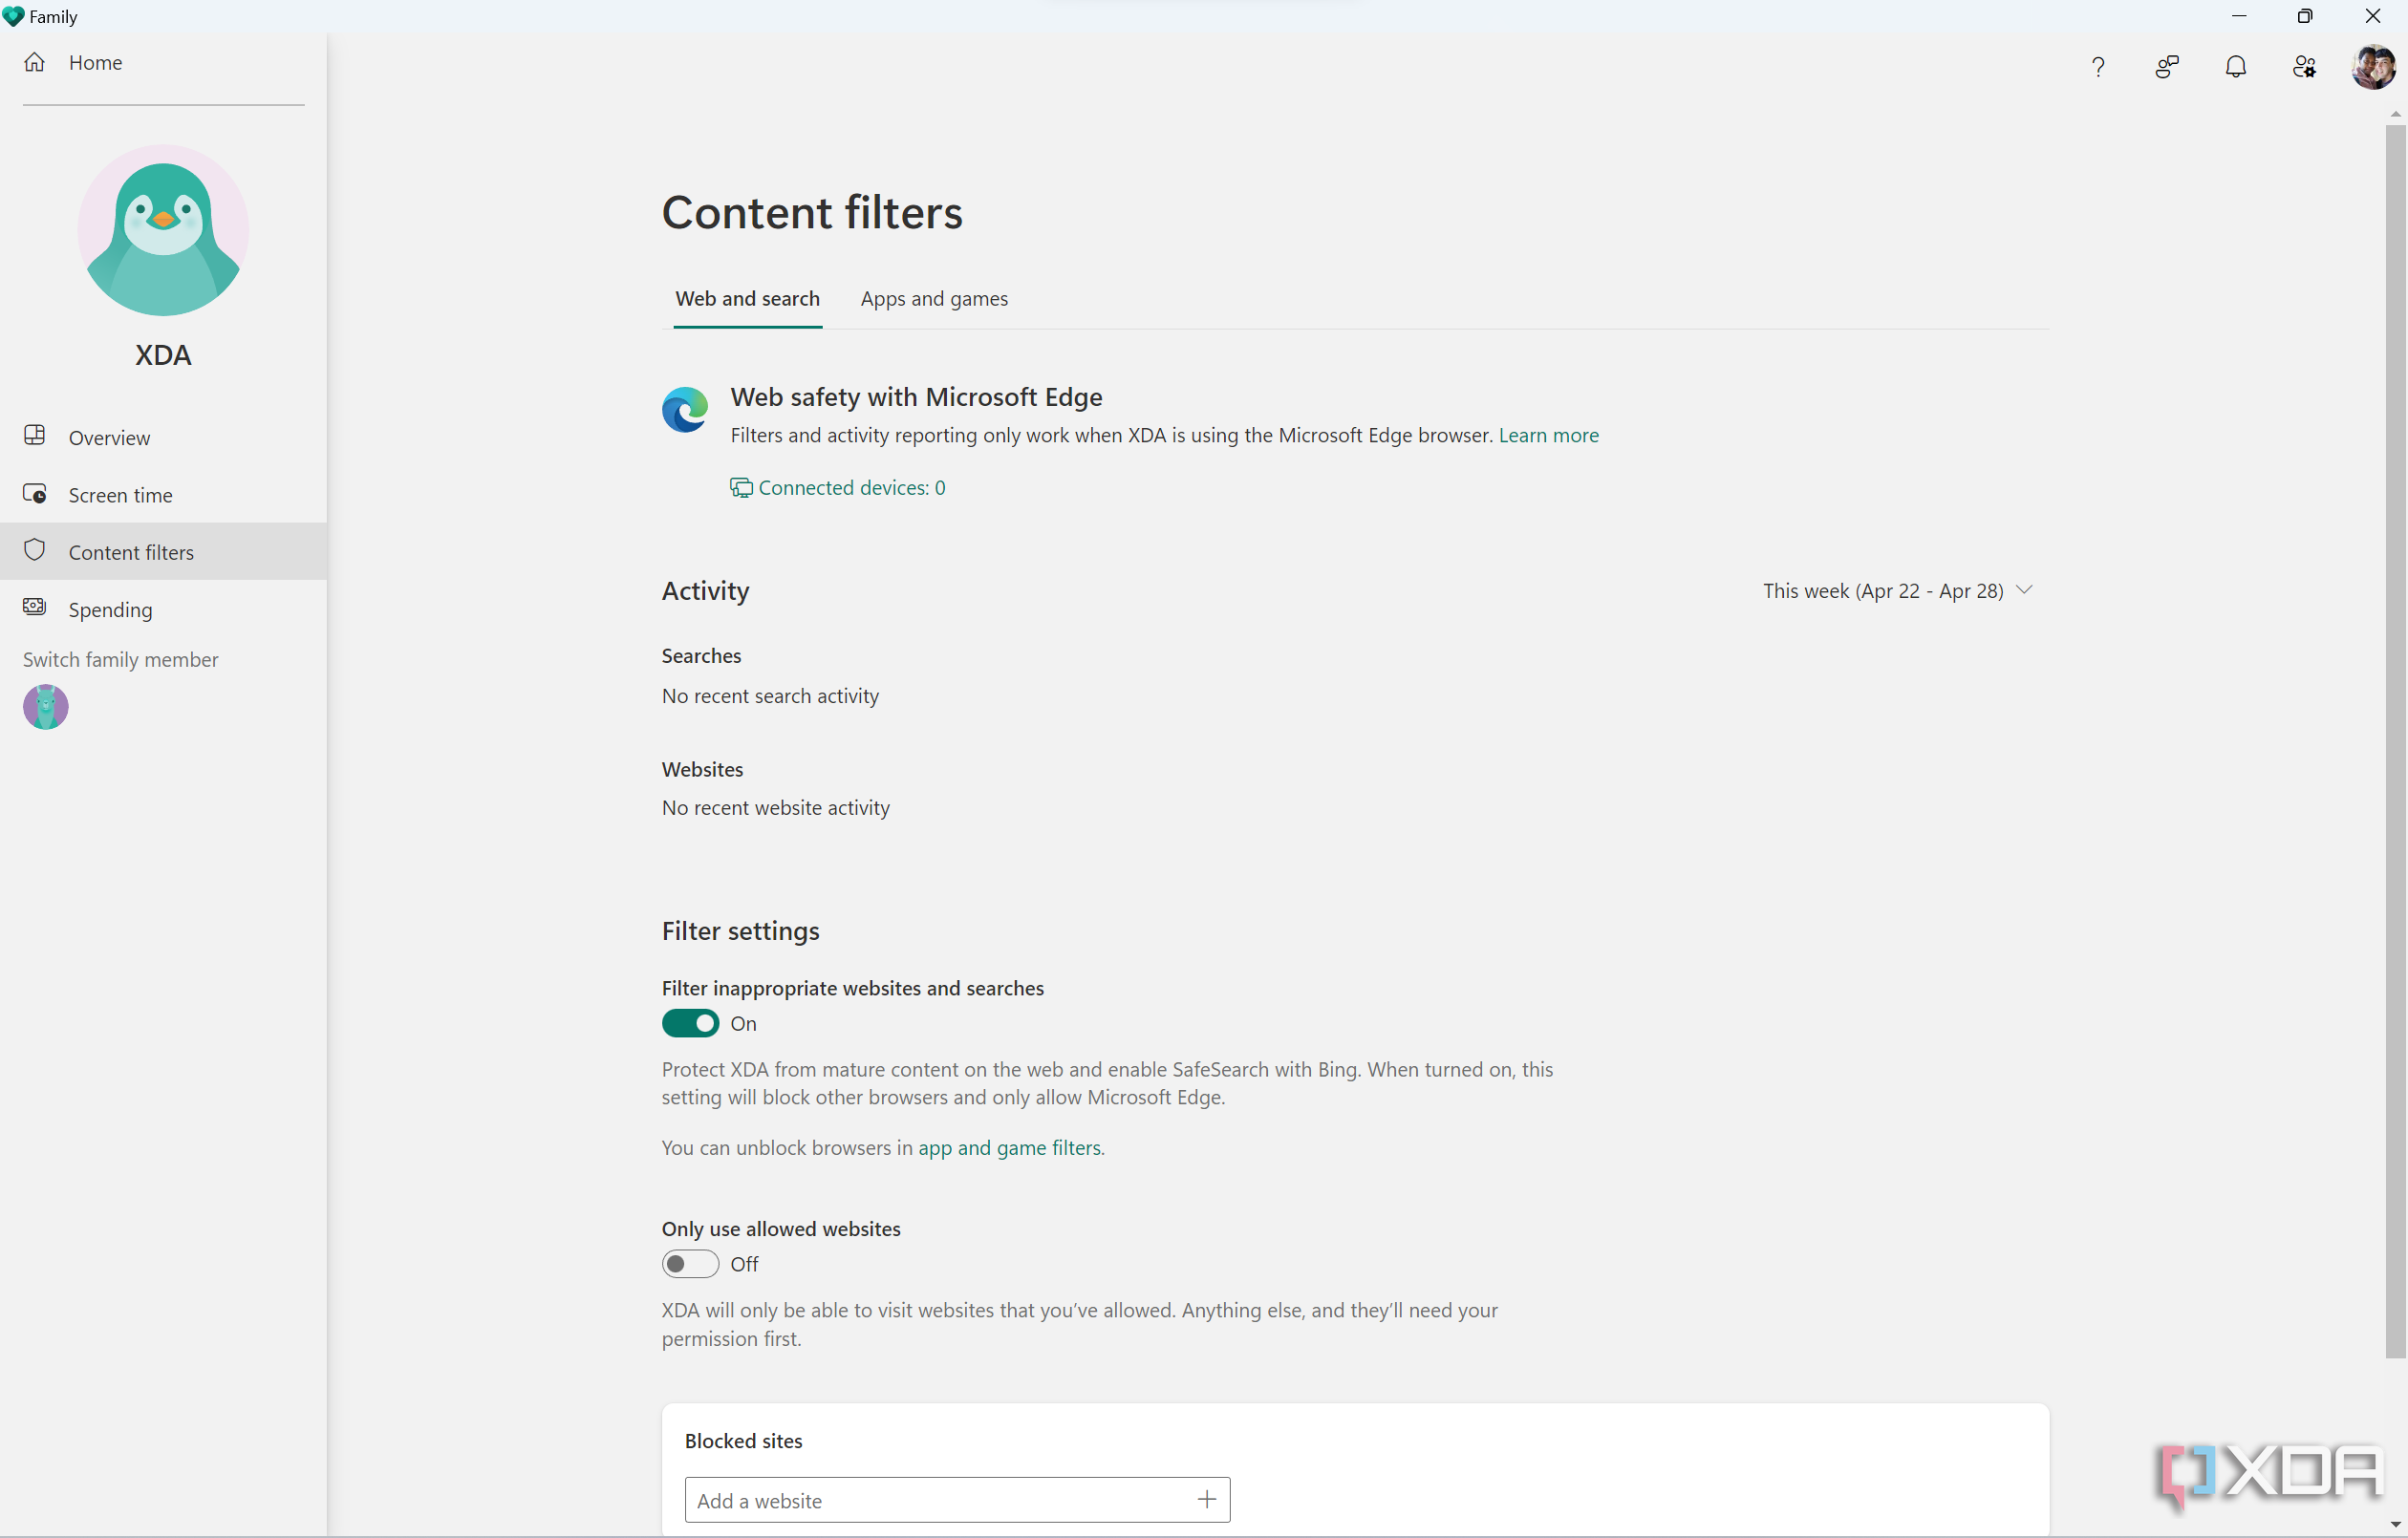
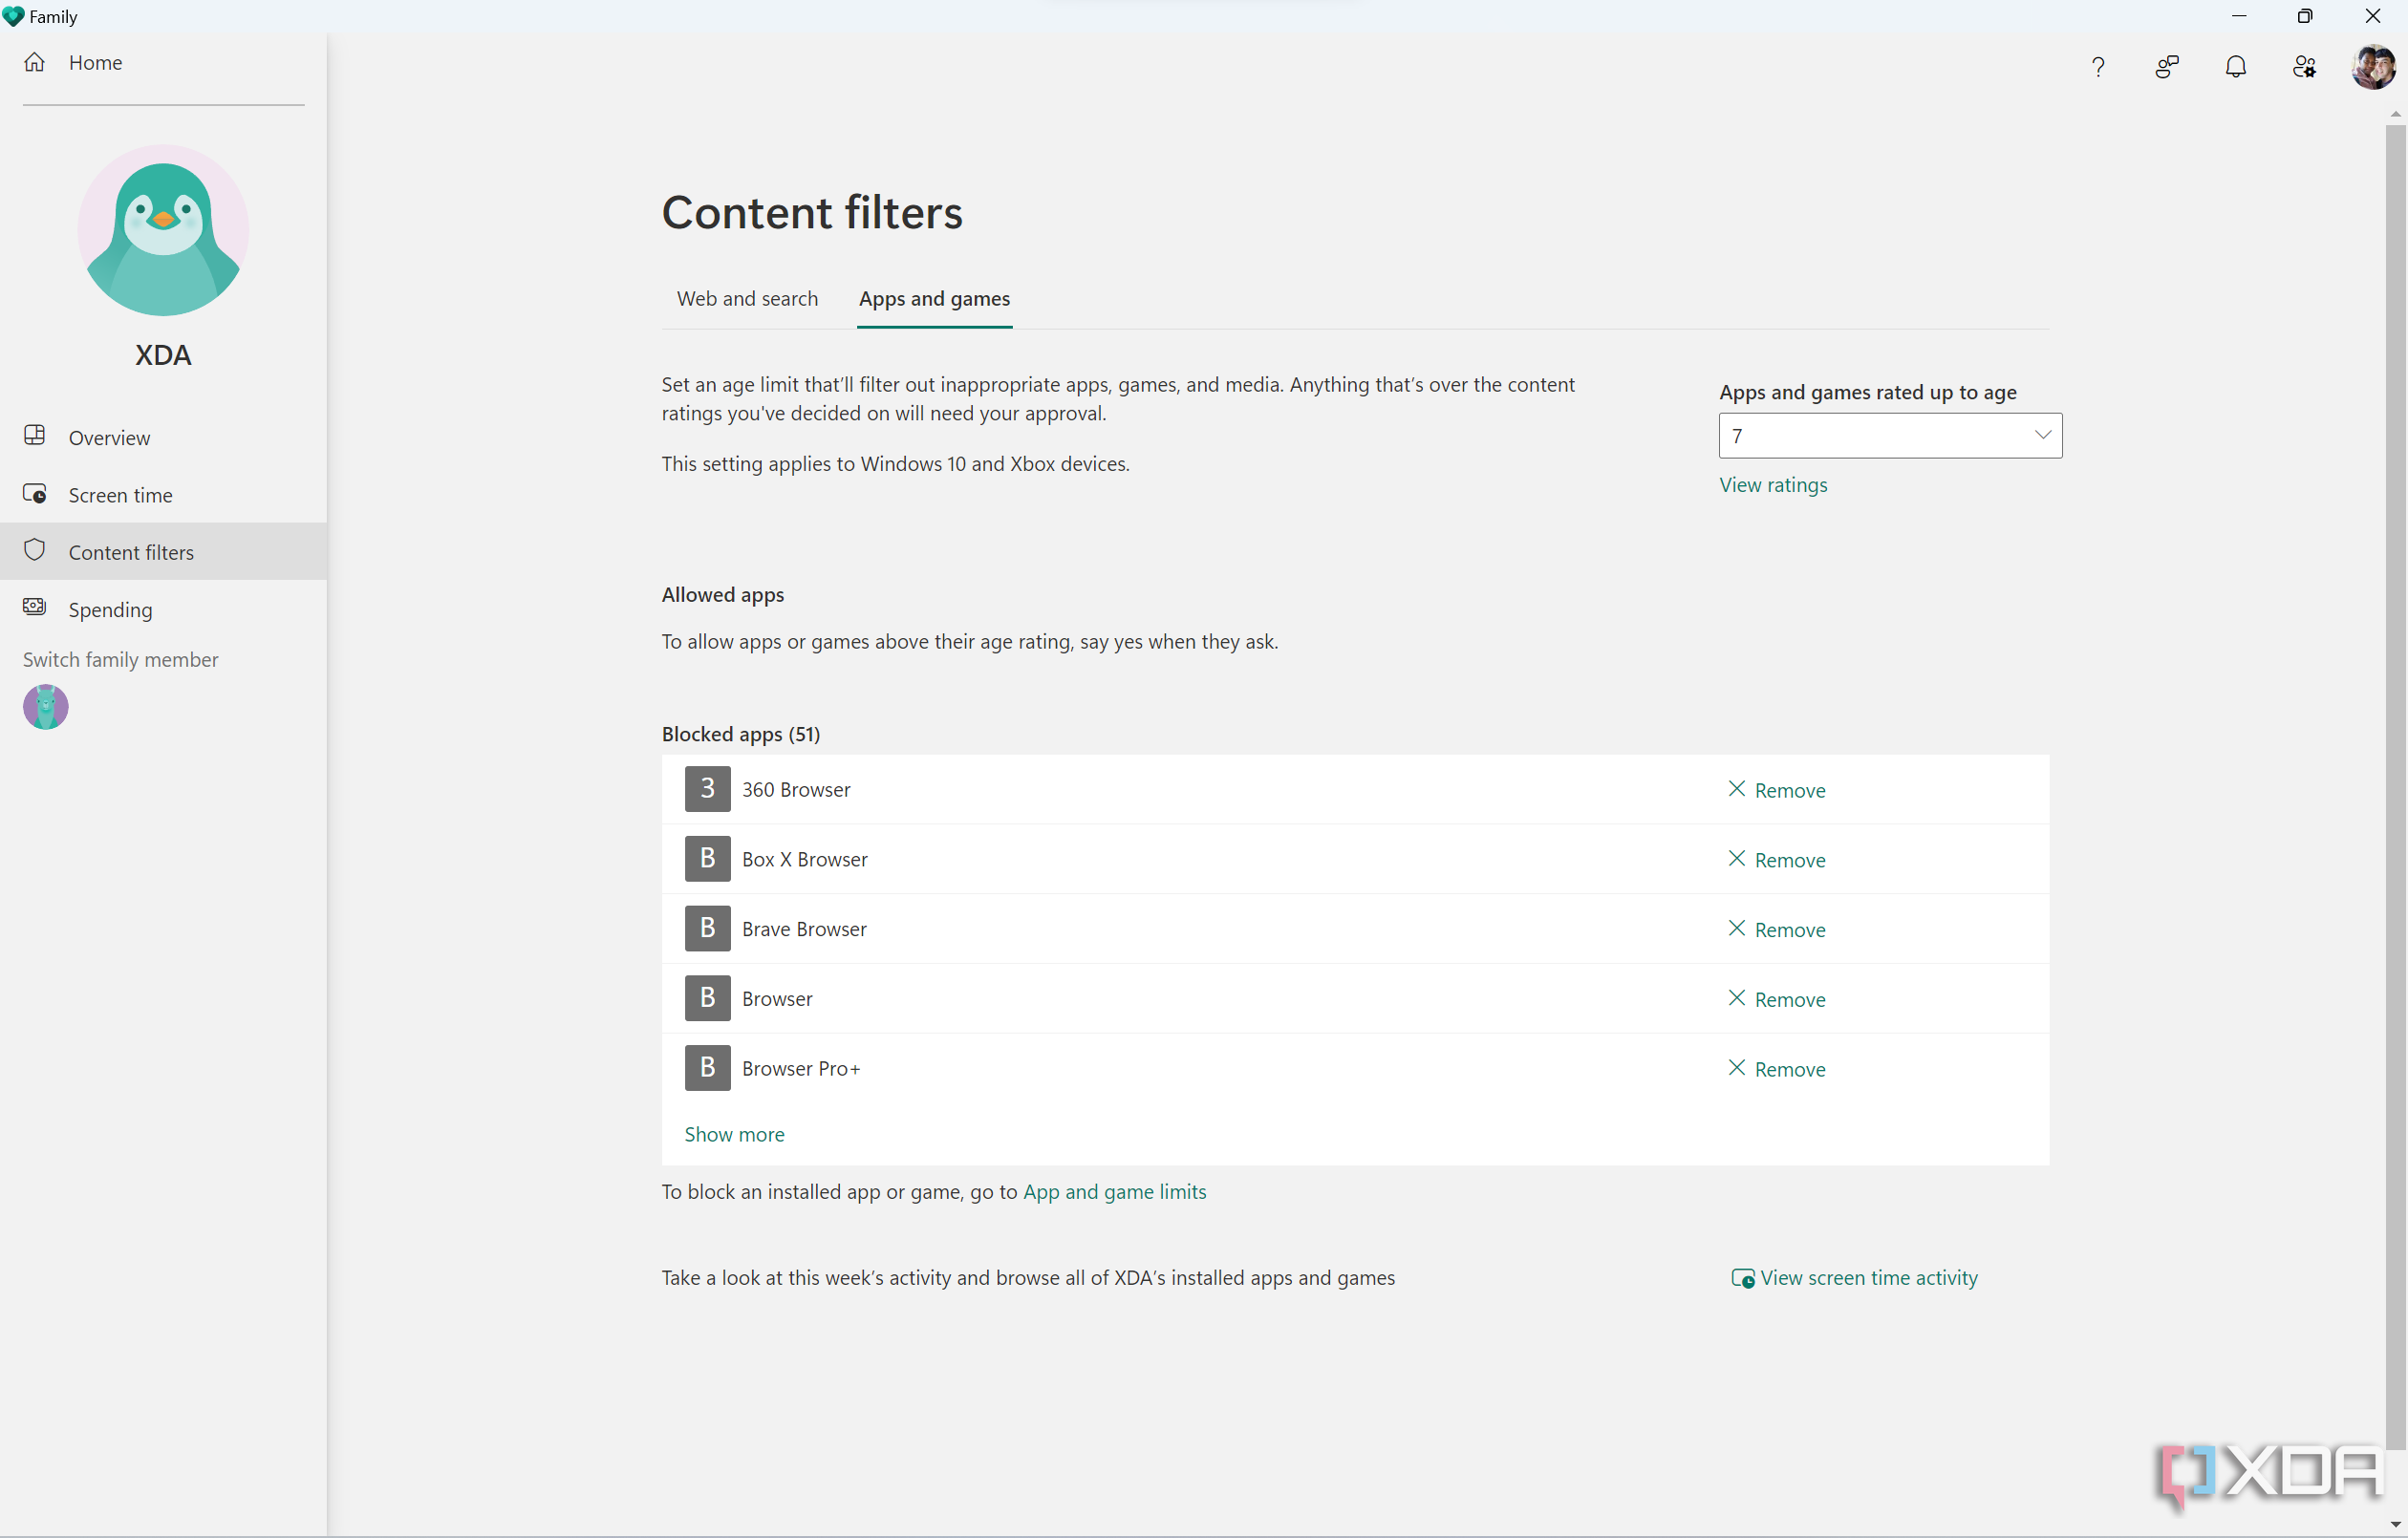
The Content filters section lets you block certain online content to keep your child safe. The first part is for search and web filters, which can block inappropriate websites and search results automatically, but also give you the option to block specific websites. You can also create a list of allowed websites instead, so everything else is blocked. The second part of this section is for apps and games, and here, you can simply choose the maximum age rating for apps and games on the Microsoft Store. You can also block specific apps your child has installed using the Screen Time section above.
-
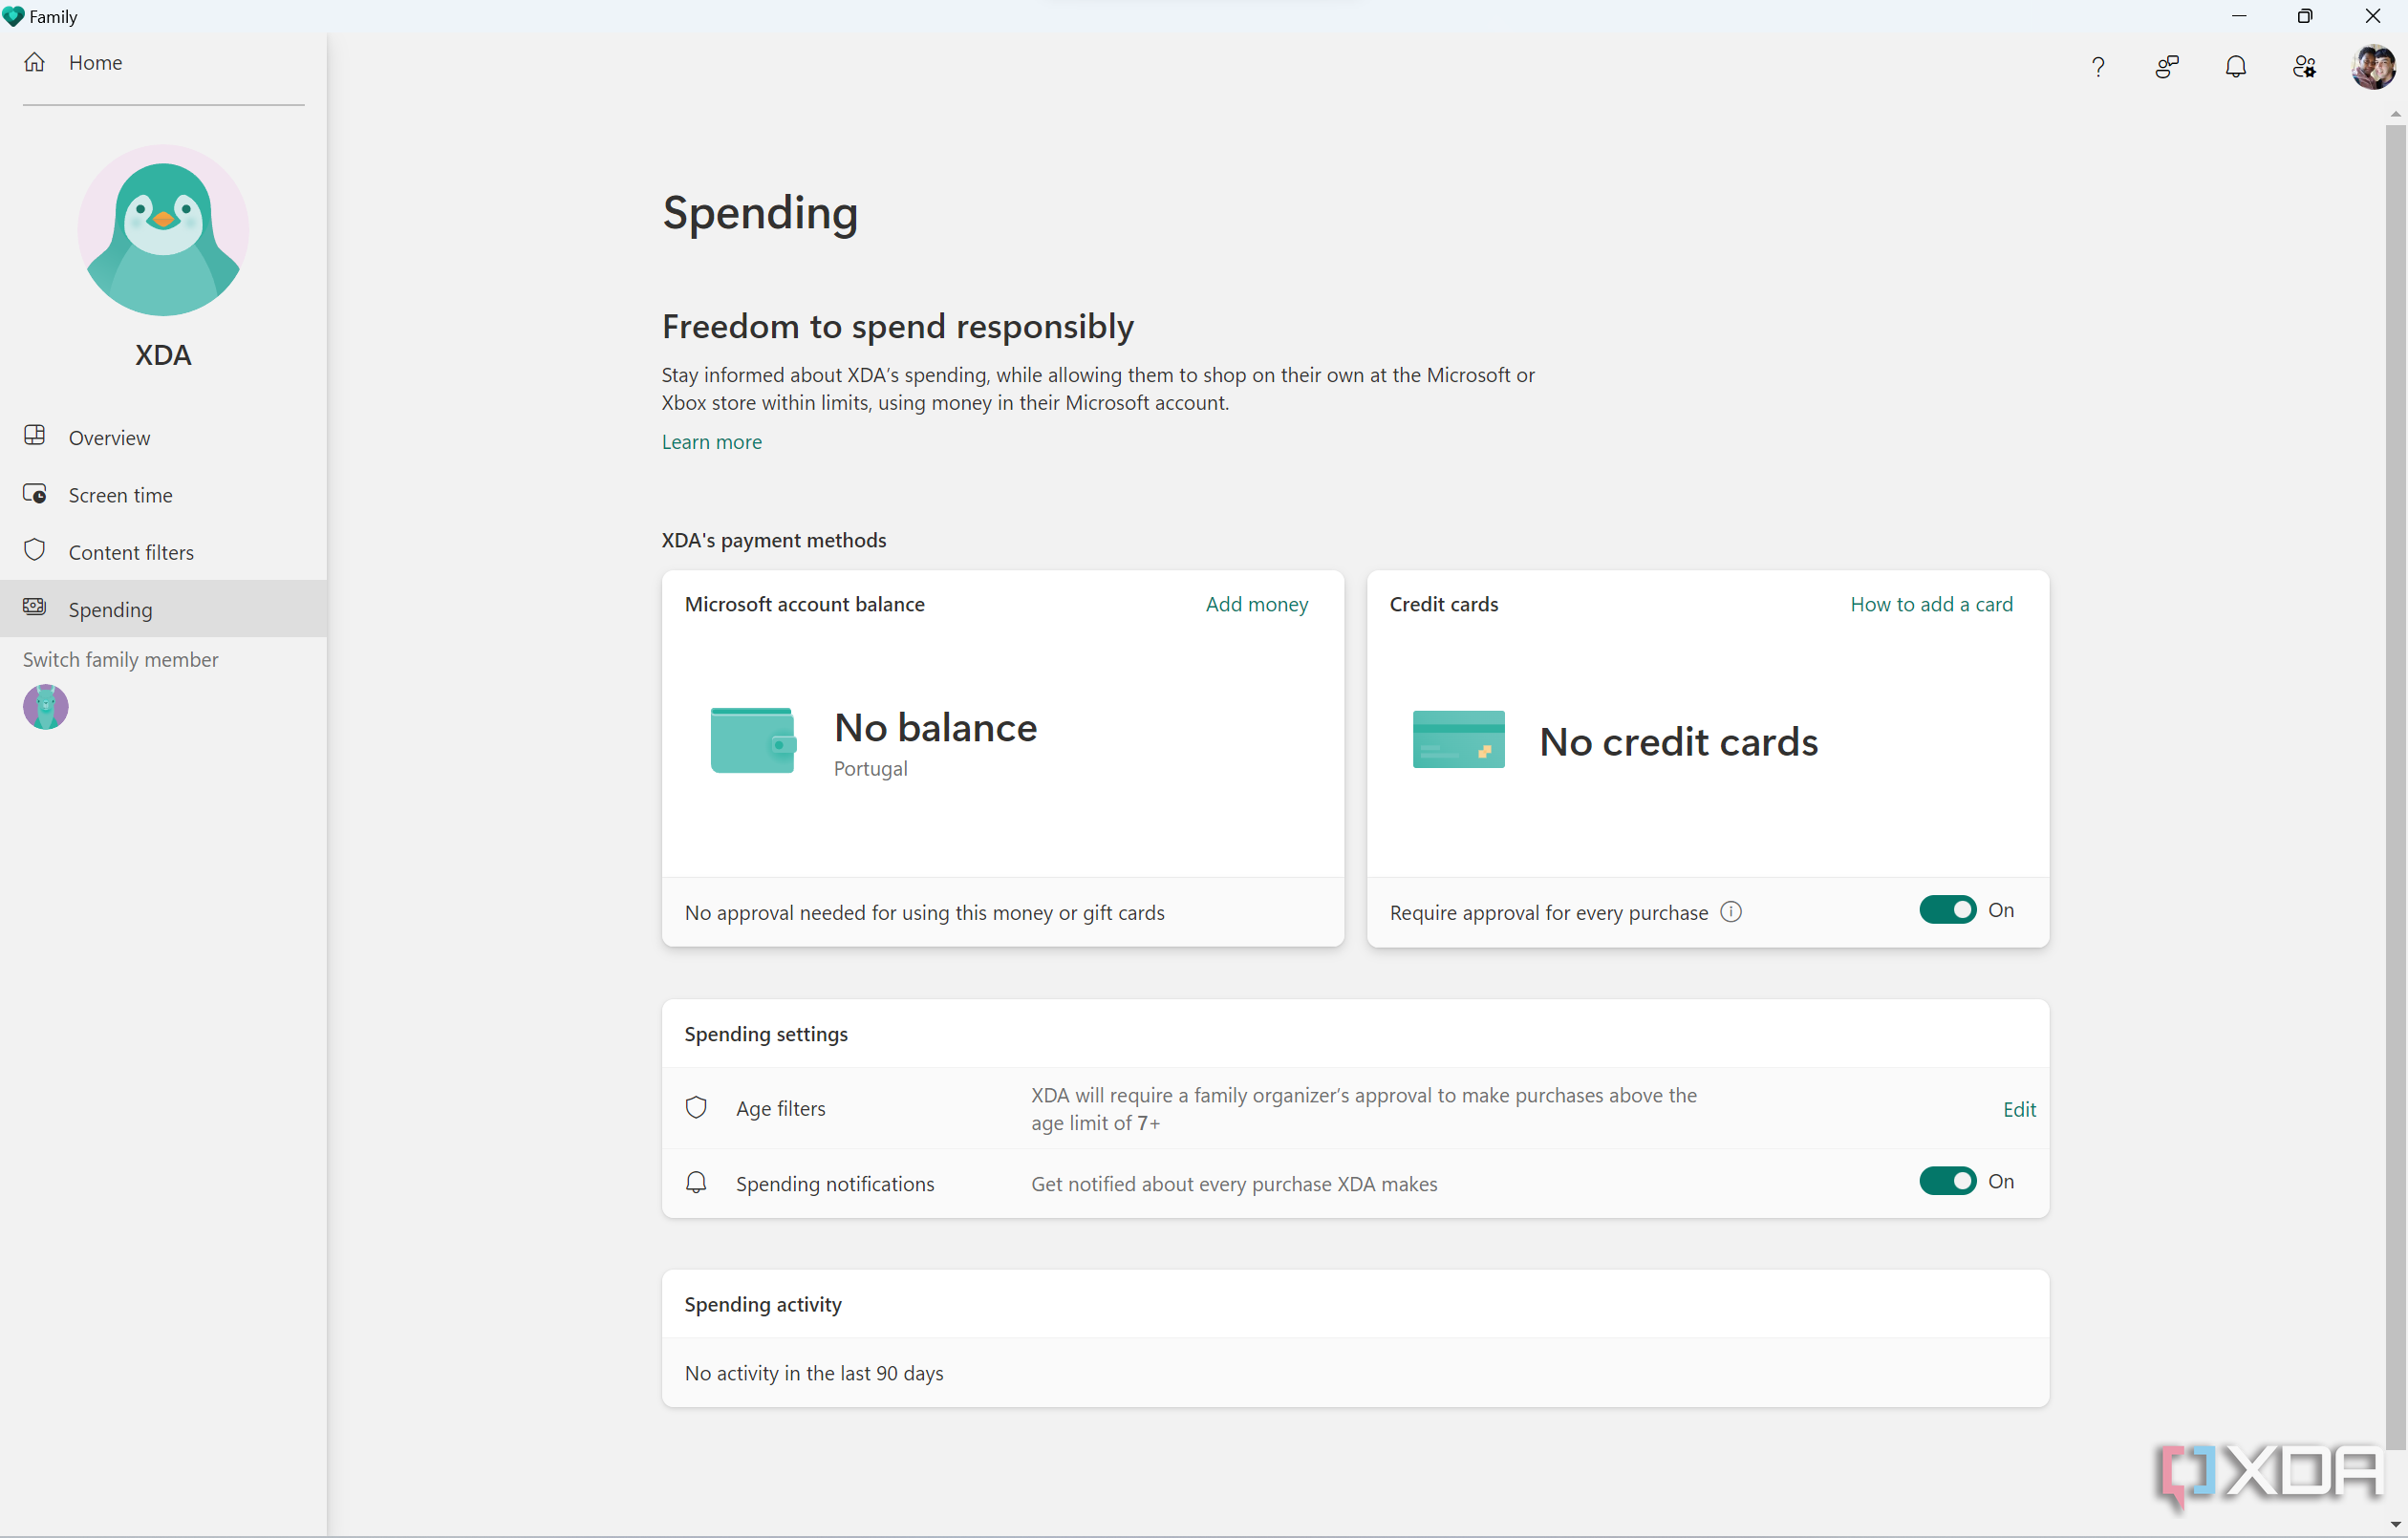
The Spending tab lets you see and manage your child's spending habits on the Microsoft and Xbox stores. You can also add money to their account so they can spend it on apps and games, or you can add a credit card instead. If you use a credit card, you have the option to require approval for every purchase, so you don't have to worry about your child spending all your money.
- If your child also has a smartphone with Microsoft Launcher or Microsoft Family Safety, you'll also see a Find your child section, allowing you to see their current location, which can give you some extra peace of mind.
-
The Screen time section lets you see how much time your child has spent using their devices. You can see a breakdown per device (if they have more than one) as well as per app. You can also set time limits for specific apps as well as general screen time limits for each device, or apply the same time limits to all devices in one go. This includes Windows PCs, Xbox, and Android phones with the Microsoft Family Safety app.


You can also manage and see these settings with the Microsoft Family app for Android or on iOS, so you can keep an eye on your child's activity anywhere you are.
And that's all you need to know about using a child account in Windows 11, so you can share your PC with your kids. Are they old enough to stop sharing? Check out the best laptops for students for some suggestions on great devices for younger users. If you're interested in more Windows 11-related help, you can check out how to change your default browser in Windows 11.