Quick Links
Keeping your data safe is extremely important, and Windows 11, much like previous versions, comes with a technology called BitLocker. It encrypts the data on your drive, preventing third-party actors from accessing it unless they have the decryption key. You wouldn't notice it's enabled most of the time since you're always logged into your account and everything just works by verifying your identity this way, but it prevents others from accessing your files if they don't know your password.
BitLocker encryption is only available on Windows 11 Pro, Enterprise, and Education editions, but there is a limited form of device encryption in Windows 11 Home, too. The difference is you don't get the same management and setup options on Windows 11 Home, but the core feature is still there. For example, if you enable device encryption on Windows 11 Home, it will be enabled for all your drives, while Pro lets you set it up for each drive on your PC.

Windows 11 Home vs Windows 11 Pro: What's the difference?
Trying to choose between Windows 11 Home vs Pro? These are the main differences between the two editions you should be aware of.If you're wondering how to enable (or disable) BitLocker encryption on your PC, we're here to help.
How to use BitLocker encryption on Windows 11 Pro, Enterprise, and Education
In many cases, BitLocker encryption will be enabled by default on your PC, especially if you bought a laptop or a pre-built desktop. However, if it isn't enabled, here's how you can do it yourself:
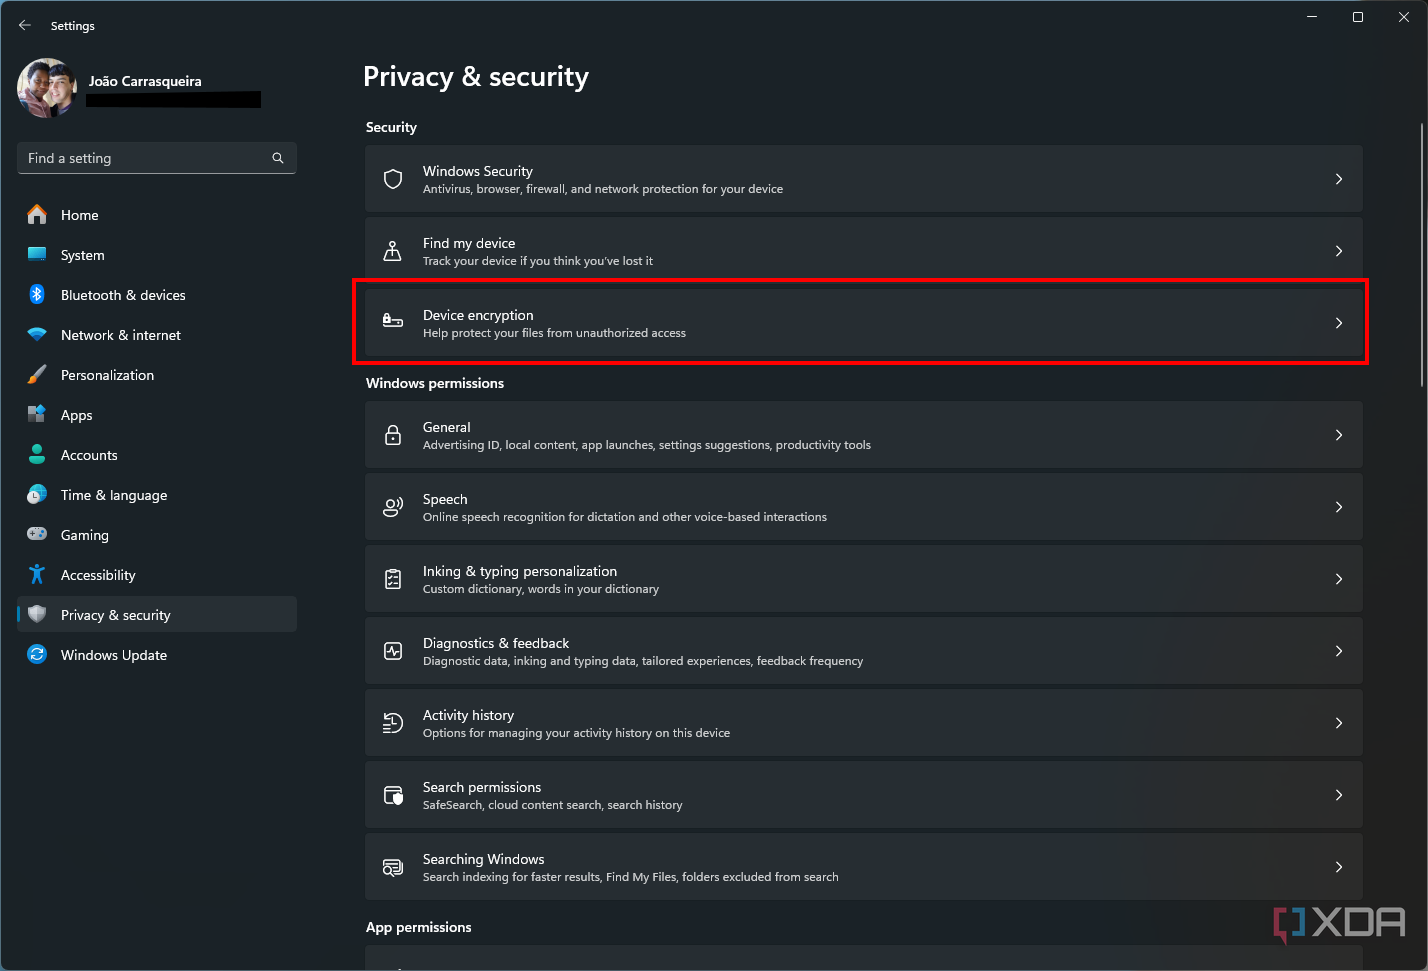
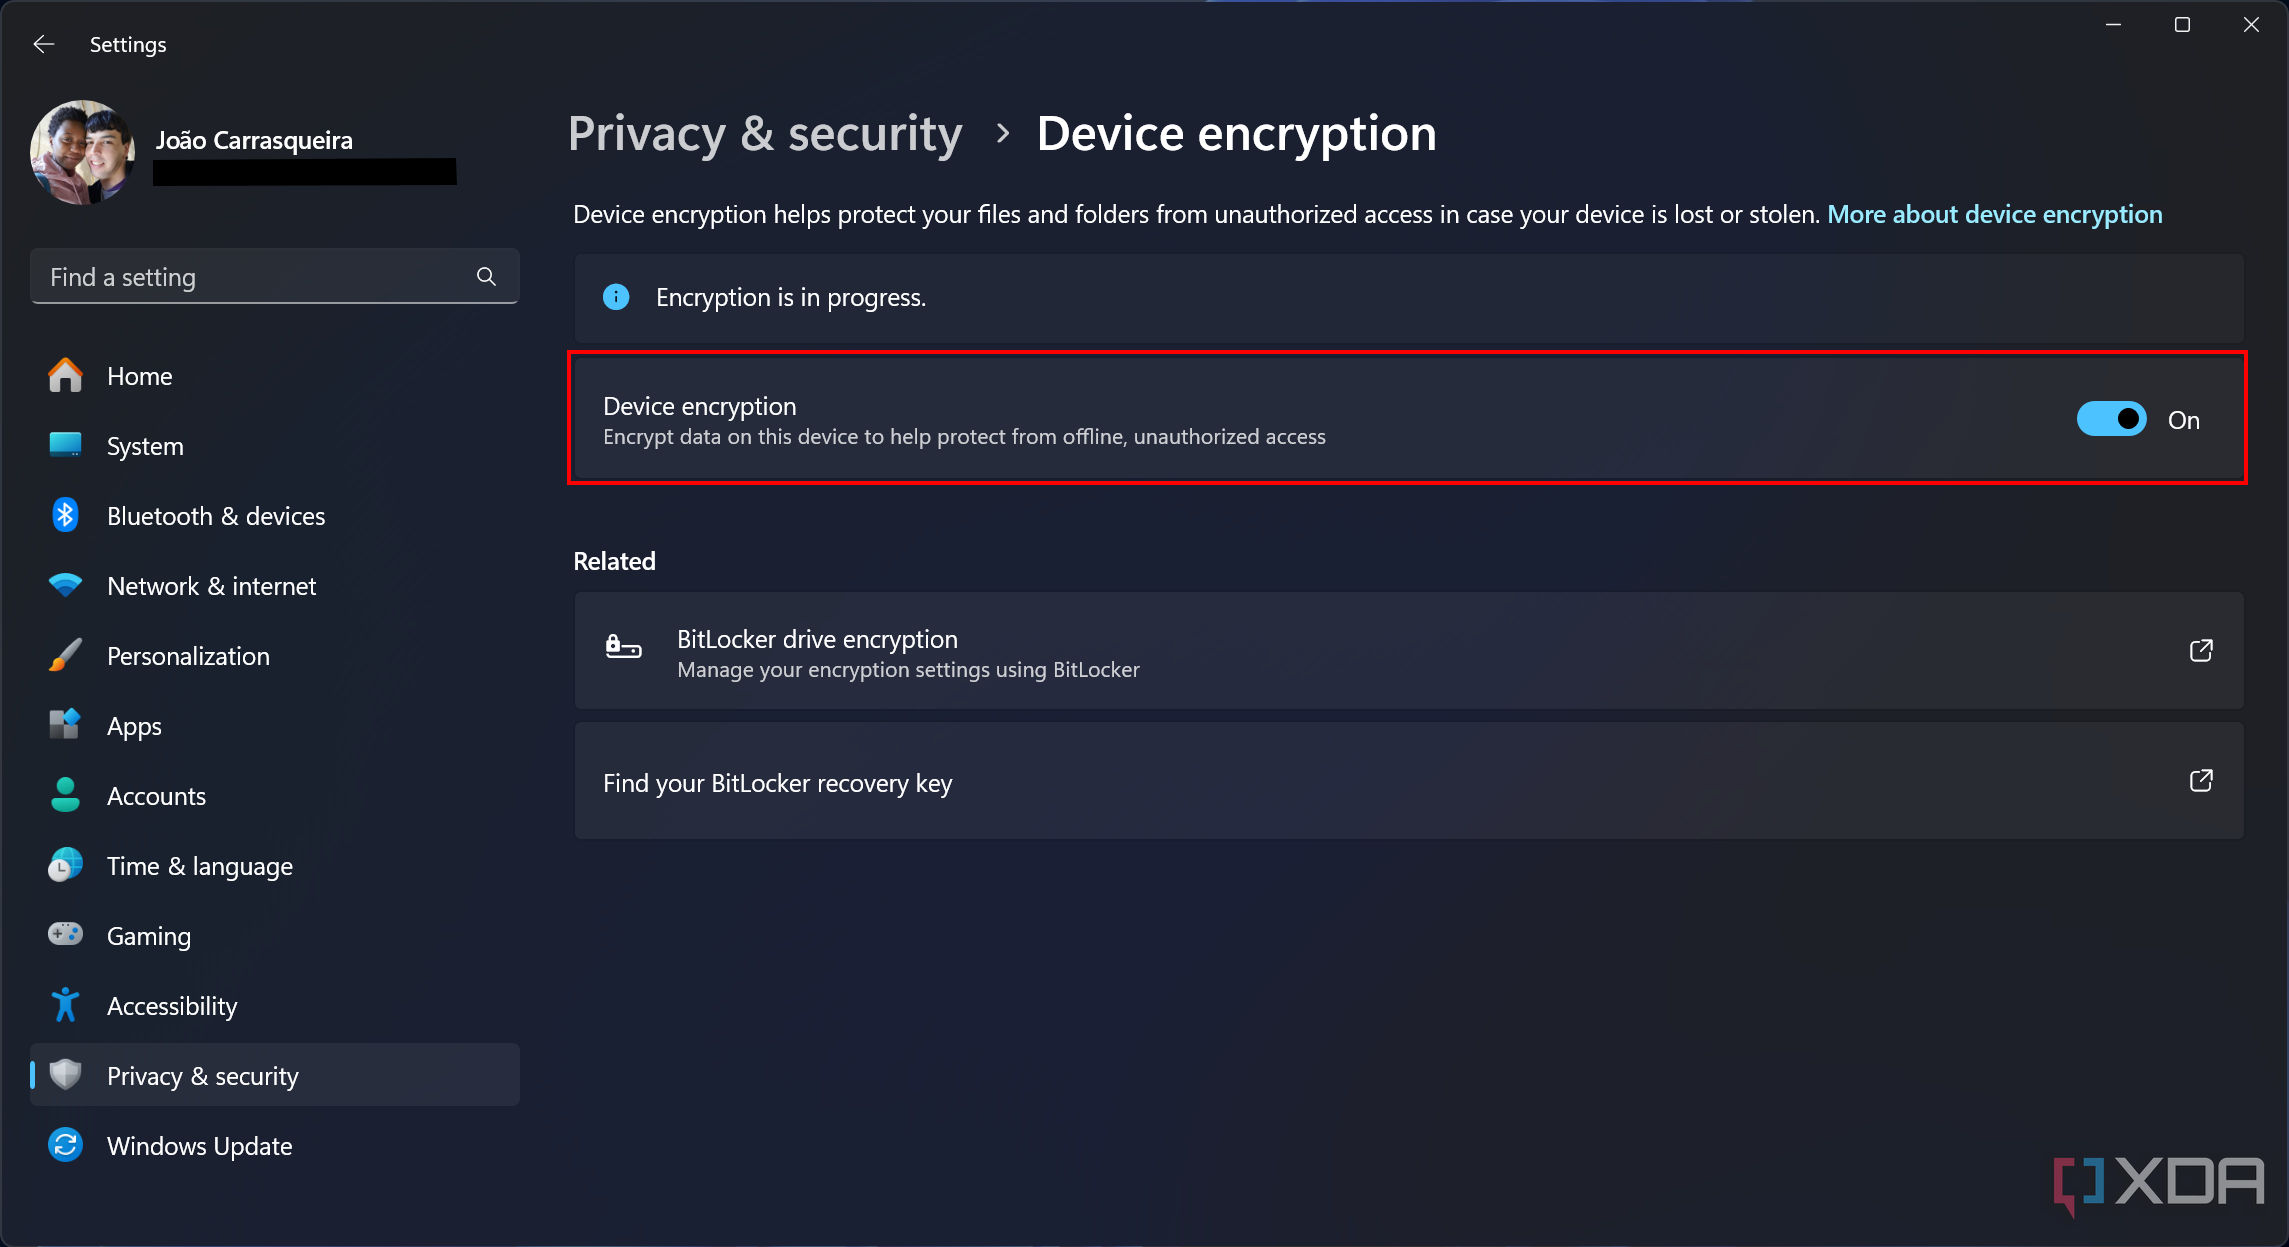
- Open the Settings app and select Privacy & security in the menu on the left.
-
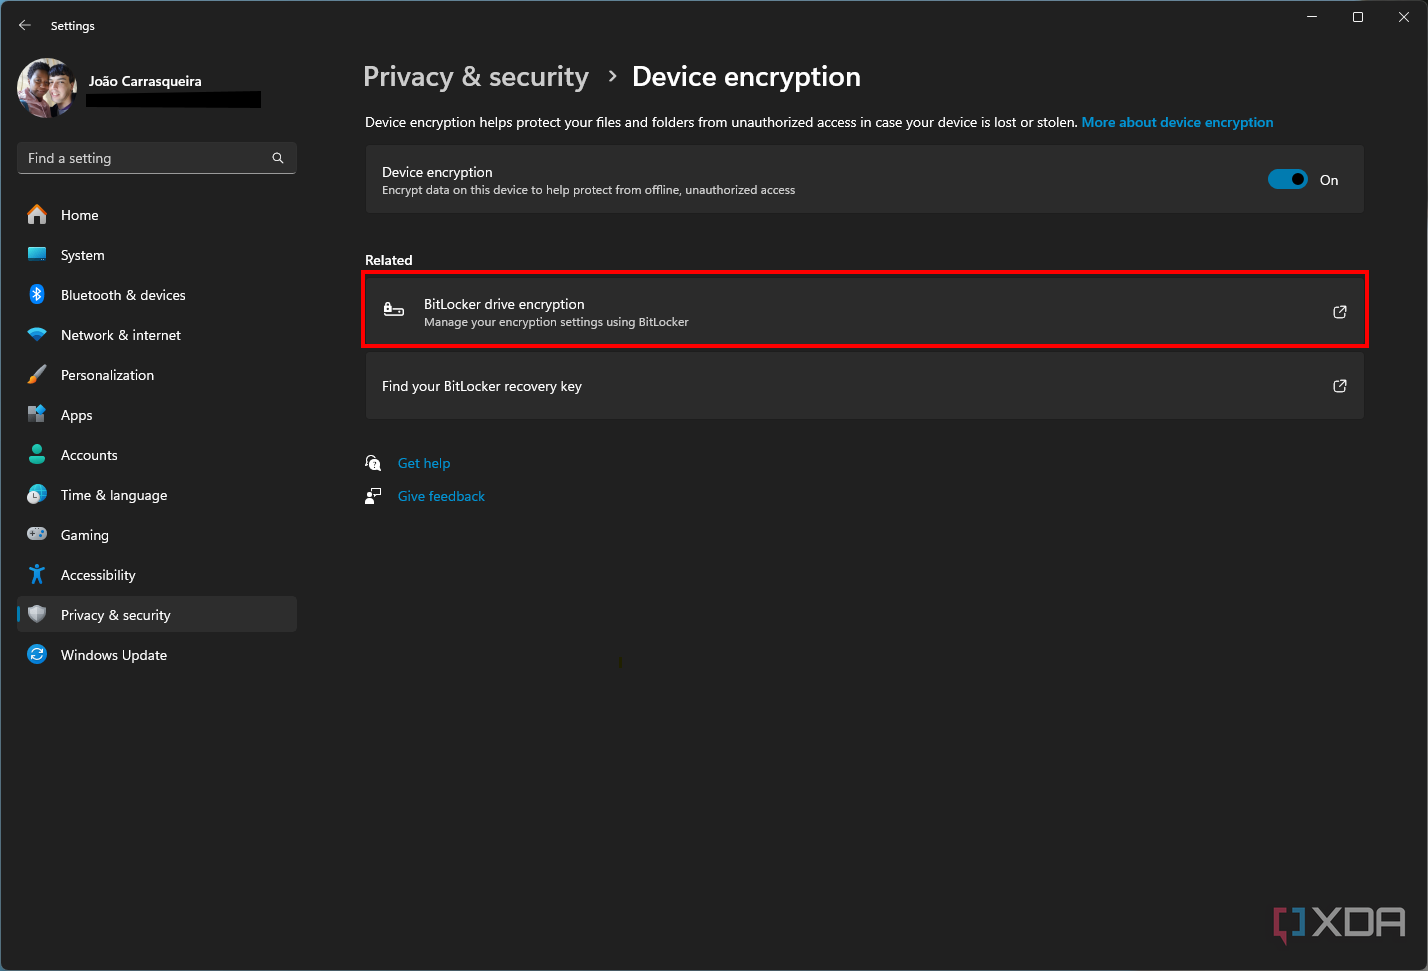
Click Device encryption.
- You can simply enable encryption by changing the Device encryption toggle to On.
-
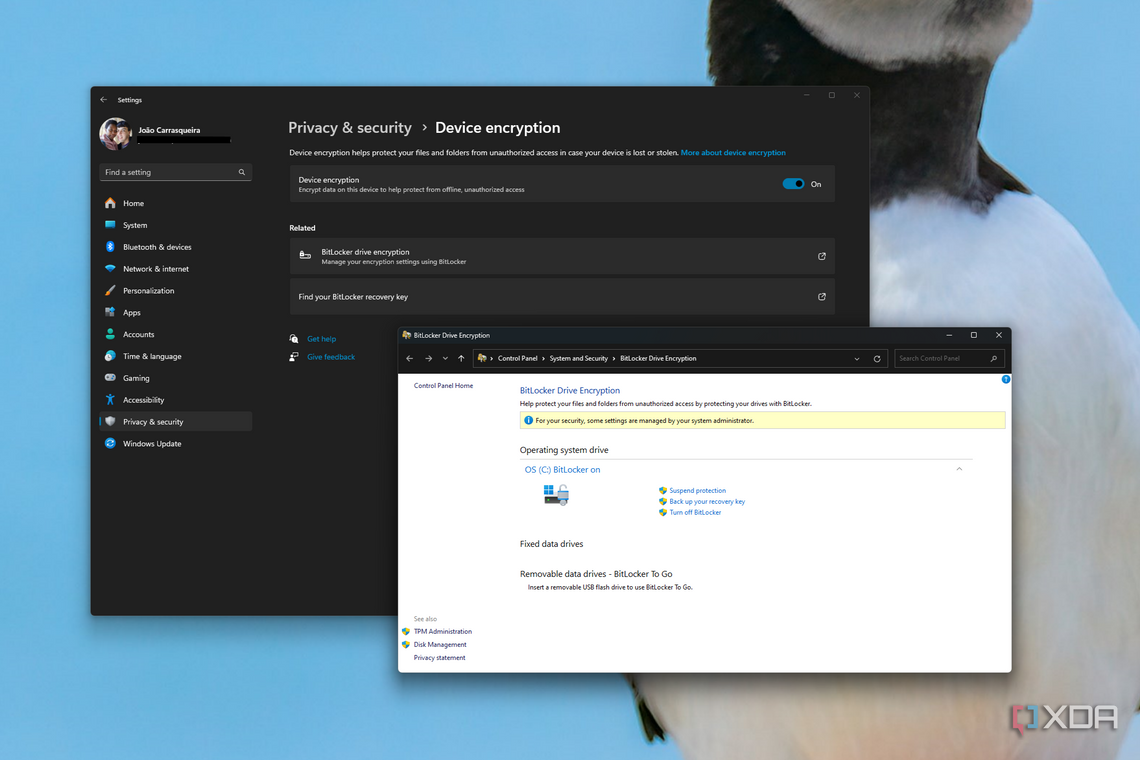
Alternatively, click BitLocker drive encryption to manage encryption settings in Control Panel.
-
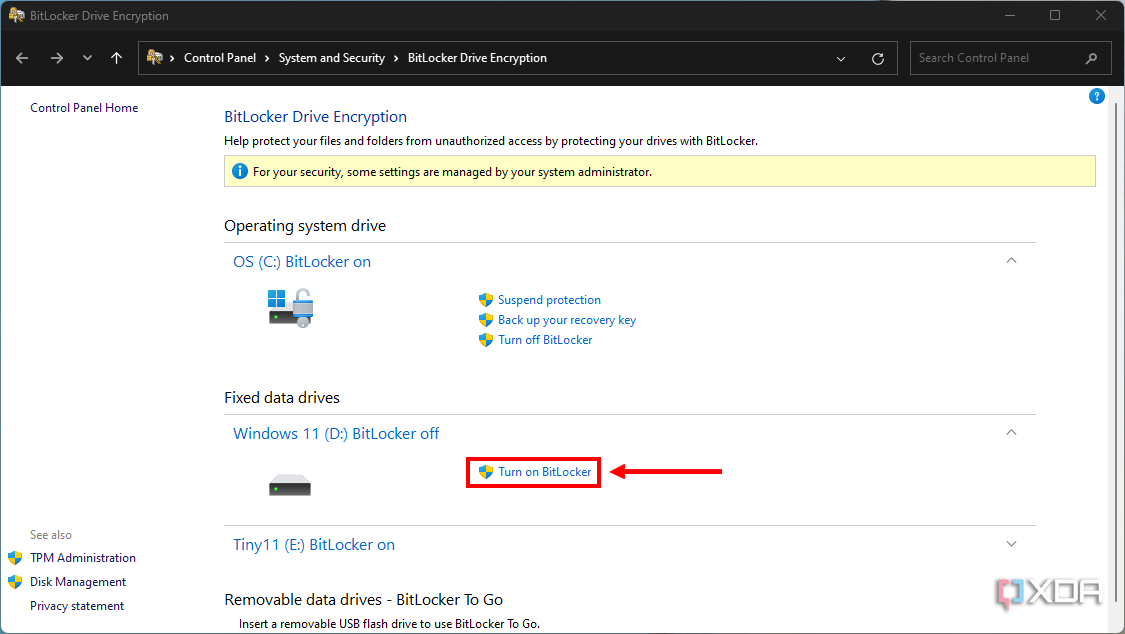
Find the drive you want to encrypt (if you have multiple) and click Turn on BitLocker if it isn't already enabled.
-
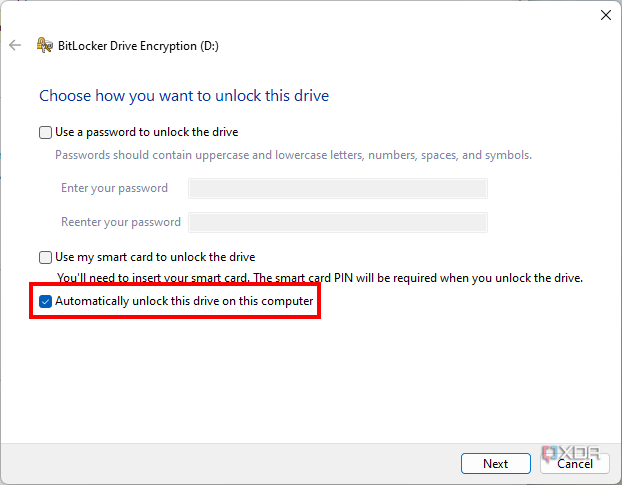
(Optional) If the drive you're encrypting isn't your OS drive, you'll be asked how to unlock the drive once it's encrypted. You can choose Automatically unlock this drive on this computer so it unlocks automatically when you sign in to your account.
-
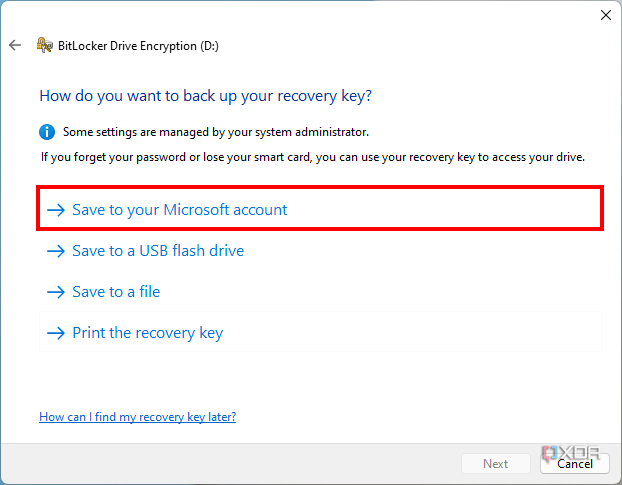
Choose a location to save your decryption key. If you have a Microsoft account linked to your Windows 11 install, you can back it up to your Microsoft account; otherwise, you can save it to a local file or print it and store it somewhere safe.
- Once the encryption key has been saved, you'll see a message confirming it. Click Next.
-
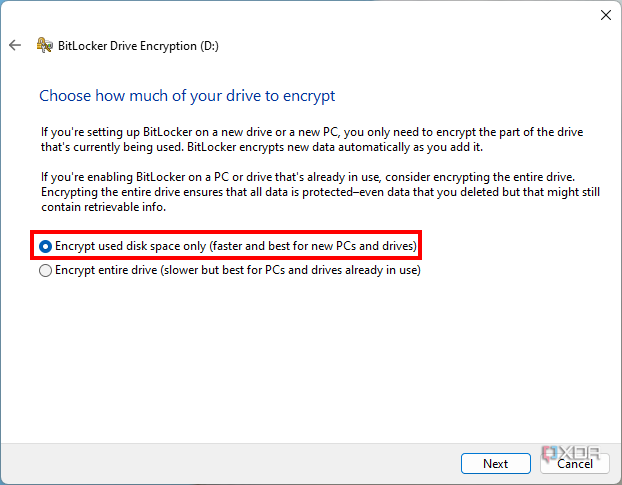
Choose Encrypt used disk space only to encrypt your drive faster and click Next. The slower option is generally unnecessary unless you have an older PC with a lot of data stored on it.
-
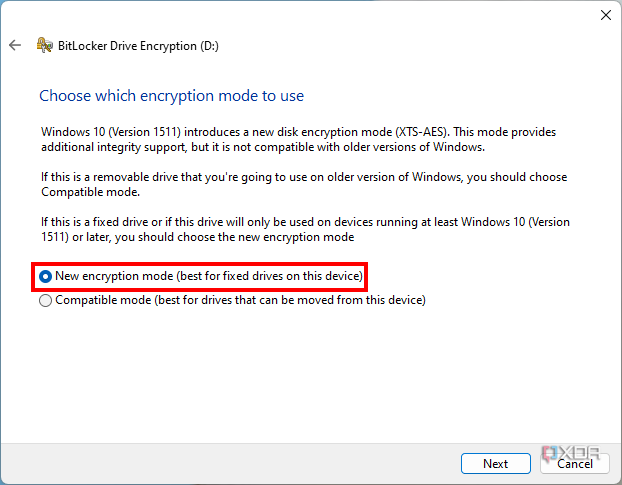
Choose New encryption mode (the default setting) and click Next.
-
If prompted, enable the Run BitLocker system check checkbox, and click Continue. Non-OS drives won't give you this option, and the button will be labeled Start encrypting instead.
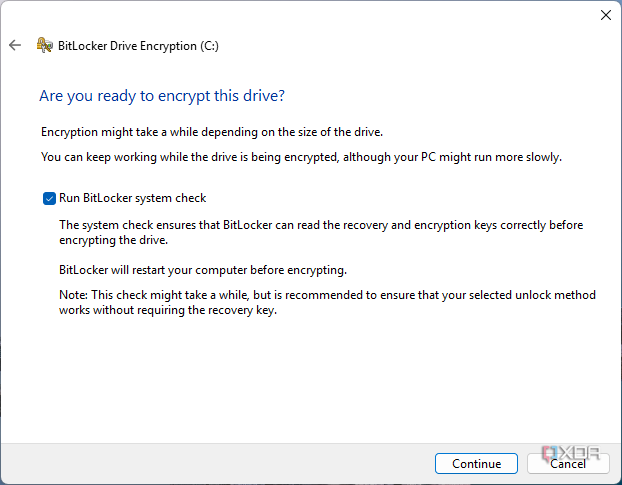
- You'll be prompted to restart the computer (if you're encrypting your OS drive) and your drive will begin encrypting.


That's all there is to enabling BitLocker. If you backed up your decryption key to your Microsoft account, you can find it on this page, which you'll need if you want to erase or make changes to your data without signing in. All your encrypted PCs and drives will be here.
How to turn off BitLocker
If you're no longer interested in using BitLocker for whatever reason, you can follow these steps to disable it.
- Open the Settings app and choose Privacy & security on the left-side menu.
- Click Device encryption.
-
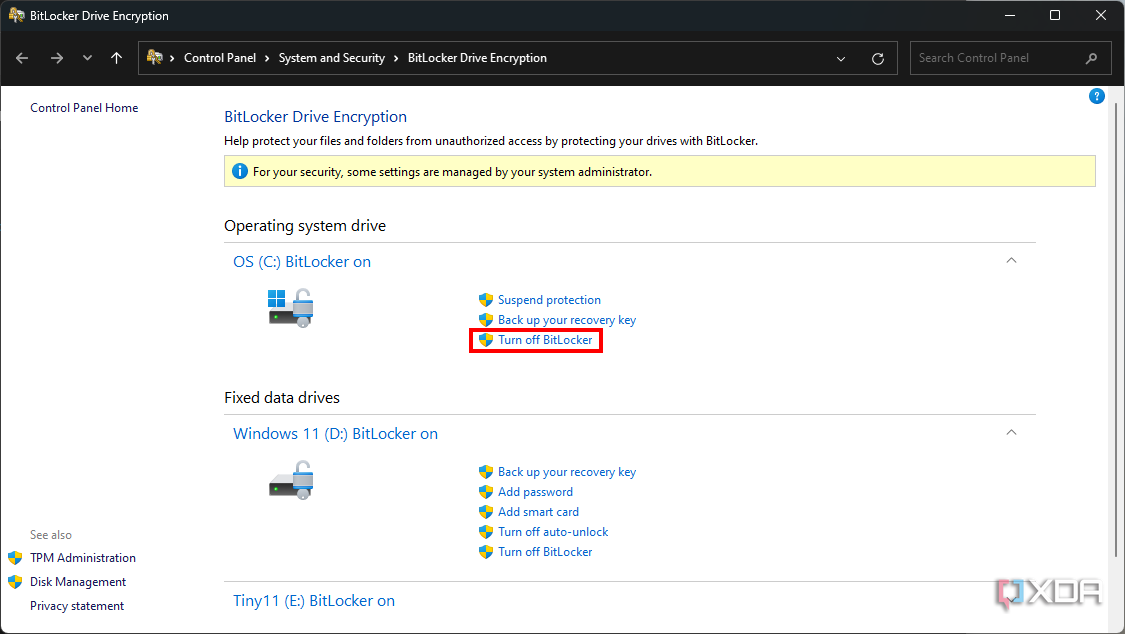
Choose BitLocker drive encryption to open the Control Panel
If you previously enabled encryption using the Device encryption toggle, you can disable it in the Settings app. If you used BitLocker in the Control Panel, this option isn't available.
-
Click Turn off BitLocker next to the drive you want to decrypt.
-
Confirm your choice by clicking Turn off BitLocker again.
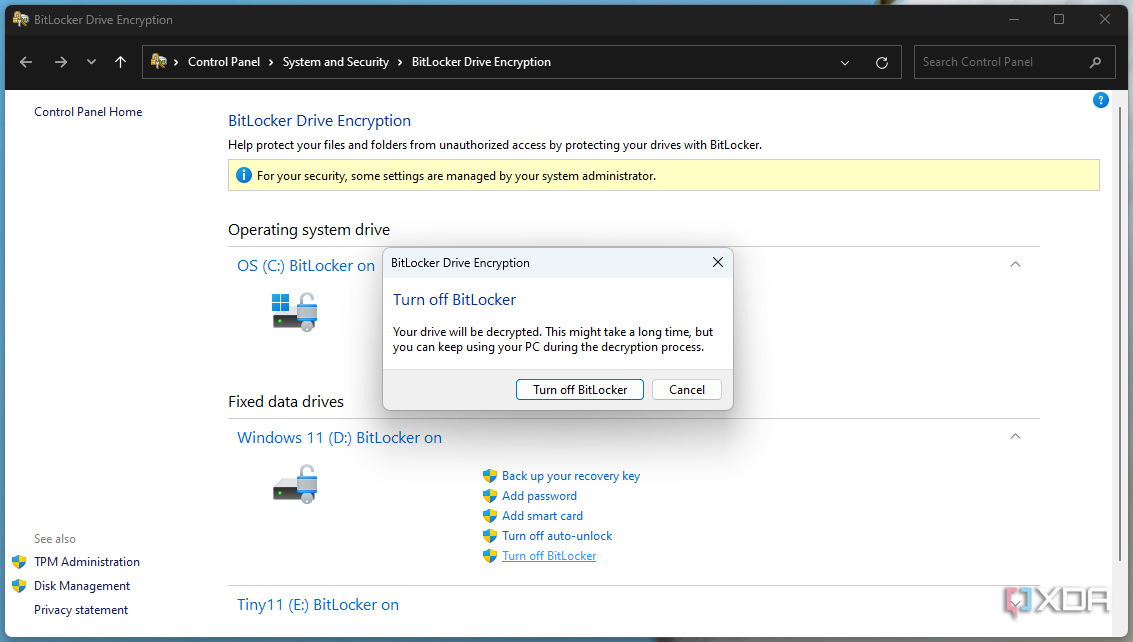
- Your drive will begin decrypting, which may take a long time, depending on how many files you have.


Once the process finishes, your data will no longer be encrypted and anyone with physical access to the computer could be able to read it. It's not generally recommended to disable BitLocker, but it might be useful if you move a drive to a new PC, for example.
How to use device encryption on Windows 11 Home
If you're using Windows 11 Home but still want to make sure your data is encrypted, the process is very similar but somewhat simpler.
- Open the Settings app and choose Privacy & security from the menu on the left.
- Click Device encryption.
-
Set the Device encryption toggle to On.
- The encryption process will begin automatically. Some devices may not support encryption, so if you don't see the option, don't be too alarmed.

How to backup your recovery key
On Windows 11 Home, your decryption key is backed up to your Microsoft account automatically, so you must have one linked to your PC to encrypt your drive. You can find your decryption keys here. However, if you'd like to save a copy of your key, you can follow these steps:
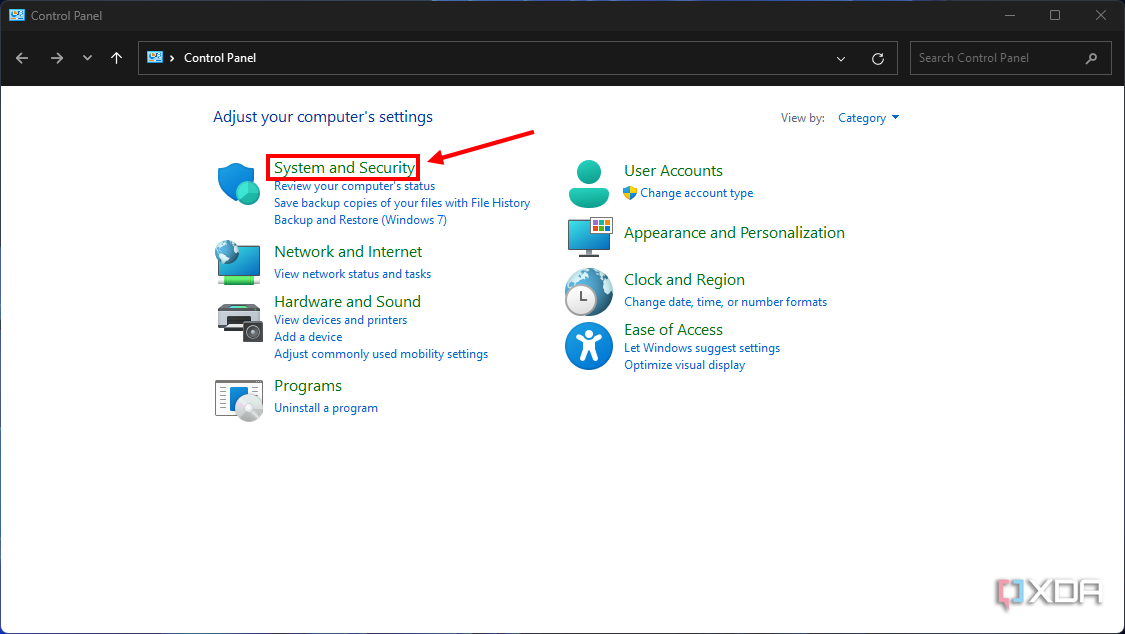
- Open the Control Panel. You can search for Control Panel in the Start menu to find it.
-
Select System & security.
-
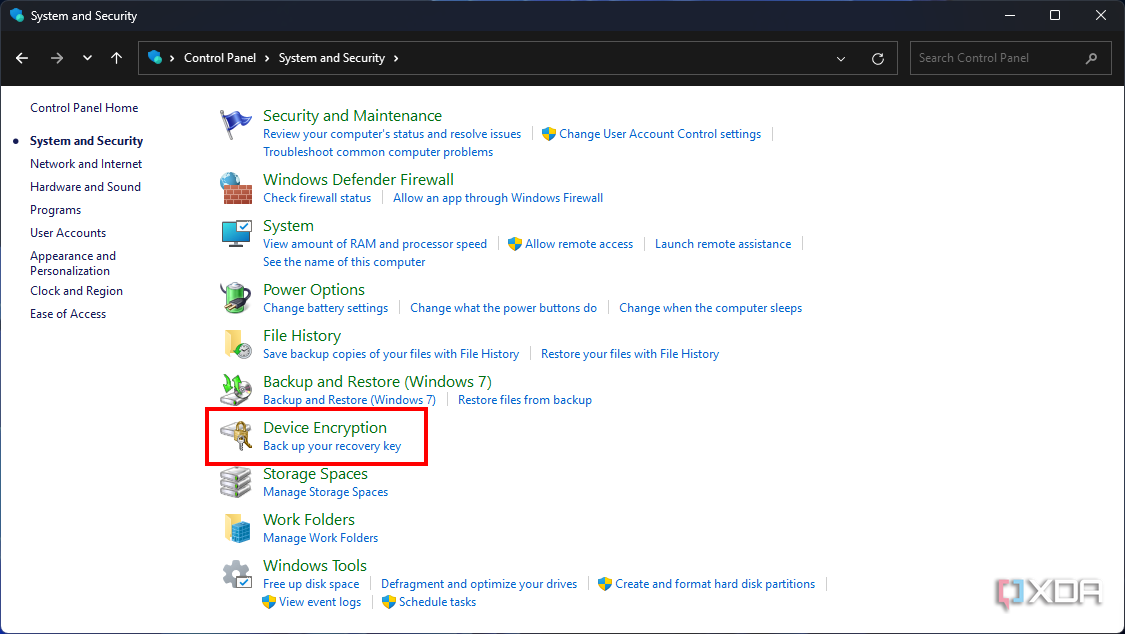
Click Device encryption.
-
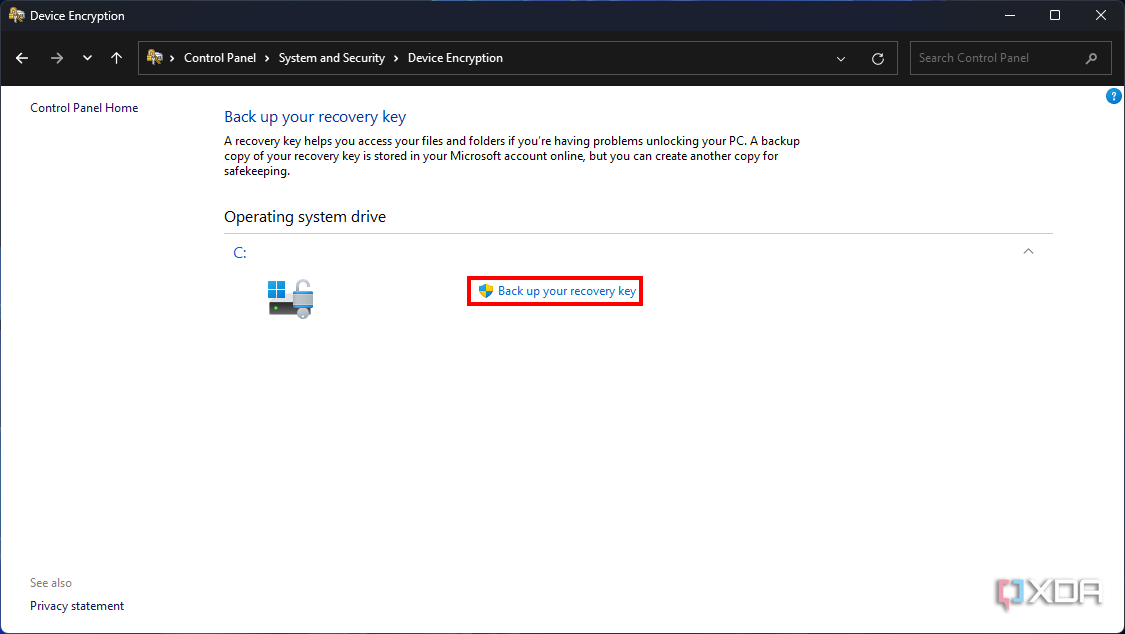
Click Back up your recovery key next to your drive.
-
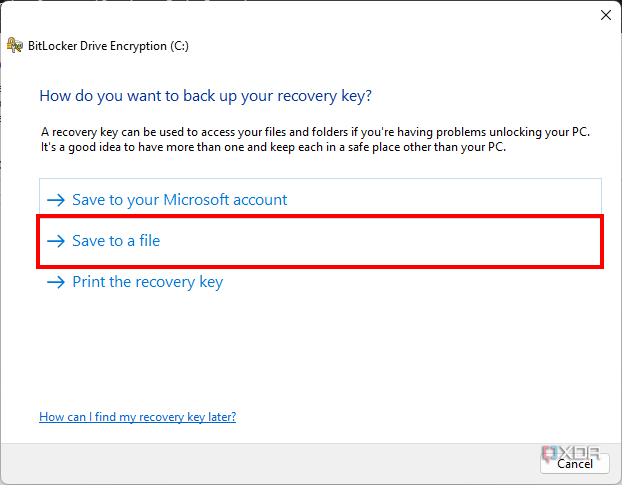
Choose a location for the backup. You can save it to a file or print it. There's also an Azure AD option if you happen to have an account, but most Windows 11 Home users likely won't.
If you're using a file, you'll need to choose a location that's not on the encrypted drive.


That's about it for enabling device encryption on Windows 11 Home. Disabling encryption is equally simple. Just head over to the Device encryption page in the Settings app and set the toggle to Off.
Keep your data safe with BitLocker
BitLocker encryption is one of the many security features in Windows 11, and if you'd like to learn more about that, you may want to check out how to use Smart App Control, a new feature in Windows 11 version 22H2. We also have a guide on how to turn off Microsoft Defender if that interests you.