
Whether you have a Mac Studio (2023) running macOS Sonoma, or another Mac model, Apple offers a wide range of privacy and security features to help protect your data. FileVault happens to be on of the default features baked into macOS, and we advise all users to enable it on their machines. So what is FileVault all about, and how do you activate it? Let's find out!
Apple states that:
FileVault full-disk encryption (FileVault 2) uses XTS-AES-128 encryption with a 256-bit key to help prevent unauthorized access to the information on your startup disk.
So it basically adds another security layer to make sure nobody is able to get to your files, except for you.
How to activate FileVault on macOS
- Go to System Settings.
- Click on Privacy & Security.
-
Scroll to the bottom, and tap on FileVault.
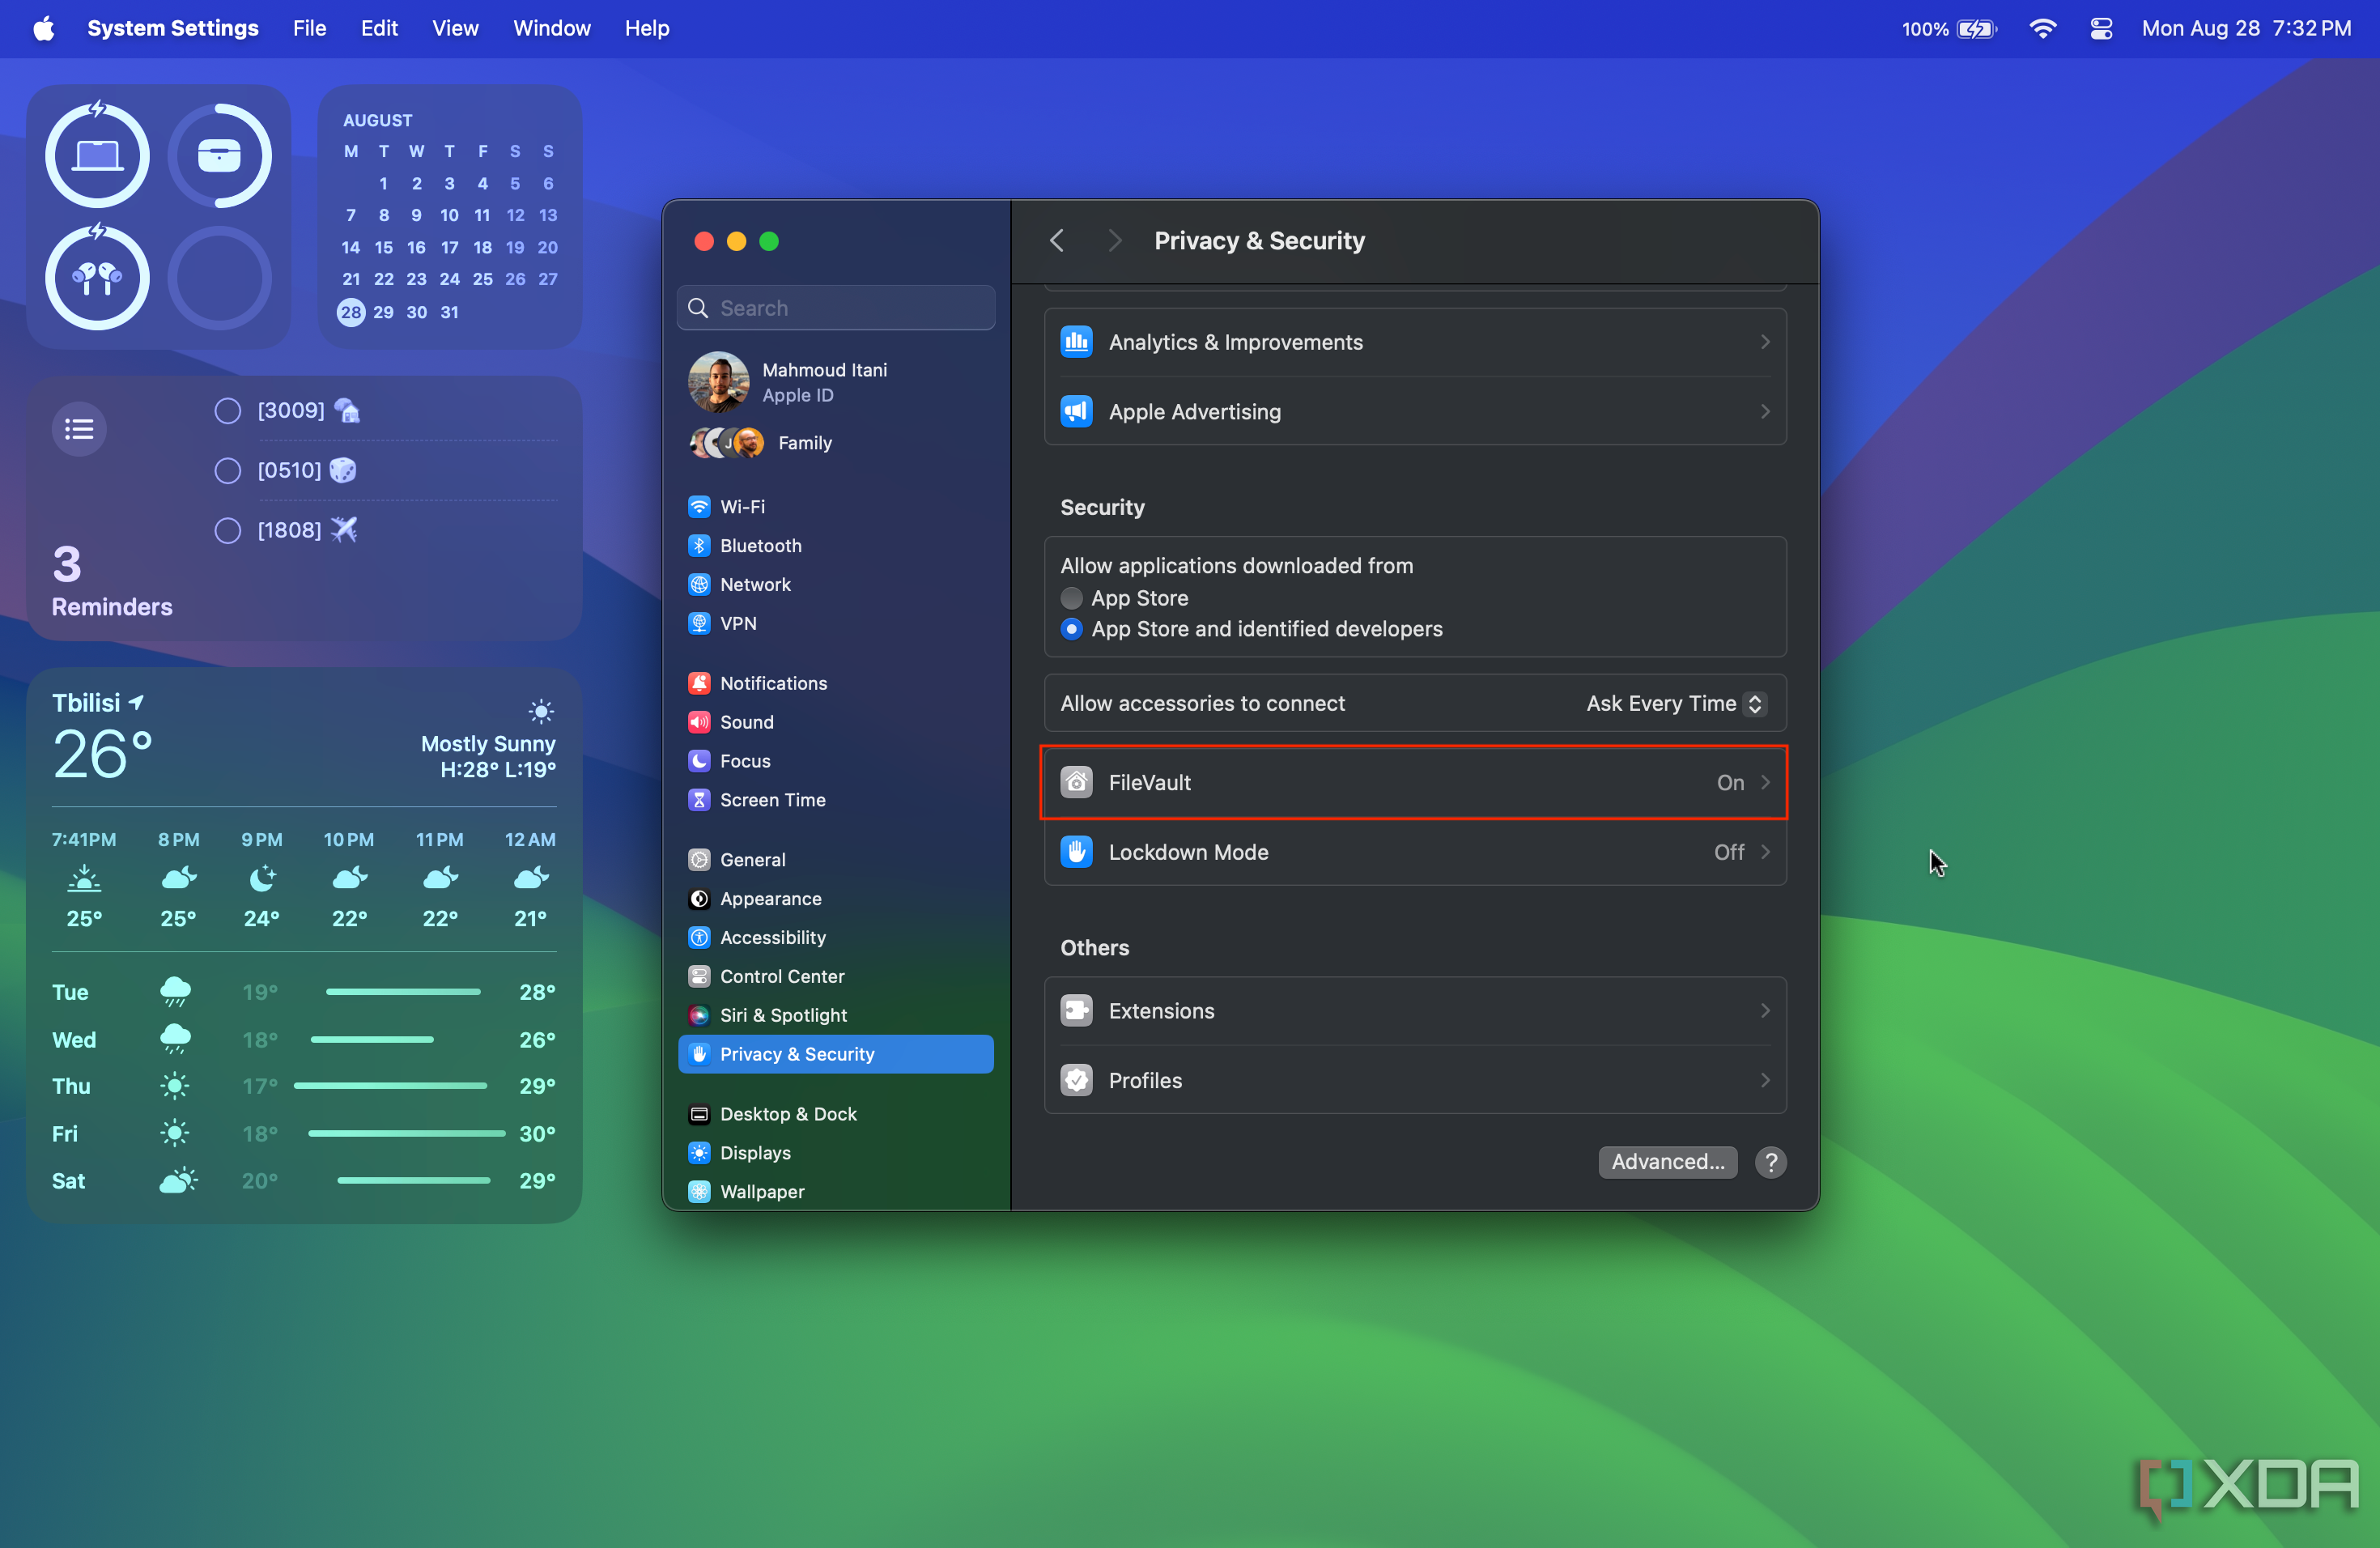
-
Tap on Turn On, if it’s not already on.

- You will be prompted to enter your Mac’s password.
- Once you do, your Mac will start the encryption process in the background.
- If you forget your password eventually, you will be able to reset it through your iCloud account or recovery key. Otherwise, you’ll be completely locked out of your Apple computer.


How to check whether FileVault is active or not
- Launch the System Settings app.
- Go to the Privacy & Security section.
-
Scroll to the bottom, and click on FileVault.
-
There you will see a Turn Off button. This confirms that FileVault is actually enabled.
How to disable FileVault on your Mac
- Open the System Settings app.
- Head to Privacy & Security.
-
Scroll to the bottom, and hit on FileVault.
-
Tap on Turn Off.
FileVault recovery

As a backup plan, Apple allows you to recover your files through your iCloud account or a complex recovery key. If prompted to pick between the two, we advise you to go for the iCloud account recovery. That's because it spares you the need to store a dedicated recovery key safely. Considering many users log in to their iCloud or Apple ID accounts frequently, forgetting its password is less likely than losing a complex recovery key.
That’s all you need to know about FileVault! You can add an extra layer of security for your peace of mind just by enabling this basic option. FileVault makes it more challenging for ill-intentioned people to access the data you've stored on your Mac without your authorization. That's because it relies on your password to decrypt the files you have. So, if you forget your Mac's password, then you will lose this data forever.