Quick Links
Apple's latest Macs are some of the computers around because they offer a wide range of well-optimized productivity apps and tools. That's not to mention that they're also decent for gaming and media consumption. However, if you're switching from a Windows PC and trying macOS Sonoma for the first time, then you may feel a bit lost at first. Fortunately, we've got you covered, and we'll be highlighting the things you should expect with this shift.
The user interface
The first thing you will notice right after you set up your Mac is a desktop that's quite different from what you're used to seeing on Windows. For starters, there's no Start Menu or Taskbar on macOS. Instead, you see a Menu Bar at the top of the display and a Dock at the bottom.
Desktop
The desktop on macOS is much like Windows. However, apps are arranged on the right side of the screen by default. You can also drag and drop any file or folder across the desktop as per your convenience, or use Stacks to group similar items by type of file or by date.
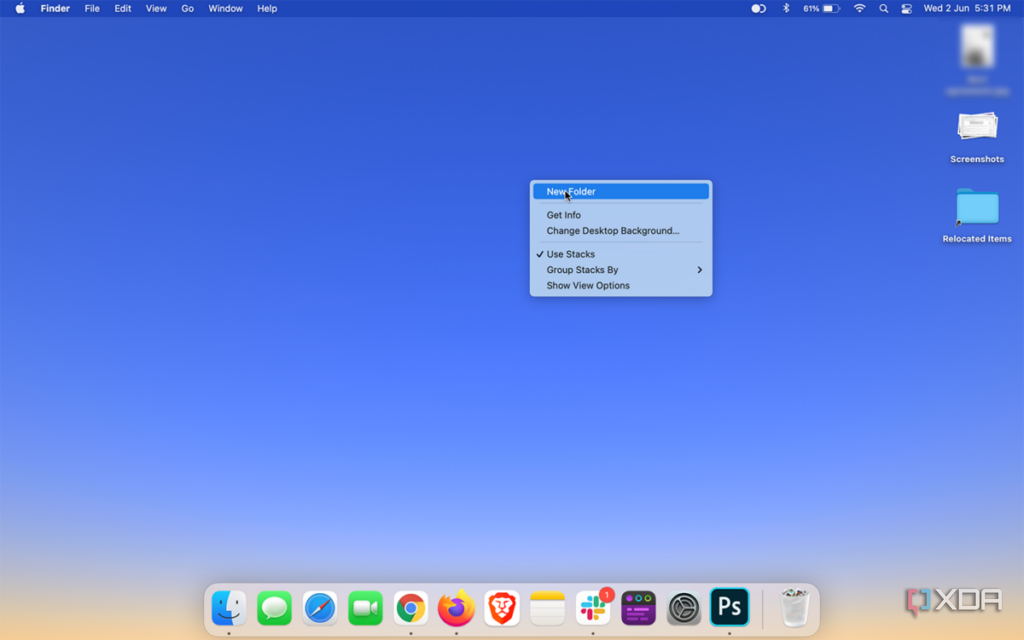
You can also right-click in an empty space on the desktop to reveal menu options to create a new folder, Get Info about the Desktop directory, change the wallpaper, and enable Stacks and other viewing options.
Menu Bar
You'll see an Apple Logo button on the left of the Menu bar, and if you click on it, you'll see options including About This Mac, System Settings, Recent Items, Force Quit, Shut Down, Restart, Lock Screen, and Log Out. Adjacent to this button, there are various options depending on the app that is at the front.
When there are no apps open on the current desktop, you'll see options relevant to Finder. Finder is similar to This PC (previously, My Computer), but ever so slightly different. We'll talk more about it in detail in the next section. Before that, let us take you through the remaining UI elements on macOS that you must know instantly as you start using it.
On the right side of the Menu Bar, there are quick-access shortcuts to certain apps (which support Menu Bar shortcuts) and settings such as Bluetooth, Wi-Fi, battery status, Spotlight Search, and others. Besides these, you can access the Control Center, which was first added in macOS Big Sur.
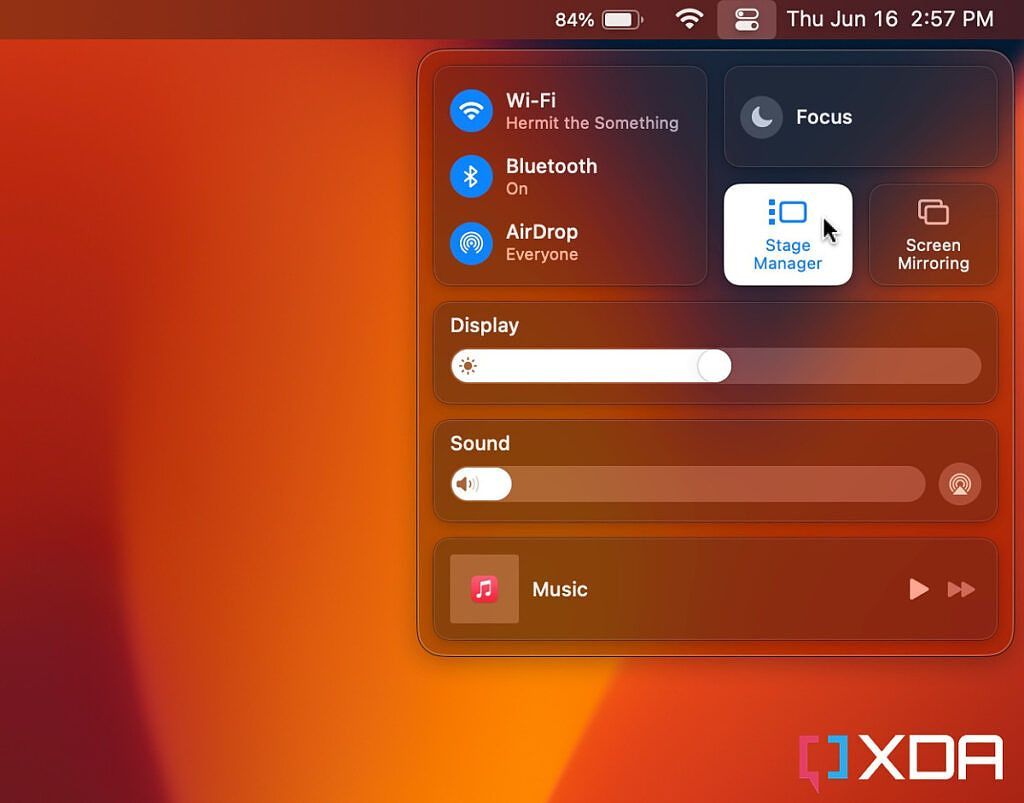
In the Control Center, you can find settings for Wi-Fi, Bluetooth, AirDrop, Focus, brightness, volume, controls for Now Playing media, Stage Manager, and Screen Mirroring. You can also add toggles for quick user switching or Accessibility settings.
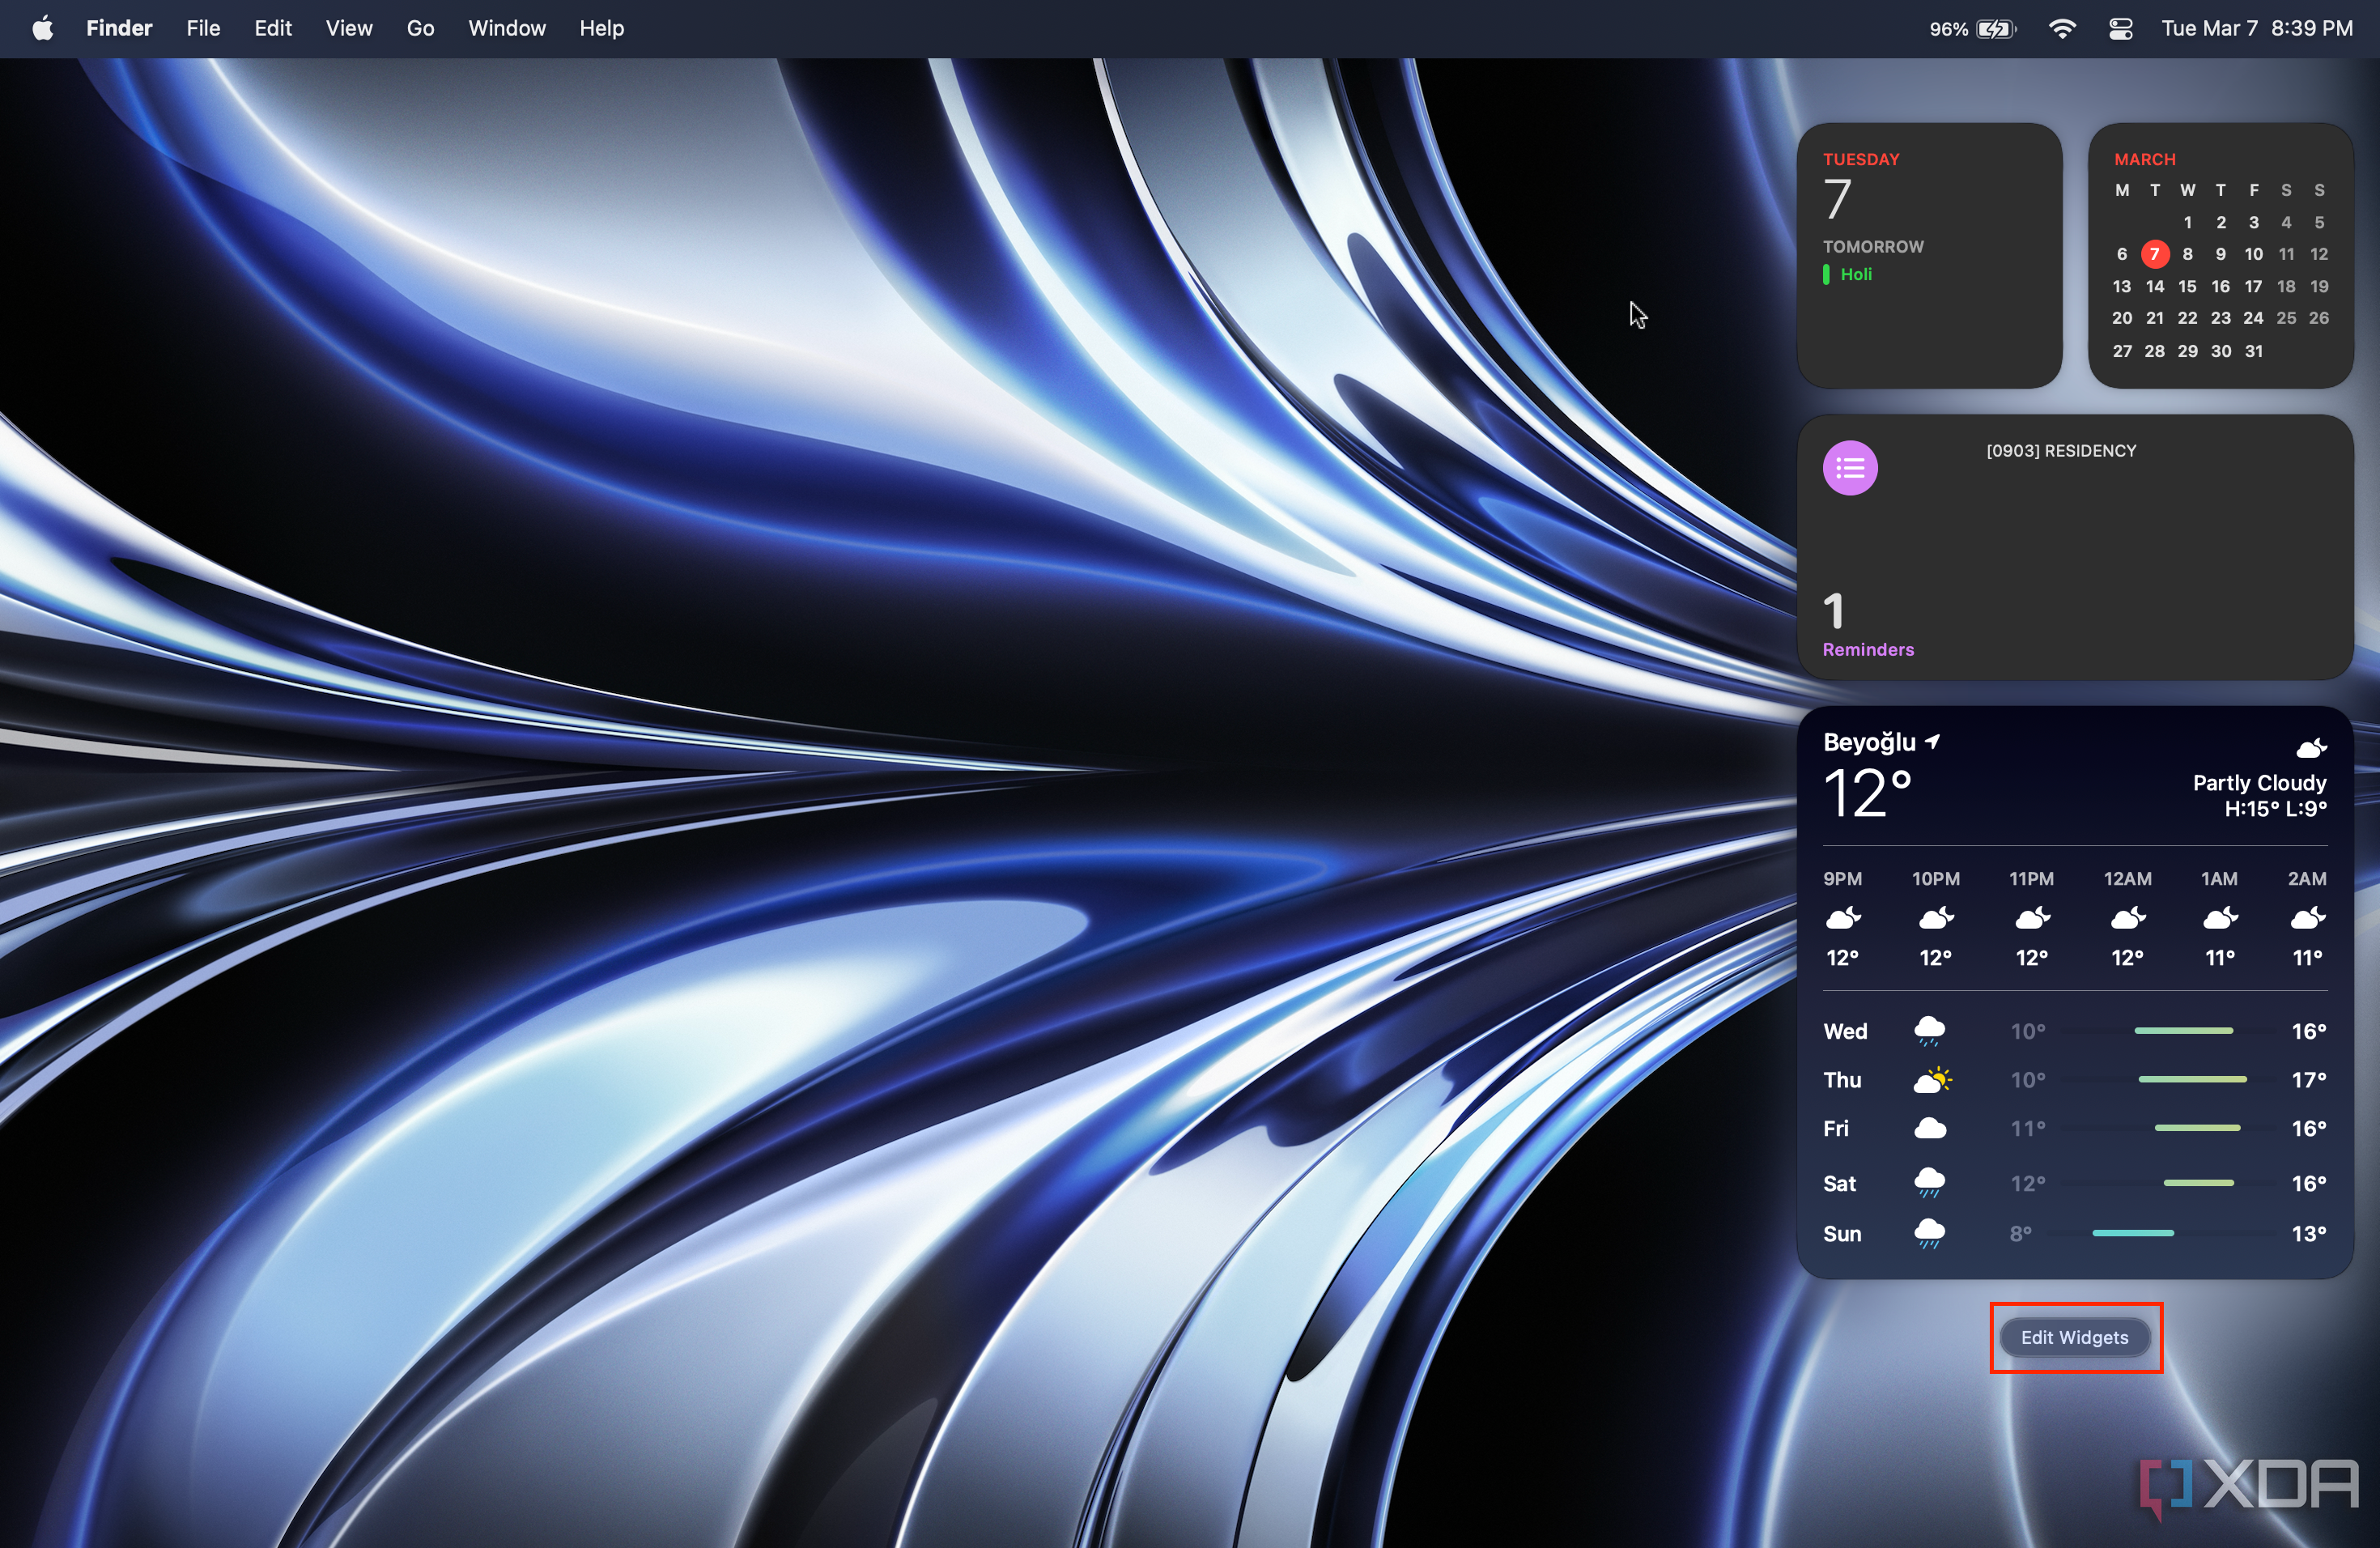
In addition, you'll find the date and time at the extreme right of the Menu Bar. Clicking on the date and time reveals the recently received notifications and widgets. You can engage with notifications as per requirements or clear them by clicking on the X icon. You can also rearrange widgets and add new ones by clicking on the Edit Widgets button at the bottom of the pane.
Dock
At the bottom of the display, the Dock is where you'll find direct shortcuts to some of the key apps. Like the Taskbar on Windows, you can change the position of the Dock, choosing between left, bottom, or the right of the display. When you hover your mouse cursor over the Dock, you will notice a magnification effect, and you can change the amount of magnification in the settings and the size of the Dock. Similar to Taskbar on Windows, the icons of all open apps are located and minimized in the Dock. You can choose whether a specific window minimizes into the app icon or as a separate preview at one extreme end of the Dock.
You can customize the icons in the Dock. To add any app to the Dock, open the app once and right-click on the icon. Then go to Options and click on Keep in Dock. To remove an app, do the same steps, except this time you'll see a checkmark next to Keep in Dock. Click on it to remove the checkmark, and thus, the app. For more settings like turning on auto-hide for the Dock, you can go to the Desktop & Dock section in System Settings.
Launchpad & Spotlight Search
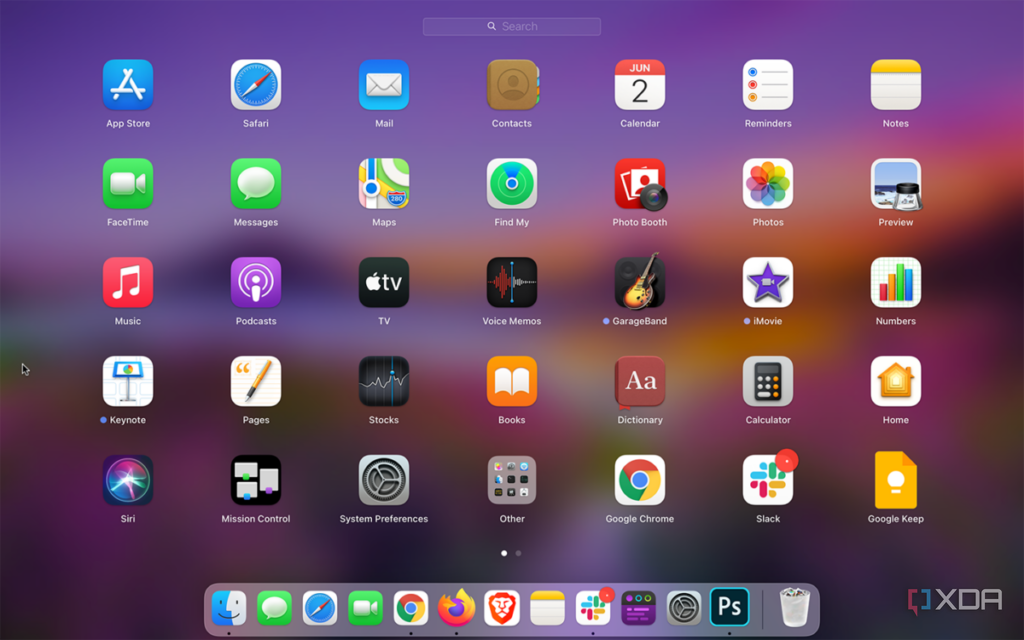
Unlike Windows, there's no Start Menu in macOS. Instead, there is Launchpad, which is like an app launcher, and it can be accessed by pressing the Launchpad icon in the Dock. Alternatively, you can open the Launchpad on a MacBook by pinching inward with three fingers and a thumb across the trackpad.
After opening the Launchpad, you can use the mouse or trackpad to sift through the list of apps or start typing right away to search for an app by its name. You can also organize apps by dragging and dropping them to the desired spot or add multiple apps to a folder by dragging one app's icon over another app or an existing folder. You can exit Launchpad by clicking the Esc button or pinching out on the trackpad using three fingers and a thumb.
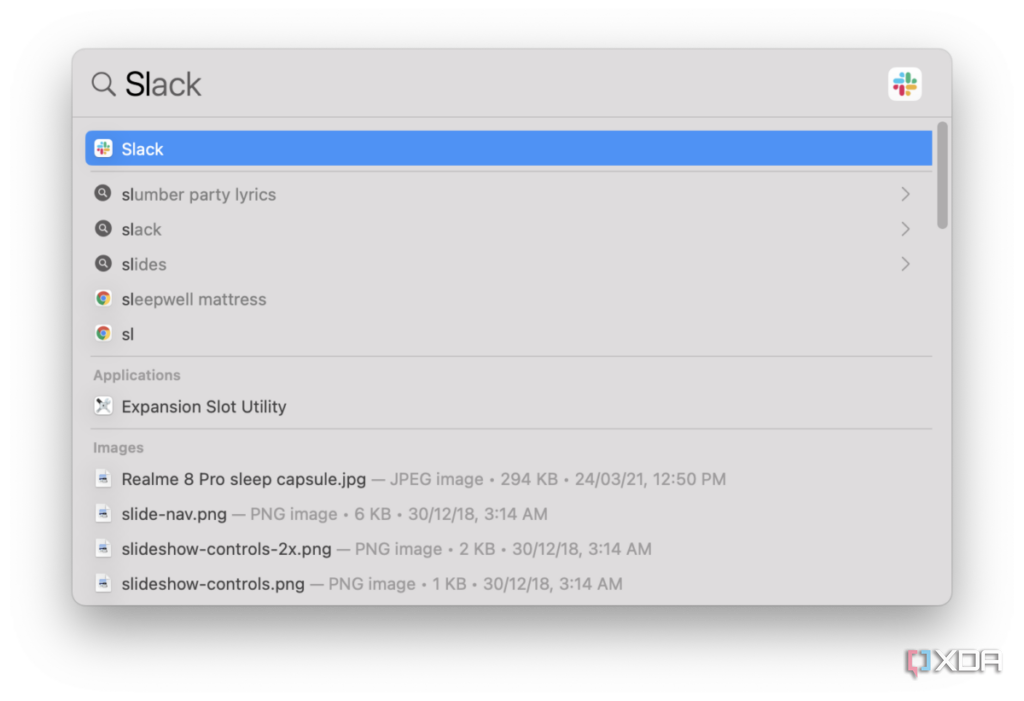
In addition to Launchpad, you get Spotlight Search in macOS. In terms of utility, it's quite similar to the Start Menu search bar in Windows and can be used for system-wide searches for files, apps, contacts, or menu items in System Settings. You can trigger Spotlight Search by clicking on the Magnifying Glass icon on the Menu Bar or by pressing Command + Space on the keyboard.
A search bar appears at the fore of the desktop. You can start typing here, and macOS will offer suggestions for results. In addition to items saved on the Mac, Spotlight Search can also search the web directly.
Finder instead of This PC
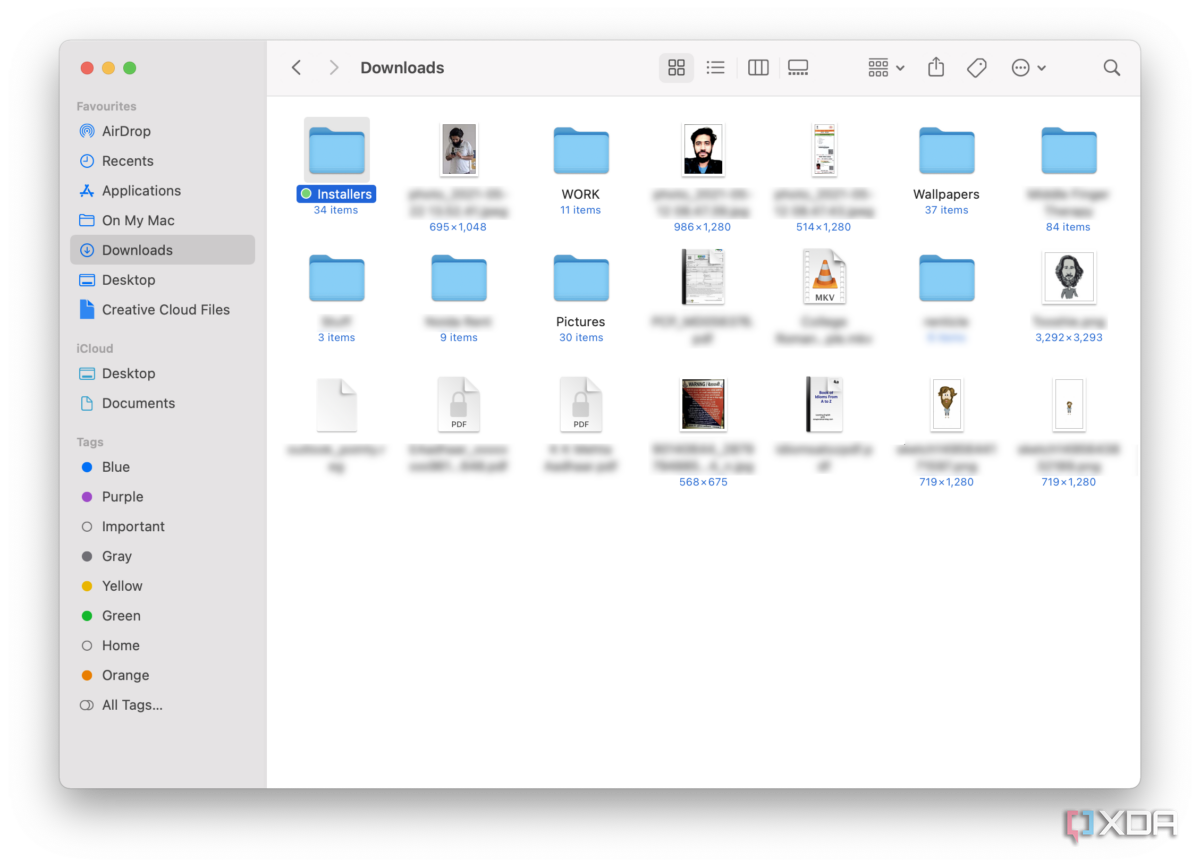
Finder is where all your files and apps are stored. It's the first icon on the Dock, characterized by the old Mac OS logo. The simplest analogy for Windows users is to see it as a replacement for This PC. Finder, however, is much more simplified as macOS doesn't usually have disk partitions. Most of your files are either stored in Downloads, Desktop, or Documents, and all of these folders can be accessed from Favorites on the left sidebar of a Finder Window.
You can open any file or folder by double-clicking on it and right-clicking to view relevant options like renaming, compressing, moving to the Bin, etc. You can also access all of your installed apps from the Finder by clicking on the Applications folder on the left pane. Additionally, you can assign colored tags to the files or folders for better sorting and then click on the color under the Tags heading in the Sidebar.
Finder also supports a tabbed view in case you want to open two folders in the same window. To do that, press Command while clicking on the folder. Alternatively, you can open two different Finder windows for easy actions like drag-and-drop.
You don't Control, you Command
Another way macOS differs from Windows is in terms of the modifier keys. A standard keyboard on a MacBook — or one that's designed to work with a Mac — has four key modifier keys: Command (cmd or ⌘), Option (alt or ⌥), Control (ctrl or ^), and Function (fn).
Unlike Windows, which uses Control as the primary modifier key, macOS uses Command. So, for action like Copy or Paste, you use Command + C and Command + V instead of Ctrl + C or Ctrl + V. Meanwhile, Option and Control are auxiliary modifier keys on macOS and rarely have direct shortcuts that do not also rely on Command. The Function key, as with Windows, is used to toggle between the F-numeric functions and the shortcuts assigned to them.
This way, your left thumb naturally rests on the Command key and can easily work between Command and the Space Bar. Simultaneously, your pinky finger doesn't need to juggle between Shift and Control and can be rested on the Shift key.
While most basic shortcuts are similar to Windows, here's a collection of the most fundamental macOS keyboard shortcuts you must know to become a power user.
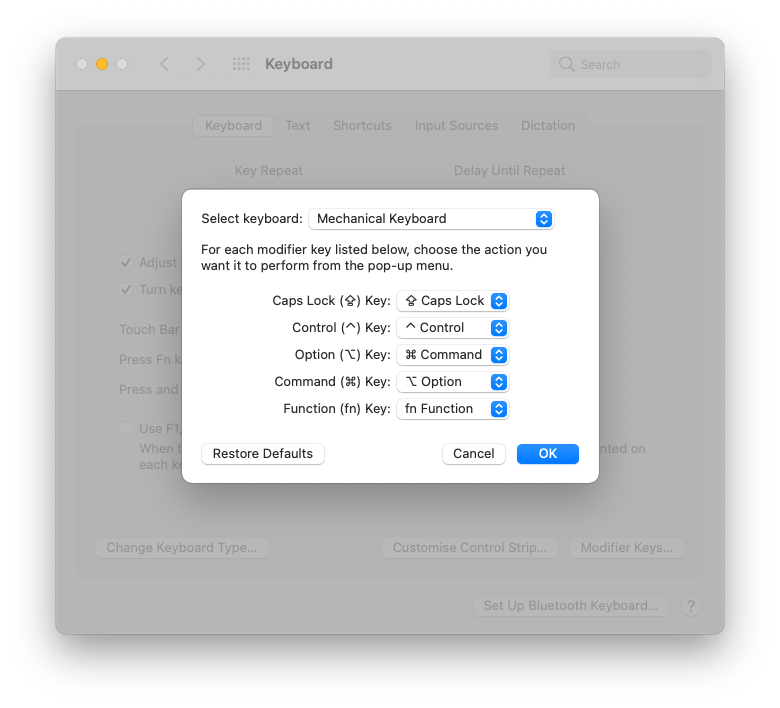
If you're using an external keyboard that isn't necessarily designed for Mac, it might work the same way it does on Windows. For instance, my USB keyboard — designed to work with Windows — identifies the Start key as Command and the Alt key as Option, basically swapping the two. Thankfully, you can reassign the modifier keys by heading over to Keyboard Settings and clicking on Modifier Keys in the Keyboard Shortcuts section.
Learning how to Cut-Paste on Mac
Macs don't traditionally support Cut-Paste as intuitively as on Windows. This means Command + X doesn't work for moving files (it does work while editing text). Bummer, right?
Fortunately, there are a few workarounds. You can either drag and drop the required file to a new destination by opening both directories side by side. But you can also Cut-Paste files with a keyboard shortcut in macOS. Copy a file using Command + C and then paste it in the destination folder using Command + Option + V instead of just Command + V. This way, the file will be removed from its original directory and copied into the new one.
Enter to Rename, Double-click to Open
During my initial days with Mac, I was constantly frustrated by trying to open a file or a folder by pressing Enter — called Return on macOS — on the keyboard. Instead of opening a file or folder, pressing Return gives you the option to rename it.
To open a file or folder in Mac, you can either double-click on any file or folder or press Command + O on the keyboard.
There's no Backspace
The lack of a Backspace button on a Mac-compatible keyboard or MacBook is fairly easy to spot. In place of Backspace, you see a Delete button, which serves differently from the one on Windows machines. The Delete button works as a Backspace while editing text, and to forward-delete, you need to press fn + Delete on the keyboard.
It must be infuriating for Windows users to learn that the Delete button does not delete a file. To delete a file, you must either right-click on the file and select Move to Trash or press Command + Delete. You can also drag the file and drop it over the Trash to delete it.
Trackpad gestures
One of the best experiences when it comes to Mac is the trackpad. Firstly, a MacBook's trackpad — or an external Magic Trackpad — is extremely responsive and precise. Newer models also offer force touch support that adds another dimension of controls. Unlike most Windows laptops that reserve the trackpad's bottom area for clicking, you can press anywhere on a MacBook's trackpad for a single click or even press with two fingers for a double-click without any significant effort.
Secondly, macOS supports a variety of trackpad gestures aimed at reducing the time spent on basic tasks like navigating to the previous or the next webpage, switching between open apps, opening notifications, rotating an image, etc. You need to make a conscious effort to learn all of the gestures but once you do, navigating through the interface becomes very easy. The menu for the Trackpad gestures is separate from general mouse settings in System Settings, and you can explore it to learn all of the gestures. To help users grasp them better, macOS also offers animated tutorials for each gesture.
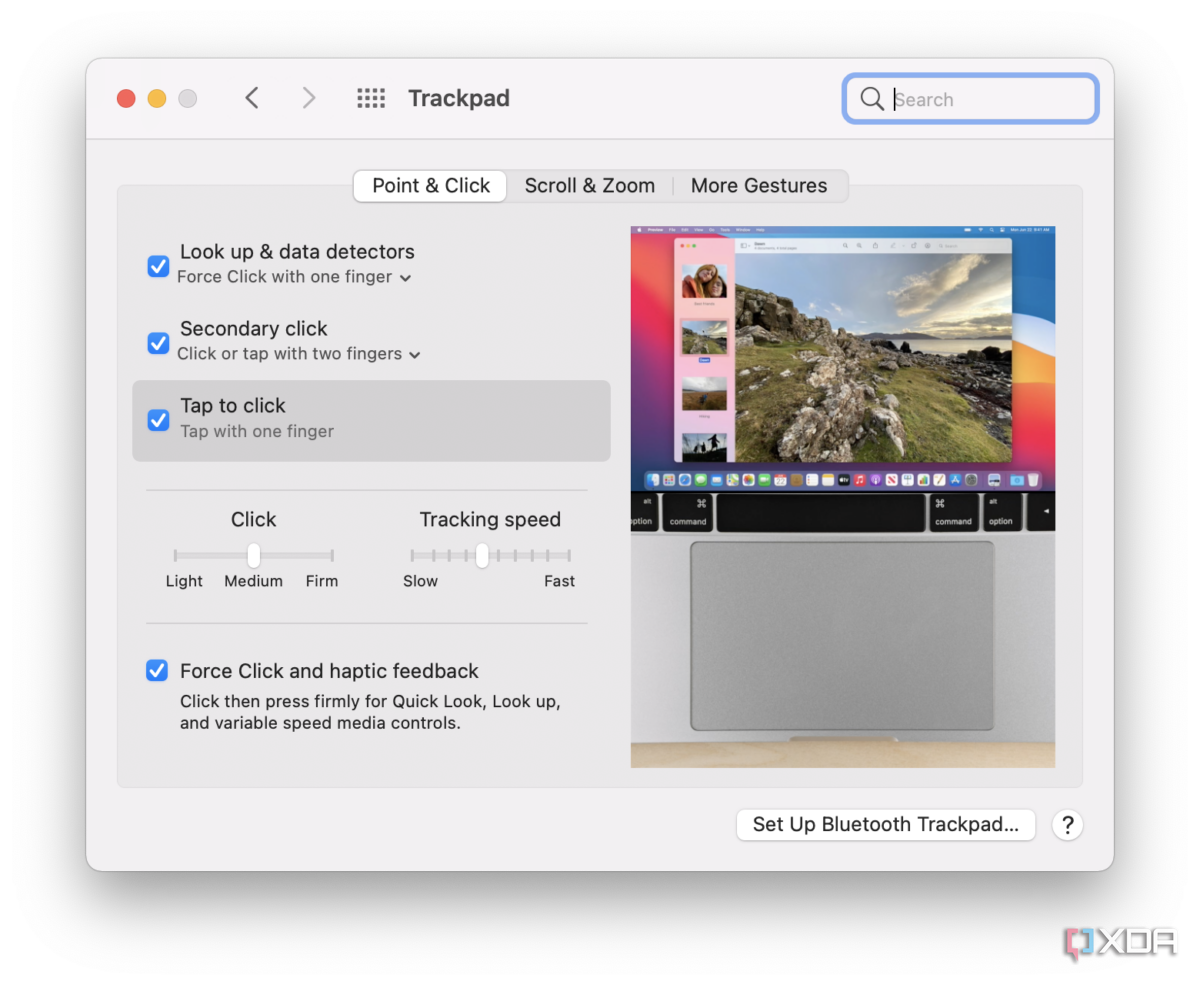
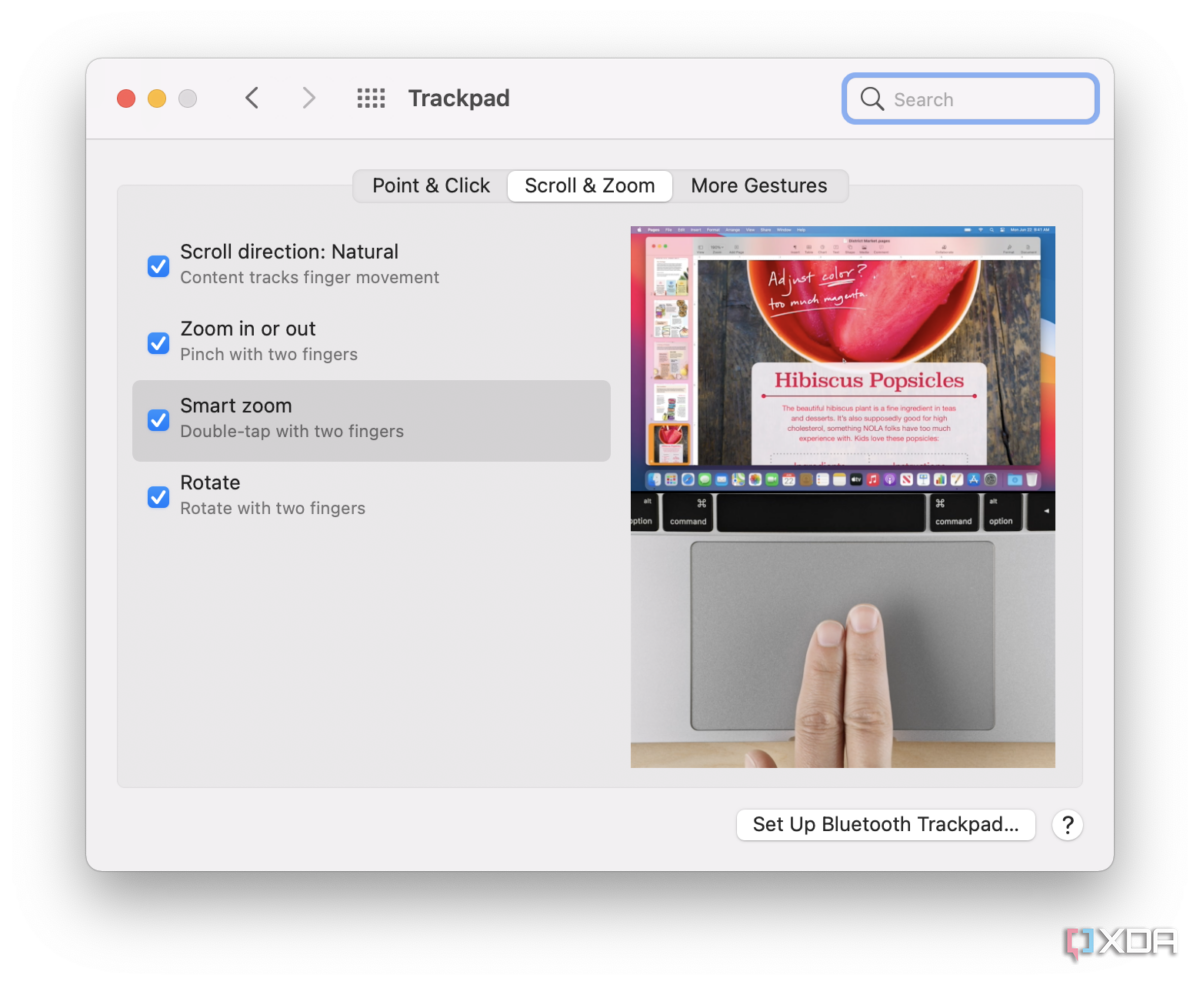
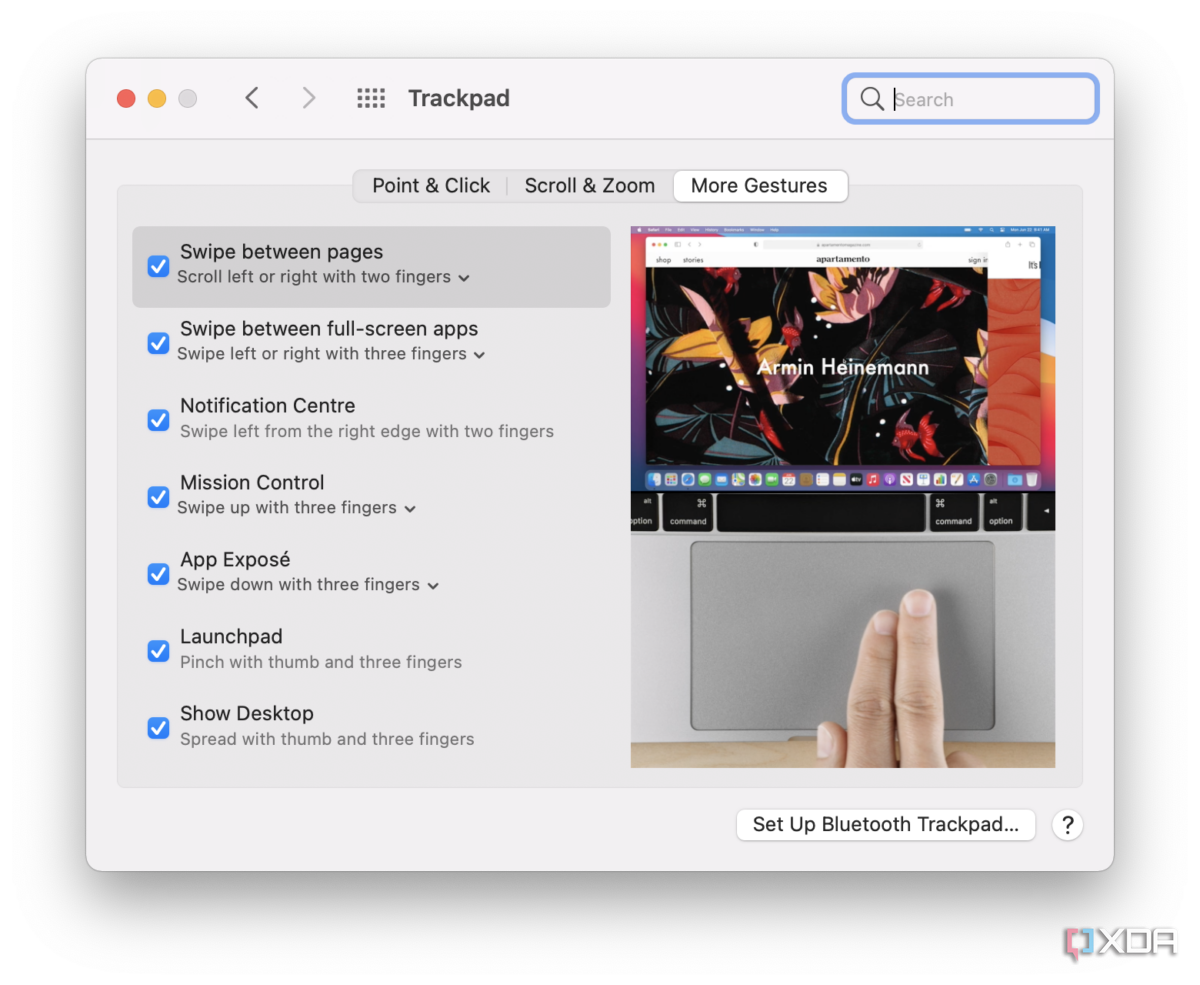
New MacBook users might find that simply tapping on the trackpad doesn't work as a click and they need to press on it. It's because Tap to click is disabled on macOS by default, but you can enable it under the Point & Click section in the Trackpad Settings.
Installing apps on macOS
The Mac ecosystem may not be as diverse as it is for Windows, but there are countless apps for macOS. One of the best ways to find the right app for your Mac is by heading over to the pre-installed App Store and finding apps from verified developers. Being uploaded to the App Store ensures that the app has gone through strict scrutiny and satisfies the UI & UX standards required by macOS.
However, certain developers might not want to upload their apps on Apple's App Store. In that case, the best way to find a relevant app is to use a search engine and type in a query like, "download [App Name] for Mac."
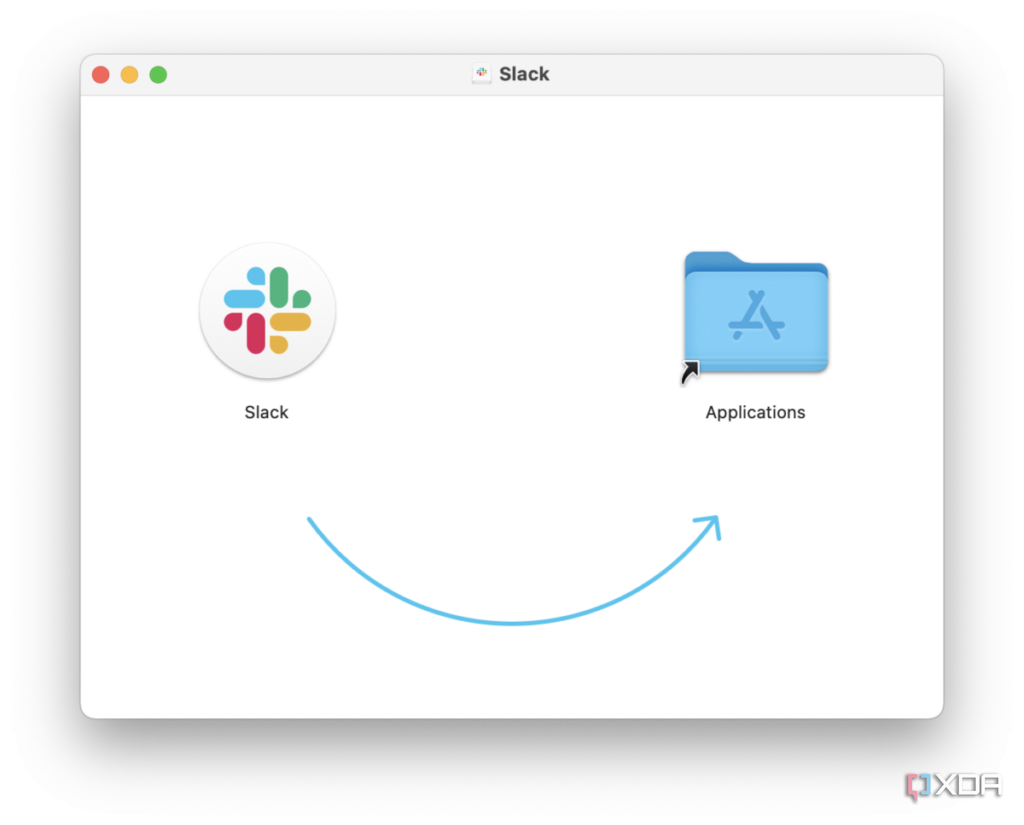
It must be noted that installers for macOS have ".pkg" or ".dmg" extensions, and ".exe" files will not work here. After downloading the package, just double-click on it. While installing apps downloaded from the internet on your Mac, you might see a window where you need to drag and drop the app icon to the Applications folder.
One more thing to note is that when you open an installer package on macOS, it mounts as an external disk visible on both the Desktop and the Sidebar in Finder. Once you're done installing the app, make sure you eject the installer to prevent it from consuming RAM unnecessarily.
Closing vs Quitting an app
By now, you must have realized the window control buttons — close, minimize, and maximize — are color-coded and placed on the left side of the title bar, i.e., opposite to what we're used to seeing on Windows. Other than this, macOS takes a peculiar approach to closing apps.
When you click the red icon with a cross, that particular instance of the app is closed. While it disappears from the screen, the app is sometimes still running in the background, represented by a dot below the app icon in the dock. Since the app is active in the background, it can be relaunched pretty easily without any waiting. While this is useful if you have to work with many apps, the app constantly requires some RAM to stay alive, and in turn, can slow down your Mac.
To avoid that, you can Quit an app to clear it completely instead of just closing it. To quit an app, you can either press Command + Q on the keyboard or right-click on the app's icon in the Dock and click Quit. If neither option works, you can click on the Apple Logo button in the Menu Bar and then on Force Quit. A small window will subsequently pop up, and here, you can force the app to quit. If the app freezes, you can try one of the four methods to force quit an unresponsive app on a Mac.
Multitasking on macOS
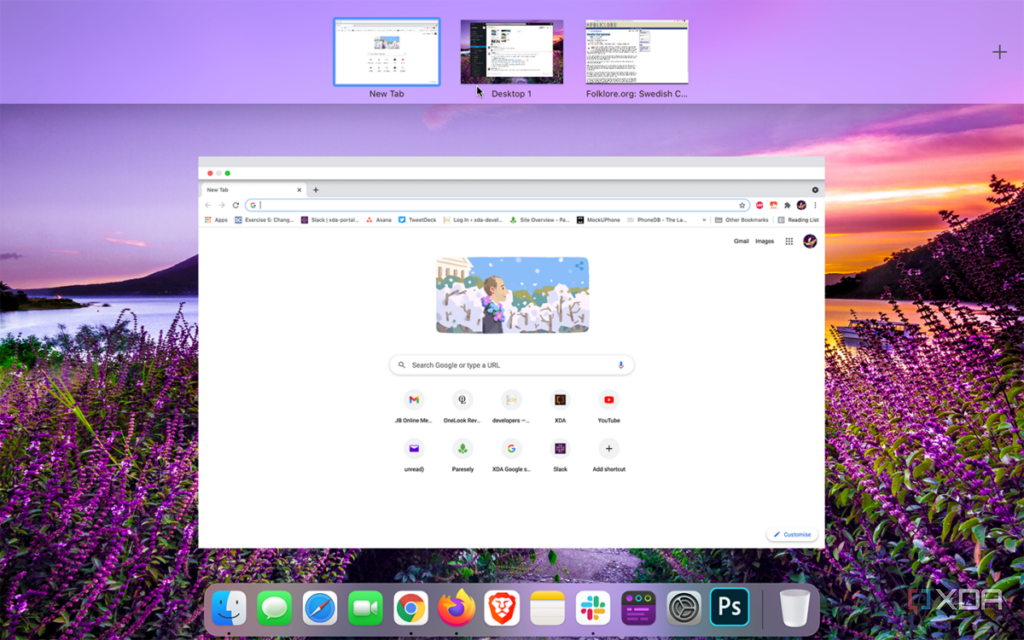
Like the closing of apps, macOS also has a different approach to resizing windows. Each window you resize to a full screen opens as a separate Desktop on macOS. This means that the app takes up the entire space on the display, and even the Dock and the Menu Bar are hidden — unless you bring the cursor close to the area where they usually are. This approach allows users to devote their complete attention to just one app without getting distracted by other elements.
Understandably, you can't just keep using one app and might need to switch between apps while working. To assist with that, macOS offers some intuitive gestures:
- First, you can swipe with three fingers left or right on the trackpad to cycle between all the desktops. You can also use the Control and left or right arrows to achieve the same.
- You can swipe with three fingers upward to reveal all the Desktops.
- All of the apps not maximized to fill the screen are available on a single desktop. To view all of these apps, you can swipe up with three fingers to view them.
How often should you turn off your Mac?
You might have often come across MacBook users just casually shutting the lid on their laptop and then resuming directly from there. This is because Macs support instant waking, and do not need to shut down frequently. In fact, shutting down or restarting your Mac can flush the RAM, thereby taking longer to launch an app. Therefore, it's a good idea to turn off or restart your Mac to fix any unexpected error or when you are updating your Mac. Otherwise, you can mostly put your Mac to sleep instead of shutting it down completely as long as you're going to use it frequently.
Unlike most Windows laptops, the battery on a MacBook is unlikely to get drained while sleeping. However, some energy is still consumed to keep the disk powered up. Therefore, it's a good idea to shut down your MacBook if you won't be using it for a long time. Likewise, a desktop Mac like the iMac, Mac Mini, or Mac Pro might draw electrical power unnecessarily, so you should shut them down if you aren't going to use them for a long time.
More to learn about macOS
We hope the points listed in this article will help ease any nervousness or apprehensions when switching from Windows to macOS. Once you've gone through these, we have some more suggestions for you to take a look at, including the following:
- How to insert special characters on a Mac
- How to completely uninstall an app on Mac and delete all junk files
- How to delete the hidden download log on Mac
- How to split your screen on a Mac, and why you’d want to do it
- How to set up & use Mac voice dictation
- How to scan documents on Mac with Continuity Camera
- What is Disk Utility on Mac and what can it do?
- How to use Find My on Mac to find your lost Apple device

