Quick Links
Windows 11 is a great version of Microsoft's operating system, having brought along many changes that make Windows more visually appealing and welcoming to new users. However, it's not to everyone's taste. For example, you might not like that you have to use a Microsoft account with Windows 11. It's used in a few places throughout the operating system and its apps. As of Windows 11 version 22H2, both Home and Pro editions of Windows 11 require a Microsoft account to set up, at least for most users.
Of course, that's the official stance from Microsoft, but thankfully, there are some workarounds you can use to bypass the need for a Microsoft account, and that's what we're here to help you with. Alternatively, if you've already set up your Windows 11 PC, you can remove your Microsoft account from it — it's only required during the setup process, not to use the OS.
Should you use Windows 11 without a Microsoft account?
What you need to know about Microsoft accounts is that they do enhance the experience on Windows 11. If you sign into Windows 11 with your Microsoft account, that account is also added to system apps like the Microsoft Store, Mail, Xbox, and so on. It also lets you sync your settings across devices. This allows you to buy apps and movies from the Microsoft Store, for example. Without a Microsoft account, you also can't download free apps from the Store if they have an age rating that requires verification. That includes apps like Netflix and Spotify, due to the wide range of content available there.
However, you can add your Microsoft account to these apps individually, so you don't necessarily have to sign into Windows 11 itself. Or maybe you don't care about these features enabled by a Microsoft account, so it's a good thing you're able to set up your computer without it. Here's what you can do if you don't want to use one.
What you need to know
When you go through the first-time setup process, you have to create your first account, connect to Wi-Fi, and so on. If you have Windows 11 Home, you'll have to connect to the internet, and then you'll be asked to log in with your Microsoft account. On Windows 11 Pro, if your computer has Windows 11 version 22H2, you'll be asked if you plan to use the computer for personal or work use. If you choose personal use, you'll need to sign in with a Microsoft account.
Microsoft already started requiring a Microsoft account for the Windows 10 Home edition, but you could work around it by not connecting to the internet. Here, it's a similar situation, and you can trick Windows 11 into letting you use a local account, although the methods can be complex.
When setting up your PC for the first time, you'll have to connect to the internet, which then allows you to sign in with your Microsoft account. If you don't have an internet connection, you won't be able to progress.
Method 1: Disconnecting from the internet

Microsoft has seemingly made it so that you're forced to stay connected to the internet during the setup process in recent versions of the Windows 11 installer. These steps may still work on some devices, but not for newer models. Check Method 3 to remove the Microsoft account requirement from the installer.
During the setup process, after connecting to the internet, your computer will check for updates and show you a license agreement. At this point, you can disconnect from the internet in a couple of ways. If you're using a laptop connected via Wi-Fi, look for a button that disables Wi-Fi altogether or one that enables airplane mode (thus disabling Wi-Fi). Alternatively, if you connected via Ethernet, simply disconnect the Ethernet cable from your computer.
Once you do that, you'll be able to create a local account instead and proceed with the process.
If you don't see a license agreement, and you're going straight to the sign-in page, you can still follow these steps and then click the back button in the top left to use a local account.
Method 2: Using Command Prompt
Microsoft has seemingly made it so that you're forced to stay connected to the internet during the setup process in recent versions of the Windows 11 installer. These steps may still work on some devices, but not for newer models. Check Method 3 to remove the Microsoft account requirement from the installer.
If your computer doesn't have an easy way to disconnect from the internet, the alternative is to use Command Prompt, which can be summoned during the setup process. When you get to the license agreement page mentioned above, press Shift + F10 to open Command Prompt.
Here, enter the following text, and then press Enter:
ipconfig /release

This will disconnect you from the internet, and you can follow the same steps above to finish setting up your PC.
If you have another edition of Windows, or if you're setting up Windows 11 Pro for work or school use, you won't need to do any of this. Connecting to the internet is optional, and even if you do connect to the internet, you can choose not to use a Microsoft account anyway, even though Microsoft will try to push you to do it.
Method 3: Removing the Microsoft account requirement from the installation file
There's one other way to bypass adding a Microsoft account to Windows 11, but it's only possible if you know how to create installation media for Windows 11 using a tool like Rufus. This is a third-party tool that creates a bootable USB drive, and in recent updates, it added the ability to remove the Microsoft account requirement from the installation process. To do it this way, you'll need a flash drive with at least 8GB of capacity. Keep in mind all data on it will be erased. Follow these steps to remove the Microsoft account requirement:
- Download a Windows 11 ISO from Microsoft's official website, under Download Windows 11 Disk Image (ISO) for x64 devices.
- Download Rufus from the official website and install it.
- Insert the flash drive you're going to use as installation media.
- Run Rufus.
-
Click the Select button and choose the ISO file you downloaded. Rufus should look like this:
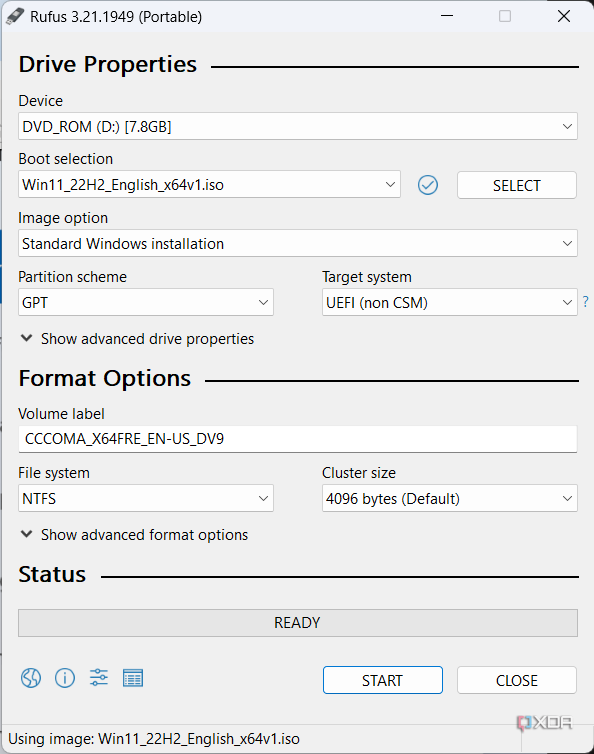
- Leave the settings in their default state and click Start.
-
Make sure the Remove requirement for an online Microsoft account box is checked.
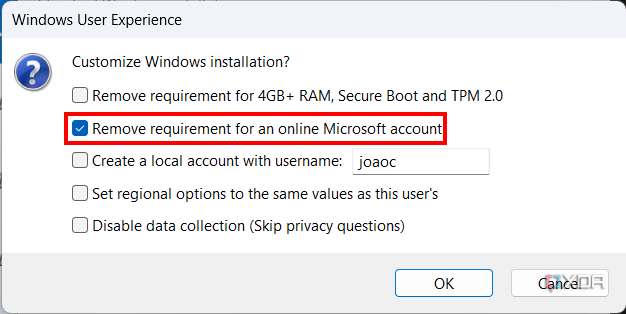
- Click OK and then OK again to confirm that your data will be deleted from the USB drive.
- Rufus will create a bootable flash drive that won't require a Microsoft account during setup.
- Follow the regular Windows 11 installation process, but make sure you don't connect to the internet during setup, as Windows 11 will download updates that revert the changes made by Rufus.
- Finish setting up the computer. You can connect to the internet once you're on the desktop as you won't be asked to sign in again.


Switching to a local account
Even if you set up your computer with a Microsoft account initially, you can still switch to a local account whenever you want. You're not forced to use your Microsoft account for as long as you have your PC. To do this, follow these steps:
- Open the Settings app.
- Switch to the Accounts section.
-
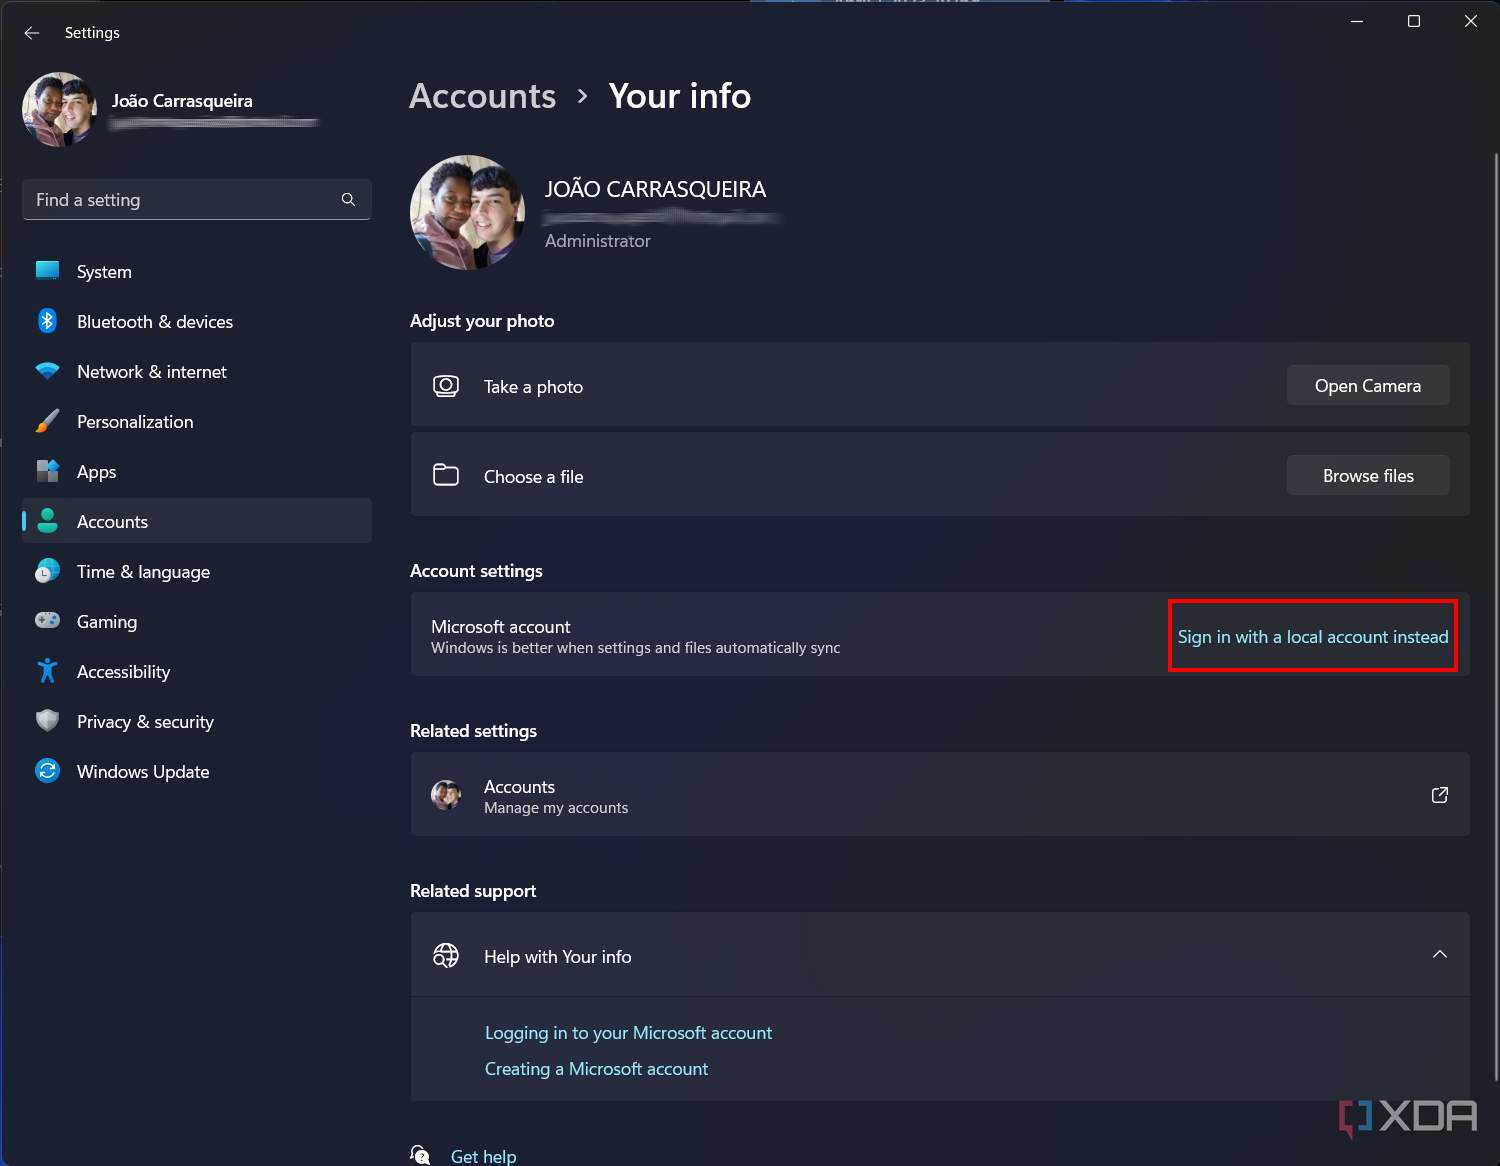
Click Your info.

-
Choose Sign in with a local account instead.
- If you encrypted your drive using BitLocker, you may want to back up your encryption key, as it's stored on your Microsoft account. Otherwise, you can still access your encryption keys here as long as the Microsoft account is active and you can click Skip this step.
- Click Next to confirm that you want to sign out of your Microsoft account, and verify your identity.
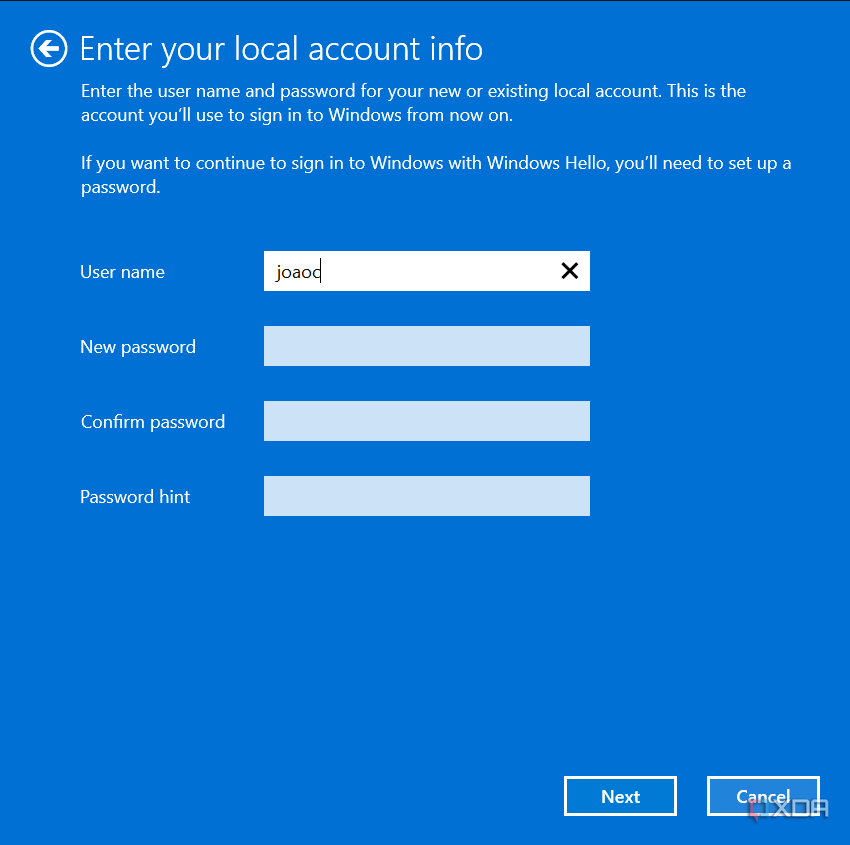
-
Choose a username and password (optional) for your local account.
- Click Sign out and finish to log out of your Microsoft account. Some Microsoft apps may still remember your Microsoft account after this and you may want to sign out of them manually, too.


If you want to add your account back, you can always go into the account settings mentioned above and sign in again.
As you can see, removing your Microsoft account isn't all that hard. Using it during the setup process has some benefits, like backing up your activation key to your Microsoft account, and it can also store encryption keys if you choose to encrypt your drives for extra security. But once that's done, you can remove the Microsoft account from your device, though we'd generally recommend keeping it linked.
If you'd like to learn more about Windows 11, a good place to start is checking out the differences between Windows 11 Home and Pro. Windows 11 Home is the most common option, even on high-end laptops, but business laptops tend to come with Windows 11 Pro.