Windows 11 comes with a lot of changes, both in the OS itself and also with its many built-in apps. Specifically, it brings a major upgrade to the Snipping Tool, which has now been revamped with a modernized look and has a ton of new features that have been added over time.
The Snipping Tool is great for simple screenshots and quick doodles, but it can now do much more beyond that. It can now record video and audio, and recognize (even redact) text in images. Let's take a look at all of these features and how you can use them on your Windows computer.

Best game recording software in 2024
Want to share gameplay footage with the world? These screen recording apps are what you're looking for.The Snipping Tool UI on Windows 11
Getting acquainted with the upgraded tool
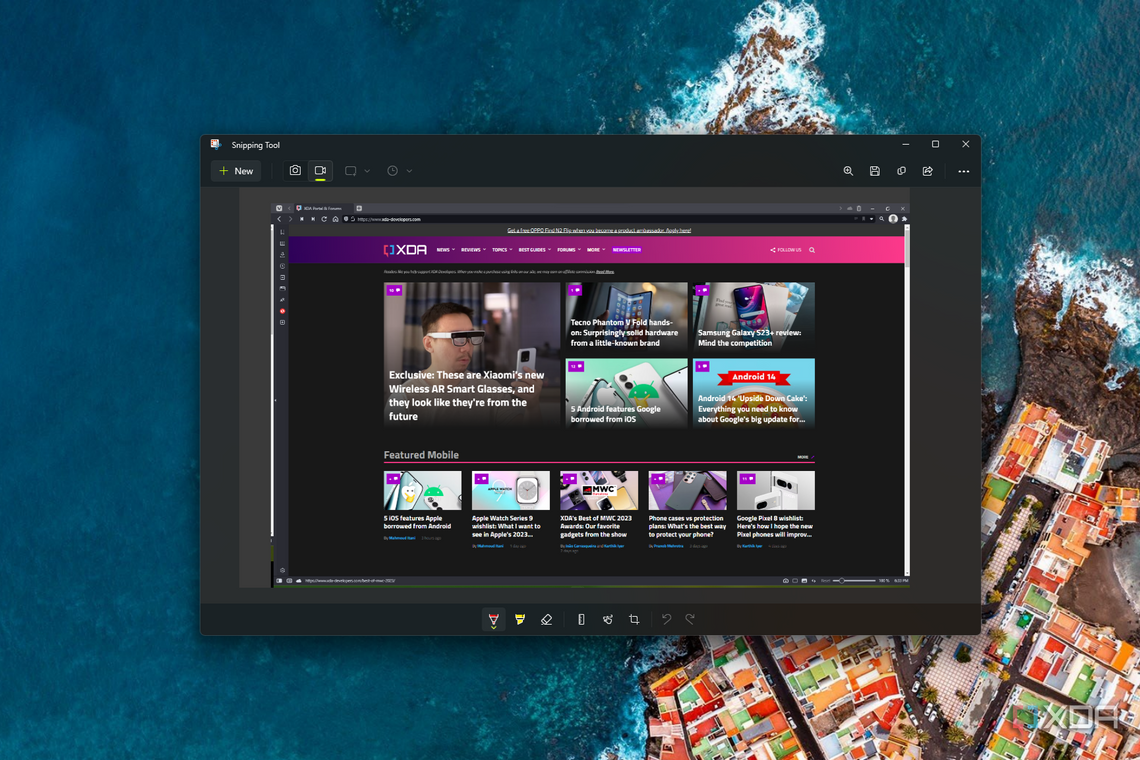
When you launch the Snipping Tool app on Windows 11, you're greeted with the window below. This window gives you a handful of options that will be familiar if you've used the classic Snipping Tool back in Windows 10 or prior. You can set a type of snip (Full-screen, Rectangle, or Free-form), as well as a time delay of 3, 5, or 10 seconds.
The biggest news, however, is the ability to record video, which you can do by hitting the recorder icon next to the camera button. Indeed, Snipping Tool can now record videos of your screen, which is a very long-awaited feature. You'll notice that if you switch to screen recording mode, you'll no longer be able to set a timer or choose a capture mode in the main window (though you can still choose an area to record, as we'll explain later). In either case, you can click New to start a snip or a recording.
Taking and editing screenshots
The basics
Taking a screenshot with the Snipping Tool is fairly easy. You can click the New button in the top left corner while the capture mode is set to Snip. Once you start taking a screenshot with the Snipping Tool, you can still change the type of snip using the floating toolbar at the top of the screen because you can launch the Snipping Tool while you're in snip mode with a keyboard shortcut (Windows key + Shift + S). If you do it this way, you're taken straight to the capture UI, so you can still change the type of capture you want to do without needing to open the main Snipping Tool window.

After you select an area to take a screenshot of, you'll get a notification in the bottom right corner of your screen which you can click to edit the snip. Once in the editor, the tools are pretty much the same as before, though some buttons have been moved around. The undo and redo buttons are now in the central section of the toolbar, along with dividers for different kinds of tools. You may also notice that the drawing tools are now sometimes at the bottom of the app window.
The first division includes the drawing tools, like pen, highlighter, eraser, and ruler options. These are the same as before, but the color picker for the pen and highlighter is translucent now. The second group in the center has cropping, text actions, and finger draw options (possible on touch-enabled devices). Finally, the last division has the undo and redo buttons.
Just like the main window, the editing tool also allows you to set a timer and the mode so that you can take a new screenshot from there. These options are up in the left corner, and in the right corner everything is the same as before (aside from updated icons). You can save, copy, or share the snip, but by default, snips are now automatically saved to your Screenshots folder within Pictures. Through the ellipsis menu at the top right of the tool, you can also print the image, open image file, or choose to open the snip with a different app for further editing.
Text recognition

You may have noticed that we mentioned text actions above, and yes, Snipping Tool now uses OCR (optical character recognition) to detect text in the screenshots and pictures you open. When you click the Text actions button in the toolbar, your picture will be scanned for text, and you can quickly Copy all text or use the Quick redact feature, which automatically hides email addresses and phone numbers in the screenshot.
If you want something more specific, the text can be selected directly within the screenshot so that you can select specific parts of the text to copy it or redact it.
Recording videos with the Snipping Tool
As we've mentioned, one of the big additions to the Snipping Tool on Windows 11 is the ability to record videos since its update in February 2023. You can record a video of any area of your screen, which can also capture system audio and microphone inputs. This makes it much easier to record Windows tutorials with voice-overs now.
To record a video, you need to open the Snipping Tool, switch over to video mode, and click New. You'll then be asked to select a recording area, which can be any rectangular area as long as it doesn't span across multiple monitors.

Once you select an area, click Start at the top of the screen to begin recording. If you want to record your voice, click the Microphone icon next to the recording time. Similarly, you can record system audio by clicking the icon to the right of the microphone.
After you're done recording, click the Stop button (the red square) at the top to finish. You'll then see a preview of your video, which you can play to see if it looks good. Unfortunately, you can't make any edits. Unlike screenshots, videos aren't saved automatically, so you'll have to click the Save icon in the top right corner to save it.
Settings
Finally, we have the app Settings. Here, you can change a few things, starting with whether you want to assign the Snipping Tool to the Print Screen key on your keyboard, replacing the typical screenshot experience by essentially functioning the same as the Windows + Shift + S keyboard shortcut. It can escort you to the Windows settings where you can enable this feature.
Other options here include whether you want all screenshots to be saved automatically, whether you want to copy your image edits to the clipboard automatically, and whether you want Snipping Tool to ask you to save screenshots you've edited before closing. You can also choose to automatically add a border to your screenshots, or whether new screenshots should be opened in a new Snipping Tool window if one is already open. Finally, you can change the app theme if you don't want to utilize your overall Windows theme.
The new Snipping Tool is better than ever
This is an overview of everything you need to know about using the updated Snipping Tool in Windows 11. It began as a simple fusion of the classic Snipping Tool and Snip & Sketch apps, but now, it's gained some big new features that make it more useful than ever. If you'd like to check out new features earlier than anyone else, keep an eye on all the Windows 11 features in preview.