Windows 11 (and 10) lets you organize your windows using a feature called virtual desktops, so you can separate apps into different environments. If you're not sure how to use them, we're here to help.
What is a virtual desktop?
The term "desktop" is often used to the assortment of icons displayed over the background image on a Windows PC. However, it can also refer to the very arrangement of apps and windows open at any given time. The entire environment of a Windows PC is the desktop, with all the open windows arranged on it.
With Windows 10, Microsoft introduced the ability to have multiple desktops on the same PC, and they're often called virtual desktops. These different desktops allow you to open different apps in each one, so you can have all your work apps in one desktop and all your entertainment on another, with a clear separation between them. Virtual desktops only separate your open apps, though — the icons on the desktop are the same across different virtual desktops. They're not fully separate desktops in the way you might expect, which is why the term "virtual desktop" is often used.
How to create and use virtual desktops in Windows 11
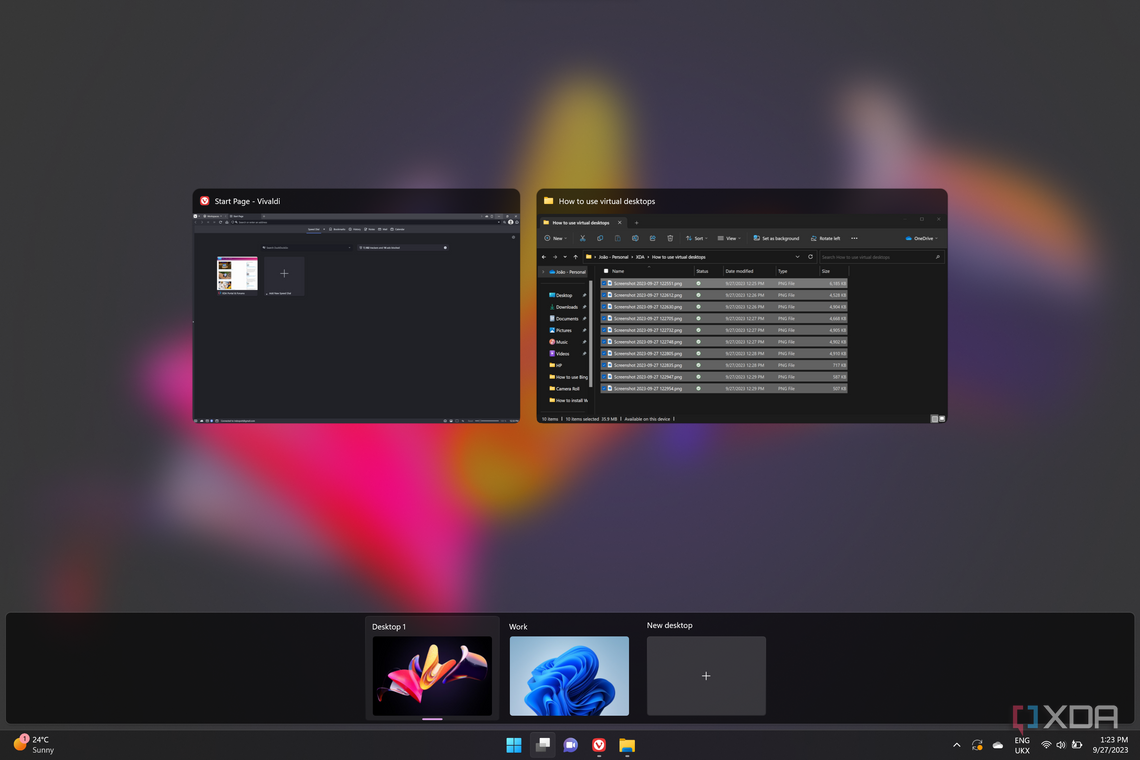
Suing virtual desktops on Windows 11 is actually very simple. You can click the Task View button on the taskbar, or press Windows + Tab on your keyboard to open Task View and see your open apps, along with your virtual desktops at the bottom. If you have a Windows tablet, you can also open Task View by swiping up with four fingers on the screen along with using other touch gestures.

From here, you can click the New desktop button at the bottom with a + (plus) sign on it to create a new desktop.

The new desktop will be created with the name Desktop 2 (or another number, depending on how many you have). You can click it to switch to it.

The new desktop will have a blank slate in terms of open apps, and you can start opening them as normal to get your new desktop workflow going. At any point, you can click the Task View button again or press Windows + Tab to see your open apps and switch between desktops.
How to move apps between virtual desktops
If you opened an app on the wrong desktop, you can easily move apps between desktops, too.
- Move to the desktop that has the app you want to move (if you're not on it already)
- Click the Task View button or press Windows + Tab on your keyboard.
-
Click and hold on the app you want to move, then drag it over the desktop you want to move it to.
-
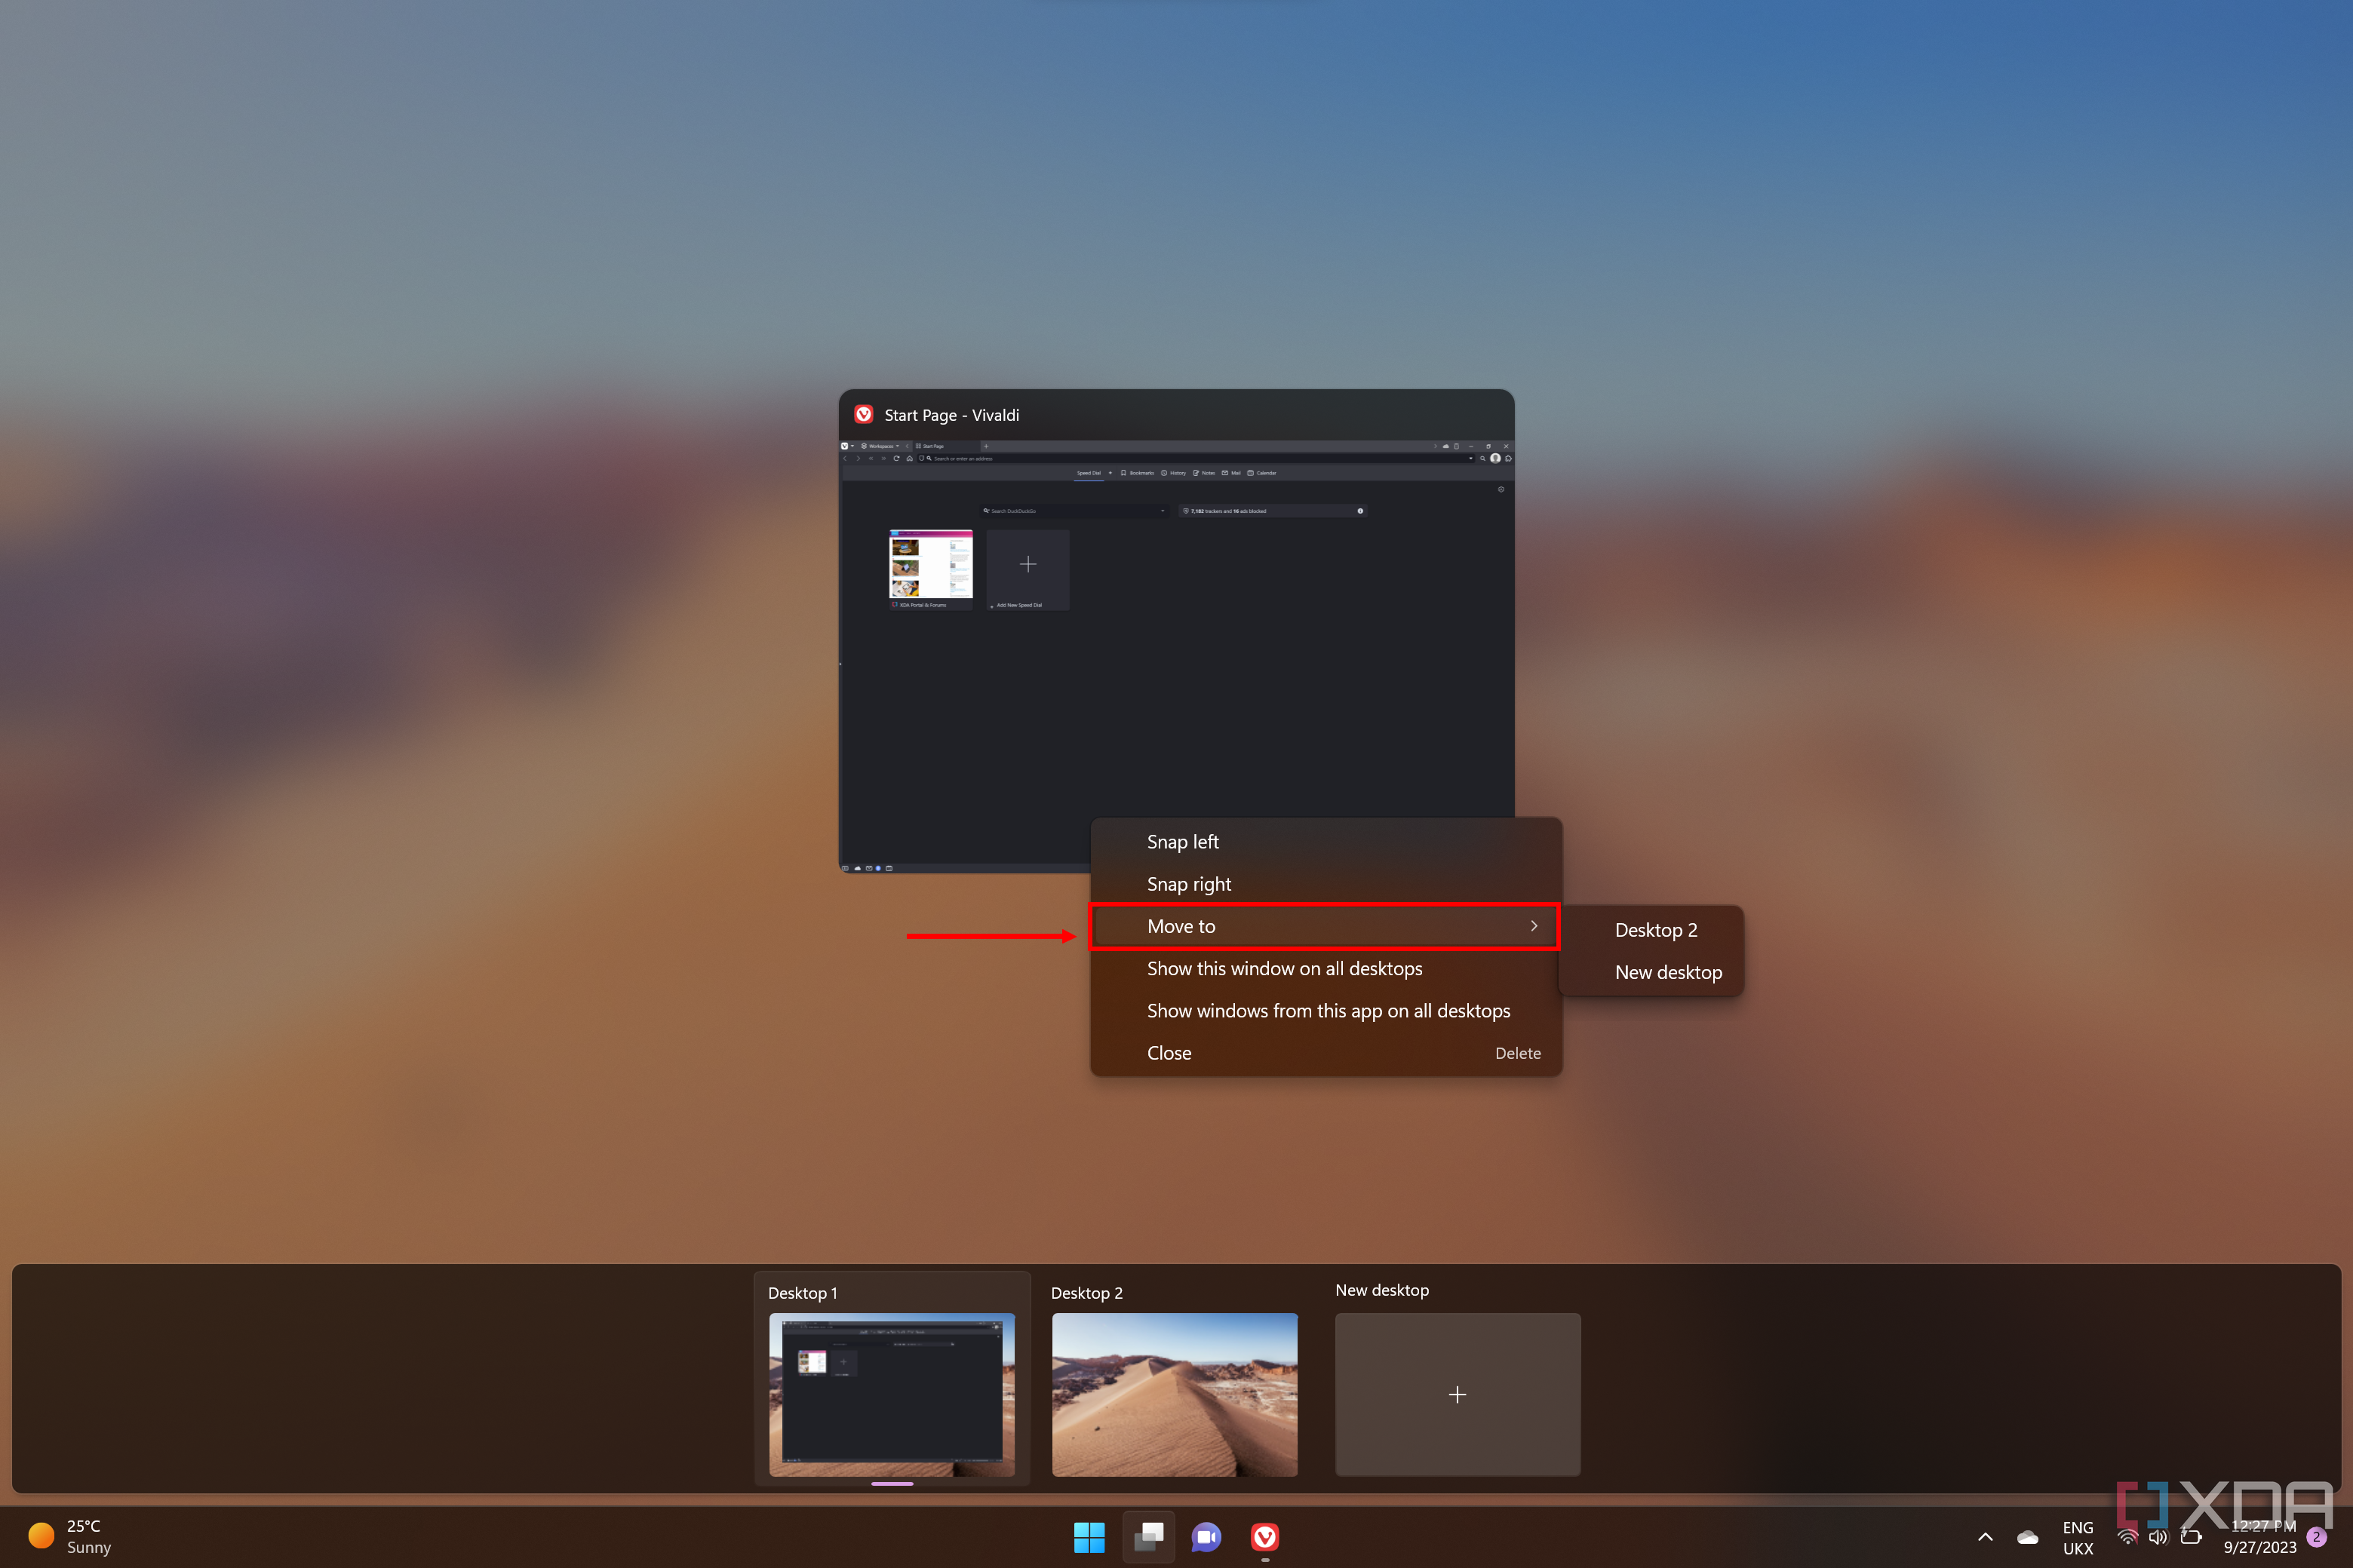
Alternatively, right-click the app you want to move and choose Move to, then select the desktop you want from the list.
-
Alternatively, right-click the app you want to move and choose Move to, then select the desktop you want from the list.

Your app will now be on the virtual desktop you selected.
How to quickly move between desktops
If you don't want to constantly open Task View to switch between desktops, you can easily move between virtual desktops with a keyboard shortcut at any time:
- Windows + Ctrl + Left arrow: Move to the next desktop on the left side of your current one.
- Windows + Ctrl + Right arrow: Move to the next desktop on the right side of your current one.
On tablets, you can also swipe sideways with four fingers to move between desktops, and you can configure similar functions for touchpad gestures on a laptop. You can also drag desktops and move their order on the list if you want to have specific desktops next to each other.
How to customize virtual desktops
There's some degree of customization available with virtual desktops on Windows 11. Specifically, you can change the name and the desktop background, so they're easier to identify in the Task View screen.
How to change the name of a virtual desktop
Changing the name of a virtual desktop is very easy. Simply:
- Open Task View
-
Click the name of the virtual desktop you want to rename

-
Type in the new name.


How to change the background of a virtual desktop
Changing the background image is a little more complicated and there are some limitations, too. If you're using a slideshow or a solid color as your desktop background, it will apply to every virtual desktop. However, you can set a different static image as the background for each virtual desktop. Here's how:
- Open Task View
- Right-click the desktop you want to customize
-
Click Choose background.

-
Make sure the Personalize your background option is set to Picture. Otherwise, backgrounds will apply to all desktops.
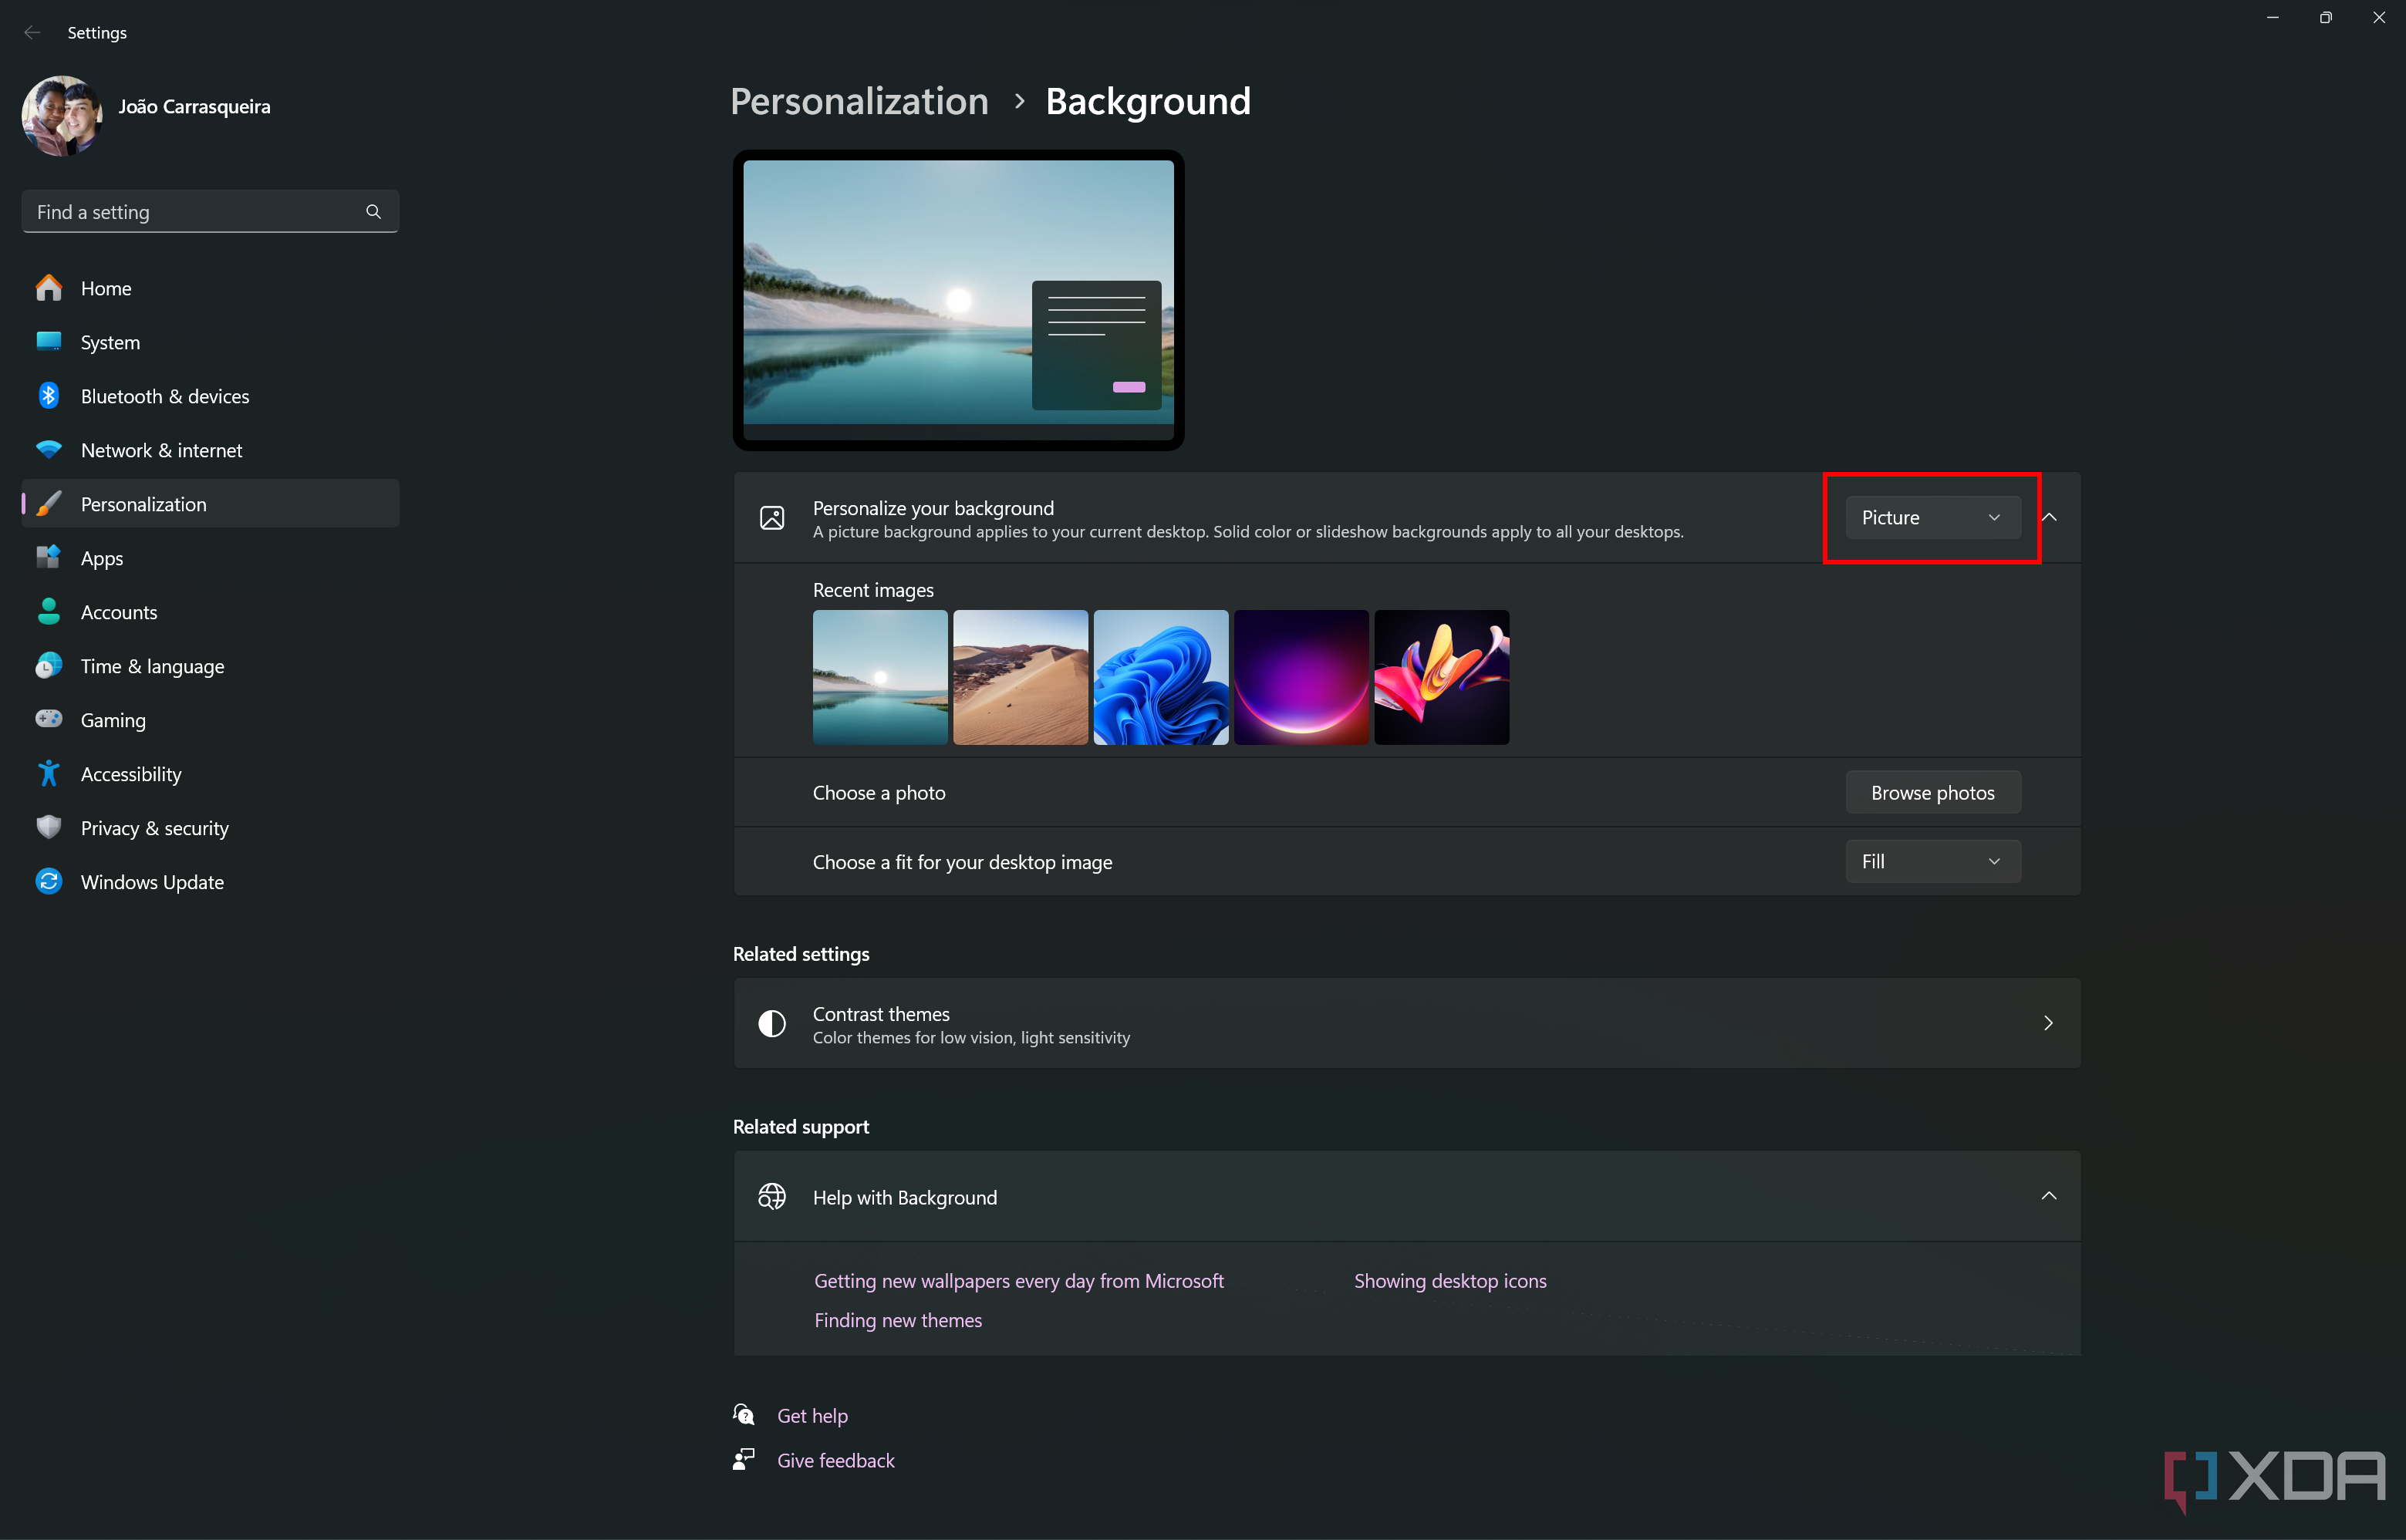
- Click Browse photos to choose a desktop background or pick one of the recent images available on the list.


You have to repeat this process for every desktop you want to customize with a different image.
How to remove a virtual desktop
If you don't see the need for a specific desktop anymore, you can easily remove it. Your open apps will automatically move to another desktop, so you won't lose them. To do this, simply open Task view, hover over the desktop you want to remove, and click the X button in the top-right corner of it.

Change what apps are shown on virtual desktops
There are a couple more settings you can change for how Windows 11 handles apps across different desktops. To access your virtual desktop settings:
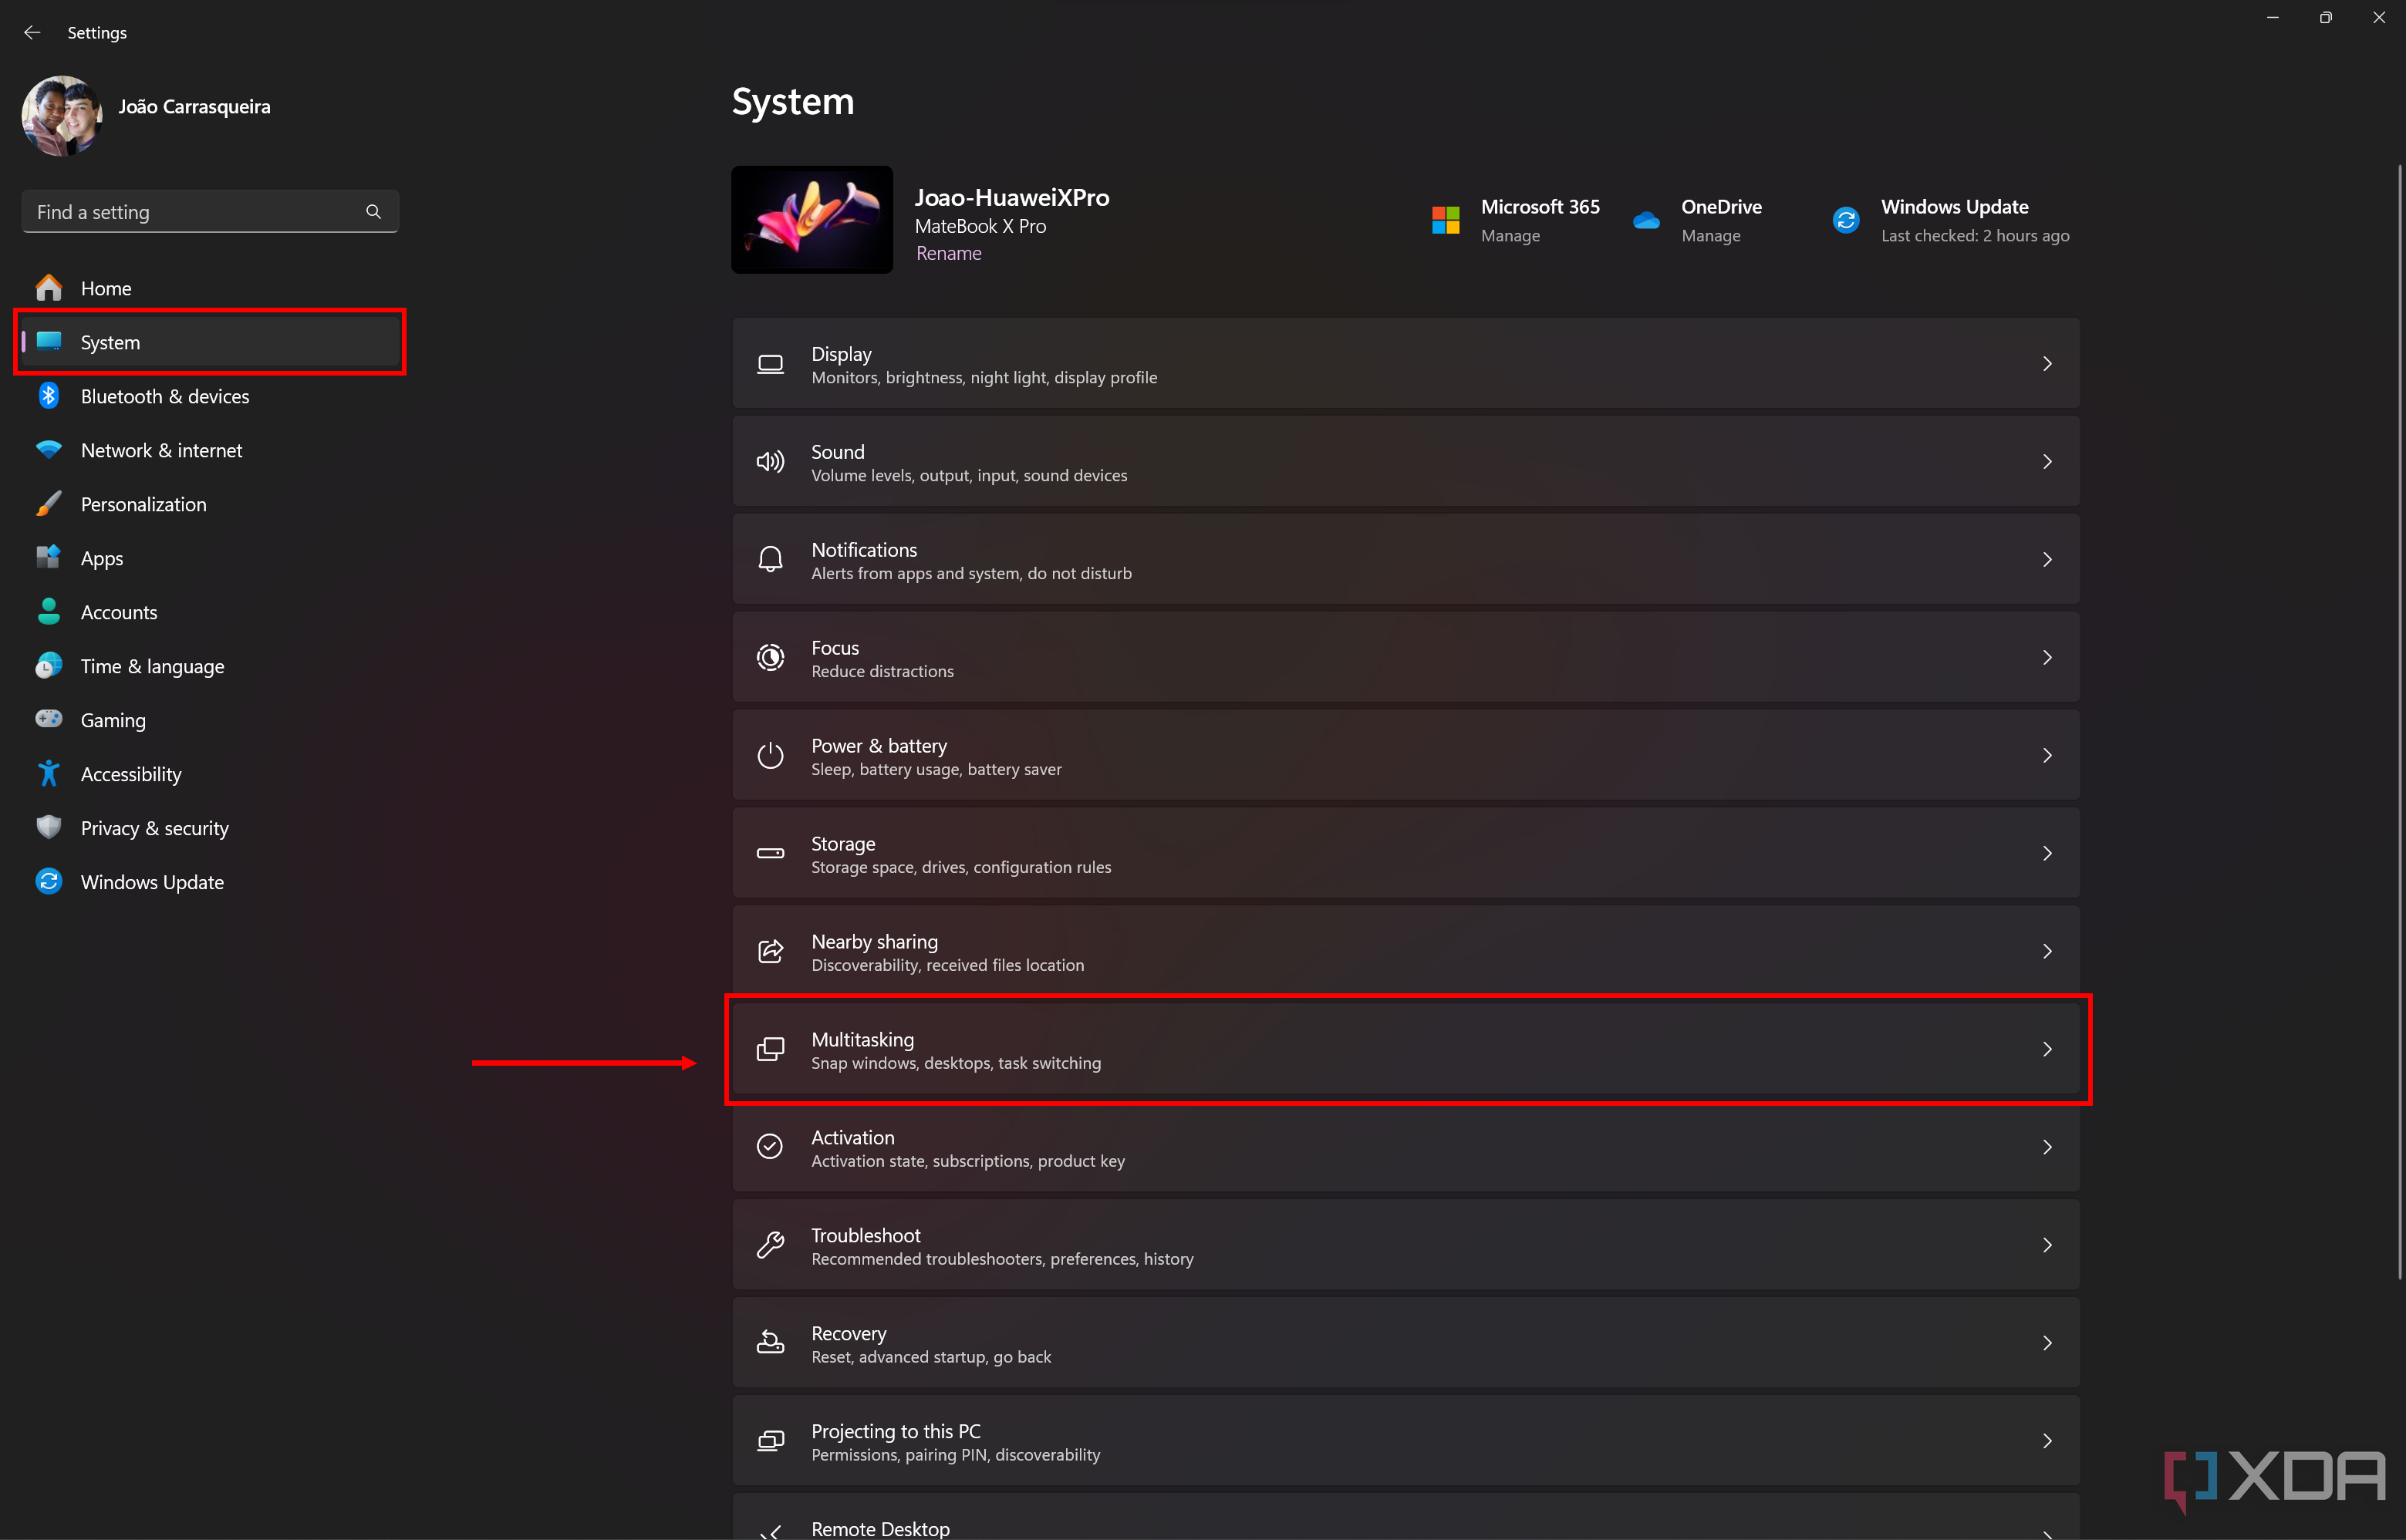
- Open the Settings app.
- Select System from the side bar.
-
Click Multitasking.
-
Expand the Desktops area to see the following options.
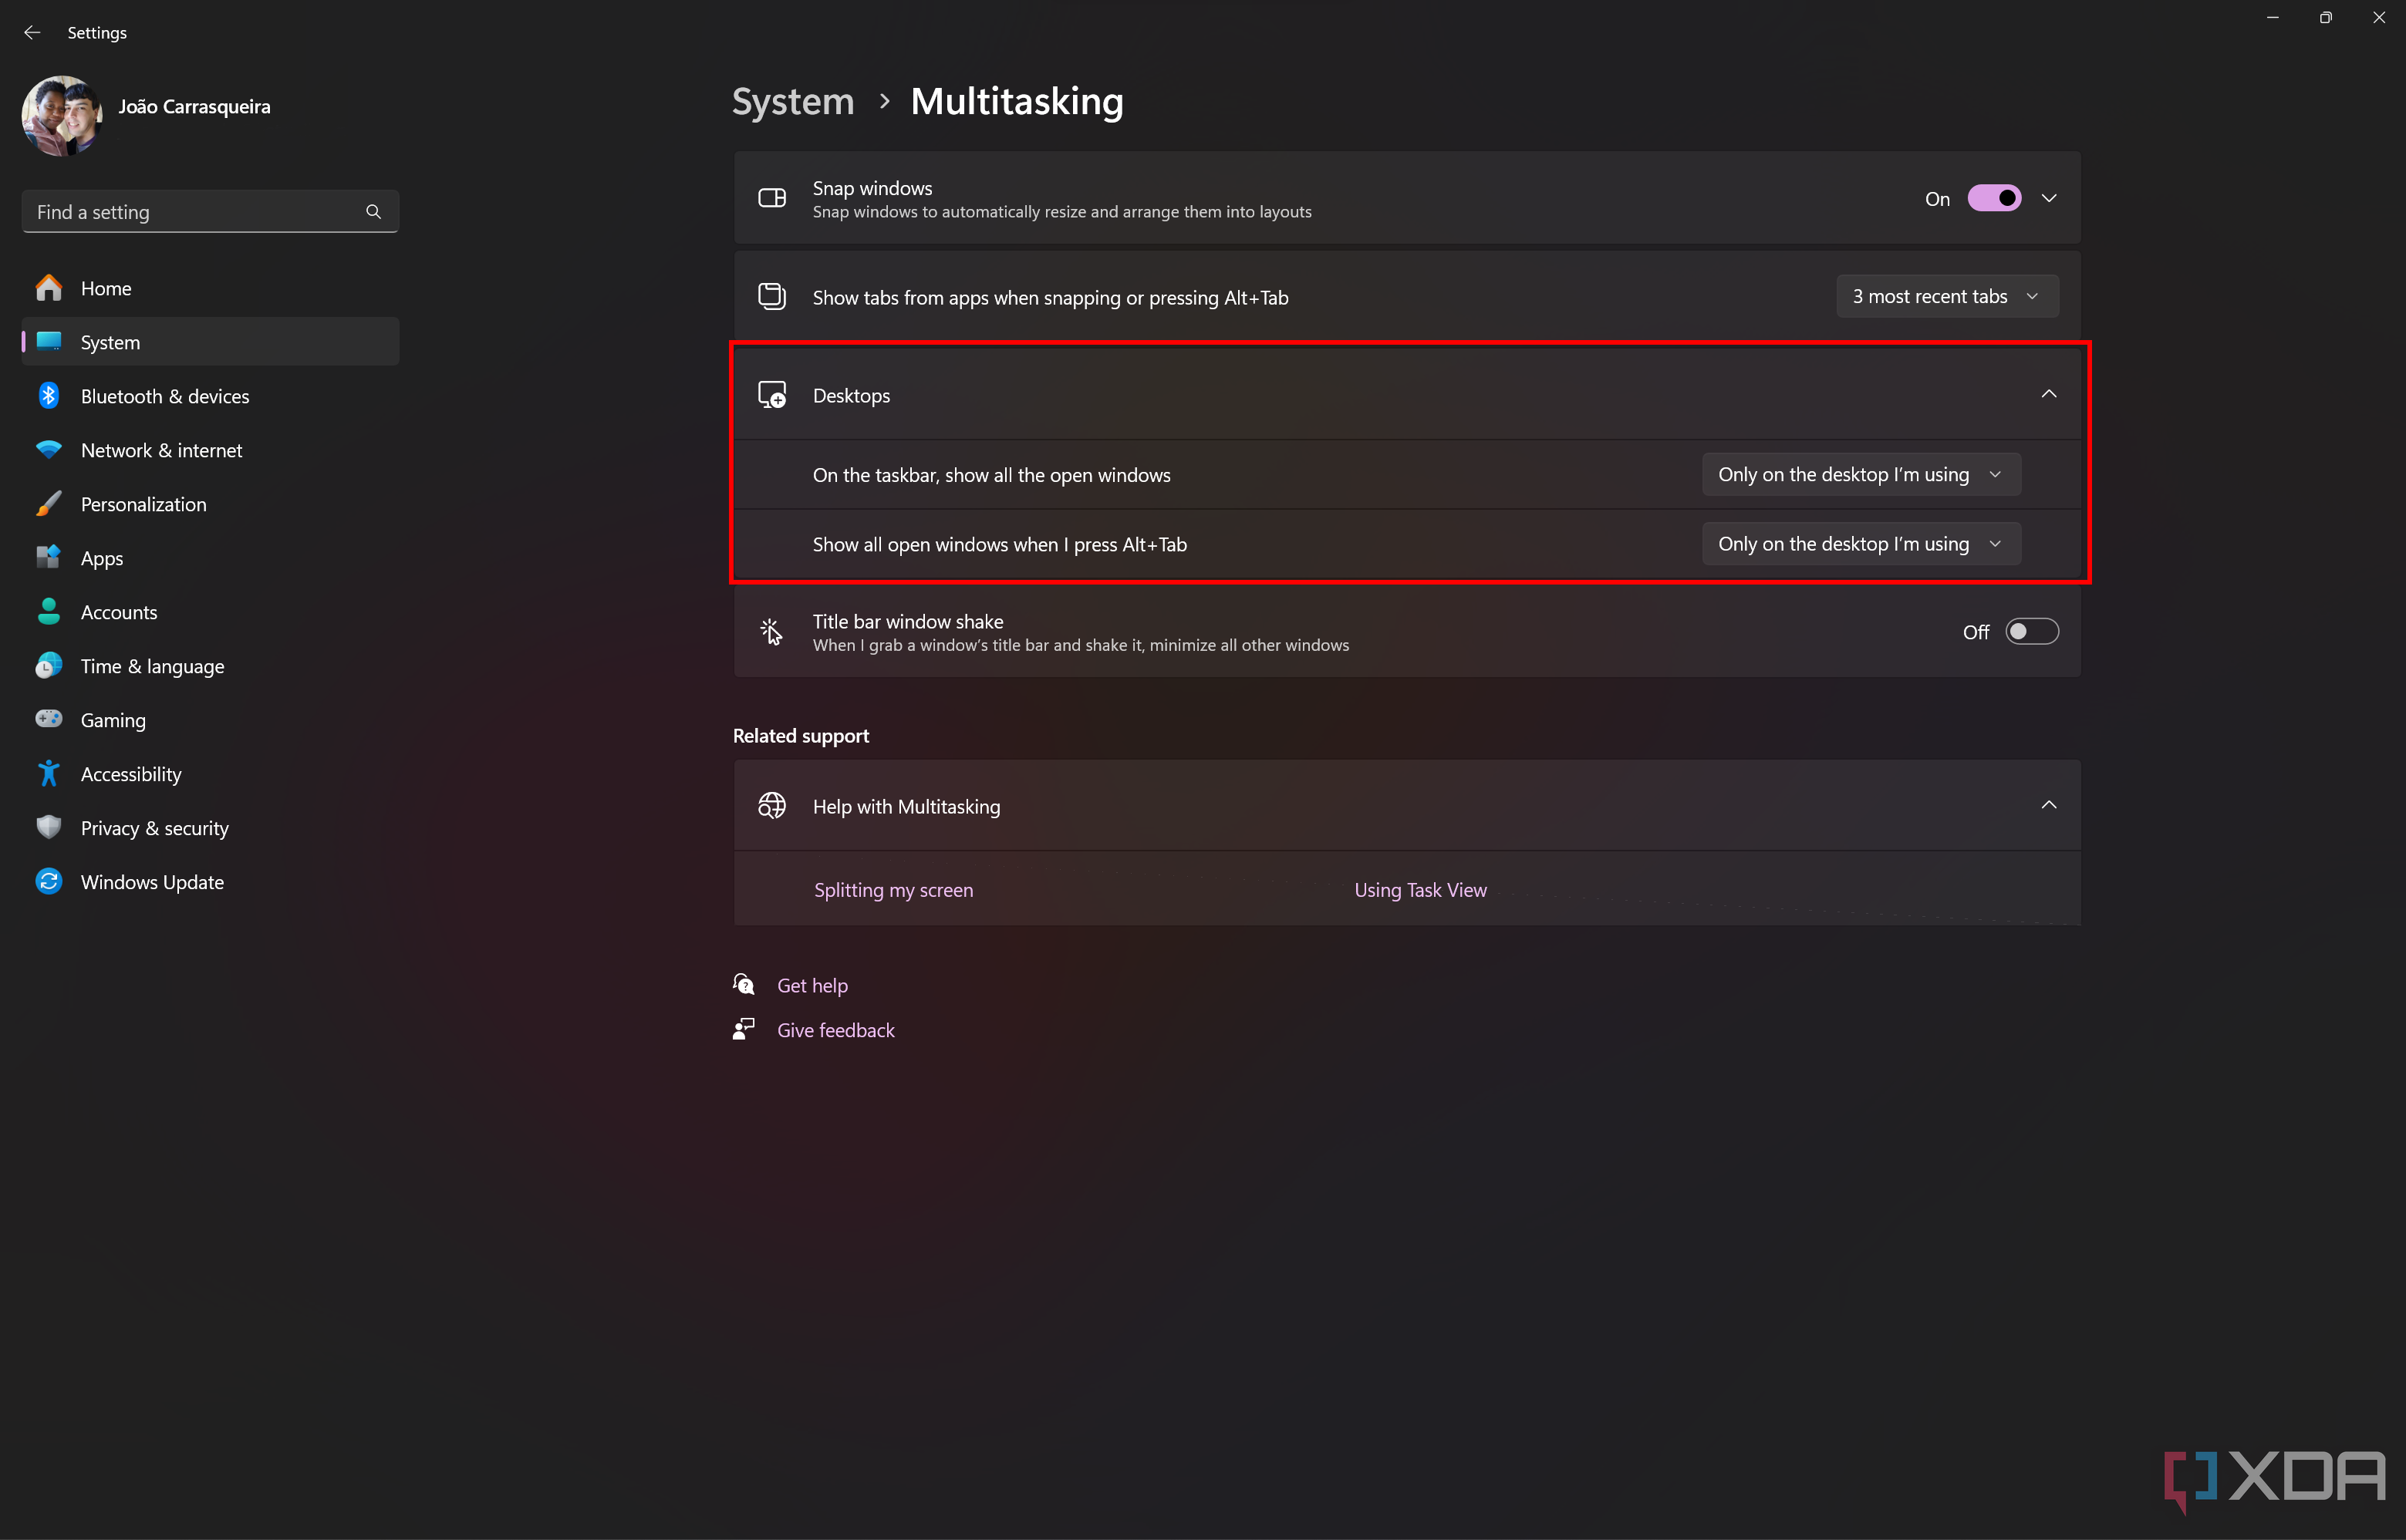
- On the taskbar, show all the open windows: Choose whether you want to see your open apps on the taskbar across desktops.
- Show all open windows when I press Alt+Tab: Choose whether the Alt + Tab task switcher should include apps from only the current desktop or all desktops.


Both of these are set to Only on the desktop I'm using, meaning you'll only see apps from your current desktop on the taskbar and task switcher, so things like cleaner. You can change it to All desktops if you want to see apps from all desktops. With this option, you'll automatically switch desktops when you select an app that's open on another desktop.
That should give you all the tools you need to get started using virtual desktops on Windows 11. While this feature also exists on Windows 10, it's not quite as robust, so some features are missing.
If you haven't upgraded to Windows 11 yet, check out the minimum system requirements, or see if you have one of the many PCs compatible with the Windows 11 upgrade. If not, you may be interested in buying a new laptop, since all Windows laptops now come with Windows 11.