Quick Links
Microsoft introduced Windows Subsystem for Linux (WSL) a while back, which brought support for running Linux apps straight from your Windows installation without the need to set up a virtual machine. Being such a complex compatibility layer, WSL had some limitations. The initial implementation didn’t even use a full-fledged Linux kernel, so several applications faced compatibility issues. Version 2 made a lot of improvements, but something was still missing: support for connecting physical USB devices.
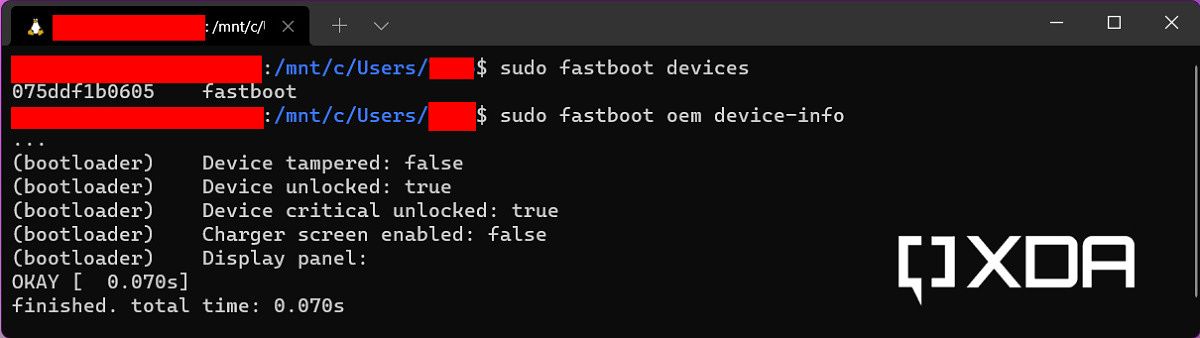
If you're an active Windows Subsystem for Linux user and want to access USB devices right from the Linux instance running under WSL, then you’ll be happy to know that there has been significant progress on this front. Thanks to Microsoft's contributions to the open-source usbipd-win project, you can now enjoy USB pass-through access in WSL. It means end users can perform tasks like flashing Android devices under Windows Subsystem for Linux, which are otherwise not supported by the Linux subsystem.
What is usbipd-win?
The usbipd-win project is all about creating a solution for sharing locally connected USB devices to other machines, including Hyper-V guests and WSL2. However, the official WSL2 Linux kernel used to lack support for the USB/IP protocol, requiring users to build the kernel themselves.
Since WSL kernel version 5.10.60.1, the required parameters are configured out of the box, so no manual recompilation is needed. Microsoft has also contributed a command line interface to the project to both enable a USB device for sharing on Windows and seamlessly attach it from within WSL.
Connect USB devices under Windows Subsystem for Linux
Before starting, make sure that you’re running Windows 11 and have installed all WSL updates. As mentioned earlier, you need a WSL 2 Linux distro for this to work.
-
Run the following command from within WSL:
uname -a
-
If the installed kernel version is older than 5.10.60.1, then it can be updated using the following commands:
        wsl --shutdown
wsl --update
-
If the installed kernel version is older than 5.10.60.1, then it can be updated using the following commands:
-
Head over to the GitHub repo of the usbipd-win project. Then download and install the latest release.
- The latest version of usbipd-win supports silent driver installation, thanks to the Windows Hardware Compatibility Program certified drivers. It also supports Dev channel builds of Windows 11.
-
In addition to the release page on GitHub, you can install and update the app using Windows Package Manager CLI (aka winget).
winget install --interactive --exact dorssel.usbipd-win
-
Install the user space tools for USB/IP and a database of USB hardware identifiers. If you're running Ubuntu on WSL, execute the following commands:
        sudo apt install linux-tools-virtual hwdata
sudo update-alternatives --install /usr/local/bin/usbip usbip `ls /usr/lib/linux-tools/*/usbip | tail -n1` 20-
You can opt for different meta packages (e.g.
linux-tools-generic) as well, depending on the installed distro. However, you might need to adjust the path variable in the next step, according to the version number of the meta package. - For other distros, consult the documentation of the relevant package management tool.
-
You can opt for different meta packages (e.g.
-
In case the symbolic link created using the
update-alternativescommand in the previous step didn't work for you, you can manually modify the sudo options to allow the root user to find theusbipcommand. To do so, edit the/etc/sudoersfile usingsudo visudoand add/usr/lib/linux-tools/<version-number>-genericto the beginning ofsecure_path. It should look like the following:Defaults secure_path="/usr/lib/linux-tools/5.4.0-77-generic:/usr/local/sbin:..."
-
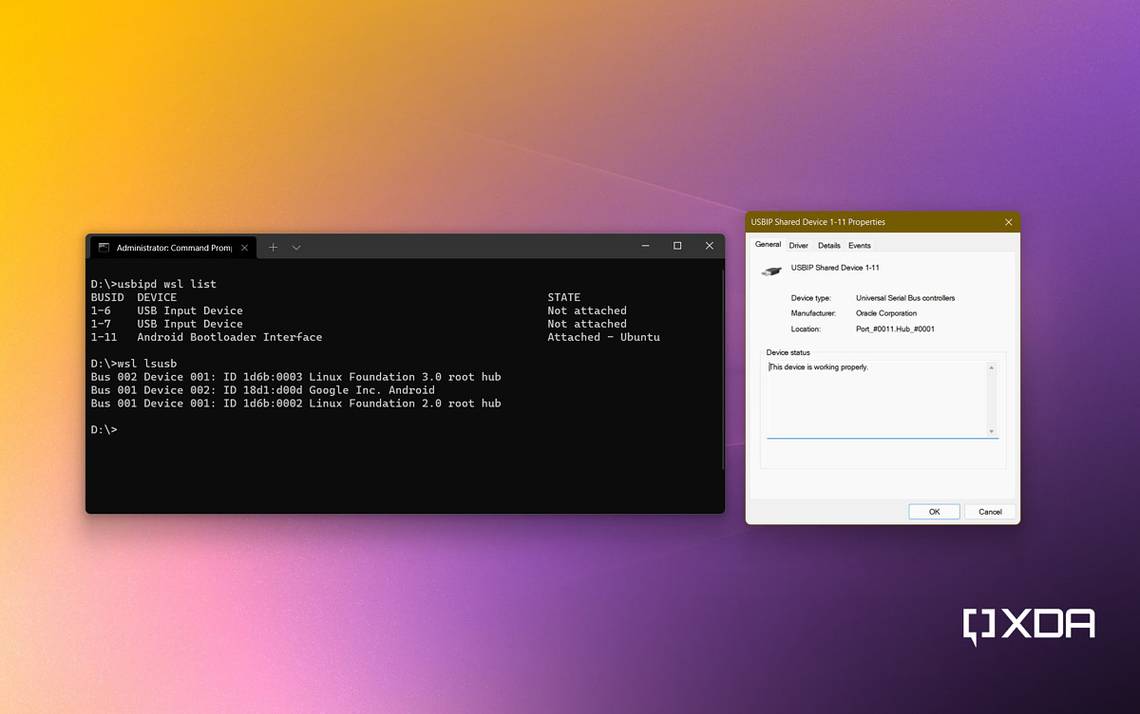
Open a new Terminal instance as Administrator and type the following command to list all the USB devices connected to Windows.
usbipd wsl list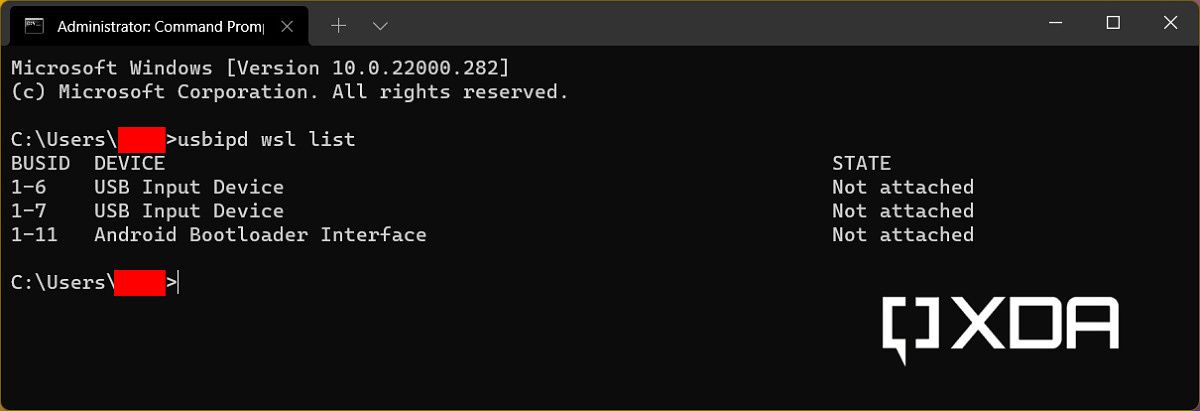
-
Note down the BUSID value of the USB device you want to attach to WSL. Next, run the following command to initiate the attachment process. You’ll be prompted by WSL for a password to run a sudo command.
usbipd wsl attach --busid <busid>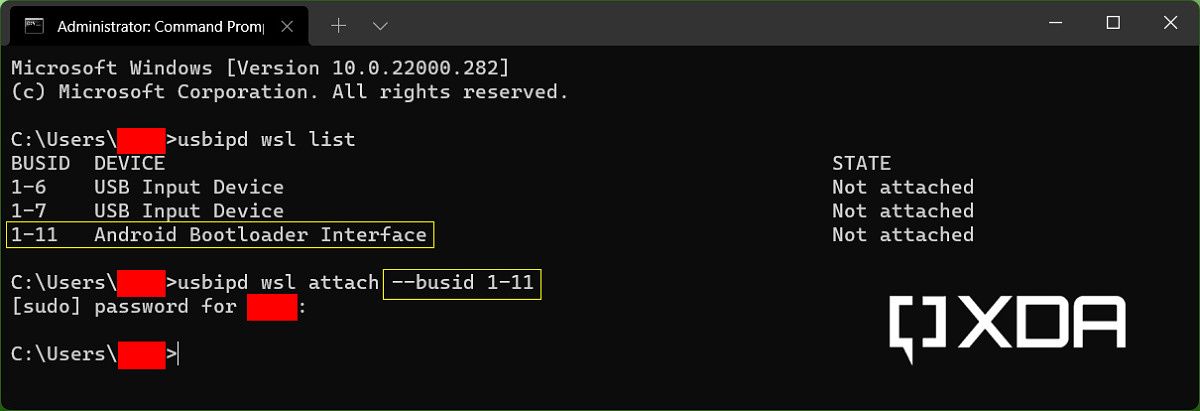
-
Now open a new WSL 2 instance and run the
lsusbcommand to see available USB devices. It should list the attached device(s).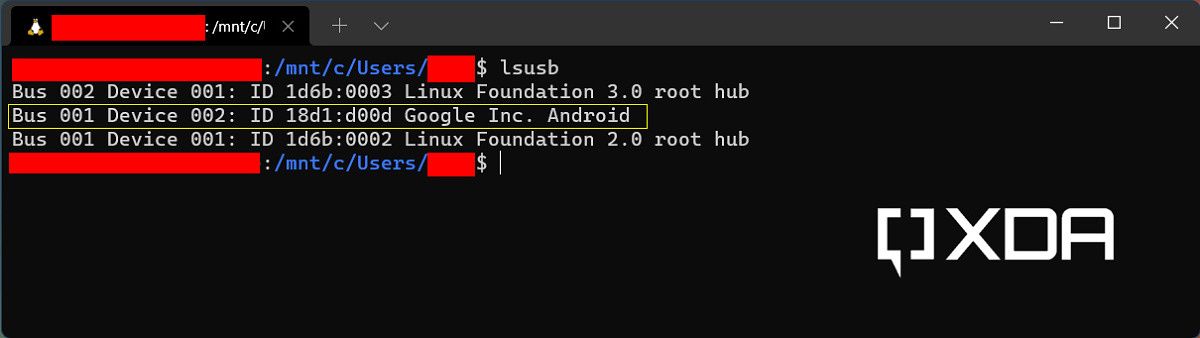
-
That's it! You can now work with your USB device right from WSL.


When you're done, you can detach the device using the command shown below. Once again, run it from a Terminal instance running as administrator.
usbipd wsl detach --busid <busid>
Is there any GUI alternative?
In case the command line interface isn't your forte, you can give wsl-usb-gui a try. It's an unofficial GUI wrapper around the usbipd-win binary, which greatly simplifies the USB device listing and interoperability between the host OS and the WSL instance.
- Make sure the latest version of usbipd-win is installed and the WSL kernel is up-to-date.
- Download the latest installer of wsl-usb-gui from the project's GitLab releases page.
-
Run the MSI file you downloaded.
- Before installing the program, the installer also checks for the prerequisites and try to set them up if necessary. However, it would be better to keep everything updated by yourself to avoid any unforeseen compatibility issues.
- Upon a successful installation, you should be able to find a newly created shortcut named WSL USB in the Start menu. Run the app from there.
- Click on the Refresh button to populate the list of USB devices connected to the host OS.
- Use the Attach and Detach buttons to unleash the full potential of USB pass-through.

From here on out, you're ready to go forth and tinker with all your USB devices you want in WSL. Our full guide will help you along the way, but once the USB passthrough is set up how you like it, it just fades into the background. To learn more, take a look at Microsoft's official documentation on connecting USB devices under WSL and usbipd-win's GitHub Wiki section.
Thanks to XDA Senior Member Some_Random_Username for the tip!